In the realm of home food preservation, few methods offer the convenience and long-term security quite like canning. Specifically, mastering the art of canning hamburger, whether as versatile ground beef crumbles or ready-to-serve patties, provides an exceptional way to store a staple protein directly in your pantry. This guide will walk you through the essential steps, safety protocols, and valuable tips to successfully preserve beef, ensuring your kitchen is always stocked with ready-to-use meat.
Why Can Ground Beef? The Ultimate Pantry Staple
Many home cooks face the delightful dilemma of having an abundance of ground beef, perhaps from a bulk purchase or a successful hunting season, with insufficient freezer space to store it all. While freezing is a common solution, it comes with its own set of challenges: freezer burn, the constant juggle for space, and the inevitable “forgot-to-defrost-dinner” moments. Canning ground beef completely bypasses these issues, transforming a perishable item into a shelf-stable, heat-and-serve meal component that can last for 12 to 18 months, or even longer under ideal conditions.
The beauty of canned beef extends beyond ground meat. You can also preserve chopped beef chunks for stews or pot roasts, and even beef broth for a rich base in countless recipes. Having these items on hand means less reliance on store-bought alternatives, greater control over ingredients, and a significant step towards self-sufficiency.
Consider the convenience: a jar of perfectly seasoned ground beef, ready to be incorporated into tacos, spaghetti sauce, chili, or a quick stir-fry, eliminating the thawing time. For those busy weeknights, this level of preparedness is invaluable, simplifying meal planning and reducing kitchen stress. It’s truly a game-changer for anyone looking to optimize their food storage and streamline their cooking routine.
Essential Safety: Pressure Canning is Non-Negotiable for Meat
Before diving into the steps, it is paramount to understand that meat, including ground beef, is a low-acid food. This means it carries a significant risk of botulism if not canned properly. Therefore, pressure canning is the ONLY safe method for preserving meat. A hot water bath canner simply does not reach or sustain the high temperatures required to destroy harmful bacteria and their spores in low-acid foods. Never attempt to water bath can meat. If you’re new to pressure canning, it’s highly recommended to consult a comprehensive beginner’s guide to familiarize yourself with the equipment and process.
Furthermore, it is critical to use a dedicated pressure canner. Instant Pots or other electric pressure cookers, while excellent for cooking, are not designed or tested for the consistent, high-pressure levels required for safe home canning. Rely on approved pressure canners from reputable brands for this process.
Canning Ground Beef Crumbles: A Versatile Option
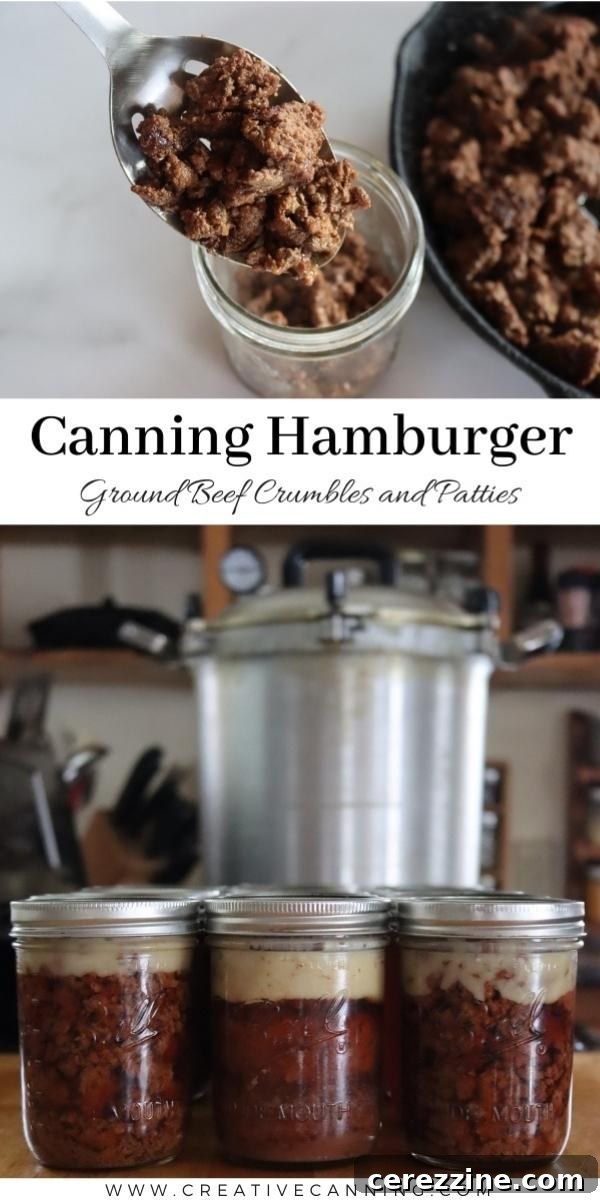
Canned ground beef crumbles are incredibly versatile, ready for a wide array of dishes from tacos and spaghetti sauce to chili, casseroles, soups, and Sloppy Joes. The preparation is straightforward, focusing on proper seasoning, browning, and packing to ensure a safe and delicious end product.
Preparing Your Ground Beef
- Measure Your Meat: For pint jars, aim for approximately 3/4 pound of raw ground beef per jar. For quart jars, use about 1 1/2 pounds. A food scale can be incredibly helpful for consistent portions.
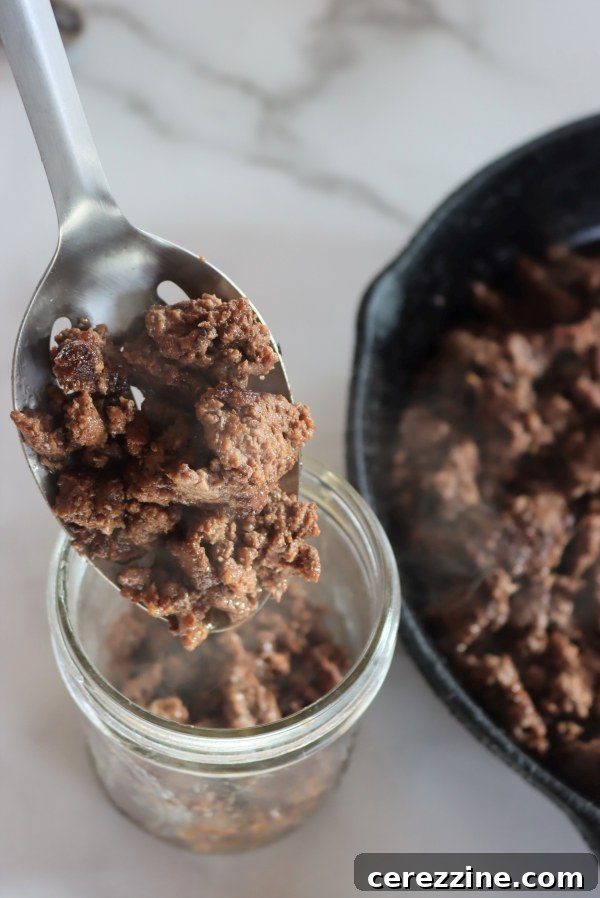
- Brown the Meat: This is a crucial step. Brown the ground beef in a small amount of neutral oil or beef fat in a large skillet. Browning serves two vital purposes: it renders out excess fat, preventing it from interfering with the seal, and it keeps the crumbles from clumping into one solid mass during processing.
- Drain the Fat: After browning, thoroughly drain the fat from the ground beef. While some fat will remain and is desirable for flavor and crisping later, removing the majority is essential for canning safety and quality.
- Season Thoughtfully: You can season the ground beef during the browning stage. Salt and pepper are always safe options (1 teaspoon per pint, 2 teaspoons per quart, or to taste – remember, you can always add more later). For added convenience, consider pre-seasoning a batch with taco seasoning for quick taco nights. If using beef bouillon, be mindful of its salt content and adjust accordingly.
- Avoid Certain Spices: Some spices intensify or change flavor unpleasantly during the long canning process. Sage and thyme can become bitter or sour, while cumin might overpower the meat. As a general rule, stick to dry herbs and spices, and err on the side of under-seasoning. It’s always easier to enhance flavor at the time of serving than to correct over-seasoning. Avoid fresh herbs entirely when canning.
Packing the Jars
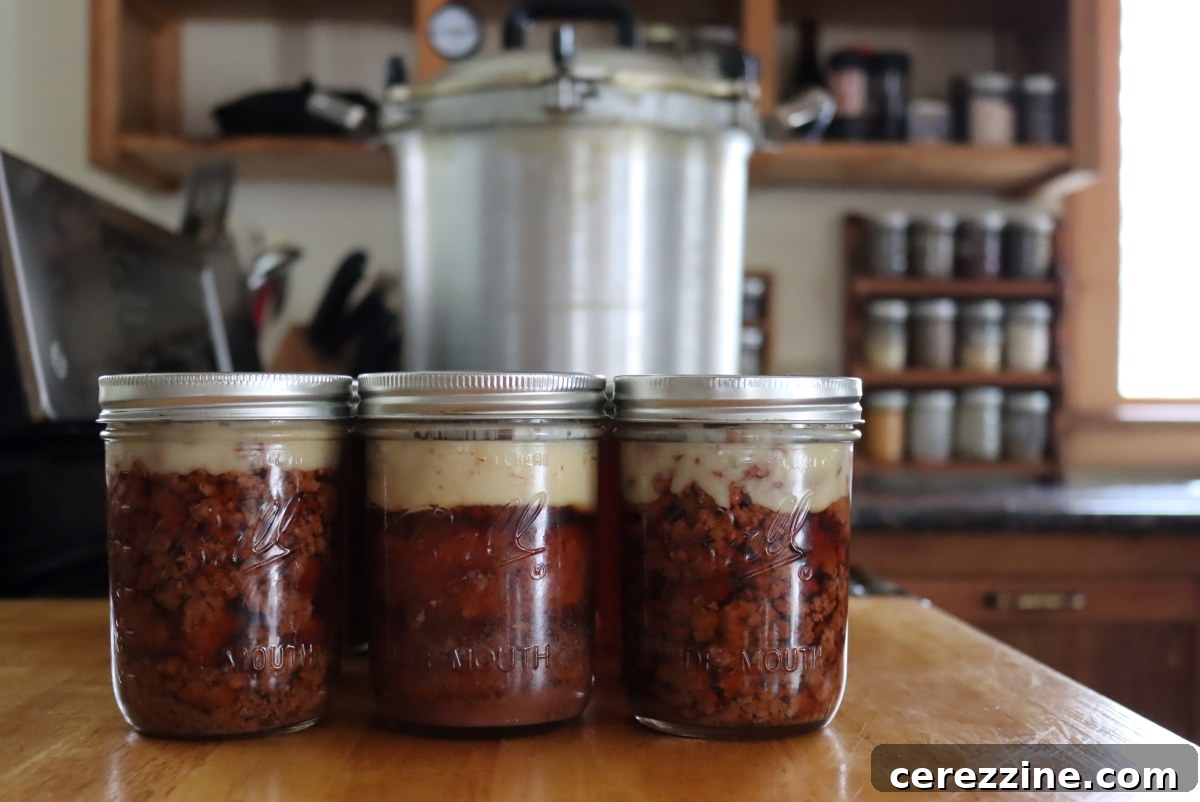
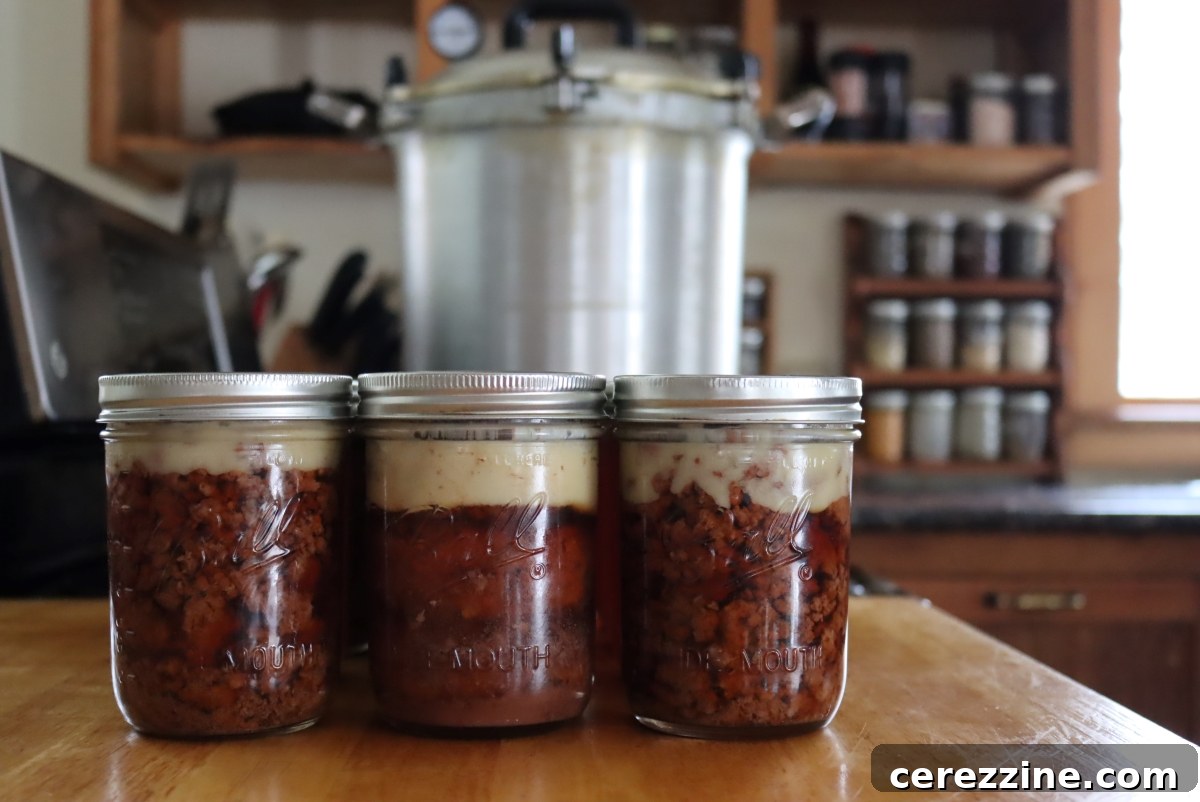
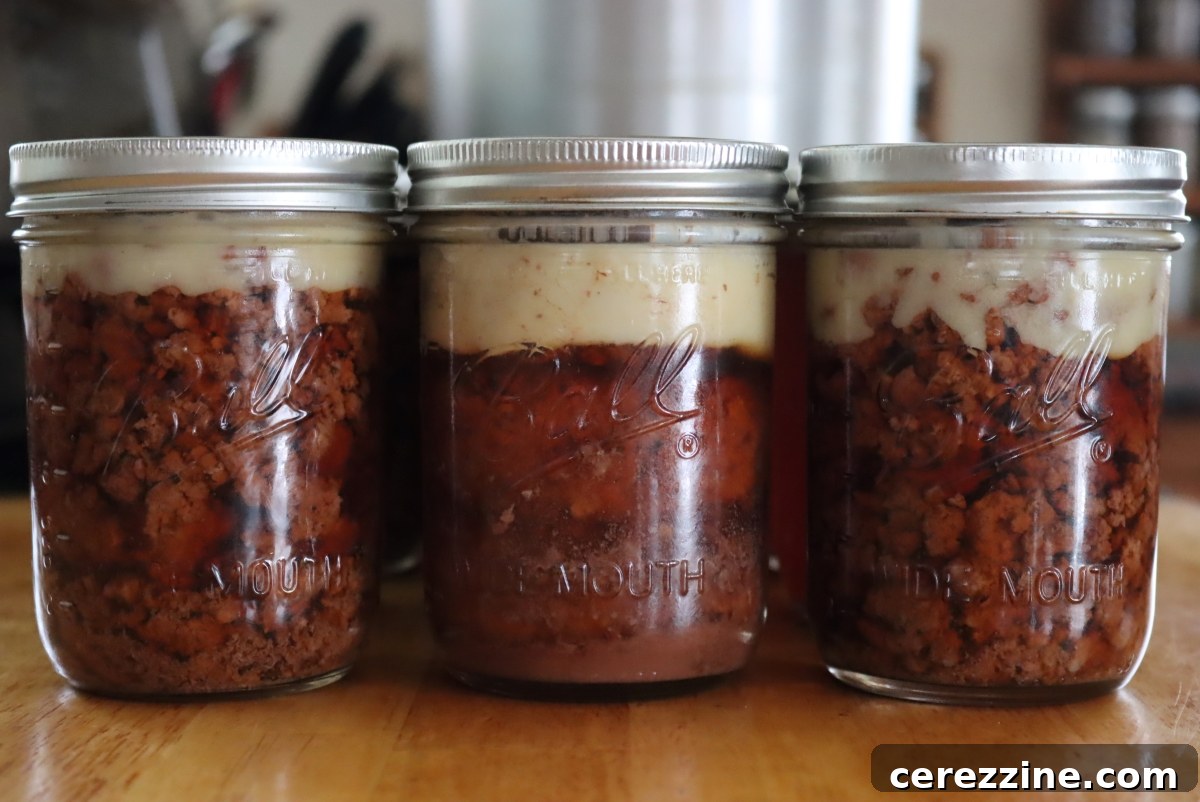
- Pack Tightly: Firmly pack the drained, browned ground beef crumbles into clean pint or quart canning jars.
- Establish Headspace: Ensure you leave a 1-inch headspace between the top of the meat and the rim of the jar. This space is critical for proper sealing and to prevent food from bubbling out during processing.
- Add Hot Liquid: Since this is a hot pack method, you must cover the ground beef with boiling liquid. Your choices include boiling water, beef broth (homemade or store-bought), or tomato juice. The liquid adds moisture and flavor, preventing the meat from becoming too dry. Again, maintain the 1-inch headspace.
- Clean and Seal: Wipe the rims of the jars with a clean, damp cloth to remove any food residue that could interfere with the seal. Apply two-piece canning lids (flats and rings) until fingertip tight.
Canning Hamburger Patties: Ready for the Grill (or Skillet!)
For those who love a quick burger, canning pre-formed hamburger patties is an excellent option. These patties are heat-and-serve, making dinner incredibly fast on demanding evenings. While canned ground beef crumbles offer more versatility, having a batch of patties on hand is perfect for those “too tired to cook” moments.
Preparing Your Hamburger Patties
- Form Patties: Weigh out ground beef into 3/4-pound sections for pint jars (which typically yields three 1/4-pound patties) or 1 1/2-pound sections for quart jars (six 1/4-pound patties). Form them tightly and uniformly to help them maintain their shape during canning and cooking.
- Season Simply: Unlike homemade patties that might use binders like breadcrumbs or eggs, canned patties should only contain ground beef, salt, and pepper. Other binders can affect canning safety and texture. Season the raw patties before browning.
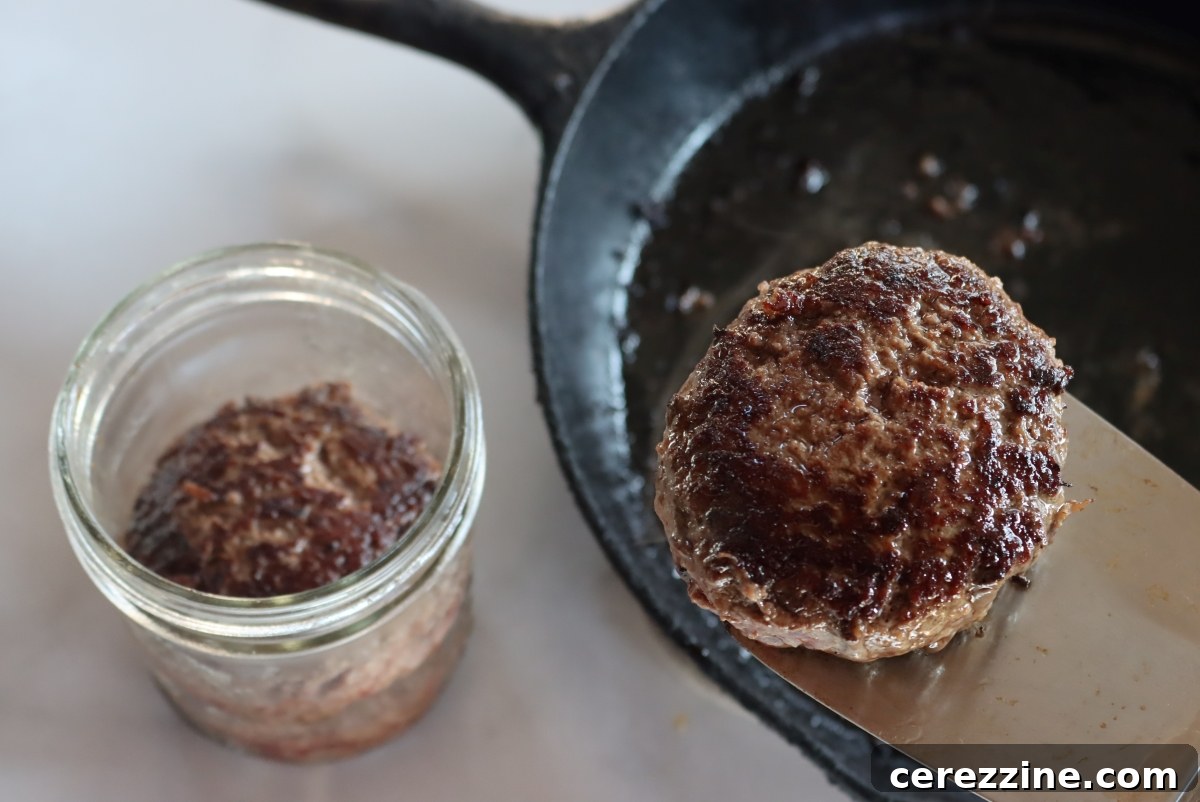
- Brown Briefly: Lightly brown the patties on both sides in a small amount of oil or beef fat. They don’t need to be cooked through, just browned to render some fat and help them hold their shape.
Packing the Jars for Patties
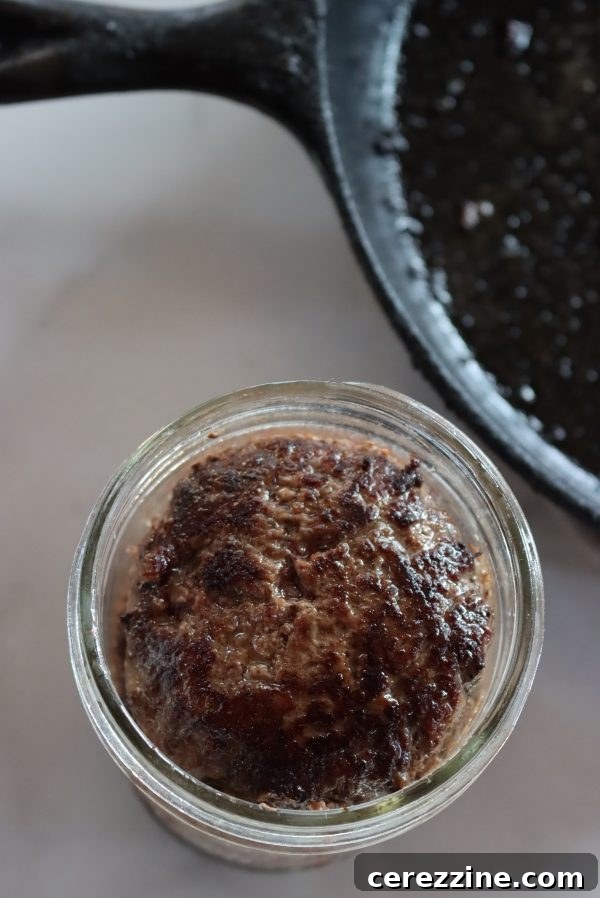
- Layer Patties: Carefully stack the browned patties into clean pint or quart jars.
- Maintain Headspace: As with crumbles, ensure a 1-inch headspace.
- Add Hot Liquid: Cover the patties with boiling liquid (water, beef broth, or tomato juice), again leaving 1-inch headspace.
- Clean and Seal: Wipe jar rims clean and apply two-piece canning lids fingertip tight.
The Pressure Canning Process: Step-by-Step Guide
This section outlines the general procedure for pressure canning ground beef, applicable to both crumbles and patties. Always refer to your specific pressure canner’s manual for precise instructions.
Preparing Your Pressure Canner
- Water Level: Add the recommended amount of water to your pressure canner, typically 2-3 inches, or as specified by your model. Bring the water to a bare simmer (around 180°F).
- Load Jars: Carefully place the prepared jars onto the rack inside the canner, ensuring they do not touch each other or the sides of the canner.
- Secure Lid & Vent: Close the canner lid, but do not apply the pressure regulator weight yet. Allow steam to vent steadily for 10 minutes. This crucial step removes unheated air, ensuring the internal temperature reaches the necessary point for safe processing.
- Reach Pressure: After venting, apply the pressure regulator weight. Allow the canner to come up to the specified pressure for your altitude and canner type.
Processing Times and Pressure Adjustments
Processing Time:
Pint jars: 75 minutes
Quart jars: 90 minutes
Important: Do not start your timer until the canner has reached the correct, stable pressure. The processing time must be maintained at the target pressure.
Adjust Pressure for Altitude:
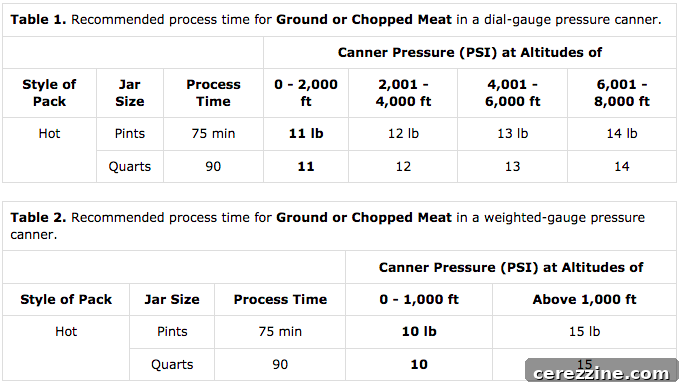
Altitude significantly impacts boiling points and pressure requirements. Adjust your canning pressure according to the table below based on your elevation above sea level.
Cooling and Storage
- Natural Pressure Release: Once the processing time is complete, turn off the heat and allow the pressure canner to cool down naturally until the pressure gauge reads 0 PSI. NEVER attempt to quick-release pressure, as this can cause liquid to siphon out of jars and compromise seals.
- Remove Jars: Once the pressure has fully dropped, carefully open the canner. Using a jar lifter, remove the hot jars and place them on a clean towel or cooling rack, leaving at least an inch of space between them to allow for even cooling.
- Cool and Check Seals: Let the jars cool undisturbed for 12 to 24 hours. As they cool, you’ll hear the satisfying “ping” as the lids seal. After cooling, check each seal by pressing on the center of the lid; it should be concave and not flex when pressed. If a lid did not seal, refrigerate the jar and consume its contents immediately.
- Store Properly: Remove the canning rings from sealed jars (rings can trap moisture and harbor bacteria if left on). Wipe down the jars to ensure they are clean. Store your safely canned ground beef in a cool, dark, dry place away from direct light. Properly canned meat can be stored for 12 to 18 months, or even longer in optimal conditions.
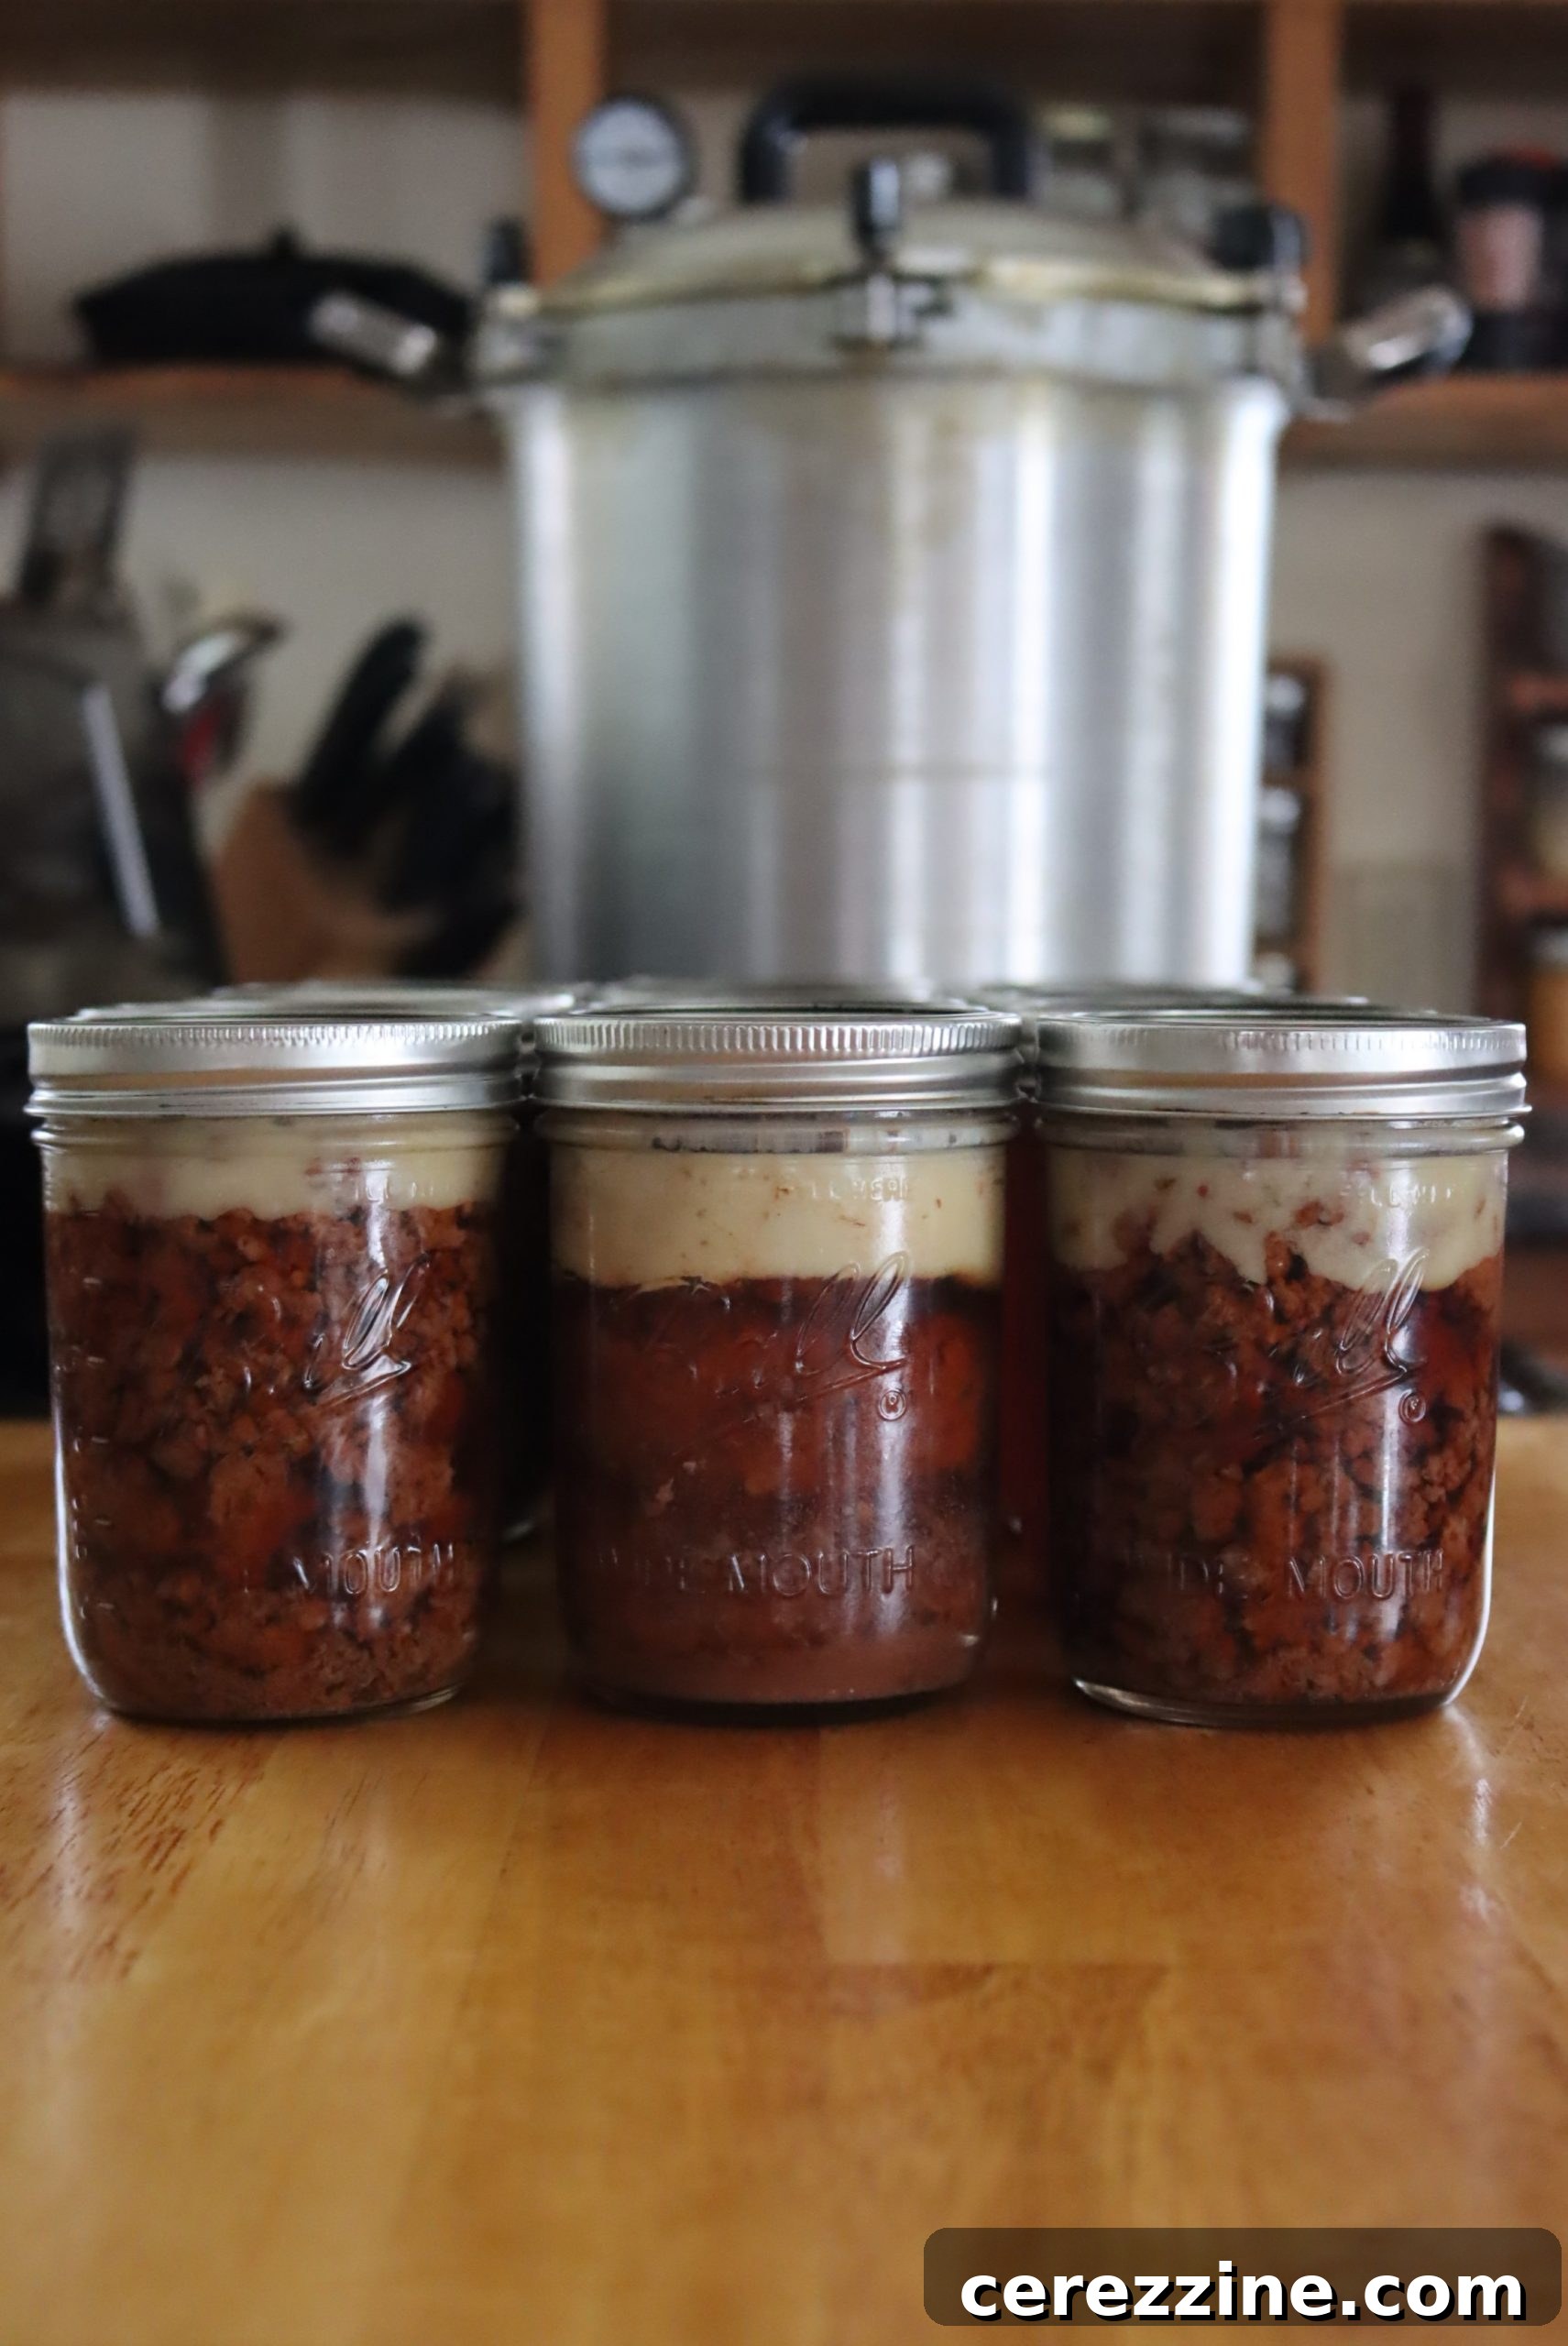
Cooking with Canned Ground Beef & Hamburger Patties
The true reward of canning comes when you’re ready to use your preserved meat. Canned ground beef and patties offer incredible convenience, but knowing a few tips can elevate your meal prep.
Using Canned Ground Beef Crumbles
The versatility of canned ground beef crumbles is unmatched. How you prepare them largely depends on the dish:
- For Tacos, Pasta, or Casseroles: Drain the canning liquid (but don’t discard it yet!). Heat a skillet and add the canned ground beef, crisping it in any remaining fat from the jar. This restores texture and flavor. Add your desired seasonings and sauces.
- For Chili or Soups: For dishes where the liquid is an asset, you can choose to drain some fat, but then add the meat along with its rich canning liquid directly into your recipe. This liquid acts as a flavorful beef broth, enhancing the overall taste of your soup or chili.
Preparing Canned Hamburger Patties
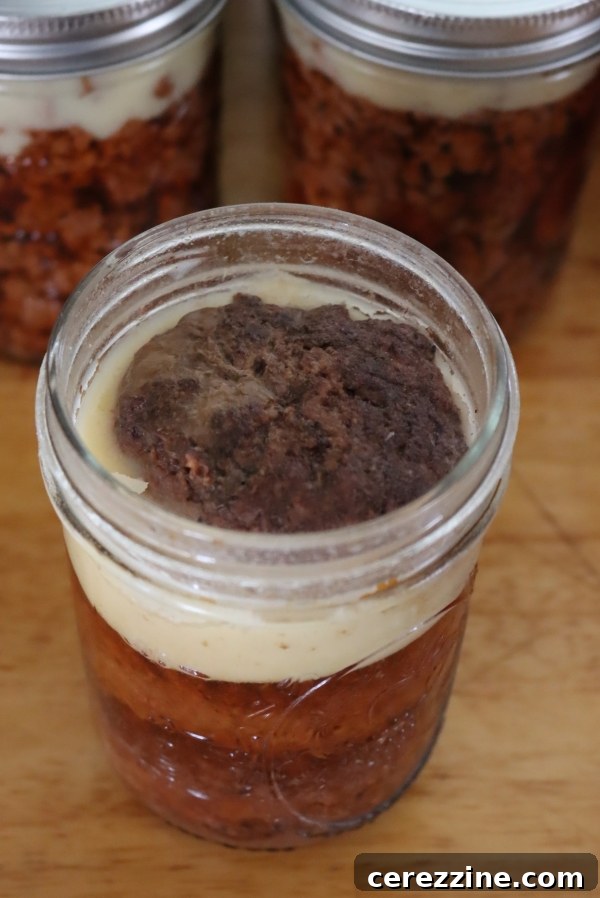
While canned hamburger patties might not look the most appetizing when first opened, they transform beautifully with a little heat:
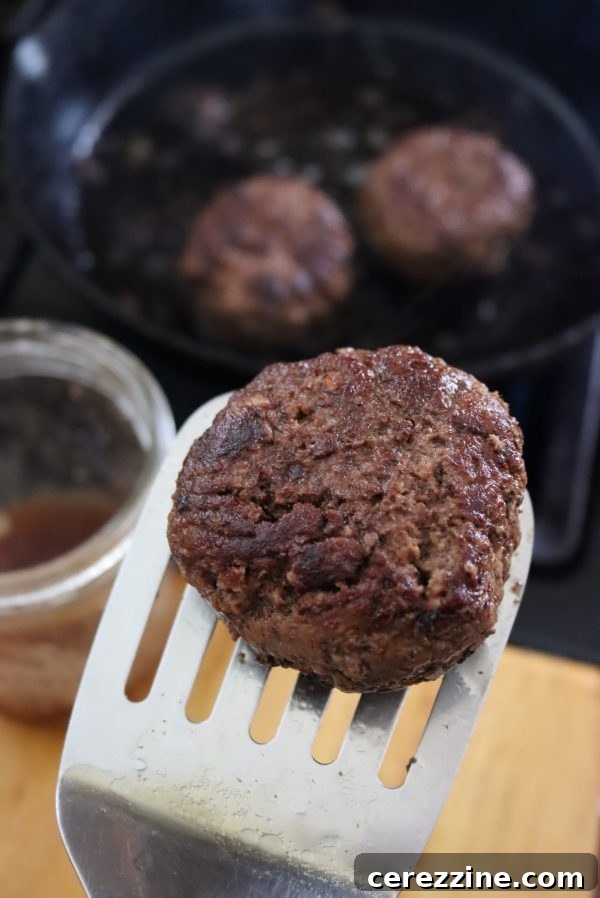
- Skillet Browning: Simply reheat and brown them in a hot skillet using some of the rendered fat from the jar. Canned patties can be on the wetter side, so pressing them gently with a spatula as they crisp up will help release excess moisture.
- Grilling Option: If you have a grill, these patties are fantastic. The grill allows any extra moisture to drip away, resulting in a wonderfully textured burger.
- Utilize the Liquid: Reserve the fat layer at the top of the jar for browning the patties. Drain the remaining liquid, which is essentially a rich beef broth. This can be saved in the refrigerator for up to a week and used in other recipes like soups or chili, adding depth of flavor.
Ultimately, while personal preference might lean towards the texture of crumbles, canned hamburger patties are an invaluable asset for those nights when time and energy are short. And remember, in a pinch, you can always break up the patties to use them as ground beef crumbles in any recipe.
Recipe: Canning Hamburger (Ground Beef)
Average Rating: 5 out of 5 stars (based on 5 votes)
Canning Hamburger (Ground Beef)
By: Ashley Adamant
Canning ground beef or hamburger patties using a pressure canner is an ideal way to store ready-to-use meat without taking up valuable freezer space.
Prep Time: 5 mins
Cook Time: 10 mins
Canning Time: 1 hr 30 mins
Total Time: 1 hr 45 mins
Equipment
- Pressure Canner
Ingredients
- Ground beef (3/4 pound per pint jar or 1 1/2 pounds per quart jar)
- Canning liquid (choose from boiling water, beef broth, or tomato juice)
- Salt and pepper (optional, to taste)
- Seasoning (e.g., taco mix, beef bouillon, optional)
- Neutral oil or beef fat (for browning)
Instructions
- Prepare a pressure canner according to the manufacturer’s directions, ensuring enough water is in the base and it’s brought to a bare simmer (approx. 180°F).
- In a large skillet, brown the ground beef in a small amount of oil or beef fat. Season with salt and pepper and/or other chosen seasonings as the beef cooks.
- Drain excess fat from the browned ground beef.
- Pack the ground beef tightly into clean pint or quart canning jars.
- Cover the packed ground beef with your choice of boiling canning liquid, ensuring a 1-inch headspace from the top of the liquid to the jar rim.
- Wipe the rims of the jars clean with a damp cloth and apply two-piece canning lids (flats and rings) until fingertip tight.
- Load the filled and sealed jars into the prepared pressure canner.
- Close the canner lid. Allow the canner to vent steam for 10 minutes before applying the pressure regulator weight.
- Bring the canner up to the correct pressure (refer to the notes below for altitude adjustments) and process pint jars for 75 minutes or quart jars for 90 minutes. Do not start the timer until the canner reaches the target pressure.
- When the processing time is complete, remove the pressure canner from the heat and allow the pressure to release naturally until it reaches 0 PSI. Do not force cool.
- Carefully transfer the hot jars to a clean surface (like a towel or cooling rack) using a jar lifter, ensuring they are spaced an inch apart, and let them cool undisturbed to room temperature (12 to 24 hours).
- After cooling, check the seal of each jar. The lid should be concave and not flex when pressed. Remove the canning rings from sealed jars. Unsealed jars should be refrigerated and consumed immediately.
- Store sealed jars in a cool, dark, dry place away from direct light for 12 to 18 months.
Notes
*For hamburger patties: Season raw ground beef with salt and pepper. Shape into equally-sized, tightly-formed patties. Brown on both sides in a small amount of oil or beef fat (they don’t need to be cooked through). Add to jars and cover with boiling liquid, leaving 1-inch headspace. Apply two-piece lids and process in a pressure canner for 75 minutes (pints) or 90 minutes (quarts).
Canning Pressure for Ground Beef and Hamburger Patties
The total processing time remains constant regardless of elevation, but the required pressure increases at higher altitudes.
Weighted Gauge Canner:
- Under 1,000 Feet Elevation: Use 10 lbs
- Over 1,000 Feet Elevation: Use 15 lbs
Dial Gauge Canner:
- 0 to 2,000 Feet Elevation: Use 11 lbs
- 2,001 to 4,000 Feet: Use 12 lbs
- 4,001 to 6,000 Feet: Use 13 lbs
- 6,001 to 8,000 Feet: Use 14 lbs
Nutrition (Approximate per serving)
Calories: 572kcal, Protein: 39g, Fat: 45g, Saturated Fat: 17g, Polyunsaturated Fat: 1g, Monounsaturated Fat: 20g, Trans Fat: 3g, Cholesterol: 160mg, Sodium: 151mg, Potassium: 608mg, Calcium: 41mg, Iron: 4mg
Nutrition information is automatically calculated and should only be used as an approximation.
Explore More Pressure Canning Recipes
Ready to expand your home food preservation skills? Keep your pressure canner busy with these other valuable canning tutorials and recipes:
- Canning Beef Chunks
- Canning Turkey
- Canning Bone Broth
- Canning Sweet Potatoes
- Canning Potatoes
- Canning Carrots
- Canning Pumpkin