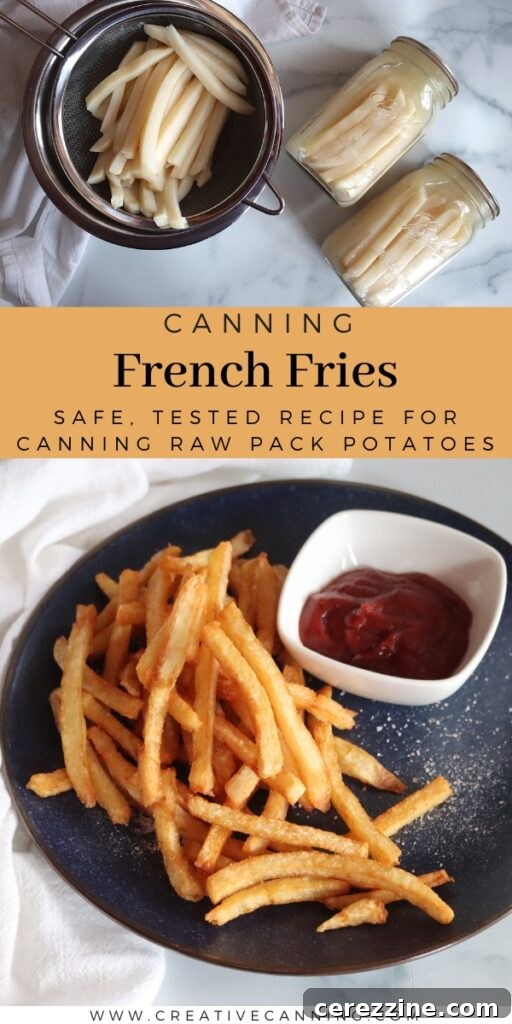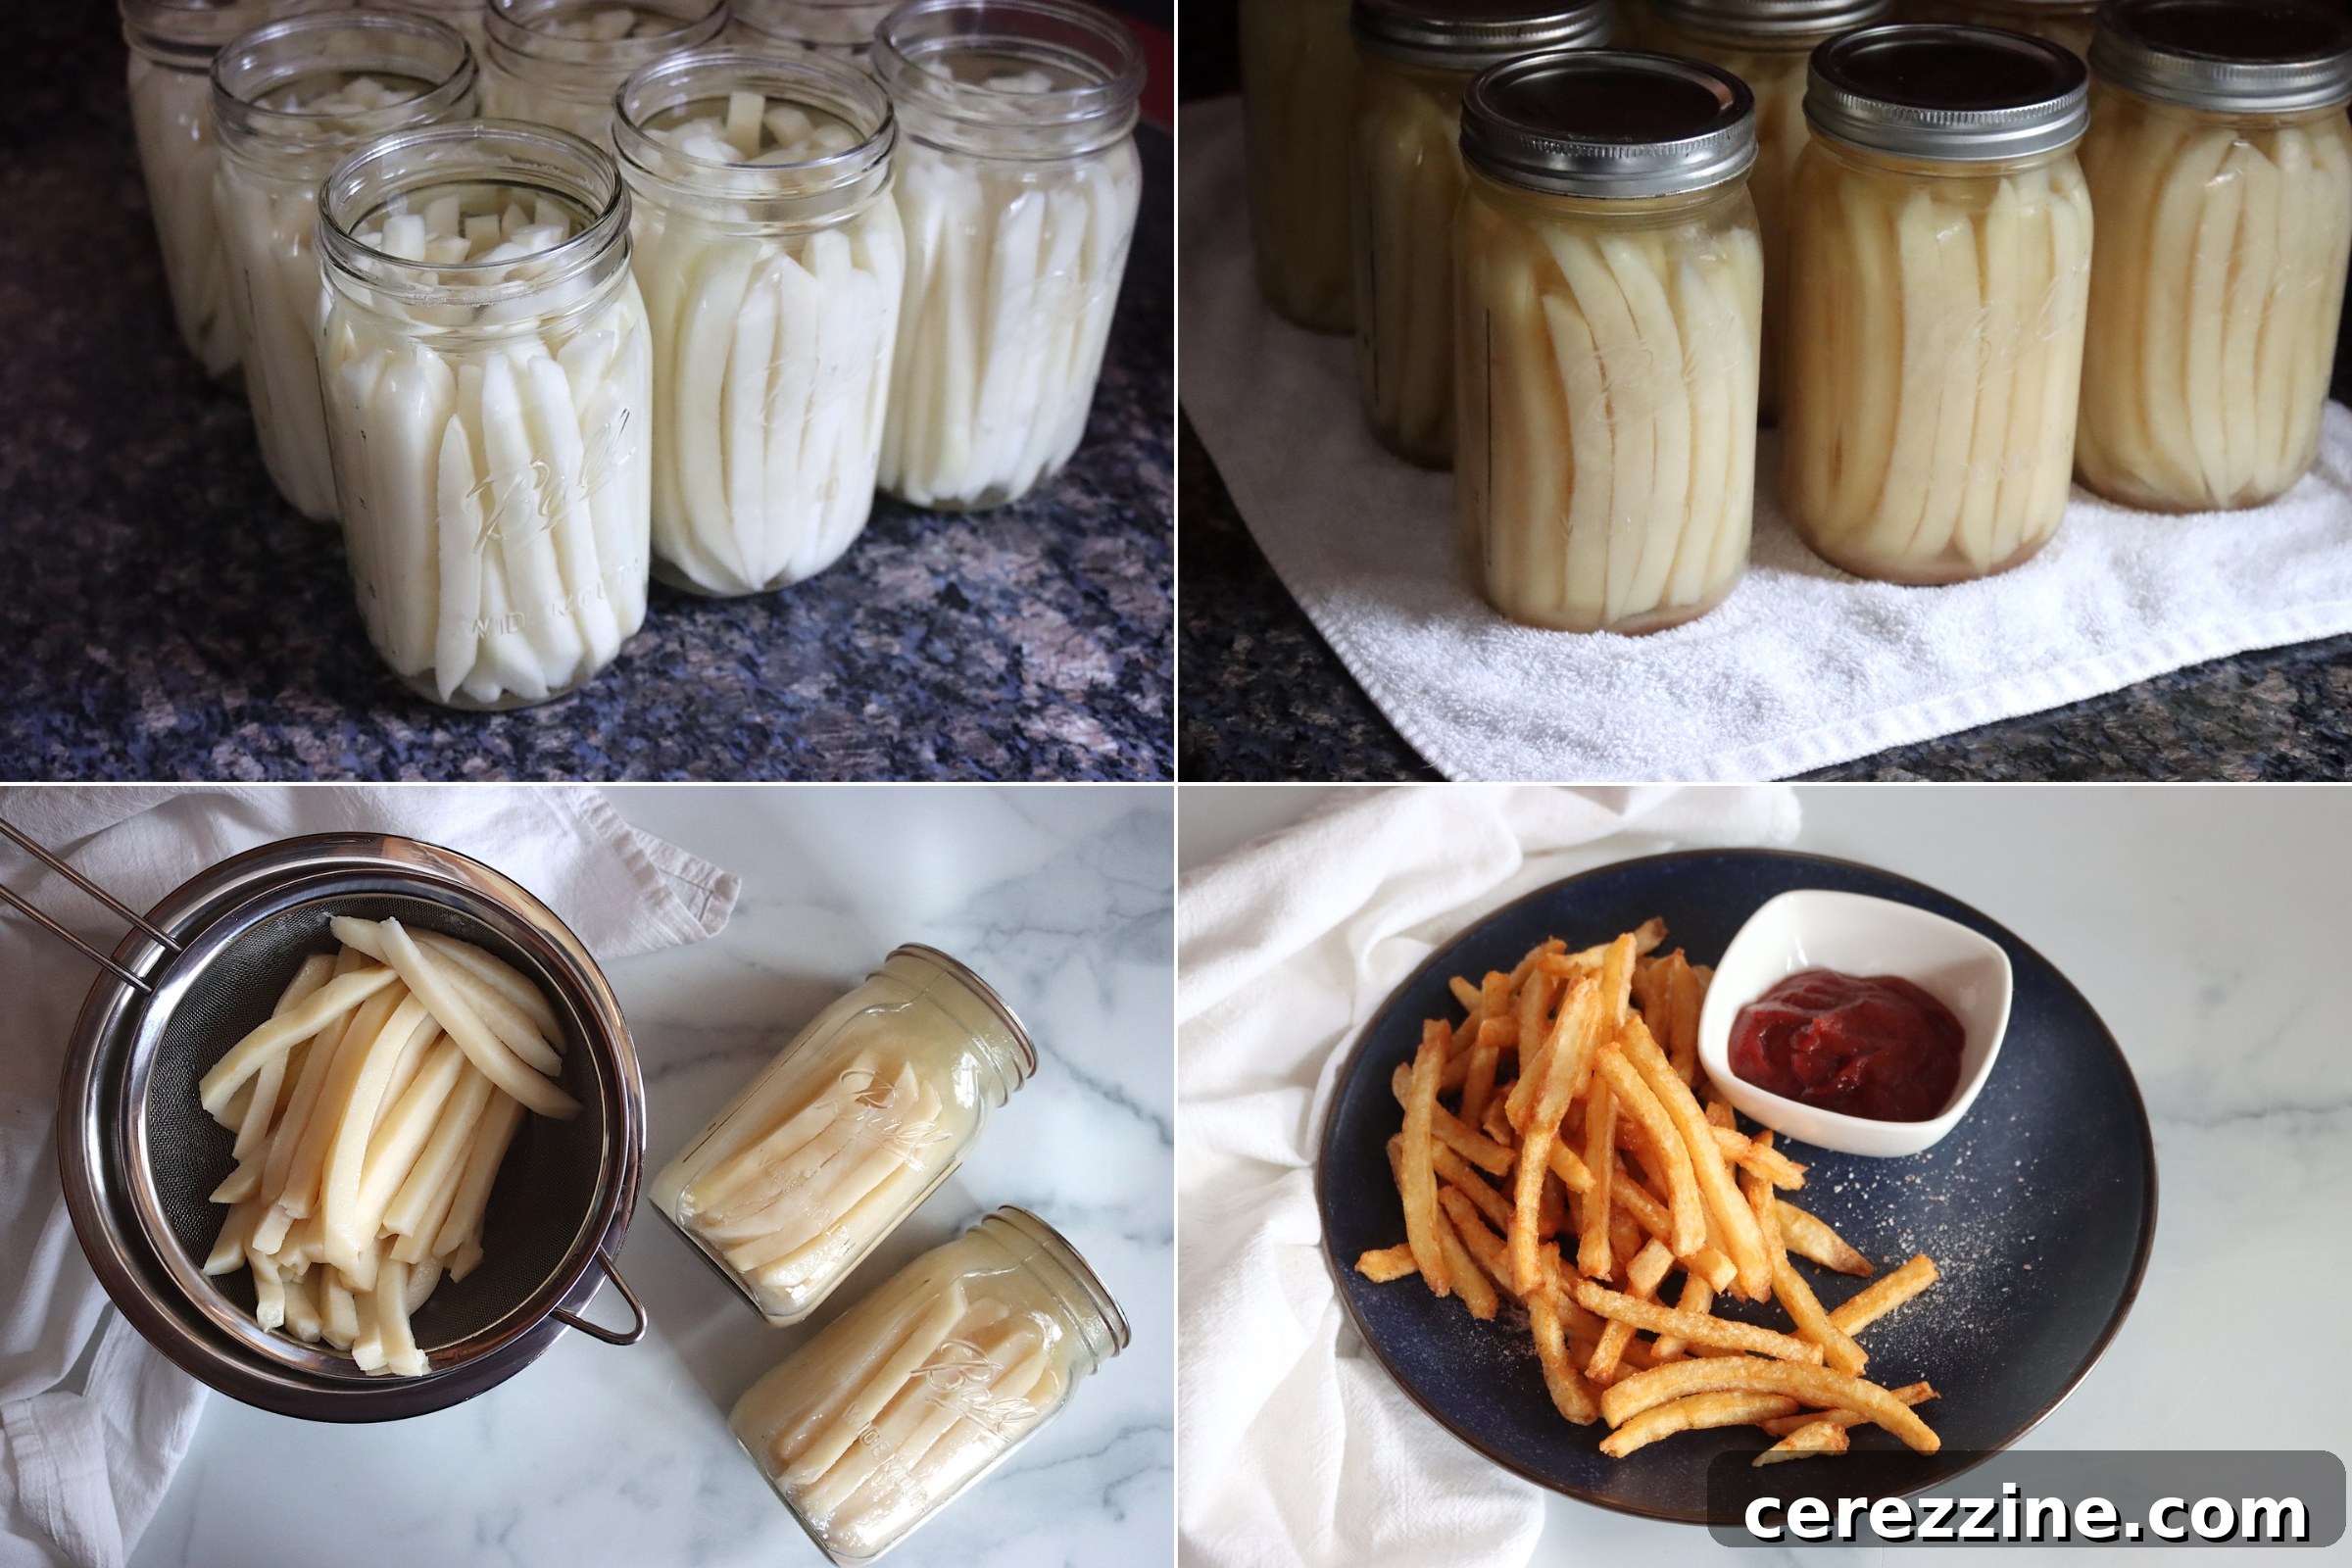
Imagine having a stash of perfectly cut, ready-to-fry French fries at your fingertips, ready to be transformed into golden, crispy perfection with minimal effort. This dream becomes a delicious reality through the art of pressure canning. Pressure canning French fries is not only a fantastic way to preserve your homemade spuds but also an ingenious method to achieve restaurant-quality fries right in your kitchen, whenever the craving strikes.
The idea of canning French fries might sound unusual at first. When I first contemplated this recipe, my daughter was understandably skeptical. “Canning French fries? Mom, that’s disgusting! What are you doing?!?!?” she exclaimed. Many people share this initial reaction, envisioning soggy, mushy potatoes. However, the magic lies in the method: we’re not canning fully cooked fries, but raw potato strips, prepared to perfection for their future culinary destiny.
Pressure canning allows you to complete all the laborious prep work – peeling, cutting, and soaking – in one large batch. This means that when you’re ready for a fresh batch of fries, all you have to do is grab a jar from the pantry, drain the potatoes, and then fry or bake them. The result? Hands down, some of the best fries I have ever tasted.
The Secret to Unforgettable Crispy Fries: The Science Behind Pressure Canning
What makes these pressure-canned fries so exceptional? The secret lies in replicating the techniques used by professional chefs to create truly great fries. The best fries are renowned for their tender, fluffy interiors and incredibly crisp exteriors. This is typically achieved through a two-stage cooking process and an essential pre-soak.
First, potatoes are soaked in water for an extended period to draw out excess starch. This crucial step prevents the fries from sticking together and ensures they achieve that coveted crispiness when fried. Our pressure canning recipe incorporates this vital pre-soaking phase. Second, traditional gourmet fries are often “twice-cooked.” They are blanched or par-fried at a lower temperature to cook the interior, then fried again at a higher temperature to crisp the exterior.
This pressure canning method inherently performs the first “cook.” The high-pressure environment within the canner pre-cooks the potato strips, tenderizing them and effectively mimicking the initial blanching step. When you later fry or bake these canned fries, you’re essentially performing the second, crisping cook. Surprisingly, the pressure canning process leaves the potato strips firm and perfectly intact. They pour effortlessly out of the jar into a colander, ready for their final crisping, without turning to mush – provided they are raw-packed after proper soaking.
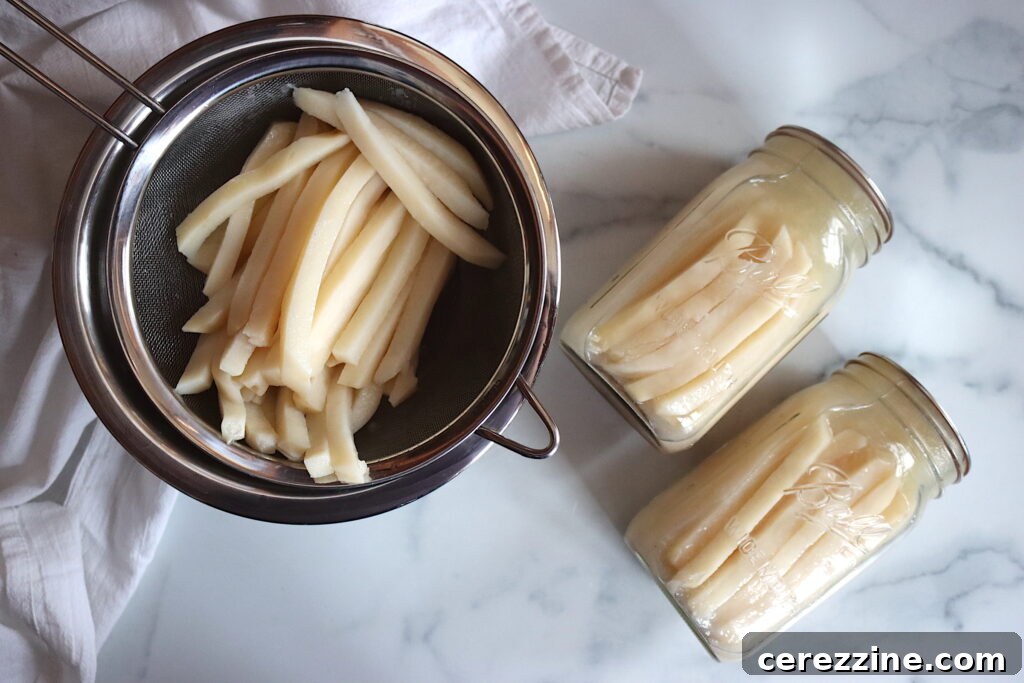
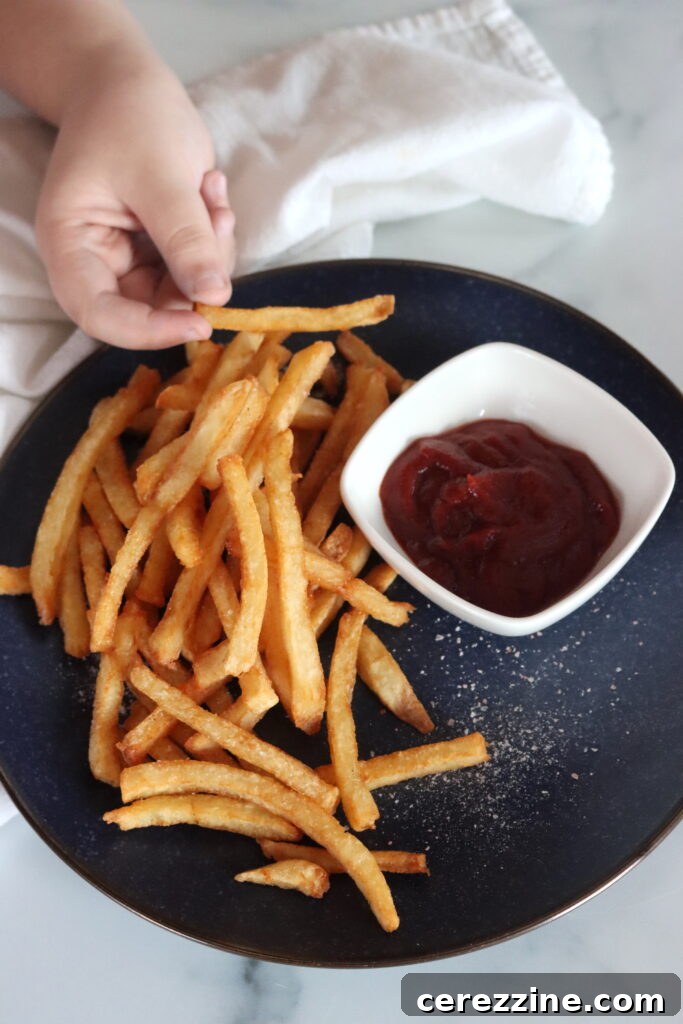
I understand the skepticism; I felt it myself before trying this method. We’re often taught that boiling potatoes can turn them into an unusable mush. However, the controlled environment of a pressure canner operates differently. The consistent pressure and temperature allow the potatoes to cook gently without disintegrating. When these pre-cooked fries hit hot oil, they crisp up beautifully, especially when fried in traditional fats like tallow. My daughter, a tough critic, was utterly convinced after her first bite, and I guarantee you will be too.
Is This a Tested Canning Recipe? Ensuring Safety and Quality
One of the most important considerations in home canning is safety. You’ll be pleased to know that this is a safe, tested canning method. This recipe for raw-packed potatoes, suitable for making French fries, was developed and rigorously tested by Ball Canning, a trusted authority in home preservation, and published in their esteemed “All New Book of Canning and Preserving.”
Ball Canning recognized that the traditional pre-cooking steps for many vegetable and meal-in-a-jar recipes could be time-consuming. They conducted extensive re-testing of various recipes to determine if raw packing (canning vegetables without pre-cooking them on the stovetop) was safe and effective. Their research found that for many low-acid foods, including potatoes, skipping the stovetop pre-cooking step did not alter the required pressure canning times, making the process more efficient without compromising safety or quality.
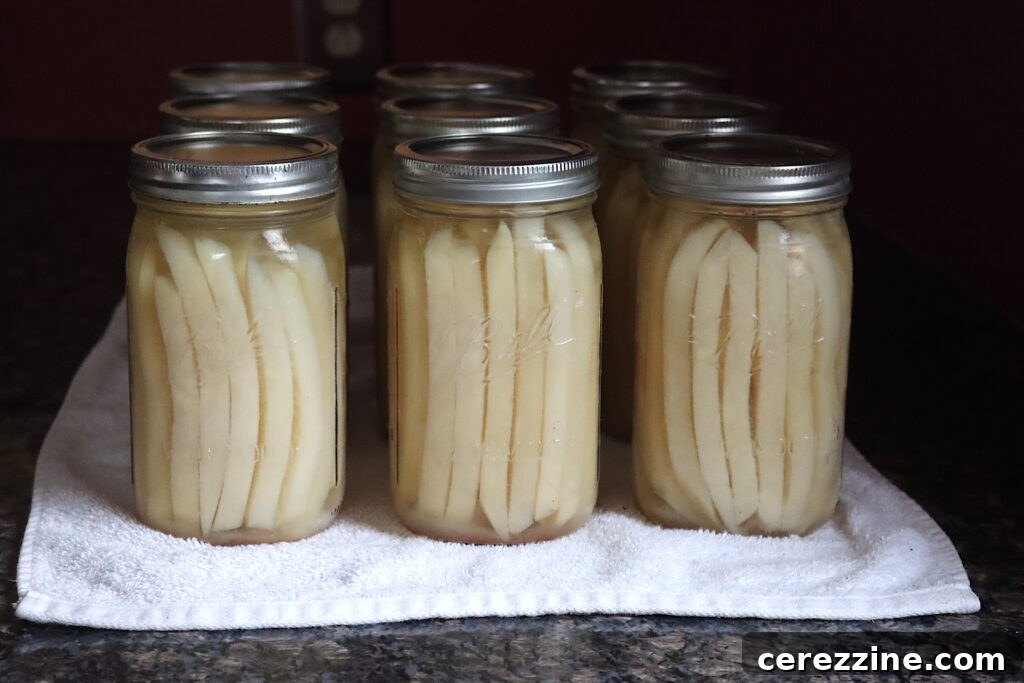
The “All New Book of Canning and Preserving” features several recipes for raw-packed potatoes, including variations canned in broth with herbs, with peppers and onions, or with chipotle peppers. This specific raw pack variation is designed to be simpler, focusing solely on the potatoes to give you the ideal base for French fries. It leverages Ball’s thoroughly tested raw pack method to deliver consistently delicious results. I am also currently adapting Ball’s method for making canned home fries, which I hope to share with you soon.
Essential Ingredients for Pressure Canning French Fries
The beauty of this recipe lies in its simplicity. You’ll only need three core ingredients: potatoes, water, and salt. However, selecting the right type and quantity of potatoes, along with understanding the role of each ingredient, is key to success.
Choosing the Right Potatoes
The total amount of potatoes needed will depend on their size, your peeling efficiency, and how densely you pack the jars. As a general guide, a canner load of seven quart jars typically requires about 20 pounds of potatoes, while nine pint jars will need approximately 12 to 14 pounds. For the best-canned fries, I highly recommend using large baking potatoes, such as Russets. Their high starch content and fluffy texture after cooking make them ideal for achieving a crispy exterior and tender interior.
I have experimented with waxy yellow potatoes like Yukon Golds, but these varieties contain more natural sugars. When pressure canned, these sugars can caramelize, resulting in a slightly brown color and a sweet, almost off-putting flavor that isn’t ideal for savory fries. While this might be acceptable in a beef stew, it’s best to stick with Russets or other similar baking potatoes for French fries.
The Role of Salt
Salt plays a dual role in this recipe. Firstly, it’s essential for enhancing the flavor of the fries. Secondly, it contributes to maintaining their texture during the canning process. Adding salt before canning ensures the potatoes are seasoned from the inside out, making them incredibly flavorful once fried. You’ll only need a small sprinkle of additional salt for serving. Add 1 teaspoon of salt per quart jar and ½ teaspoon per pint jar. This small amount makes a significant difference in the final taste and quality.
Water for Packing
For filling the jars, you’ll need boiling water. On average, I found that about 1¾ cups of boiling water are required per quart jar. To be on the safe side, plan to bring at least 2 cups of water to a boil in a kettle for each quart jar you intend to fill, and 1 cup per pint. Ensuring the water is boiling hot when added to the jars helps to create a proper vacuum seal and aids in the canning process.
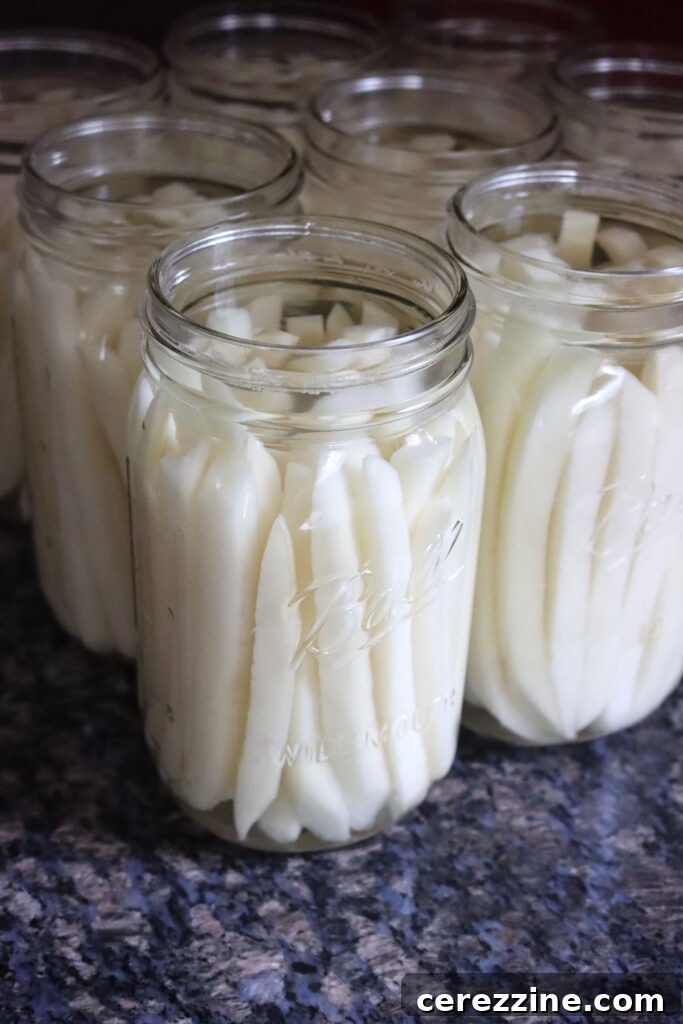
Step-by-Step: Preparing Potatoes for Canning French Fries
Proper preparation is paramount for successful pressure canning and delicious results. Follow these steps meticulously to ensure your potatoes are ready for their transformation into canned fries.
1. Peel Your Potatoes Thoroughly
Start by peeling all your potatoes. Peeling is not an optional step when canning potatoes, regardless of the recipe. The peels can harbor bacteria and affect the safety and quality of the canned product. Use a sharp vegetable peeler to remove all skin, eyes, and any soft spots or blemishes. As you peel, immediately place the peeled potatoes into a large bowl filled with cold water. This prevents them from browning due to oxidation while you work through the rest of the batch.
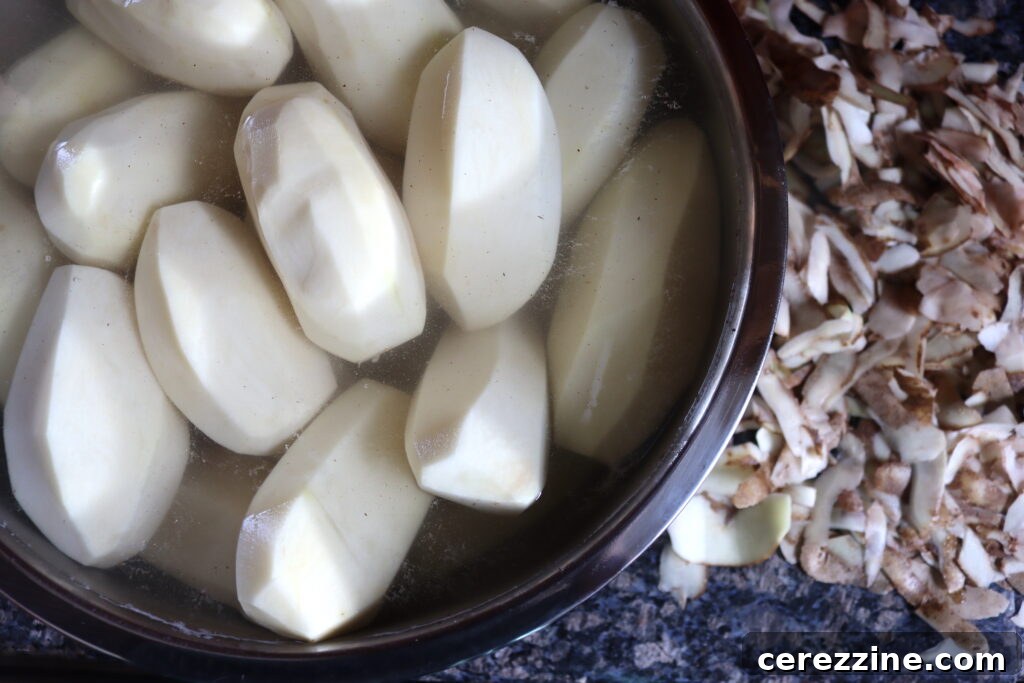
2. Cut into Uniform Fry Strips
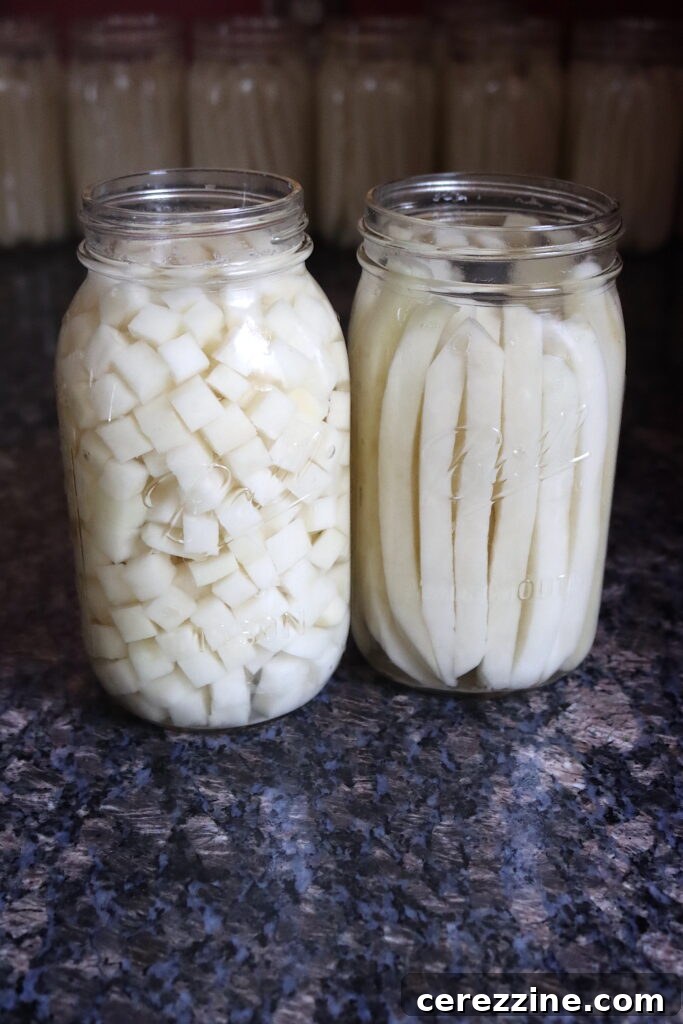
Once peeled, cut your potatoes into uniform fry-shaped strips. Aim for a consistent size of approximately ½ to ¾ inch wide. Consistency is crucial here because it ensures even cooking during the pressure canning process and contributes to a uniform texture when you eventually fry or bake them. An uneven cut can lead to some fries being overcooked and mushy, while others remain undercooked.
While you can certainly cut them by hand, using a dedicated French fry cutter is highly recommended. Not only does it make the process much faster and more efficient, but it guarantees perfectly uniform strips. This recipe worked so incredibly well that I invested in a French fry cutter to streamline the process. Plus, my children absolutely love using it, turning a chore into a fun family activity and saving me time!
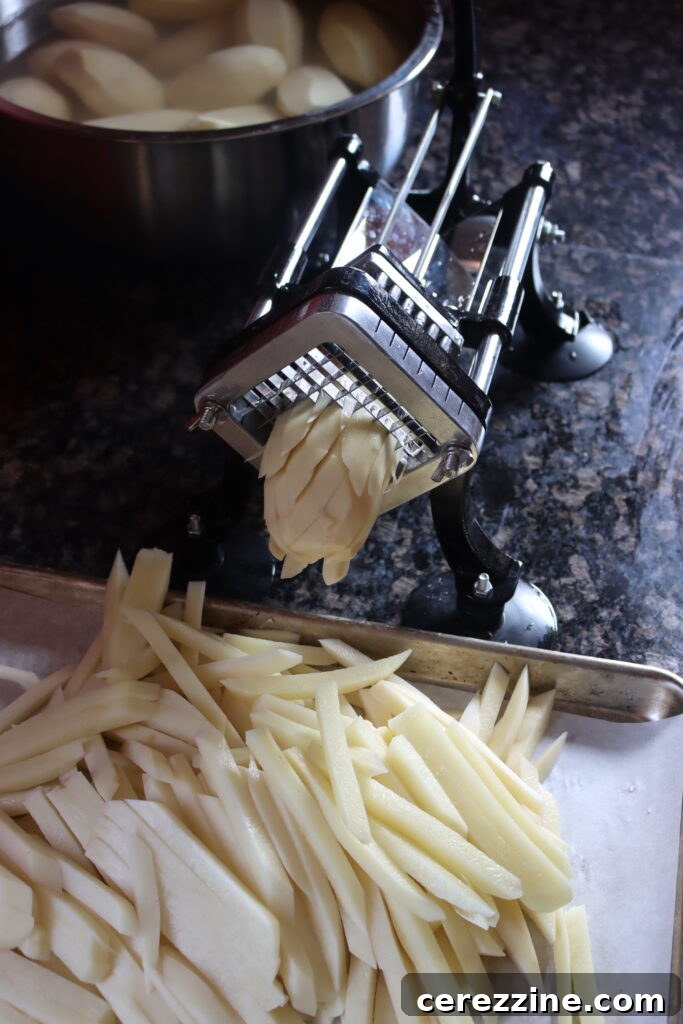
3. Soak to Remove Starch
This is arguably the most critical step for achieving crispy fries. To remove as much excess starch as possible, you’ll need to soak the cut fries in three changes of water. Place the cut potato strips into a large bowl and cover them completely with cold water. Allow them to soak for at least an hour. After an hour, drain the water, add fresh cold water, and soak for another hour. Repeat this process for a third time. For optimal results, you can even soak the fries overnight in the final change of water. This prolonged soaking period draws out a significant amount of starch, which is key to preventing stickiness and ensuring maximum crispiness.
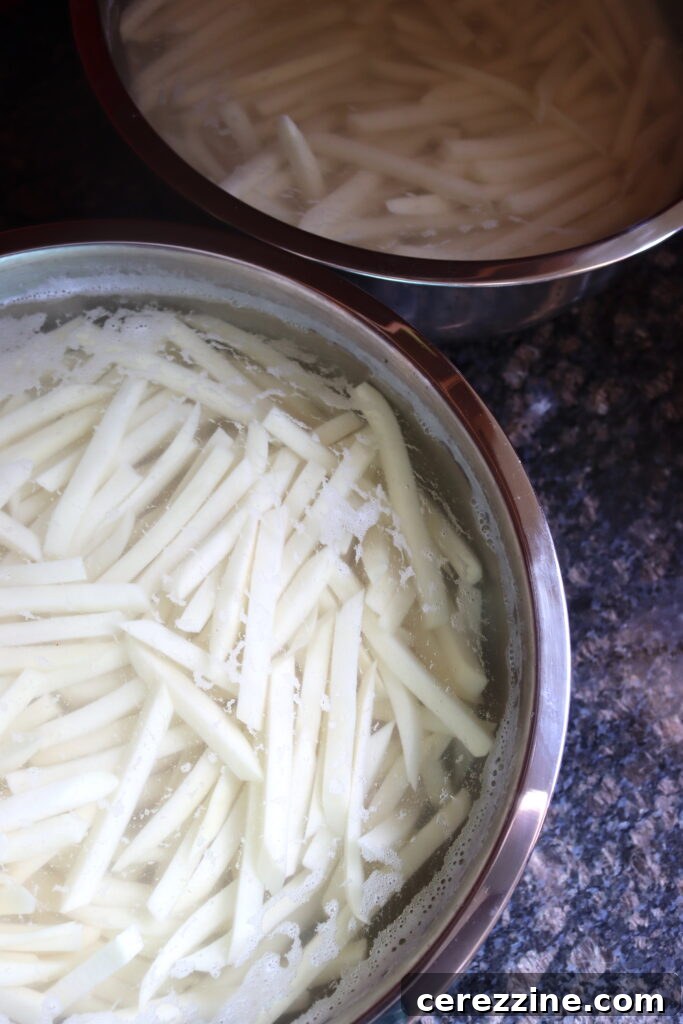
4. Final Rinse and No Re-cutting
After the final soak, drain the fries thoroughly and give them a quick rinse under cold running water. This step helps to wash away any remaining surface starch. At this point, it’s important not to cut the potatoes again. If you re-cut the fries after soaking, you expose fresh surfaces, which will immediately begin to release more starch into your jars, potentially leading to a cloudy liquid and a less desirable texture. If any fries are too long to fit into your jars, simply set those aside and fry them up for an immediate snack; they won’t fare well if canned after a fresh cut.
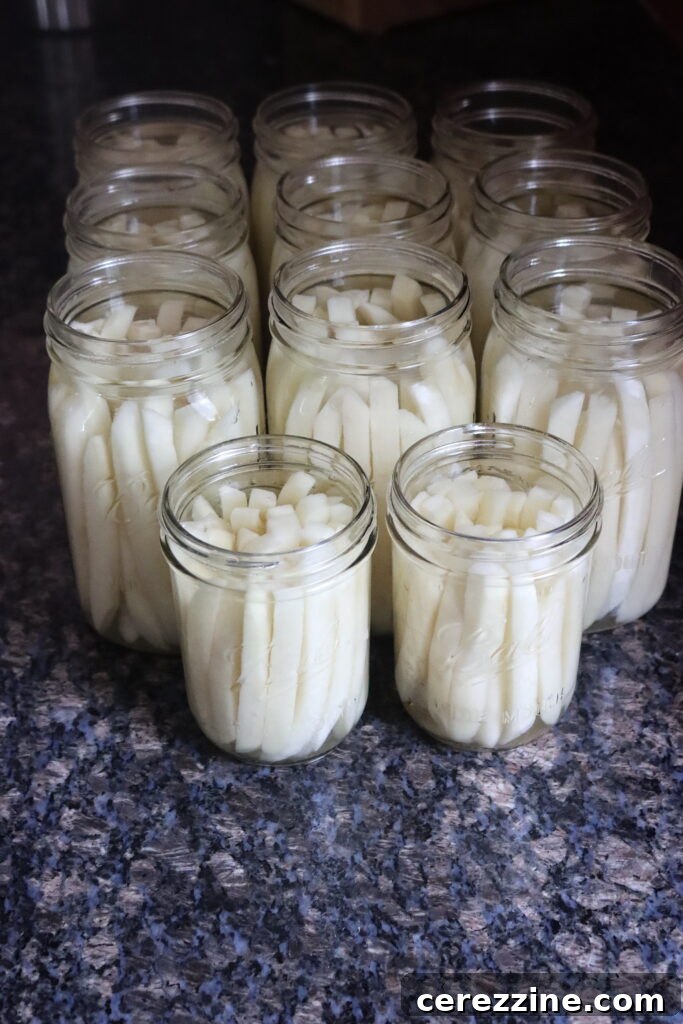
The Pressure Canning Process for French Fries
With your fries prepped, it’s time to move on to the actual canning process. This is where the magic of preservation happens, ensuring your fries are shelf-stable and ready for future enjoyment.
1. Prepare Your Canner and Jars
Begin by preparing your pressure canner. For this raw pack recipe, pre-heat it to just warm (approximately 140°F / 60°C). This helps to prevent thermal shock when you place the hot jars into the canner. Also, ensure your canning jars and lids are properly prepared. While sterilization isn’t strictly necessary for foods processed for 10 minutes or more in a pressure canner, ensure your jars are clean and free from chips or cracks. Always use new lids to ensure a proper seal.
You can use either pint or quart jars for canning fries. I personally find wide-mouth jars to be the best choice for this recipe. Their wider opening makes it significantly easier to pack the potato strips without crushing them, and more importantly, allows the pre-canned fries to slide out smoothly when you open the jar later. Standard mouth jars can make retrieval a bit challenging.
2. Add Salt and Pack the Jars
Add the appropriate amount of salt to each jar: 1 teaspoon for quart jars or ½ teaspoon for pint jars. Remember, this salt is optional for preservation but highly recommended for flavor and texture. Next, begin packing the raw, soaked, and rinsed potato strips into your jars. Pack them fairly tightly, but avoid crushing them. The goal is to maximize the space without damaging the potato strips. Try to keep the fries upright as you pack them; this not only allows you to fit more into each jar but also helps them maintain their shape. Ensure you leave a consistent 1-inch headspace at the top of each jar. Headspace is crucial for a proper seal and preventing food from siphoning out during processing.
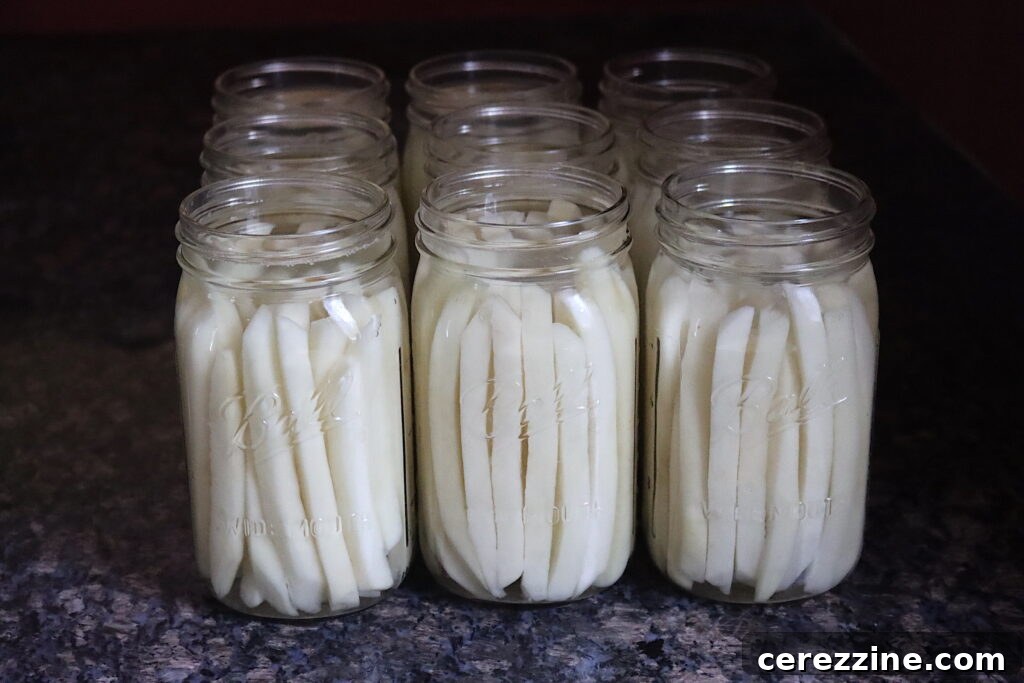
3. Fill with Boiling Water and Remove Air Bubbles
Bring a pot of water to a rolling boil. Carefully pour this boiling water into each packed jar, ensuring that the potato strips are completely submerged. Maintain the required 1-inch headspace after filling with water. Using a non-metallic utensil, such as a plastic spatula or a specialized de-bubbling tool, gently run it along the sides of each jar to release any trapped air bubbles. Air bubbles can interfere with the sealing process and may affect the quality of the canned product. After de-bubbling, re-check the headspace and add more boiling water if necessary to maintain the 1-inch space.
Finally, wipe the rims of the jars with a clean, damp cloth. Any food residue or moisture on the rim can prevent a proper seal. Apply the two-part canning lids (flat lid and screw band) to fingertip tight. This means screwing the band on until you feel resistance, then giving it just a slight extra turn – not overtightening, which can prevent air from escaping and distort the seal.
4. Pressure Can Your French Fries
Carefully place your filled and lidded jars into the prepared pressure canner, following your manufacturer’s instructions. Ensure there’s adequate water in the canner (usually 2-3 inches, or as specified by your canner’s manual). Secure the canner lid, and bring the canner up to pressure.
Process the jars at **10 pounds of pressure** for:
* **35 minutes for pint jars**
* **40 minutes for quart jars**
It is crucial to adjust the pressure according to your altitude (see the altitude adjustment chart below). Maintaining consistent pressure throughout the processing time is vital for food safety. Do not start timing until the canner has reached the correct pressure.
Once the processing time is complete, turn off the heat and allow the pressure canner to cool down and release pressure naturally. Do not try to rush this process by opening the vent or cooling the canner with water. Rushing the depressurization can cause liquid to siphon out of your jars and may prevent a proper seal. Once the pressure gauge reads zero and the lid safety lock disengages, carefully remove the canner lid. Allow the jars to cool undisturbed on a towel-lined surface for 12 to 24 hours.
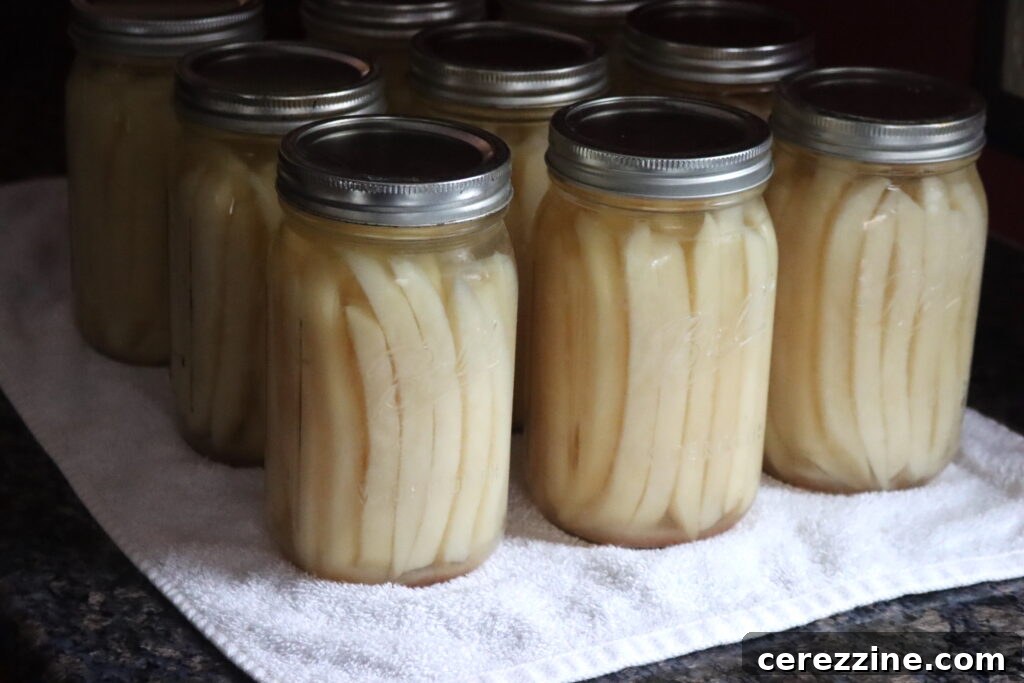
5. Label and Store
After your jars have cooled completely (12-24 hours), check each seal. The center of the lid should be concave and should not flex when pressed. If any jars did not seal properly, refrigerate them immediately and use their contents within a few days. For properly sealed jars, remove the screw bands, wipe the jars clean, and label them with the contents and the canning date. Store your canned French fries in a cool, dark place, such as a pantry or root cellar. They are now shelf-stable and ready to enjoy whenever you desire!
Altitude Adjustments for Pressure Canning
When pressure canning, the processing time remains constant, but the required pressure must be increased as your altitude above sea level increases. This is because water boils at a lower temperature at higher altitudes, necessitating more pressure to reach the internal temperatures required for safe canning.
Here are the altitude adjustments for canning raw pack potatoes:
For dial gauge pressure canners:
- 0 to 2,000 feet: 11 lbs pressure
- 2,001 to 4,000 feet: 12 lbs pressure
- 4,001 to 6,000 feet: 13 lbs pressure
- 6,001 to 8,000 feet: 14 lbs pressure
For weighted gauge pressure canners:
- 0 to 1,000 feet: 10 lbs pressure
- Above 1,000 feet: 15 lbs pressure
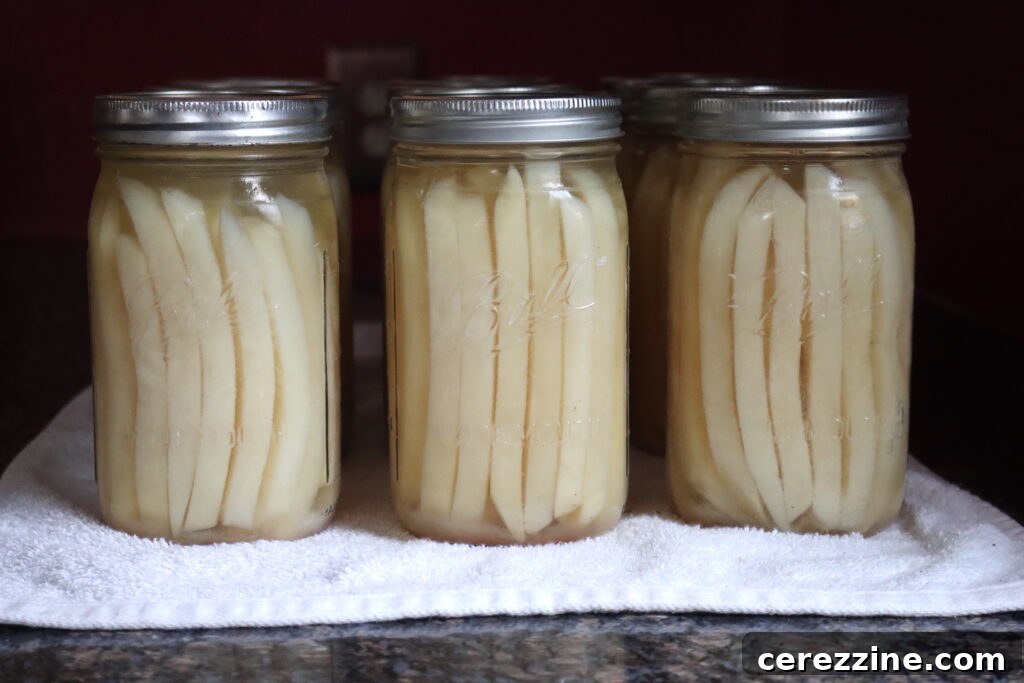
Serving Your Perfectly Canned French Fries
The moment of truth! Once you’re ready to enjoy your pressure-canned French fries, the final steps are incredibly simple and quick, making them perfect for busy weeknights or impromptu cravings. Just follow these easy instructions to achieve that irresistible golden crispness.
1. Drain and Rinse
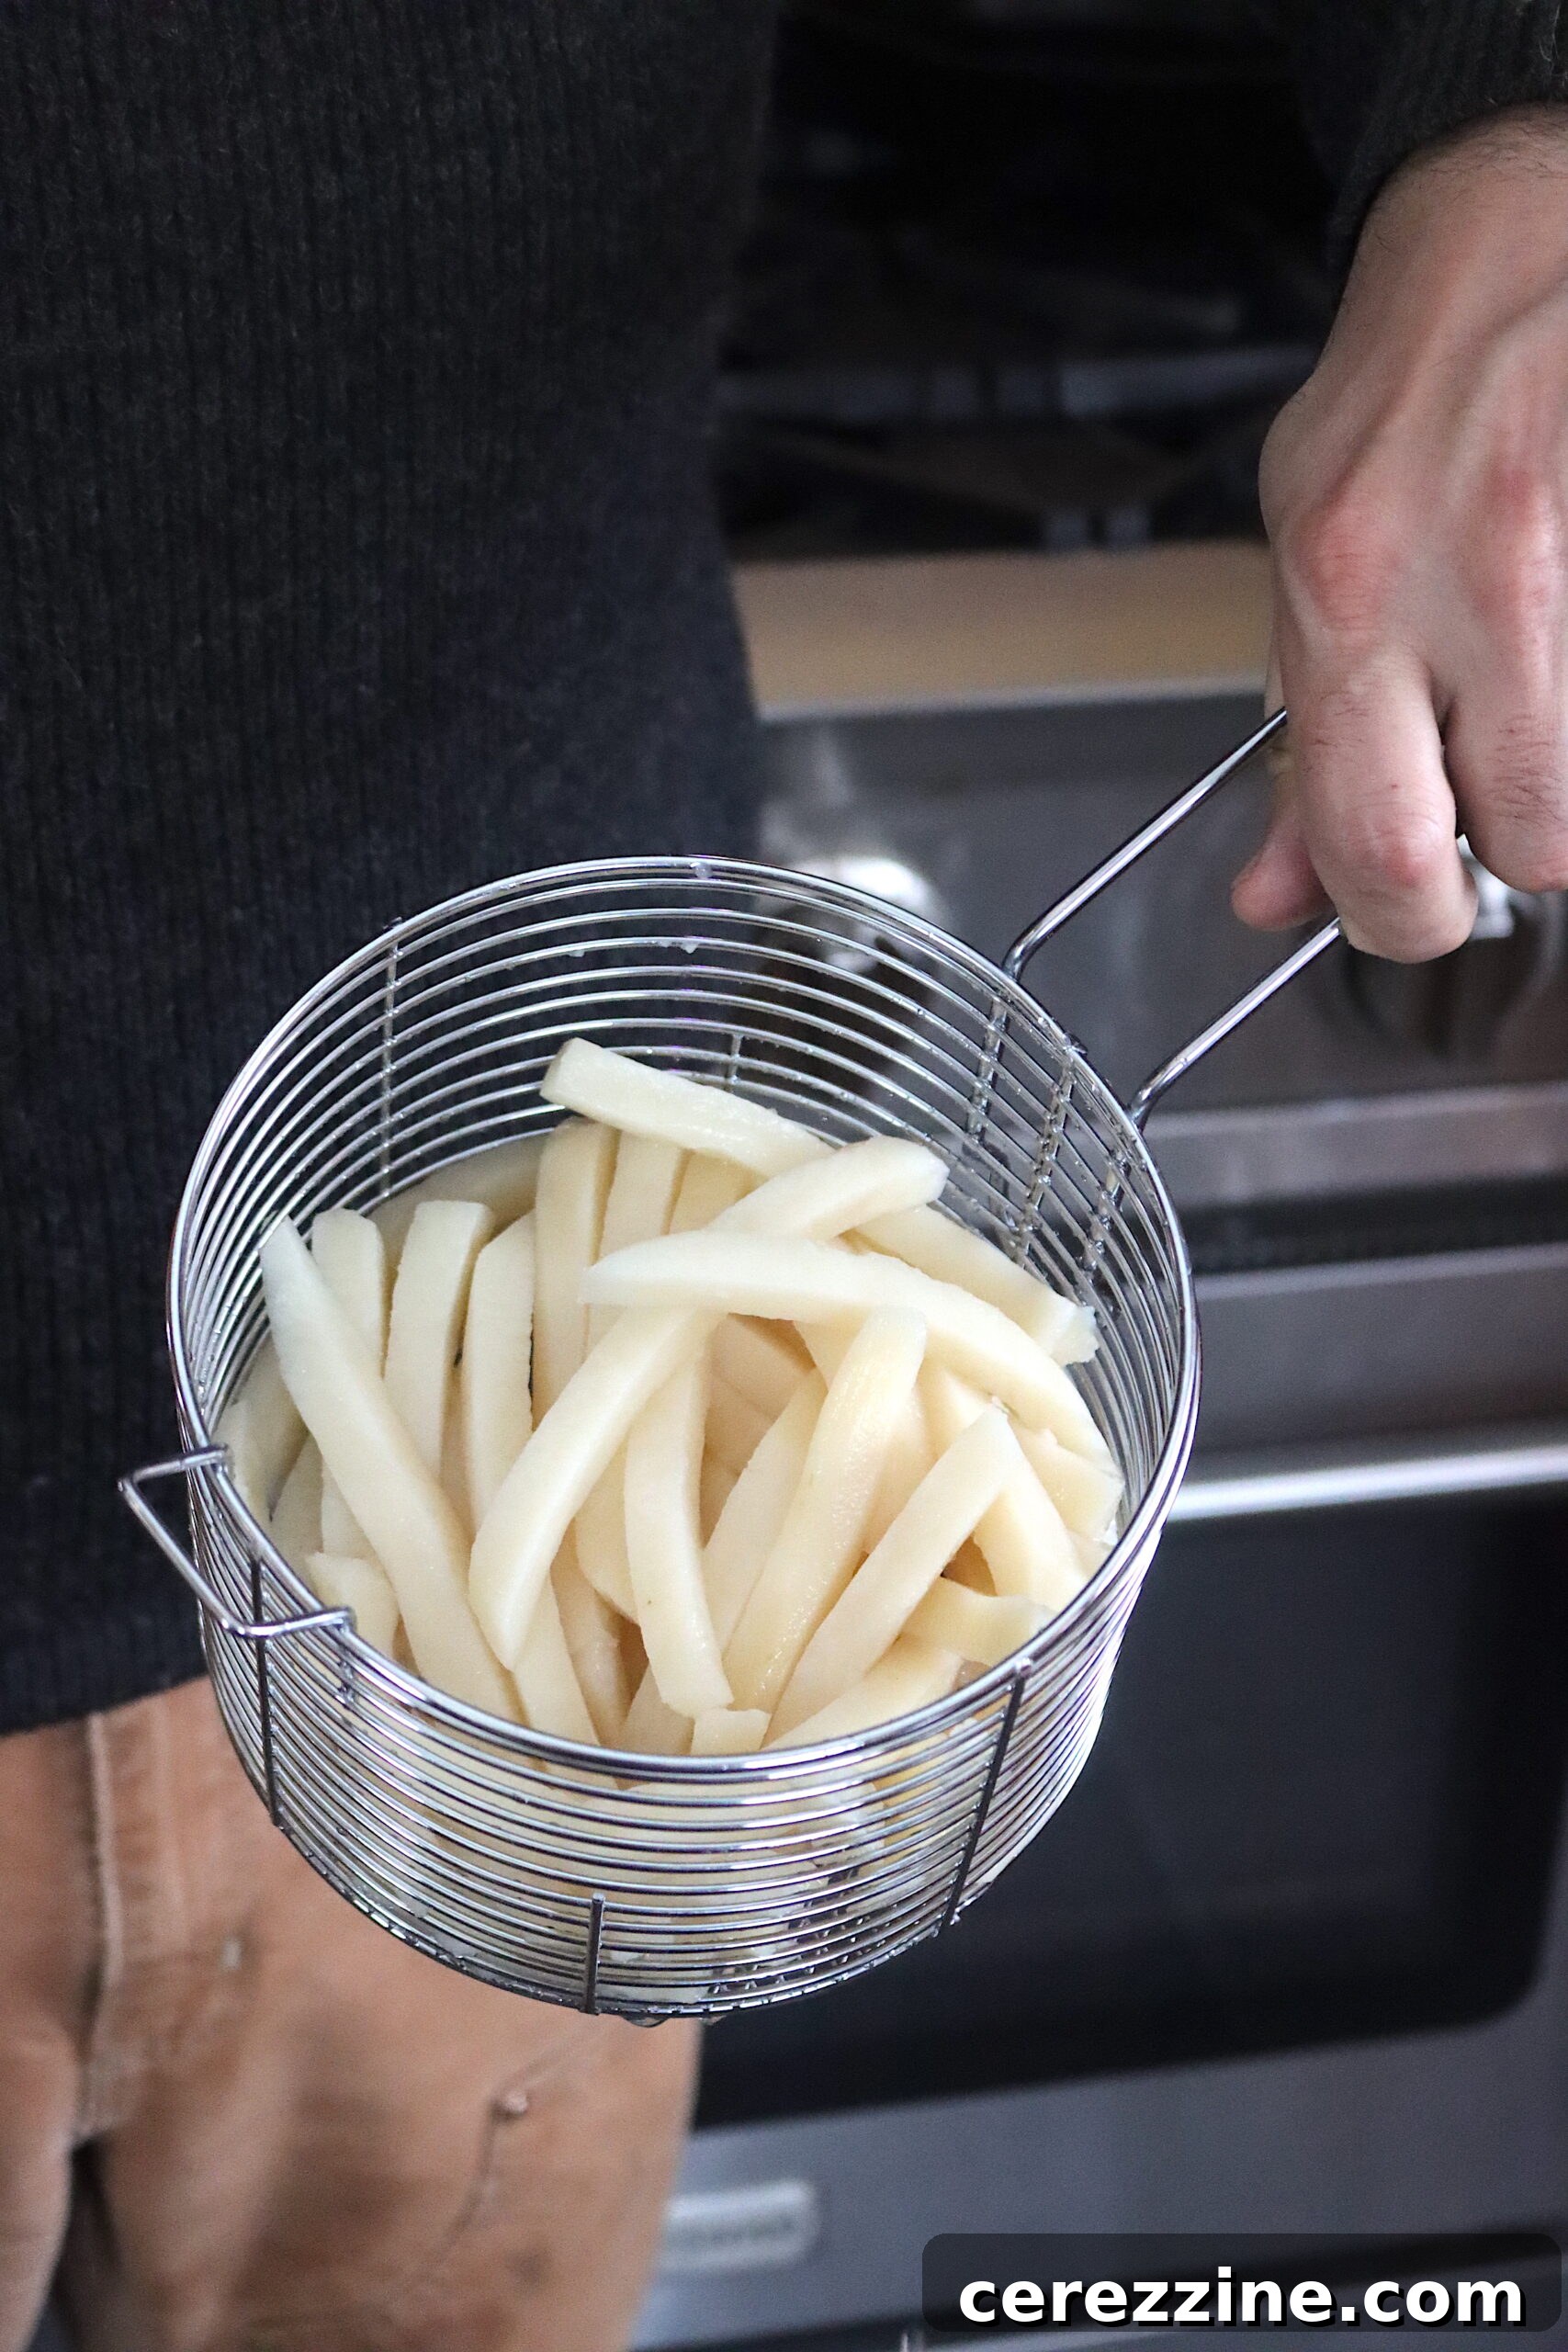
Open a jar of your homemade canned fries. Carefully drain off the canning liquid and give the fries a quick rinse under cold running water. This step helps to wash away any residual starch that may have settled in the jar, further contributing to a crispier end product.
2. Cook to Crispy Perfection
You have two excellent options for cooking your fries: frying or baking.
Deep Frying (Recommended for Ultimate Crispness)
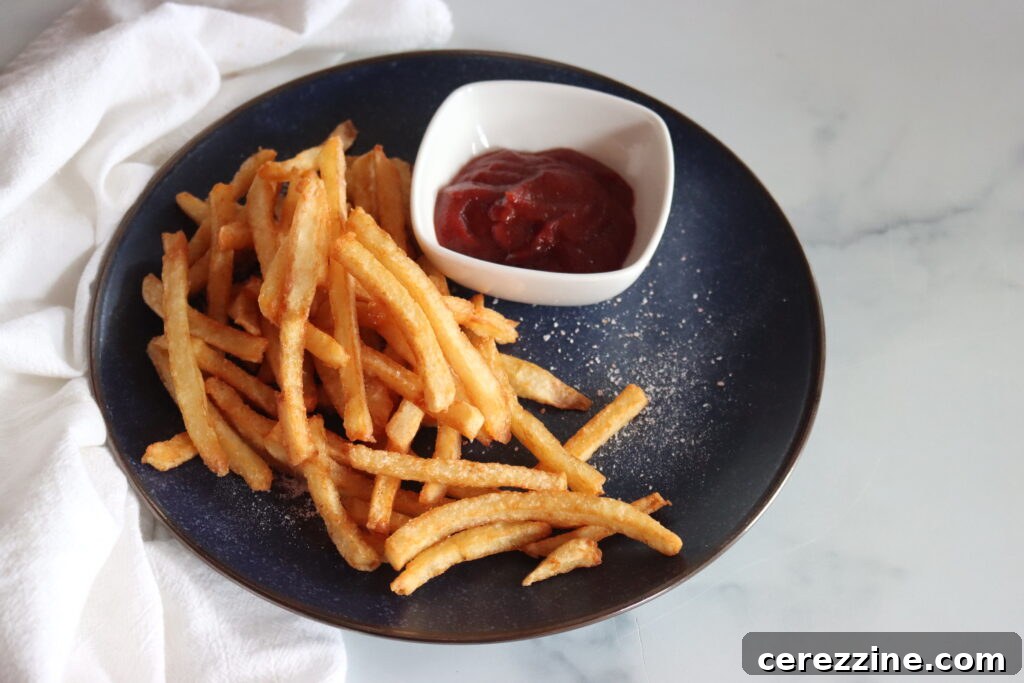
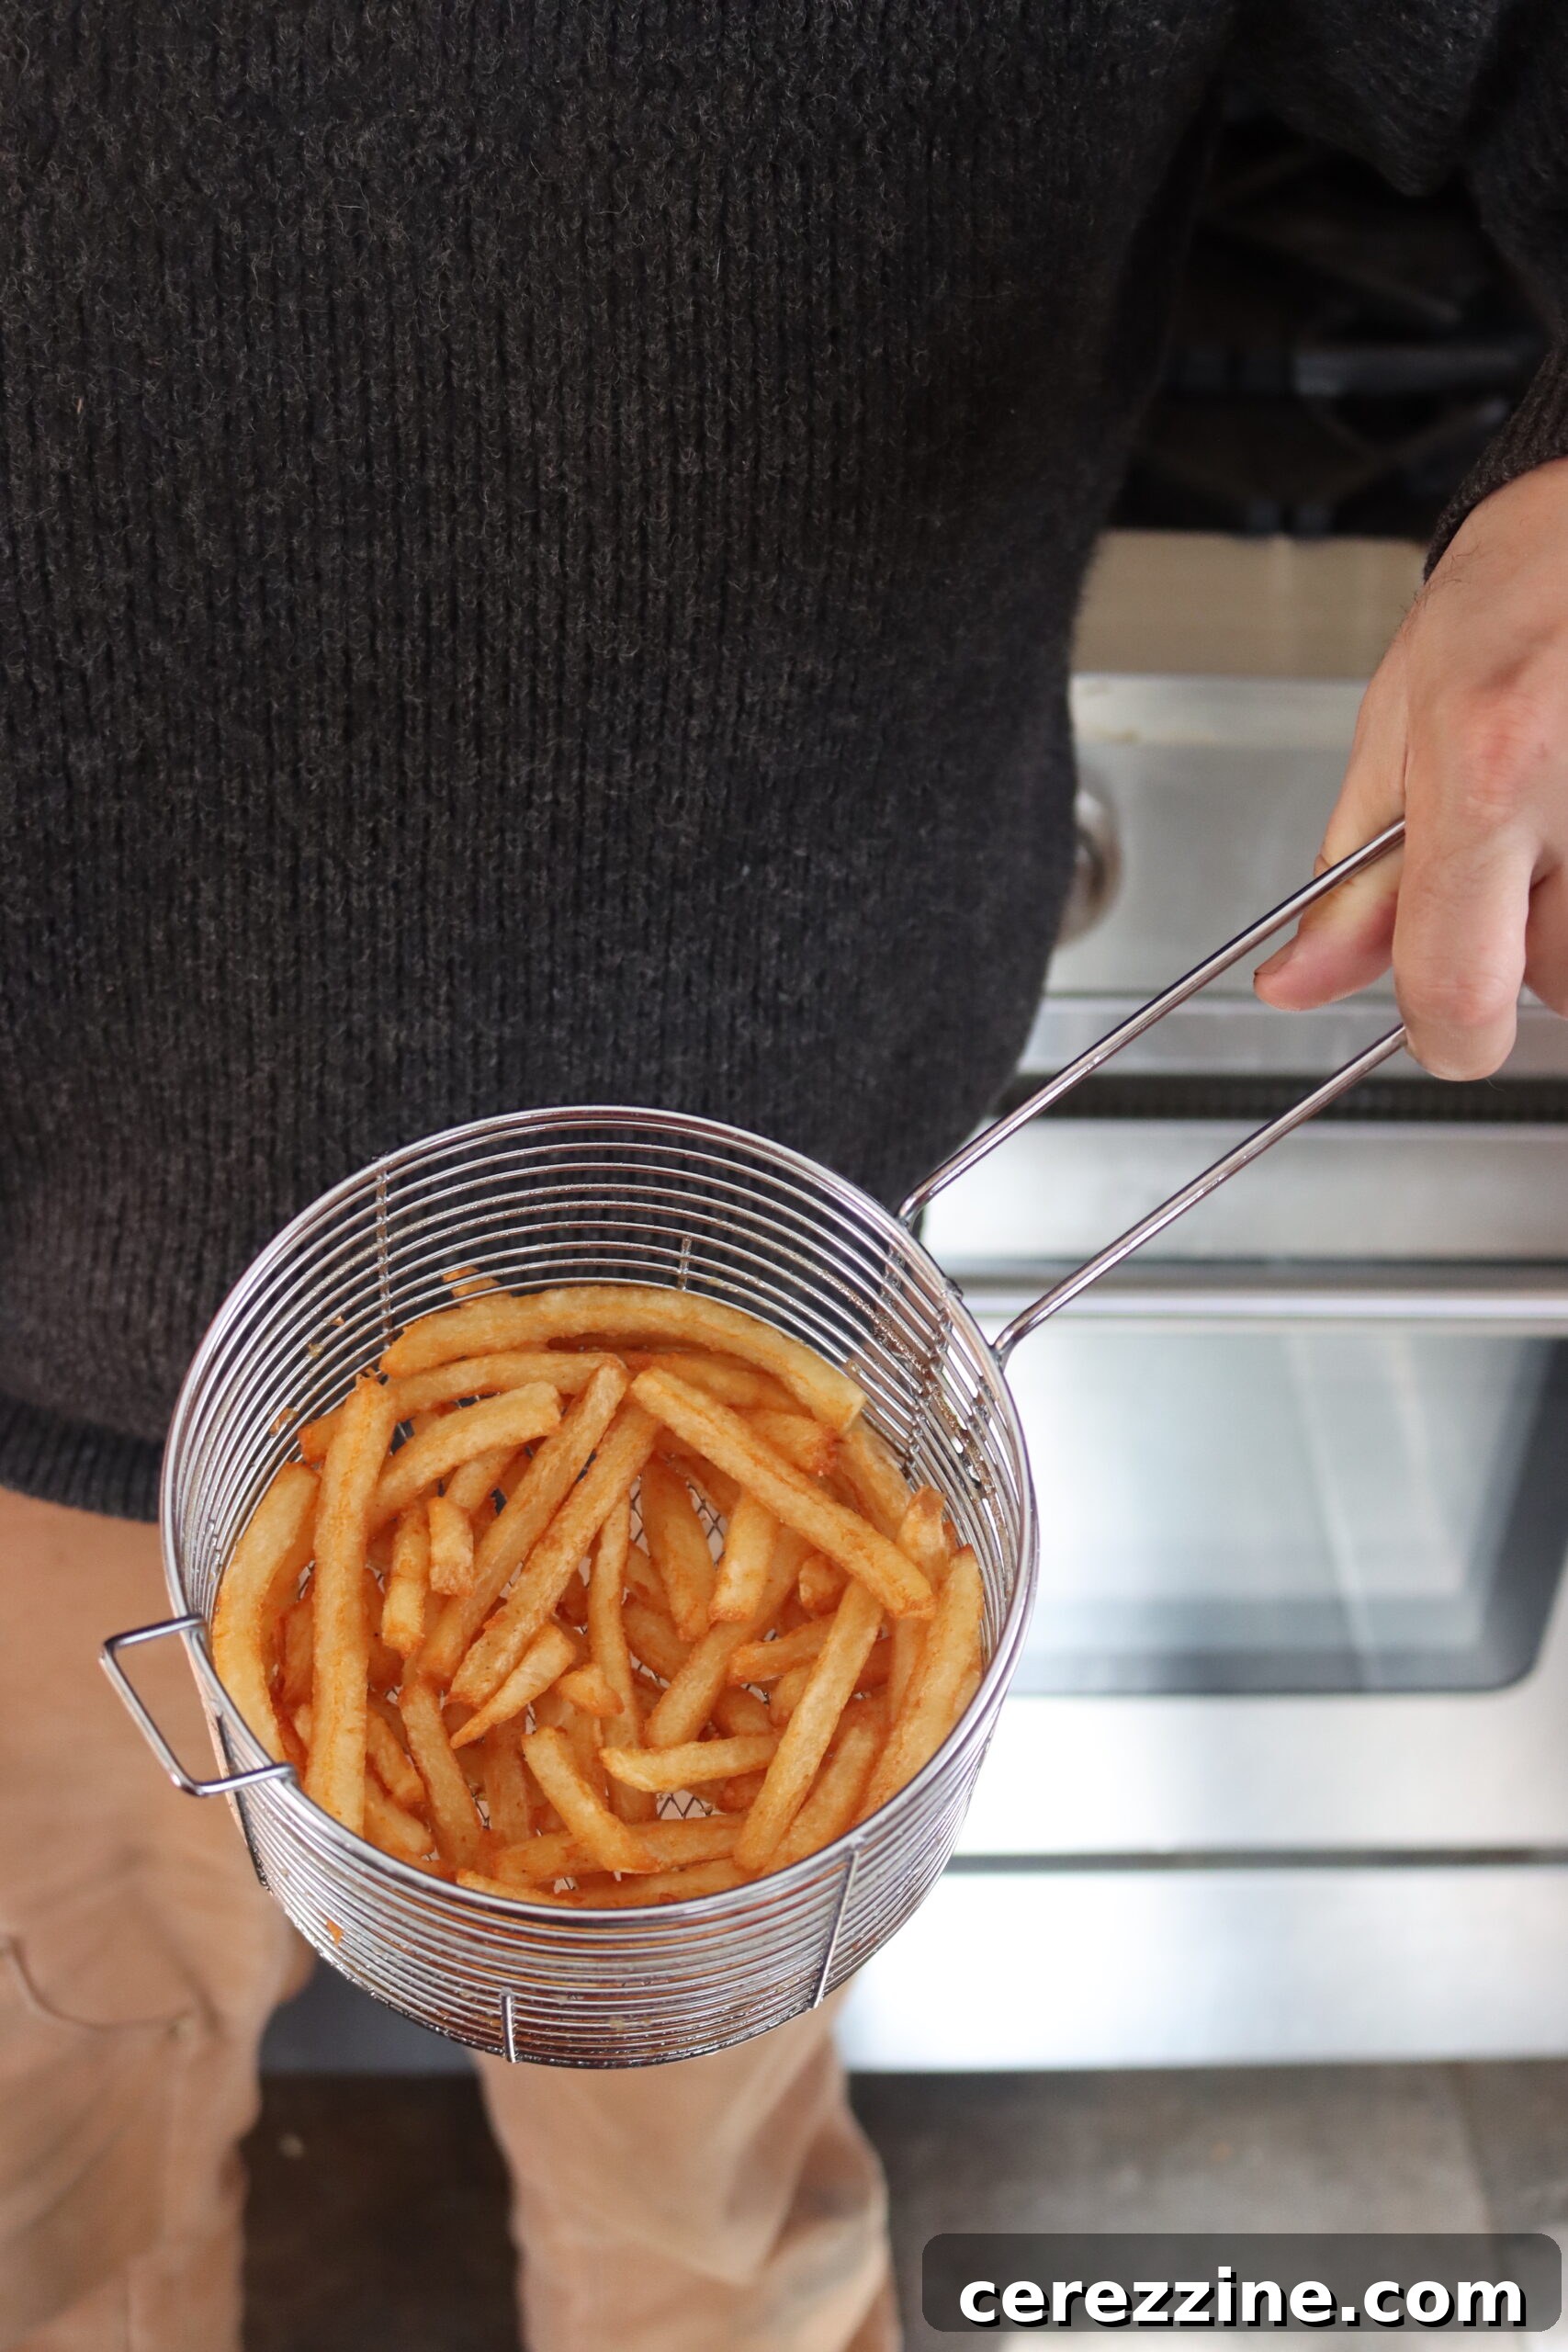
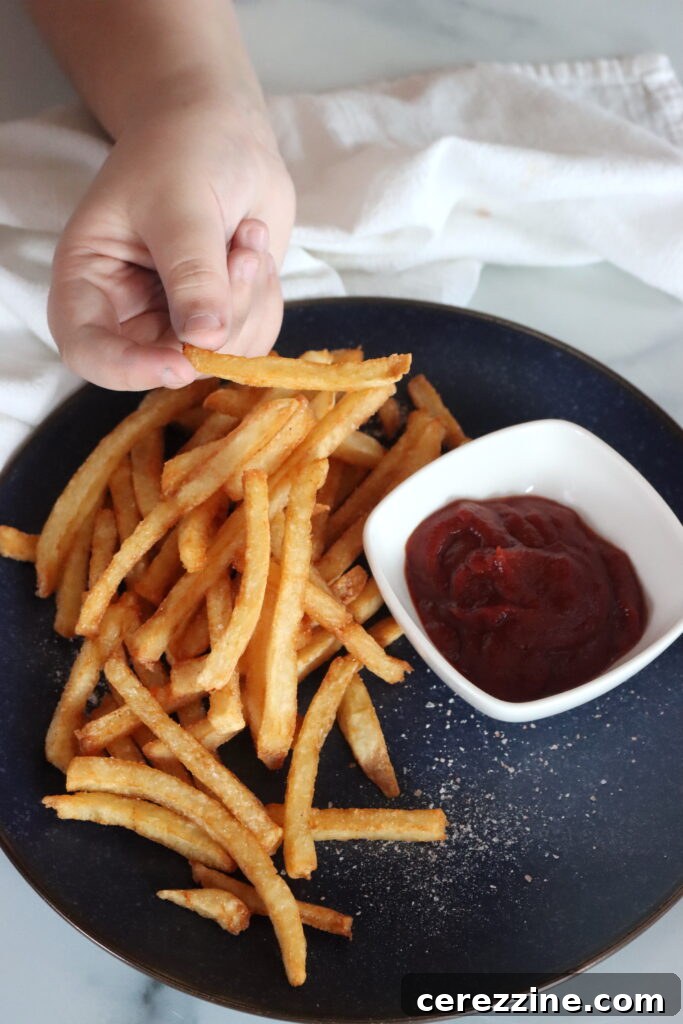
Frying will undoubtedly give you the crispiest, most classic French fry experience. Heat your preferred cooking oil in a deep pot or deep fryer to between 350°F (175°C) and 375°F (190°C). Carefully add the drained fries to the hot oil in batches, ensuring not to overcrowd the pot. Fry for approximately 7 to 10 minutes, or until they are beautifully golden brown and wonderfully crispy. The pre-cook from the pressure canner truly makes them perfect for this final crisping stage.
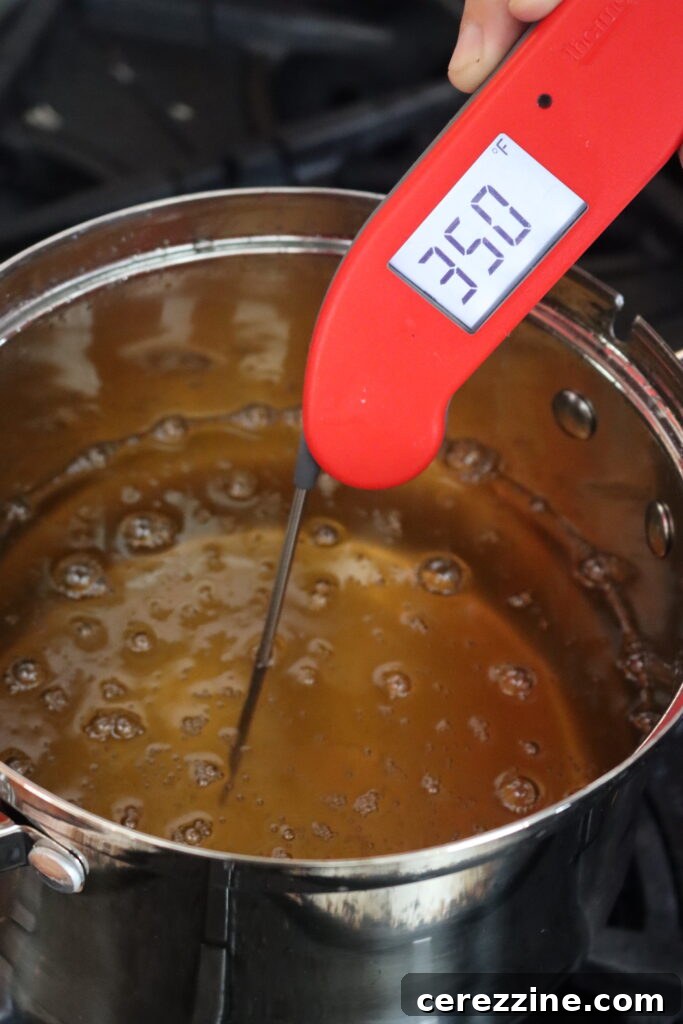
After extensive testing, I can confidently say that frying in tallow (rendered beef fat) yields an infinitely superior flavor and crispness compared to any other oil. It’s not just a traditional preference; the difference in taste and texture is truly dramatic. While I use homemade tallow, for those looking to purchase high-quality grass-fed tallow, Fatworks is an excellent source. I find a simple stainless steel stovetop fryer to be perfectly sized for a single quart of home-canned fries.
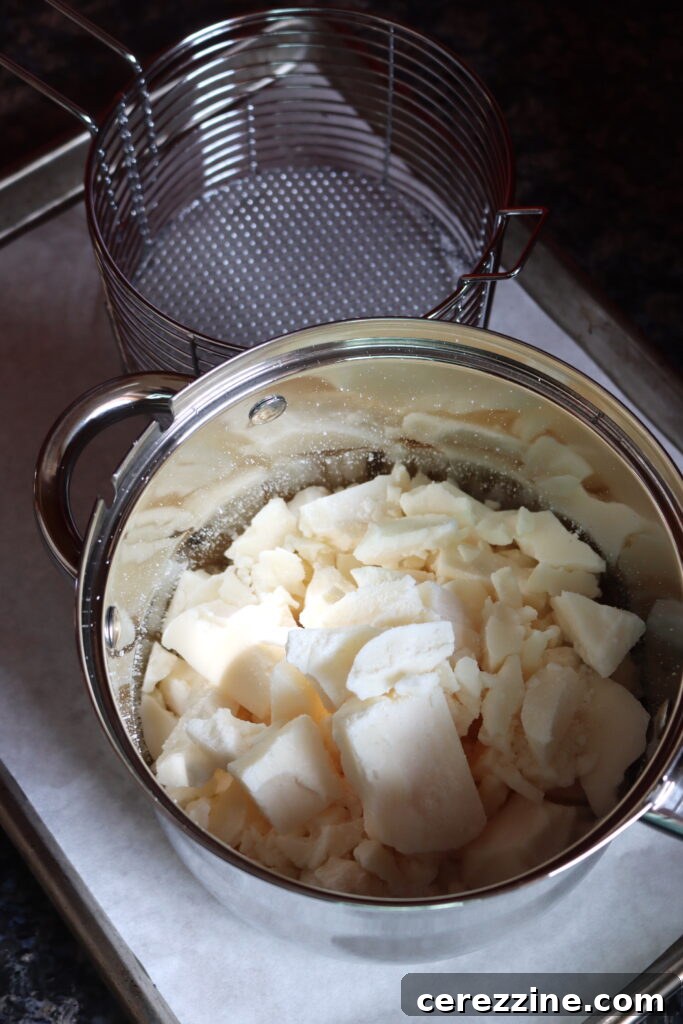
Baking or Air Frying
For a slightly healthier alternative, you can bake your canned fries. Preheat your oven to 425°F (220°C). For best results, gently toss the drained fries with a small amount of oil (like olive oil or avocado oil) before spreading them in a single layer on a baking sheet. Bake for 25-30 minutes, flipping them halfway through, until they are golden and crisp. An air fryer can also produce excellent results; simply follow your air fryer’s instructions for frozen fries, adjusting cooking time as needed.
Serving Suggestions and Meal Ideas
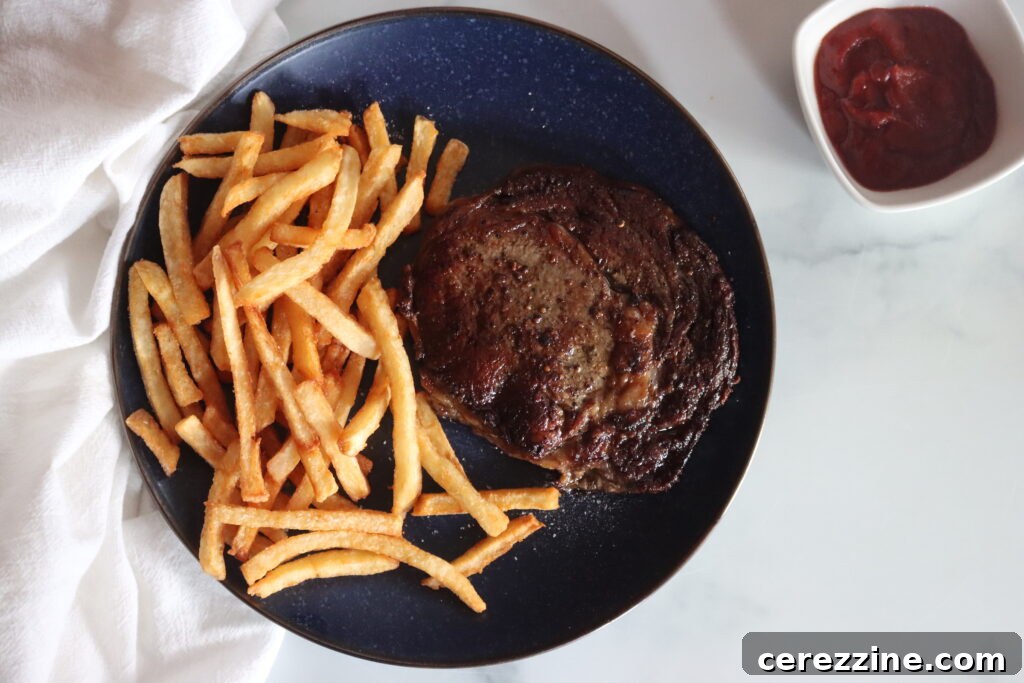
A single quart jar of canned fries is typically perfect as a quick side dish for two people, while a pint serves one. For my family of four, I usually open two quart jars for dinner. One of my favorite ways to utilize these convenient fries is to prepare a quick weeknight “Steak Frites” – a fancy-sounding meal of steak and fries. A single ribeye steak and a quart of canned fries make an ideal dinner for two, with the fries cooking in roughly the same time it takes to sear a medium-rare steak.
These versatile fries also pair wonderfully with burgers, fish and chips, or can be loaded with your favorite toppings like cheese, bacon, and chives for a decadent snack. The convenience and superior flavor of these pressure-canned fries make them a staple in my pantry.
Conclusion: Embrace the Convenience of Canned French Fries
Pressure canning French fries is a truly convenient and satisfying way to ensure you always have this beloved snack ready for later. It’s a game-changer for busy evenings when you need a quick and delicious side dish, or simply when you want to bypass the time-consuming prep work involved in making fries from scratch. The method, proven safe by Ball Canning, transforms raw potatoes into a shelf-stable, pre-cooked product that retains its integrity and, most importantly, its potential for ultimate crispiness.
The ability to pull a jar of pre-prepped, perfectly cut fries from your pantry, give them a quick finish, and serve them alongside your favorite meals is invaluable. So, the next time you find yourself with an abundance of potatoes, consider the rewarding process of pressure canning some fries. You’ll not only appreciate the incredible convenience but also fall in love with the exceptional flavor and texture of your homemade, shelf-stable French fries.
Canning French Fries Recipe
If you love homemade French fries but don’t always have the time to make them fresh, pressure canning is a great way to keep a stash of fries ready to go. The process allows you to preserve the fries in jars, so whenever you’re craving a crispy, golden batch, all you need to do is cook them up. While pressure-canned fries may be a little different than freshly cut fries, they hold up wonderfully when fried or baked, offering you the convenience of homemade fries with minimal effort.
Yield: Varies, see notes
Prep time: 1 hour 15 minutes
Cook time: 45 minutes
Soaking Time: 3 hours
Total time: 5 hours
Equipment
- Pressure Canner (An All-American Brand 930 is recommended)
- Wide Mouth Quart Mason Jars
- Jar Lifter
- Canning Funnel
- French Fry Cutter (Optional, but highly recommended for evenly sized fries)
Ingredients
- Potatoes, peeled and cut into fry shapes
- Water, for soaking
- Salt, 1 tsp per quart or ½ tsp per pint
- Boiling water
Instructions
-
Prepare the Potatoes: Begin by peeling your potatoes. Peeling is not optional when canning potatoes, regardless of the recipe. All potatoes must be peeled before pressure canning. Once peeled, cut the potatoes into uniform, fry-shaped strips. Aim for fries about ½ to ¾ inch wide. This size works best for canning and gives you that perfect fry texture after canning and cooking.
-
Soak the Potatoes: To ensure the best texture, soaking the potatoes in water helps to remove excess starch. Place your cut potatoes in a large bowl, and cover them with water. Change the water three times, allowing each water change to soak for about an hour. You can also soak them overnight for the best results. After the final soak, drain the fries well, and give them a quick rinse in cold water to remove any remaining starch.
-
Pack the Jars: Begin packing the raw fries into the jars. The fries should be packed firmly but not squished. Leave 1-inch of headspace at the top of the jar. Make sure that the fries are upright to fit as many as possible. Add 1 teaspoon of salt per quart jar or ½ teaspoon per pint jar.
-
Fill with Boiling Water: Bring a pot of water to a boil. Carefully pour the boiling water into the jars over the fries, ensuring the fries are completely submerged. Leave the 1-inch headspace as required. Use a spatula or a non-metallic utensil to remove any air bubbles by gently running it along the inside of the jar. Wipe the rims of the jars with a clean towel to ensure a good seal.
-
Pressure Can the French Fries: Place your jars in the pressure canner. Follow the manufacturer’s instructions for your pressure canner to ensure safety and proper processing times. Process the jars at 10 pounds of pressure for 35 minutes for pint jars or 40 minutes for quart jars, adjusting pressure to altitude (see notes below). After the processing time is up, turn off the heat and allow the pressure to release naturally. Once the pressure has fully released, remove the jars from the canner and let them cool on a towel-lined surface.
-
Label and Store: Once your jars are cool, check the seals to ensure they’re tight. Any jars that don’t seal properly can be refrigerated and used within a few days. Label your jars with the date of canning, and store them in a cool, dark place.
Notes
- Don’t skip the pre-soaking steps! Without soaking, there will be too much starch in the jars, leading to less crispy fries.
- Be sure to maintain 1-inch headspace when packing and filling the jars for proper sealing and processing.
Yield
- A canner load of 7 quarts requires about 20 pounds of potatoes.
- A canner load of 9 pints requires about 12 to 14 pounds of potatoes.
- Large baking Russets work the best in this recipe for optimal texture and flavor.
- Add 1 tsp of salt per quart, and ½ tsp per pint.
- You’ll also need roughly 2 cups boiling water per quart, and 1 cup per pint for filling the jars.
- I find that a single quart jar is just right for a quick side for two people, or a pint for one person. With my family of four, I usually open two quart jars for dinner.
Shelf Life
For shelf life, I’ve found that potatoes are best when used within 8 to 12 months of canning for peak quality. They’re still safe as long as the jars are sealed, but quality may start to degrade with potatoes faster than many other home-canned products. Authorities generally state that potatoes maintain peak quality for 18 months.
Altitude Adjustments
With pressure canning, the canning time stays the same, but the pressure goes up as altitude increases. Here are the altitude adjustments for canning raw pack potatoes:
For dial gauge pressure canners:
- 0 to 2,000 feet: 11 lbs pressure
- 2,001 to 4,000 feet: 12 lbs pressure
- 4,001 to 6,000 feet: 13 lbs pressure
- 6,001 to 8,000 feet: 14 lbs pressure
For weighted gauge pressure canners:
- 0 to 1,000 feet: 10 lbs pressure
- Above 1,000 feet: 15 lbs pressure
To Serve Your Canned French Fries:
When you’re ready to enjoy your homemade fries, the process is simple. Here’s how to do it:
- Drain and Rinse: Remove the fries from the jar, drain off the liquid, and give them a quick rinse under cold water to remove excess starch.
- Cook: Fry the fries in hot oil until golden brown and crispy. A 375°F (190°C) fryer for 7 to 10 minutes is just about right if deep frying. If cooking in the oven, preheat to 425°F (220°C) and bake them for 25-30 minutes, flipping halfway through. Gently tossing them in a bit of oil before baking will give them a nice crispy outside.
Nutrition (Approximate per serving before final cooking)
- Calories: 81kcal
- Carbohydrates: 18g
- Protein: 2g
- Fat: 0.1g
- Saturated Fat: 0.03g
- Polyunsaturated Fat: 0.1g
- Sodium: 6mg
- Potassium: 442mg
- Fiber: 2g
- Sugar: 1g
- Vitamin A: 2IU
- Vitamin C: 21mg
- Calcium: 13mg
- Iron: 1mg
Nutrition information is automatically calculated, so should only be used as an approximation.