Unlock the secret flavors of your garden and wild spaces with homemade floral jellies. Among these delightful culinary creations, clover jelly stands out as a unique and surprisingly flavorful treat that’s remarkably easy to make. This guide will walk you through the simple process of transforming humble clover blossoms into exquisite, vibrant jellies, a natural delicacy that anyone can harvest and appreciate.
Discover the Magic of Floral Jellies: Clover’s Unique Appeal
There’s a special kind of enchantment in crafting jellies from edible flowers. Beyond the captivating colors, the flavors often evoke a sense of wonder, surprising even seasoned foragers and cooks. Many edible flowers share color compounds with common fruits, leading to taste profiles that cleverly mimic familiar berry notes. For instance, a delicate wild violet jelly can taste astonishingly like fresh spring berries, hinting at raspberries and blueberries due to shared pigmentation.
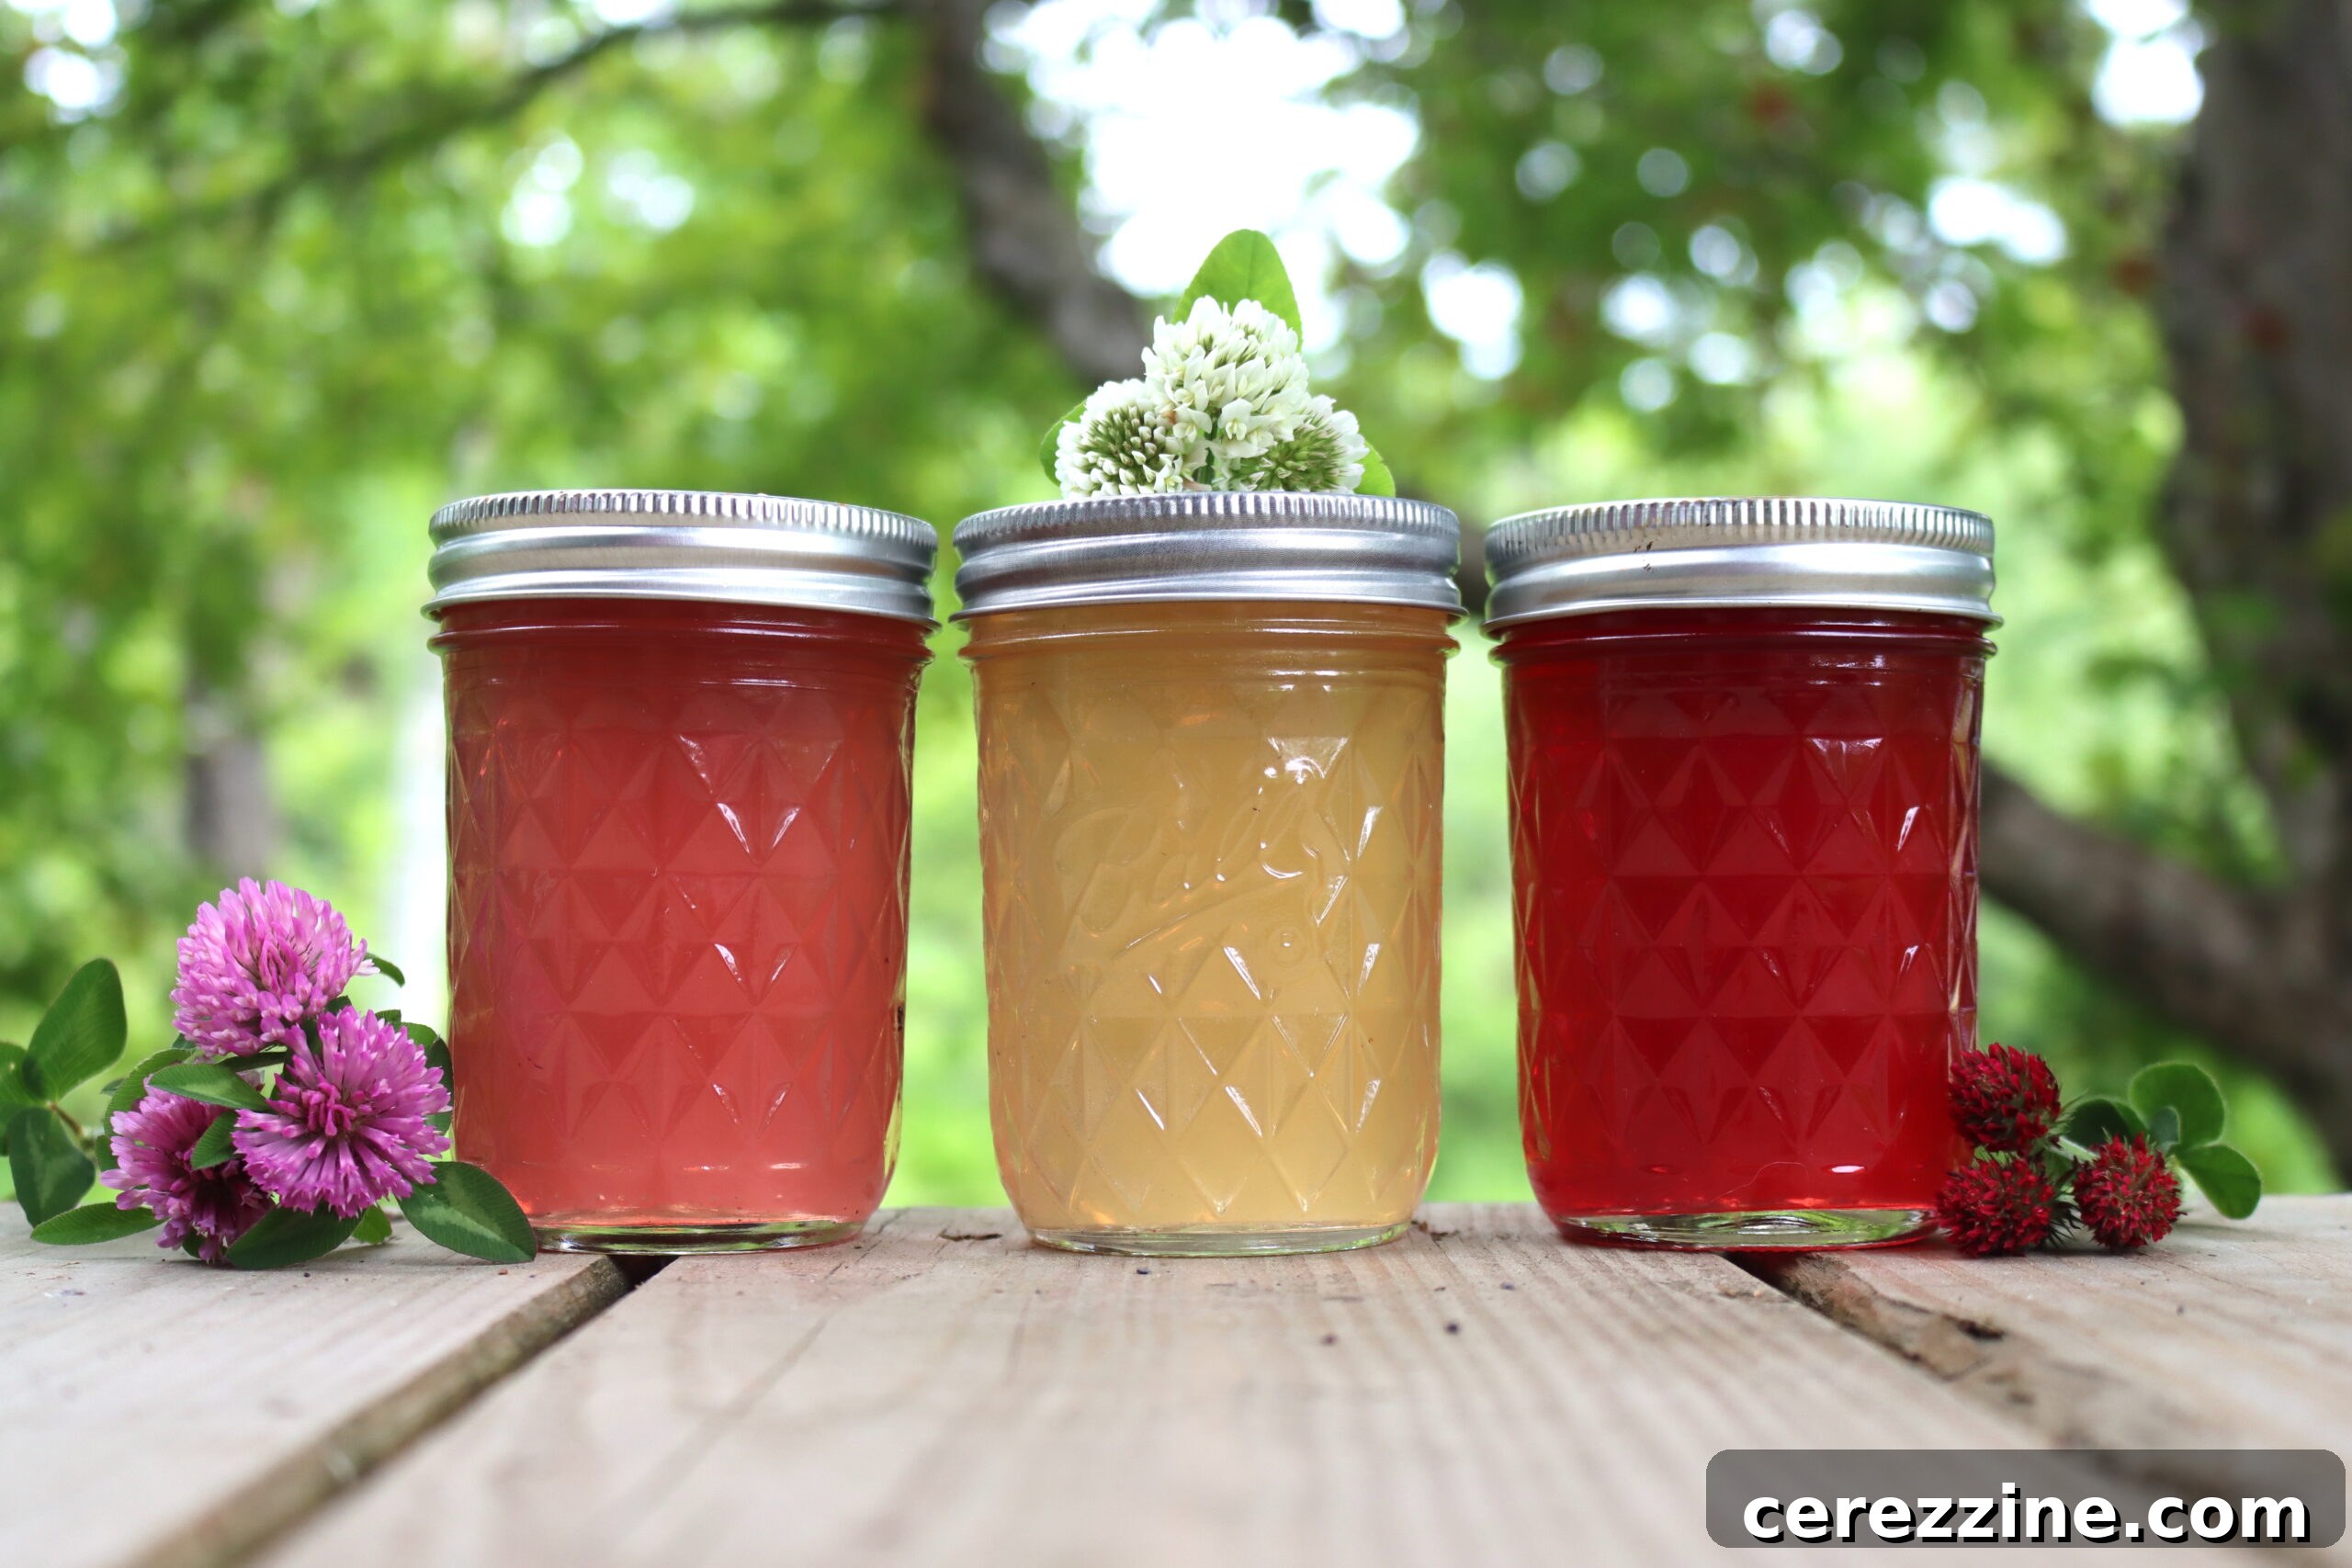
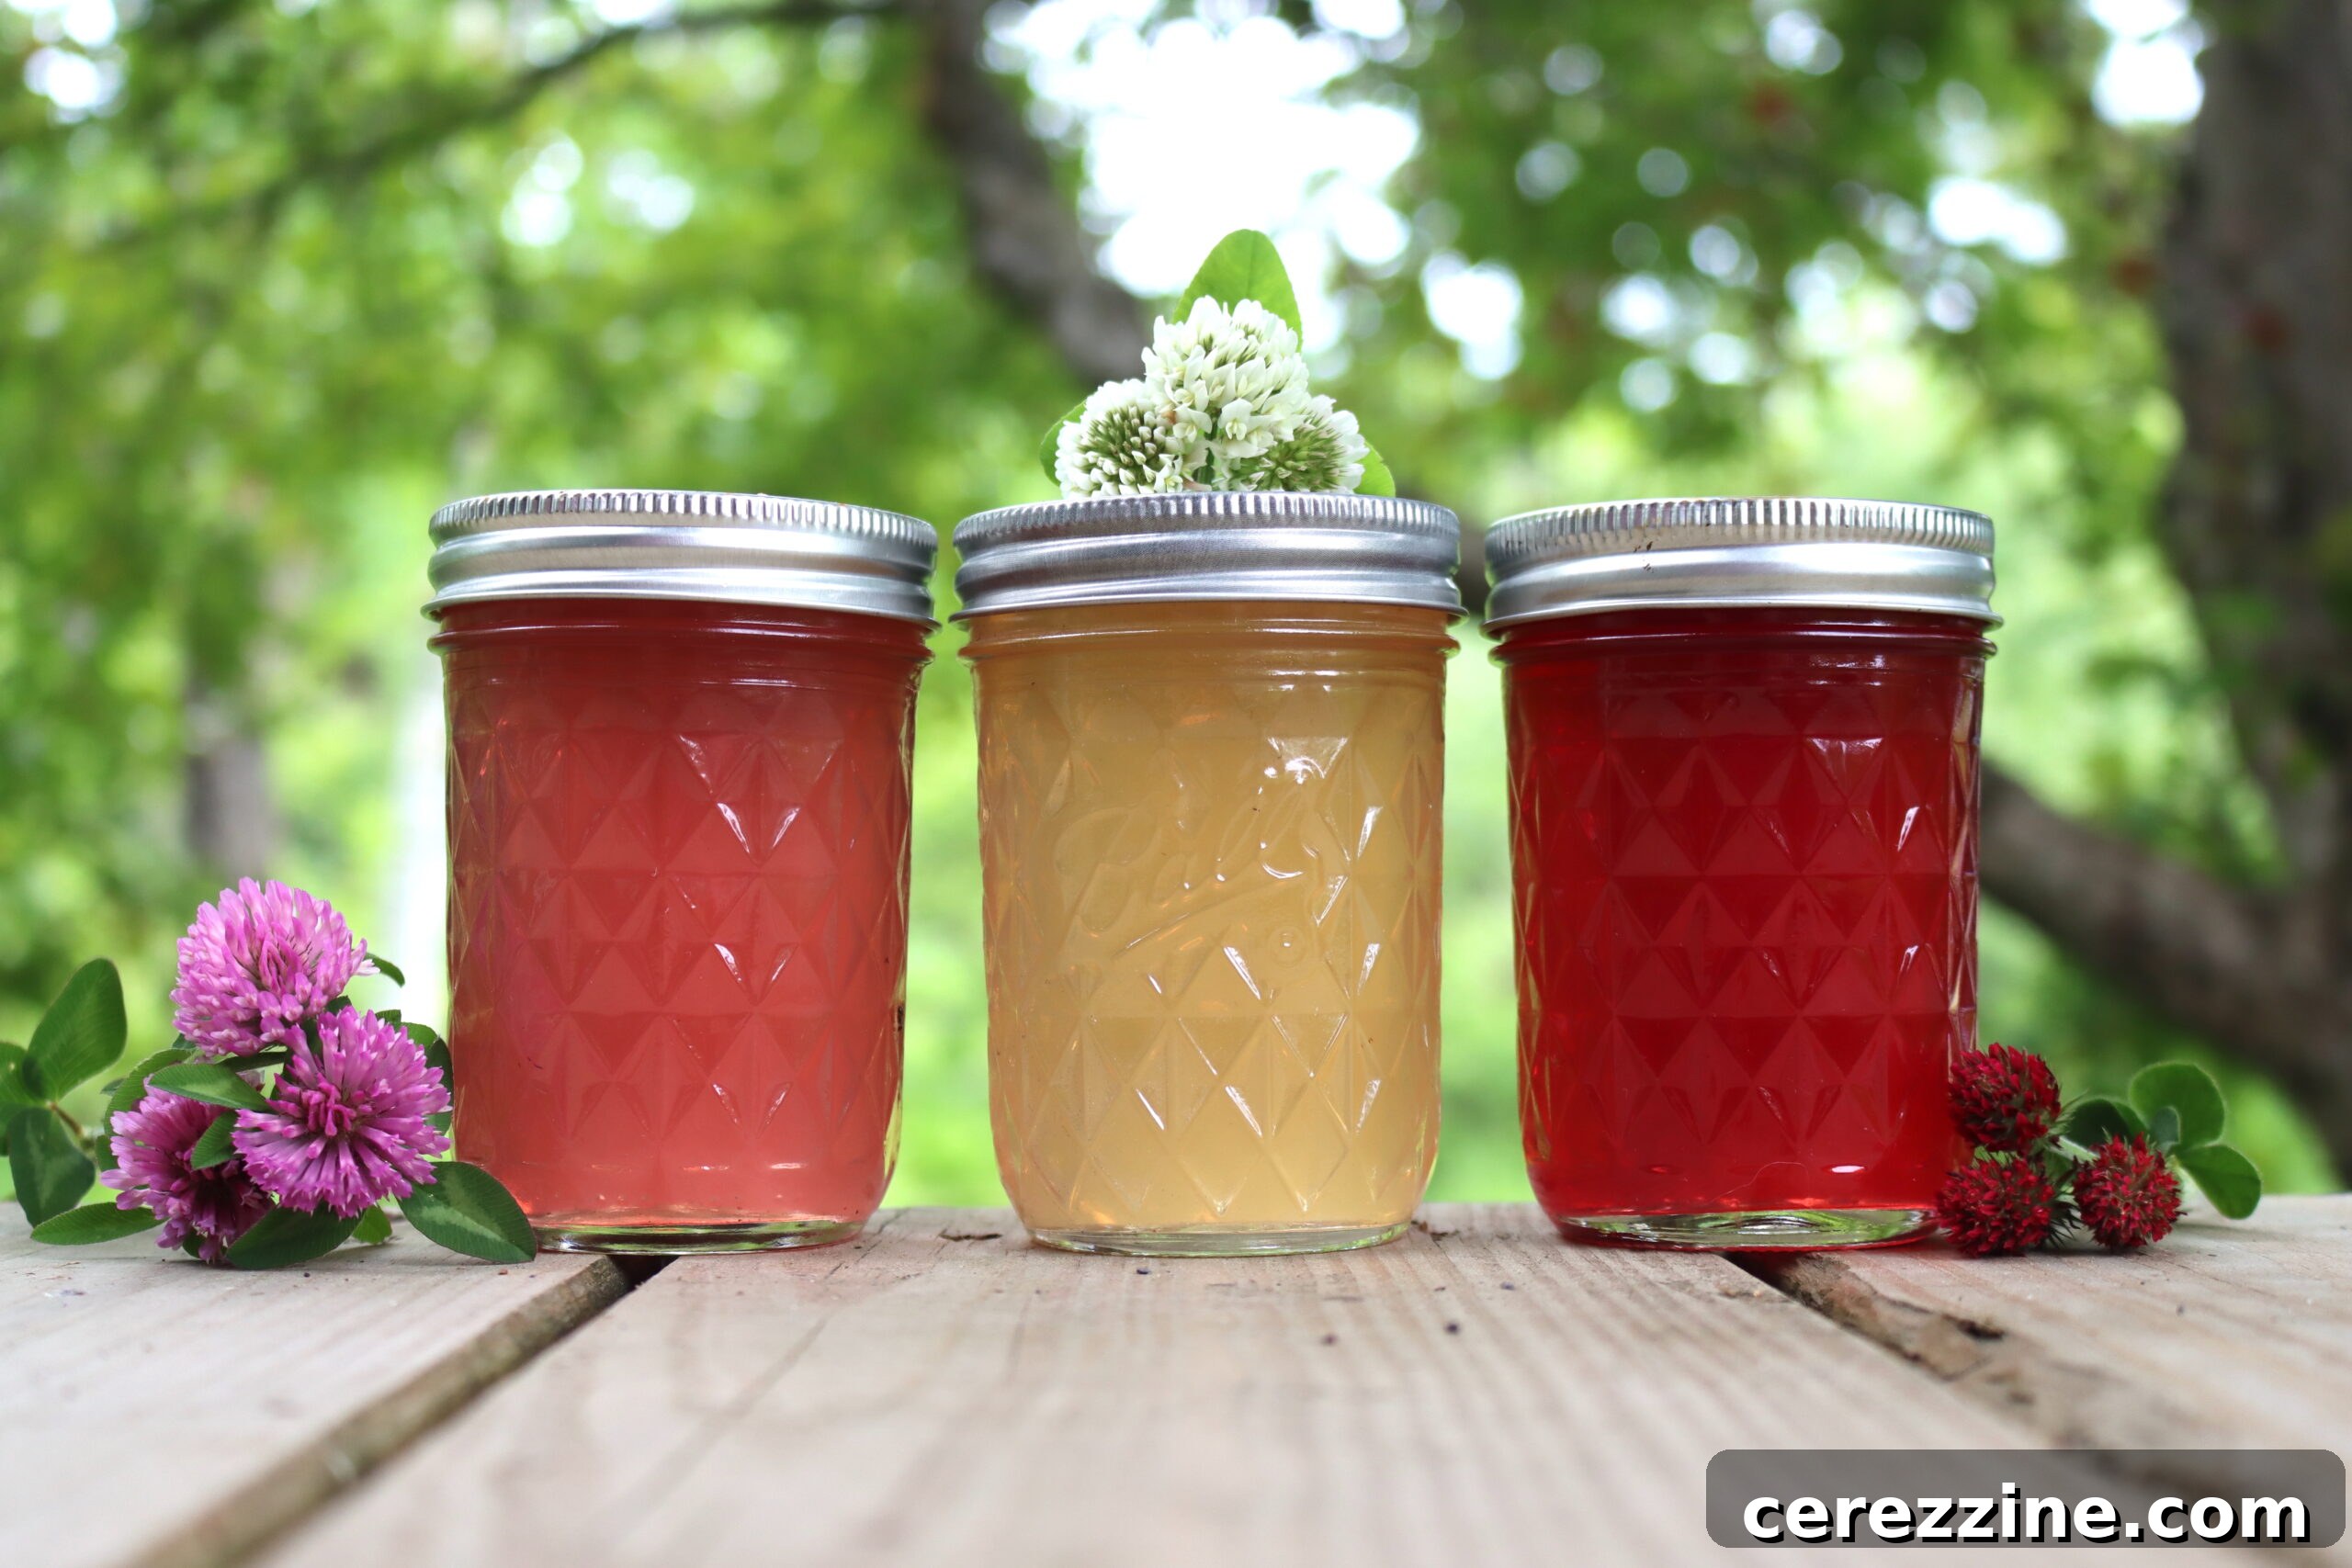
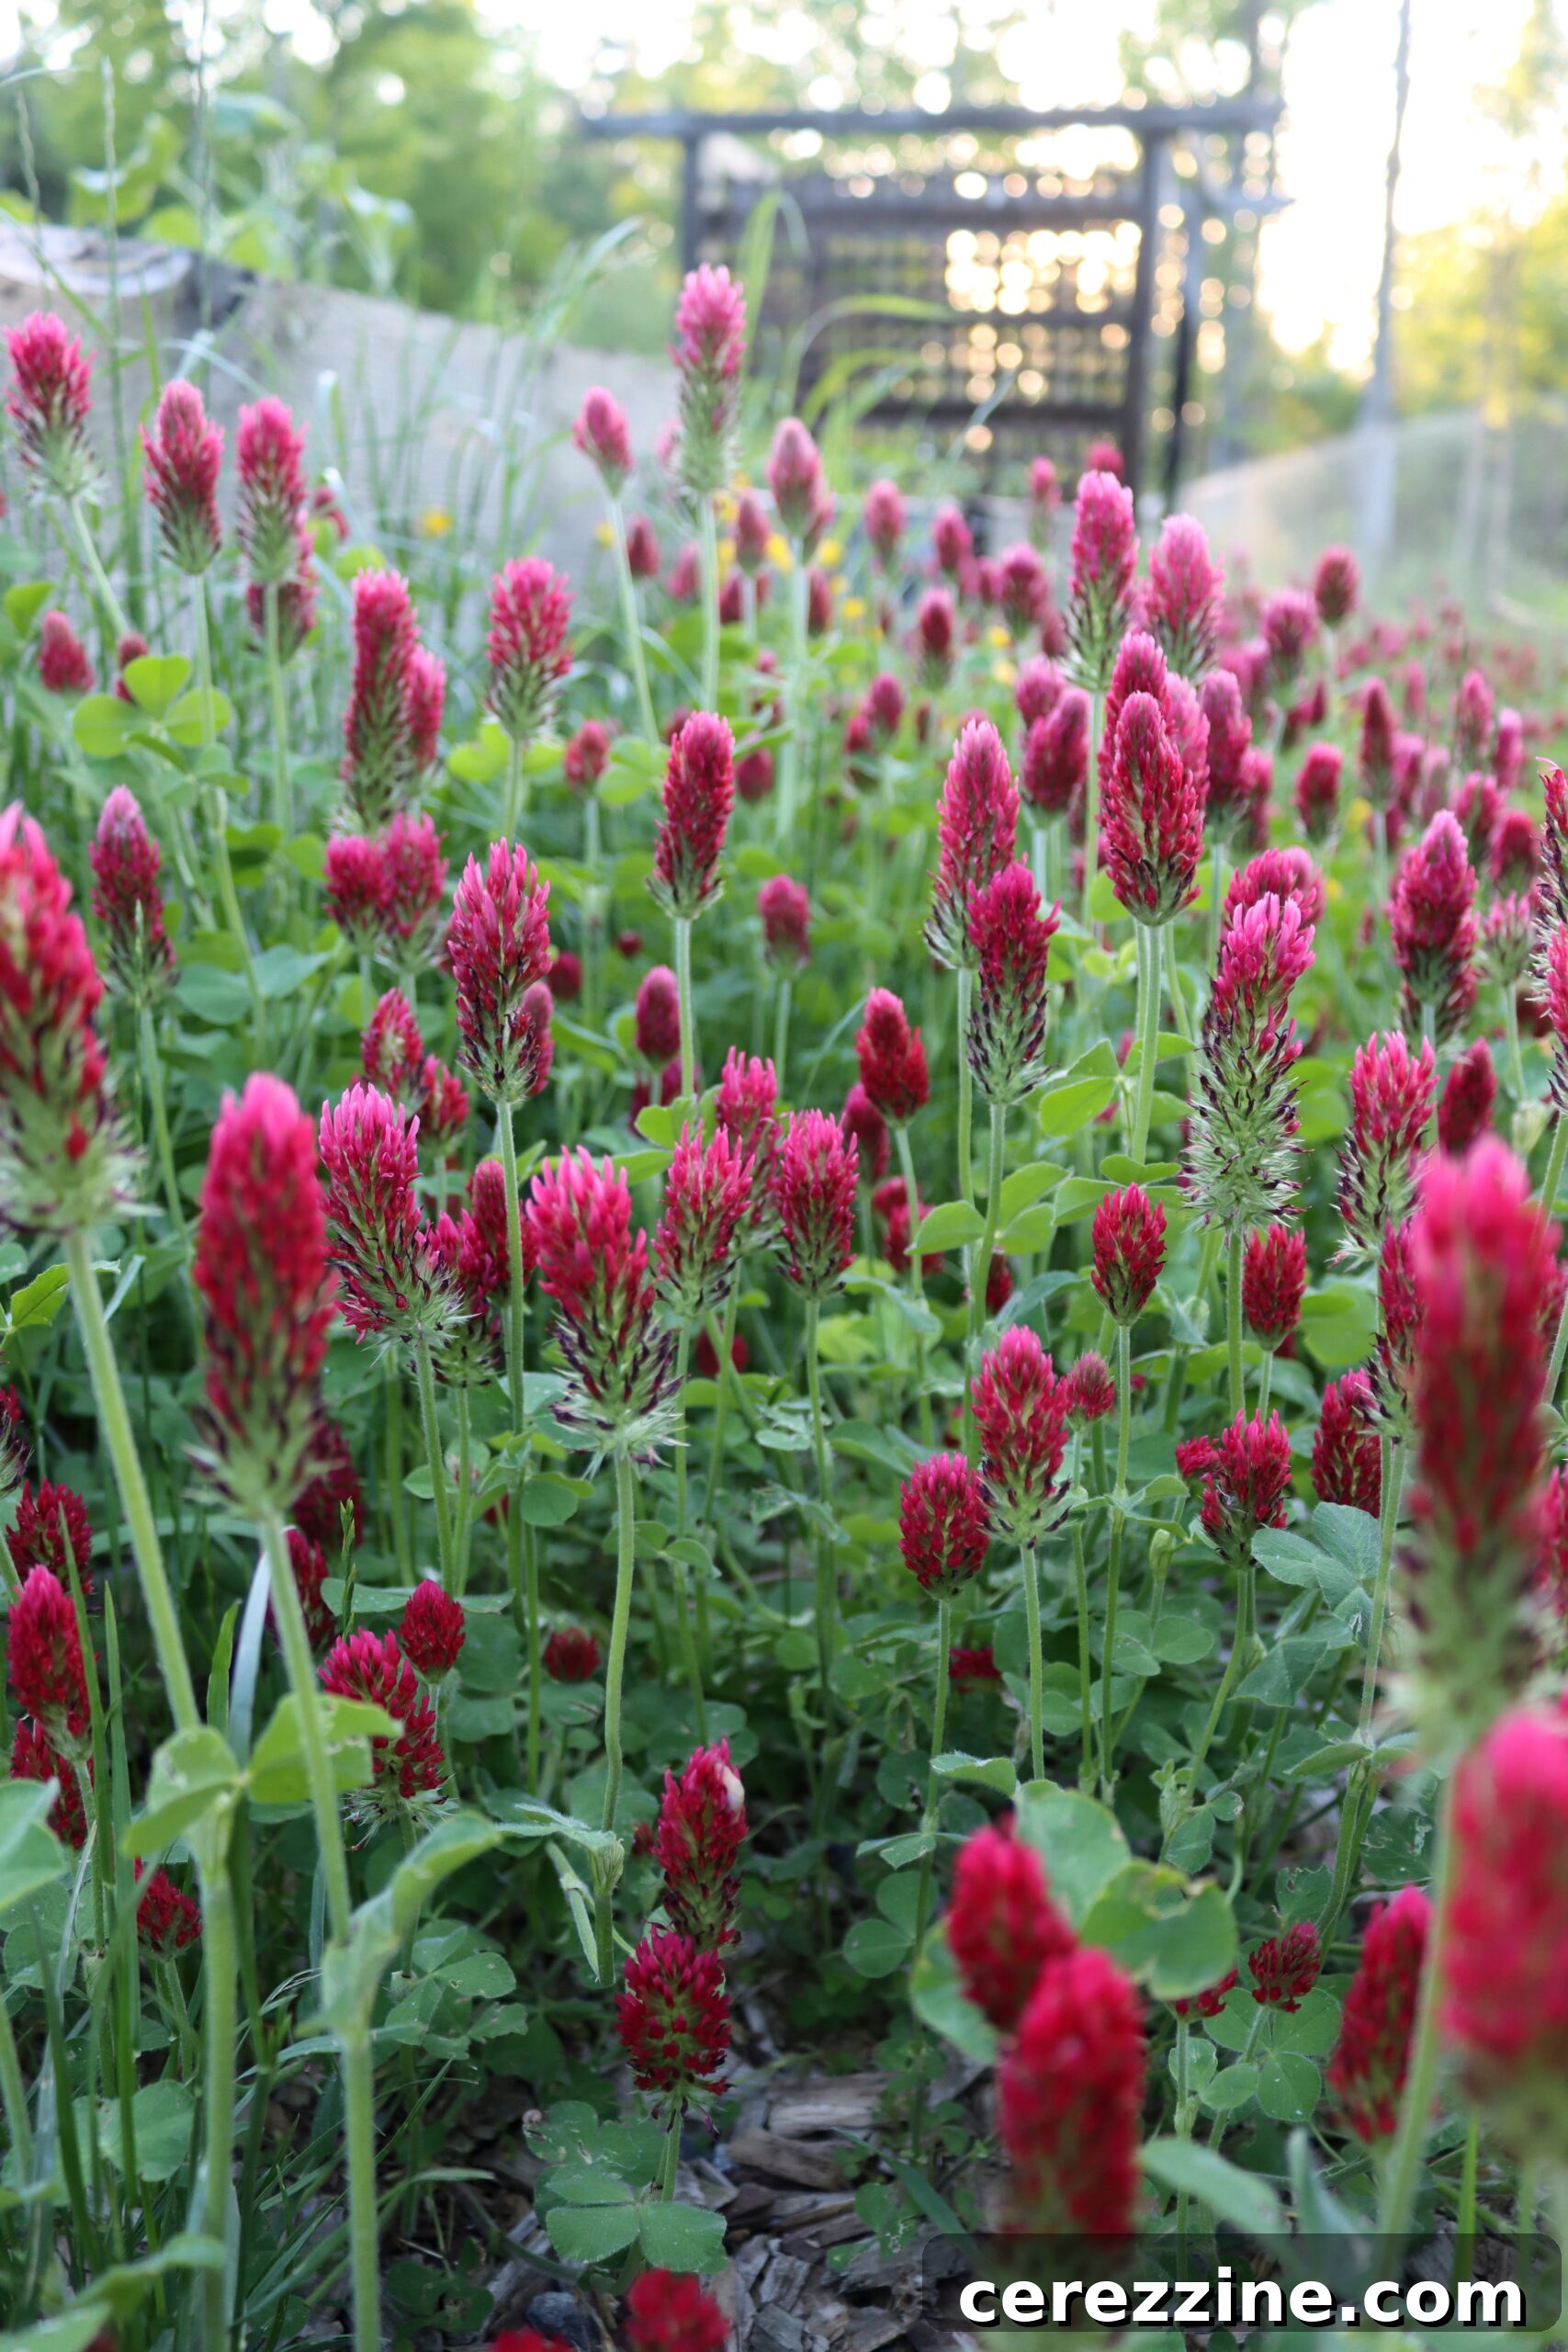
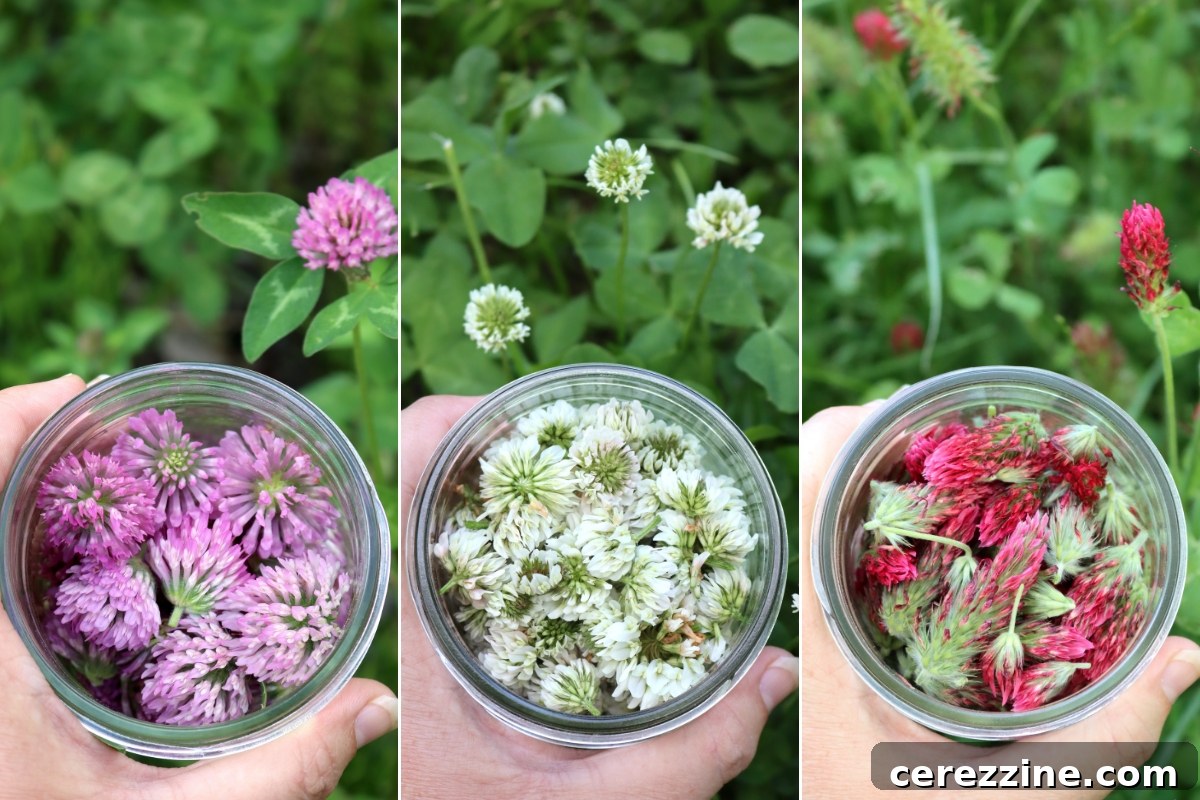
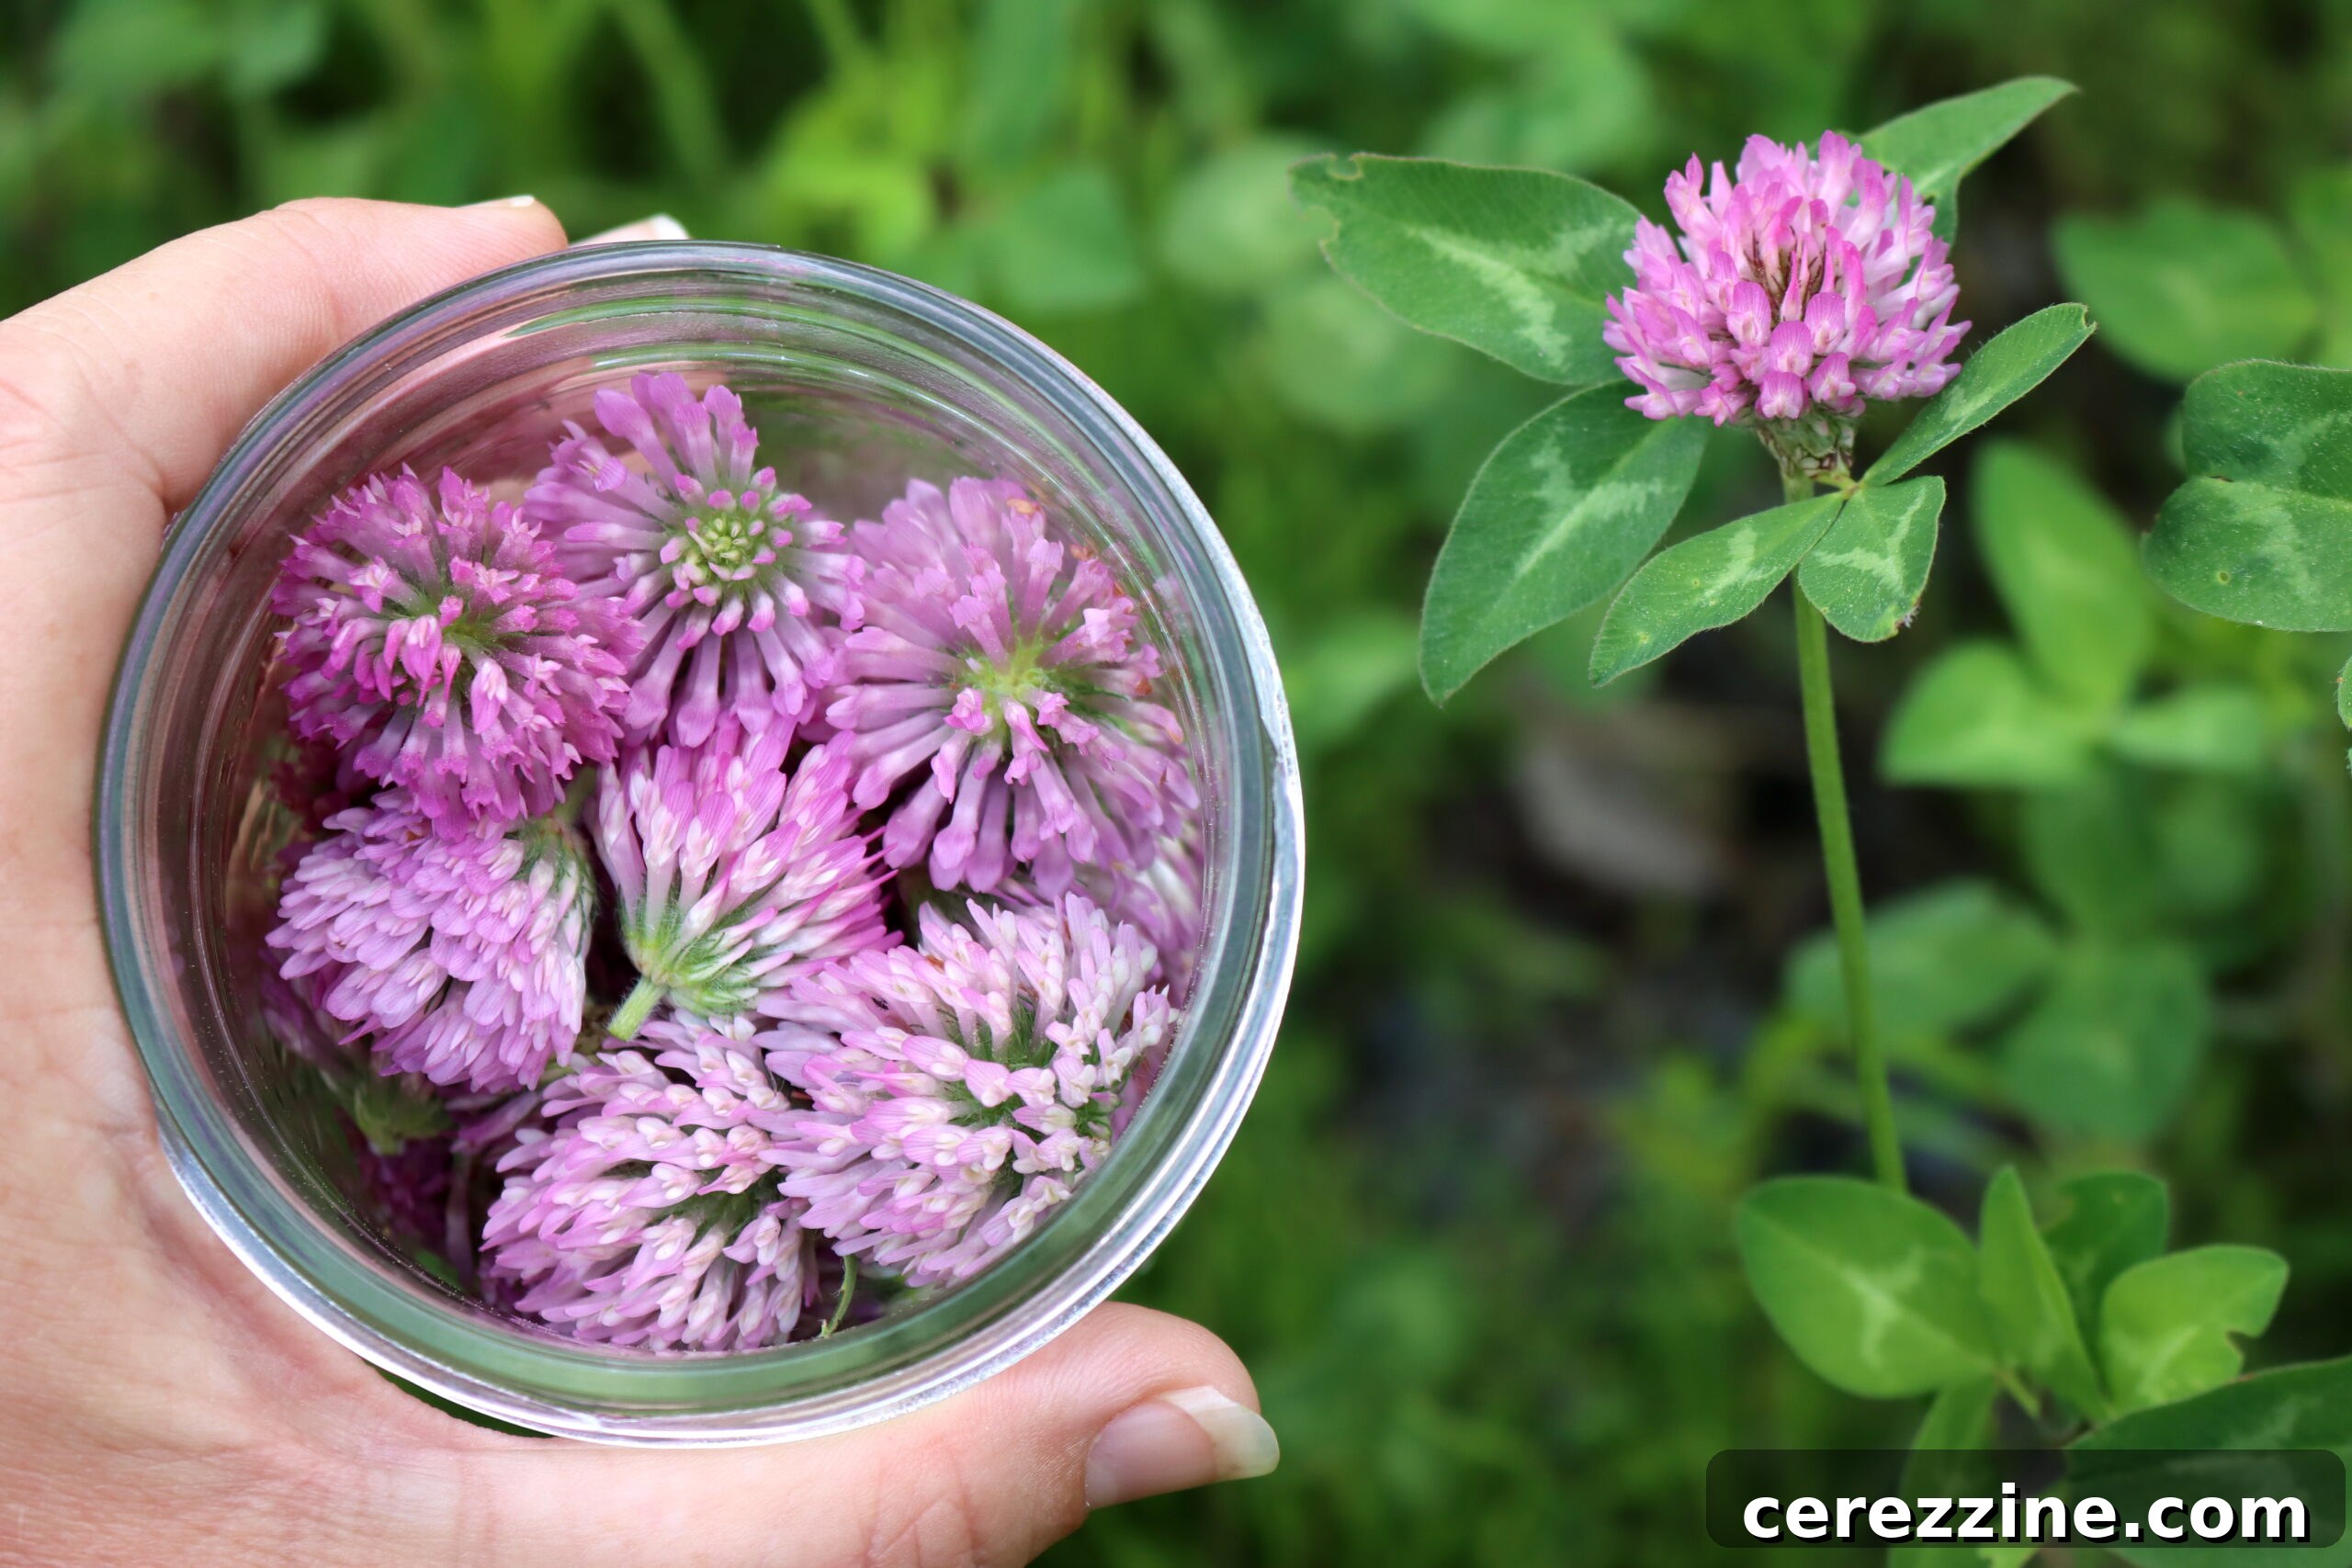
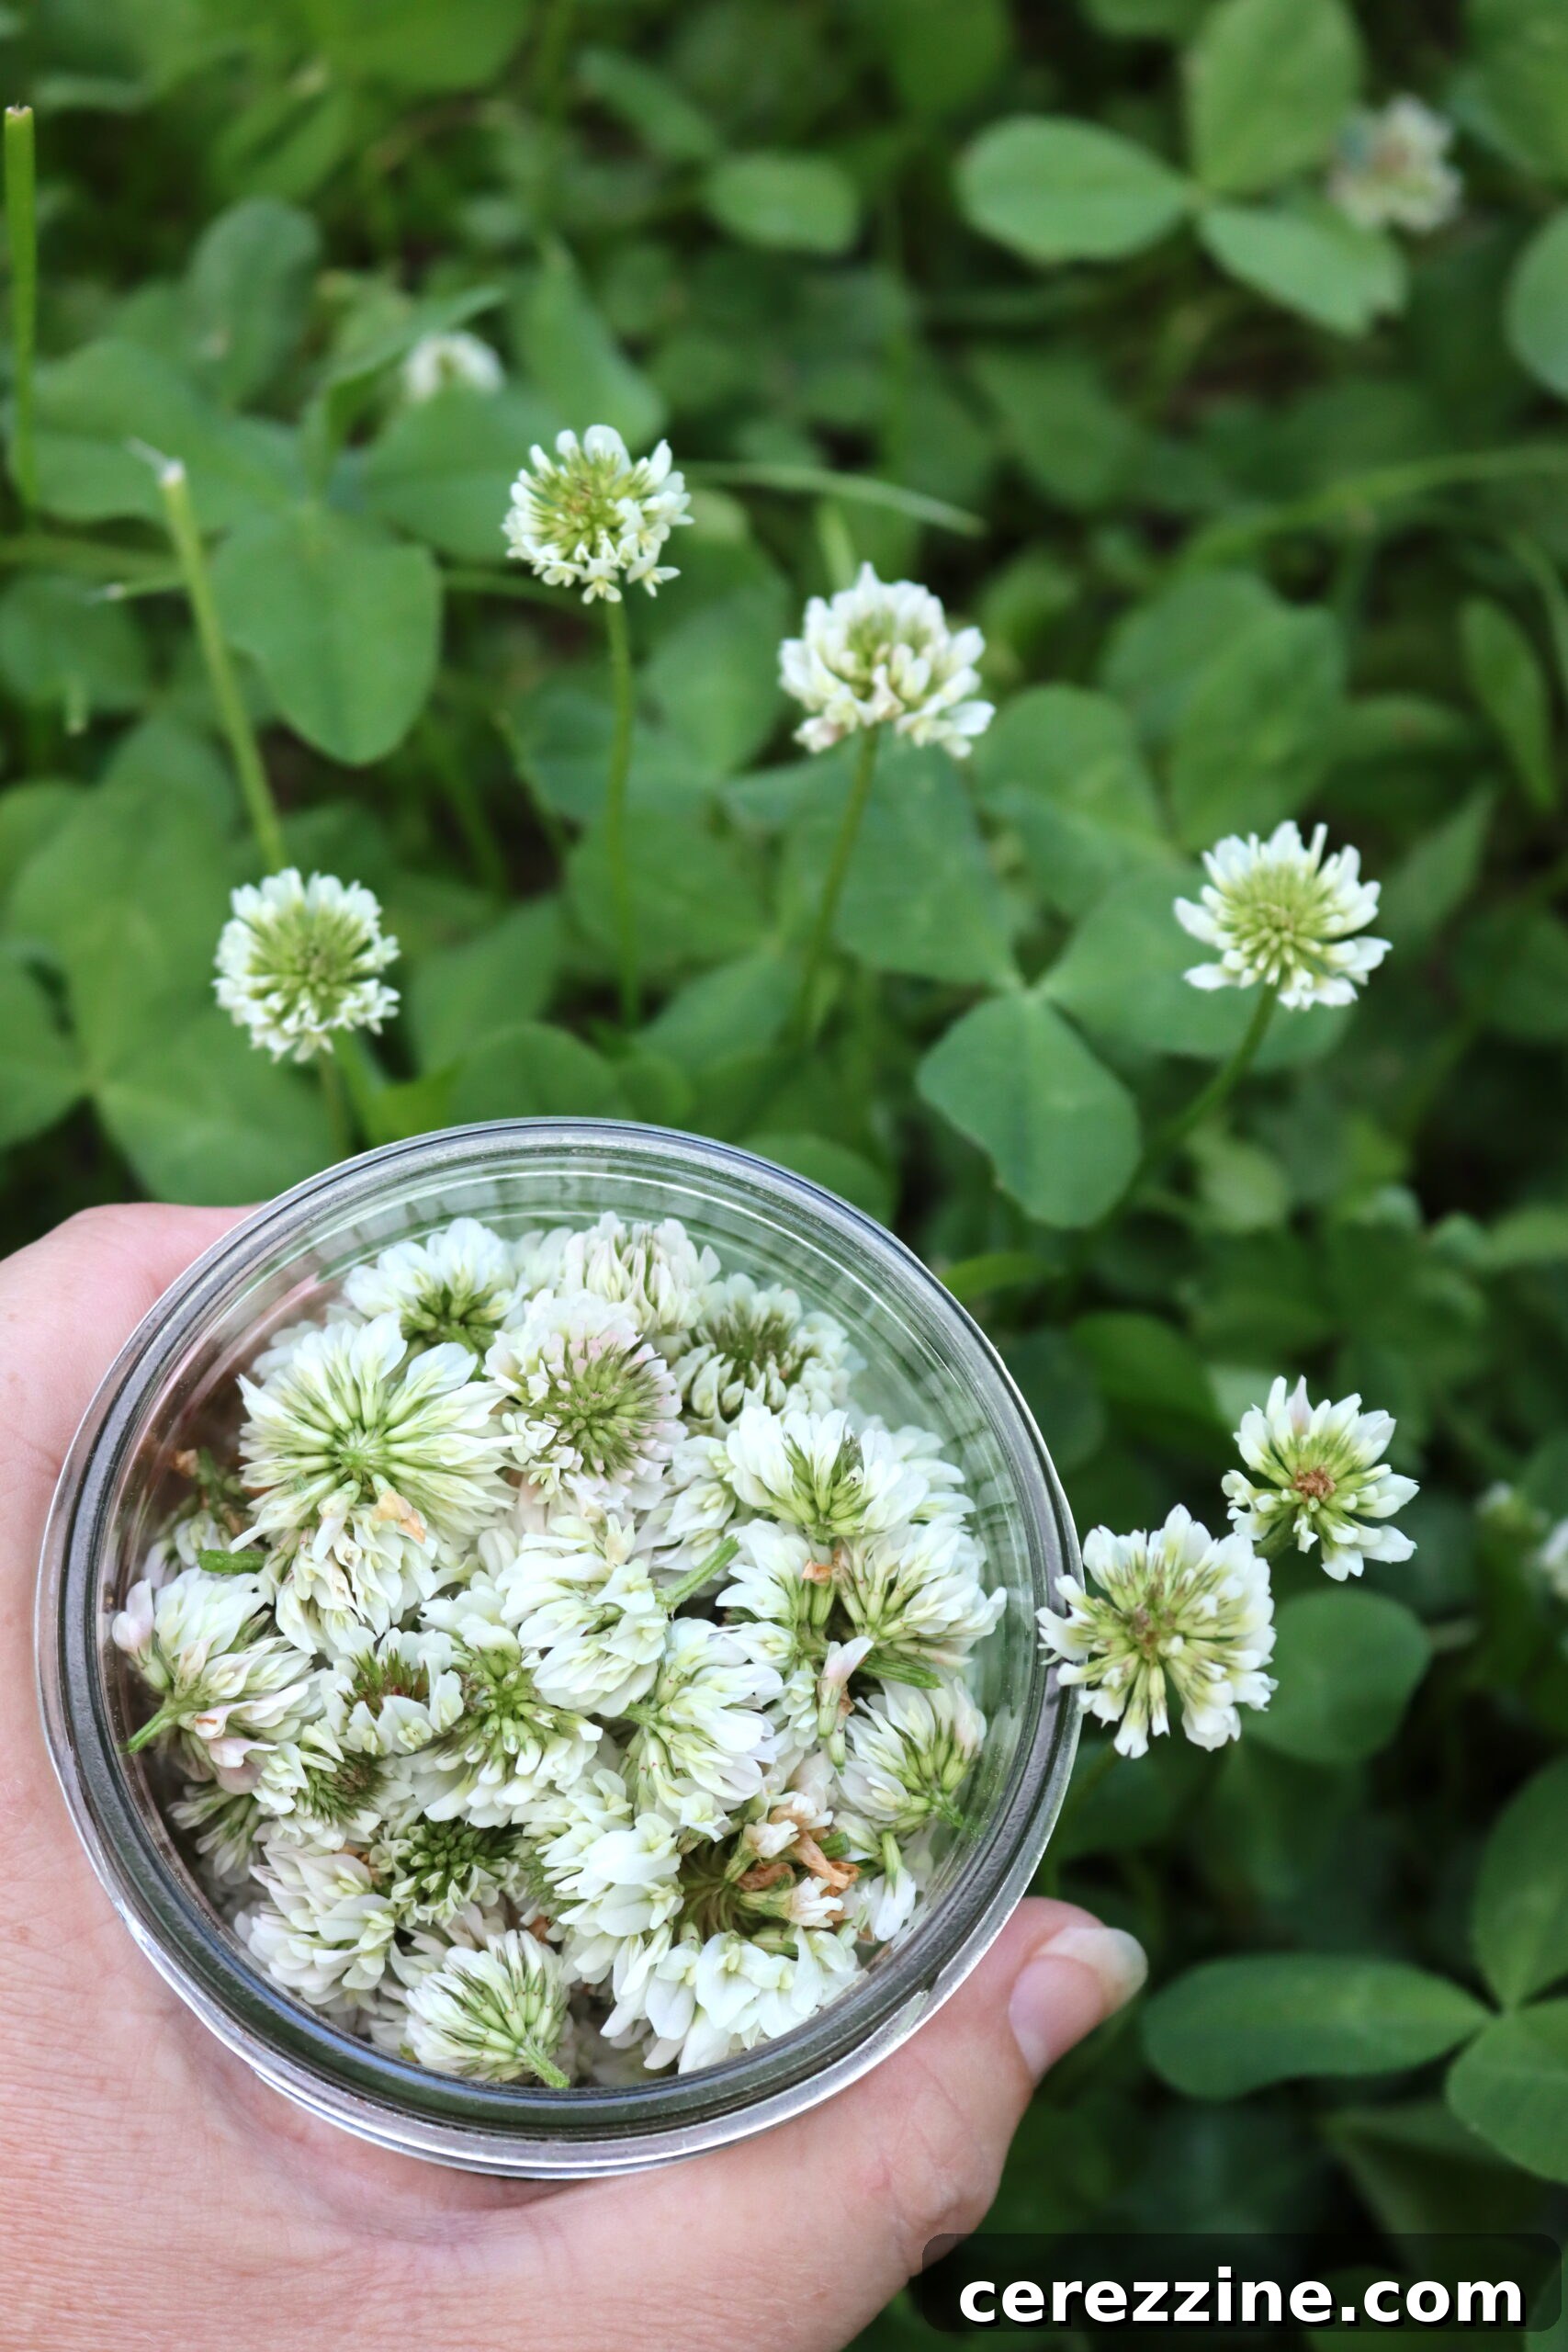
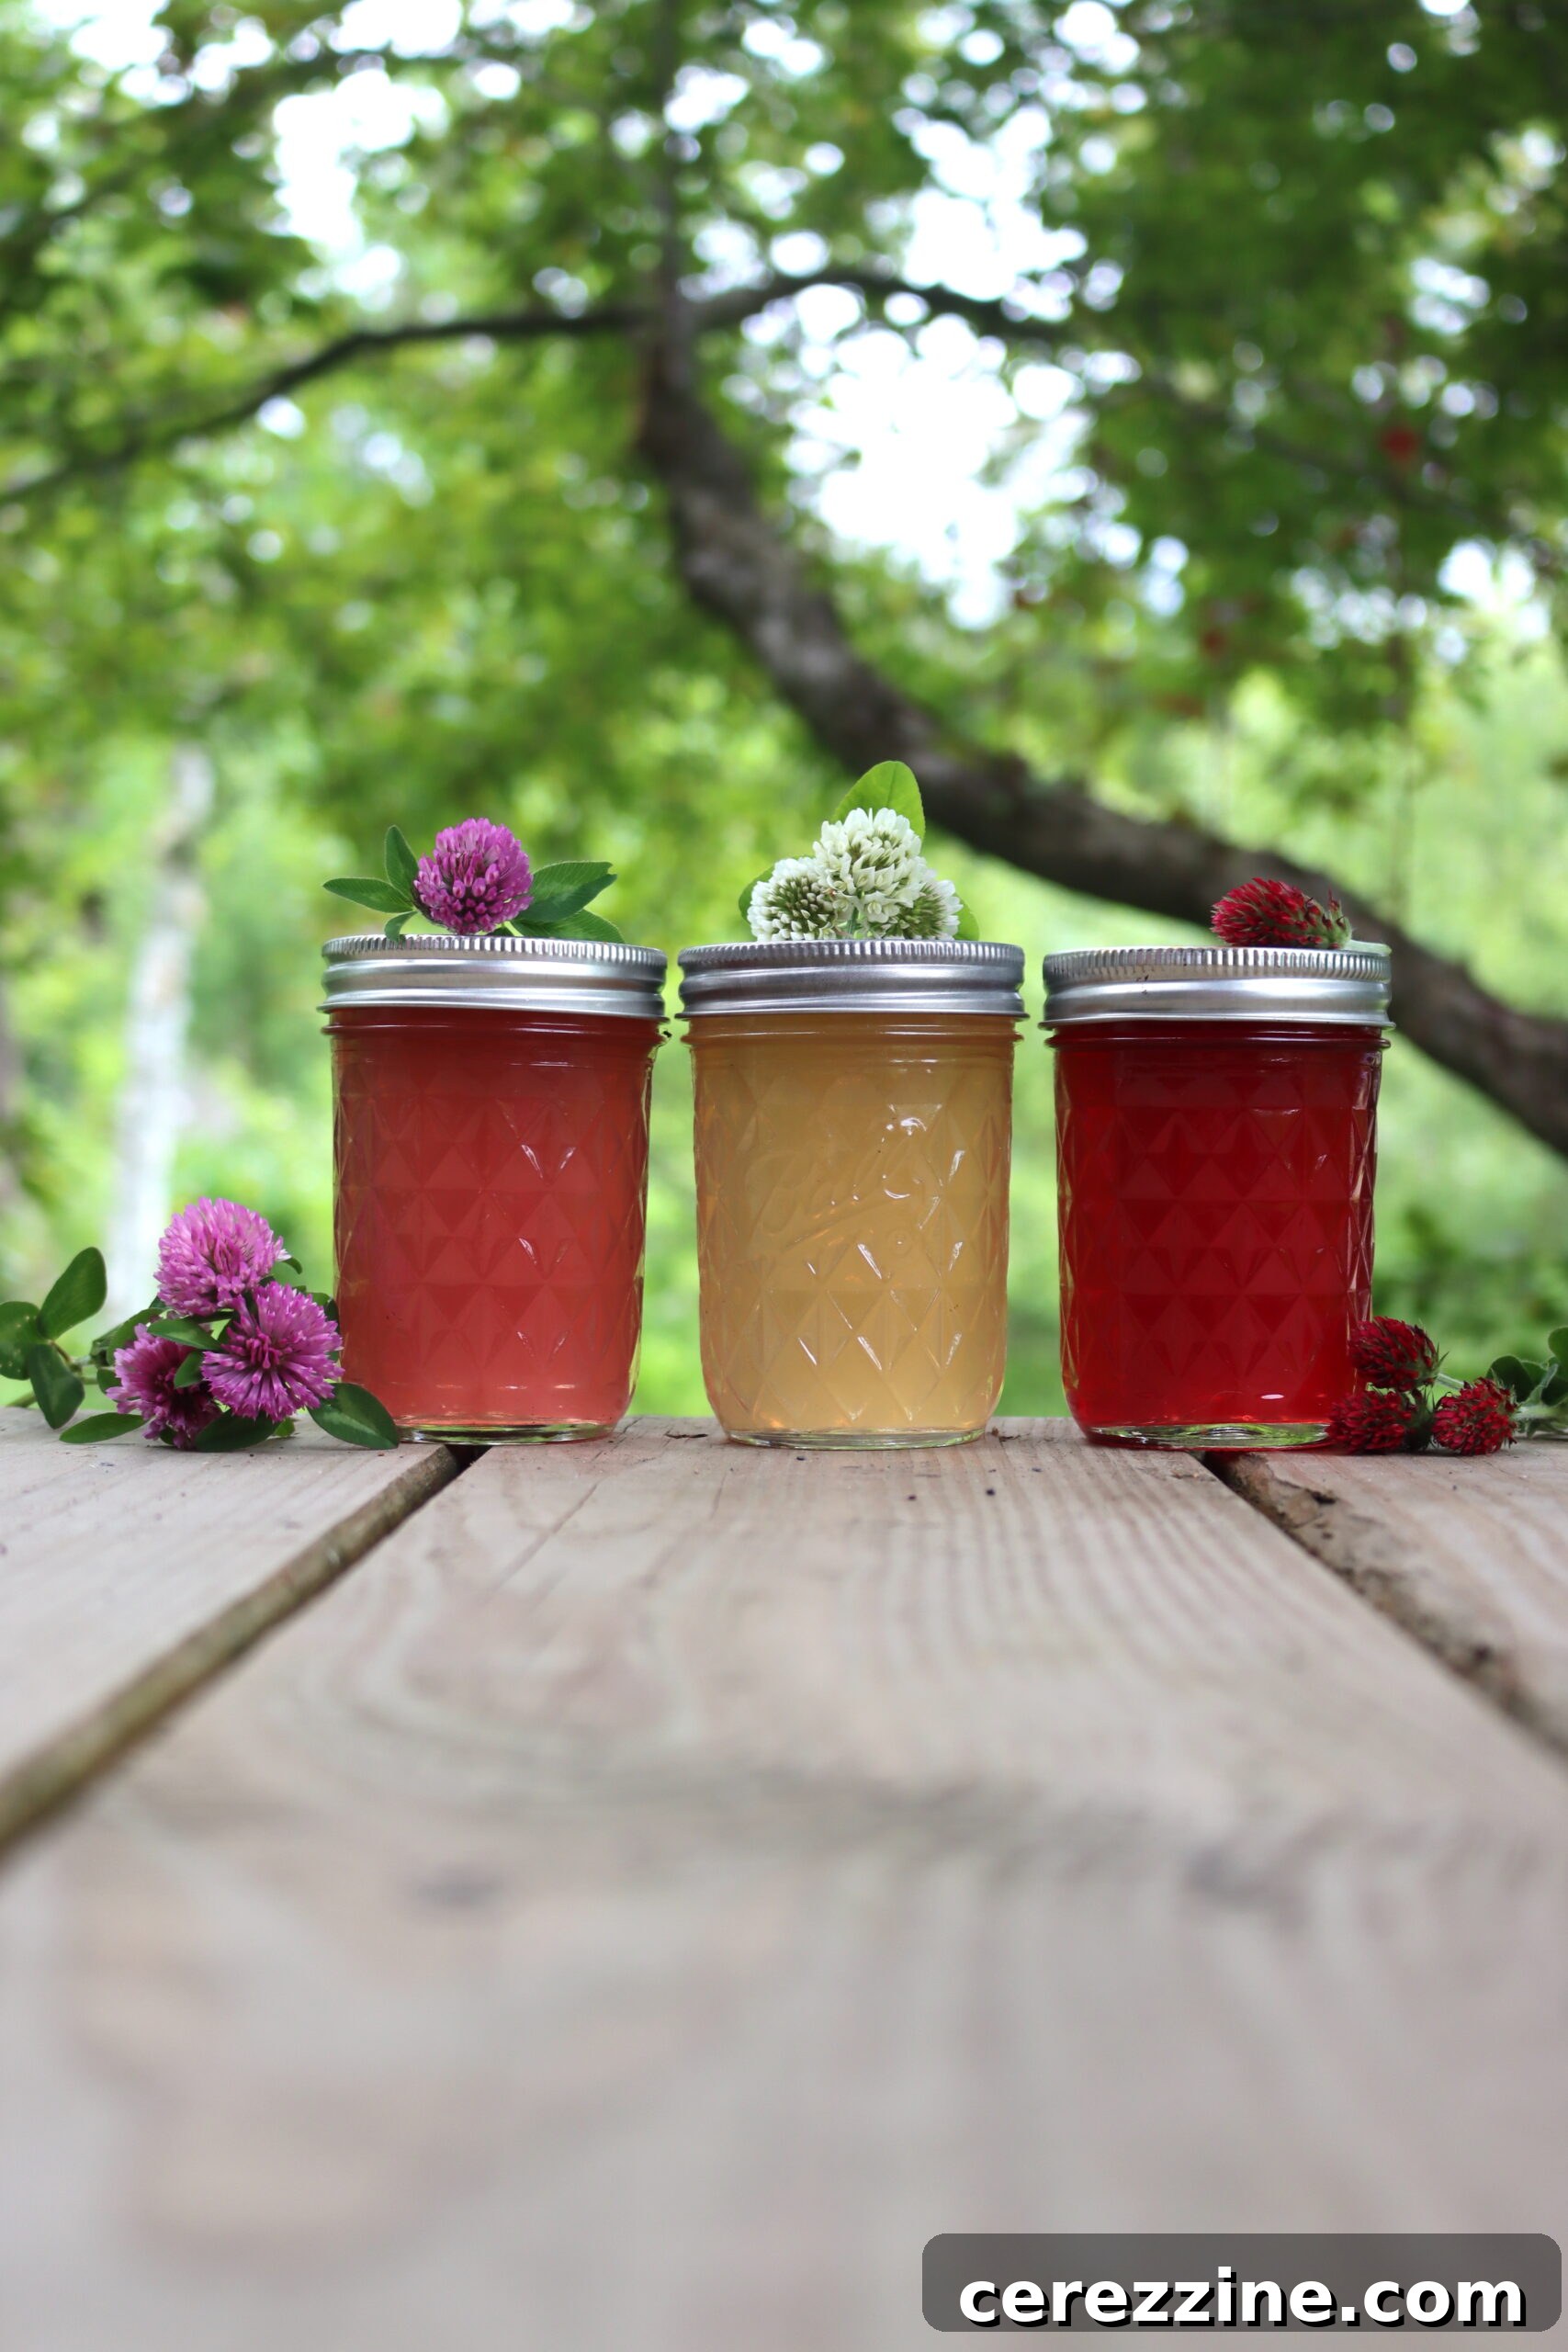
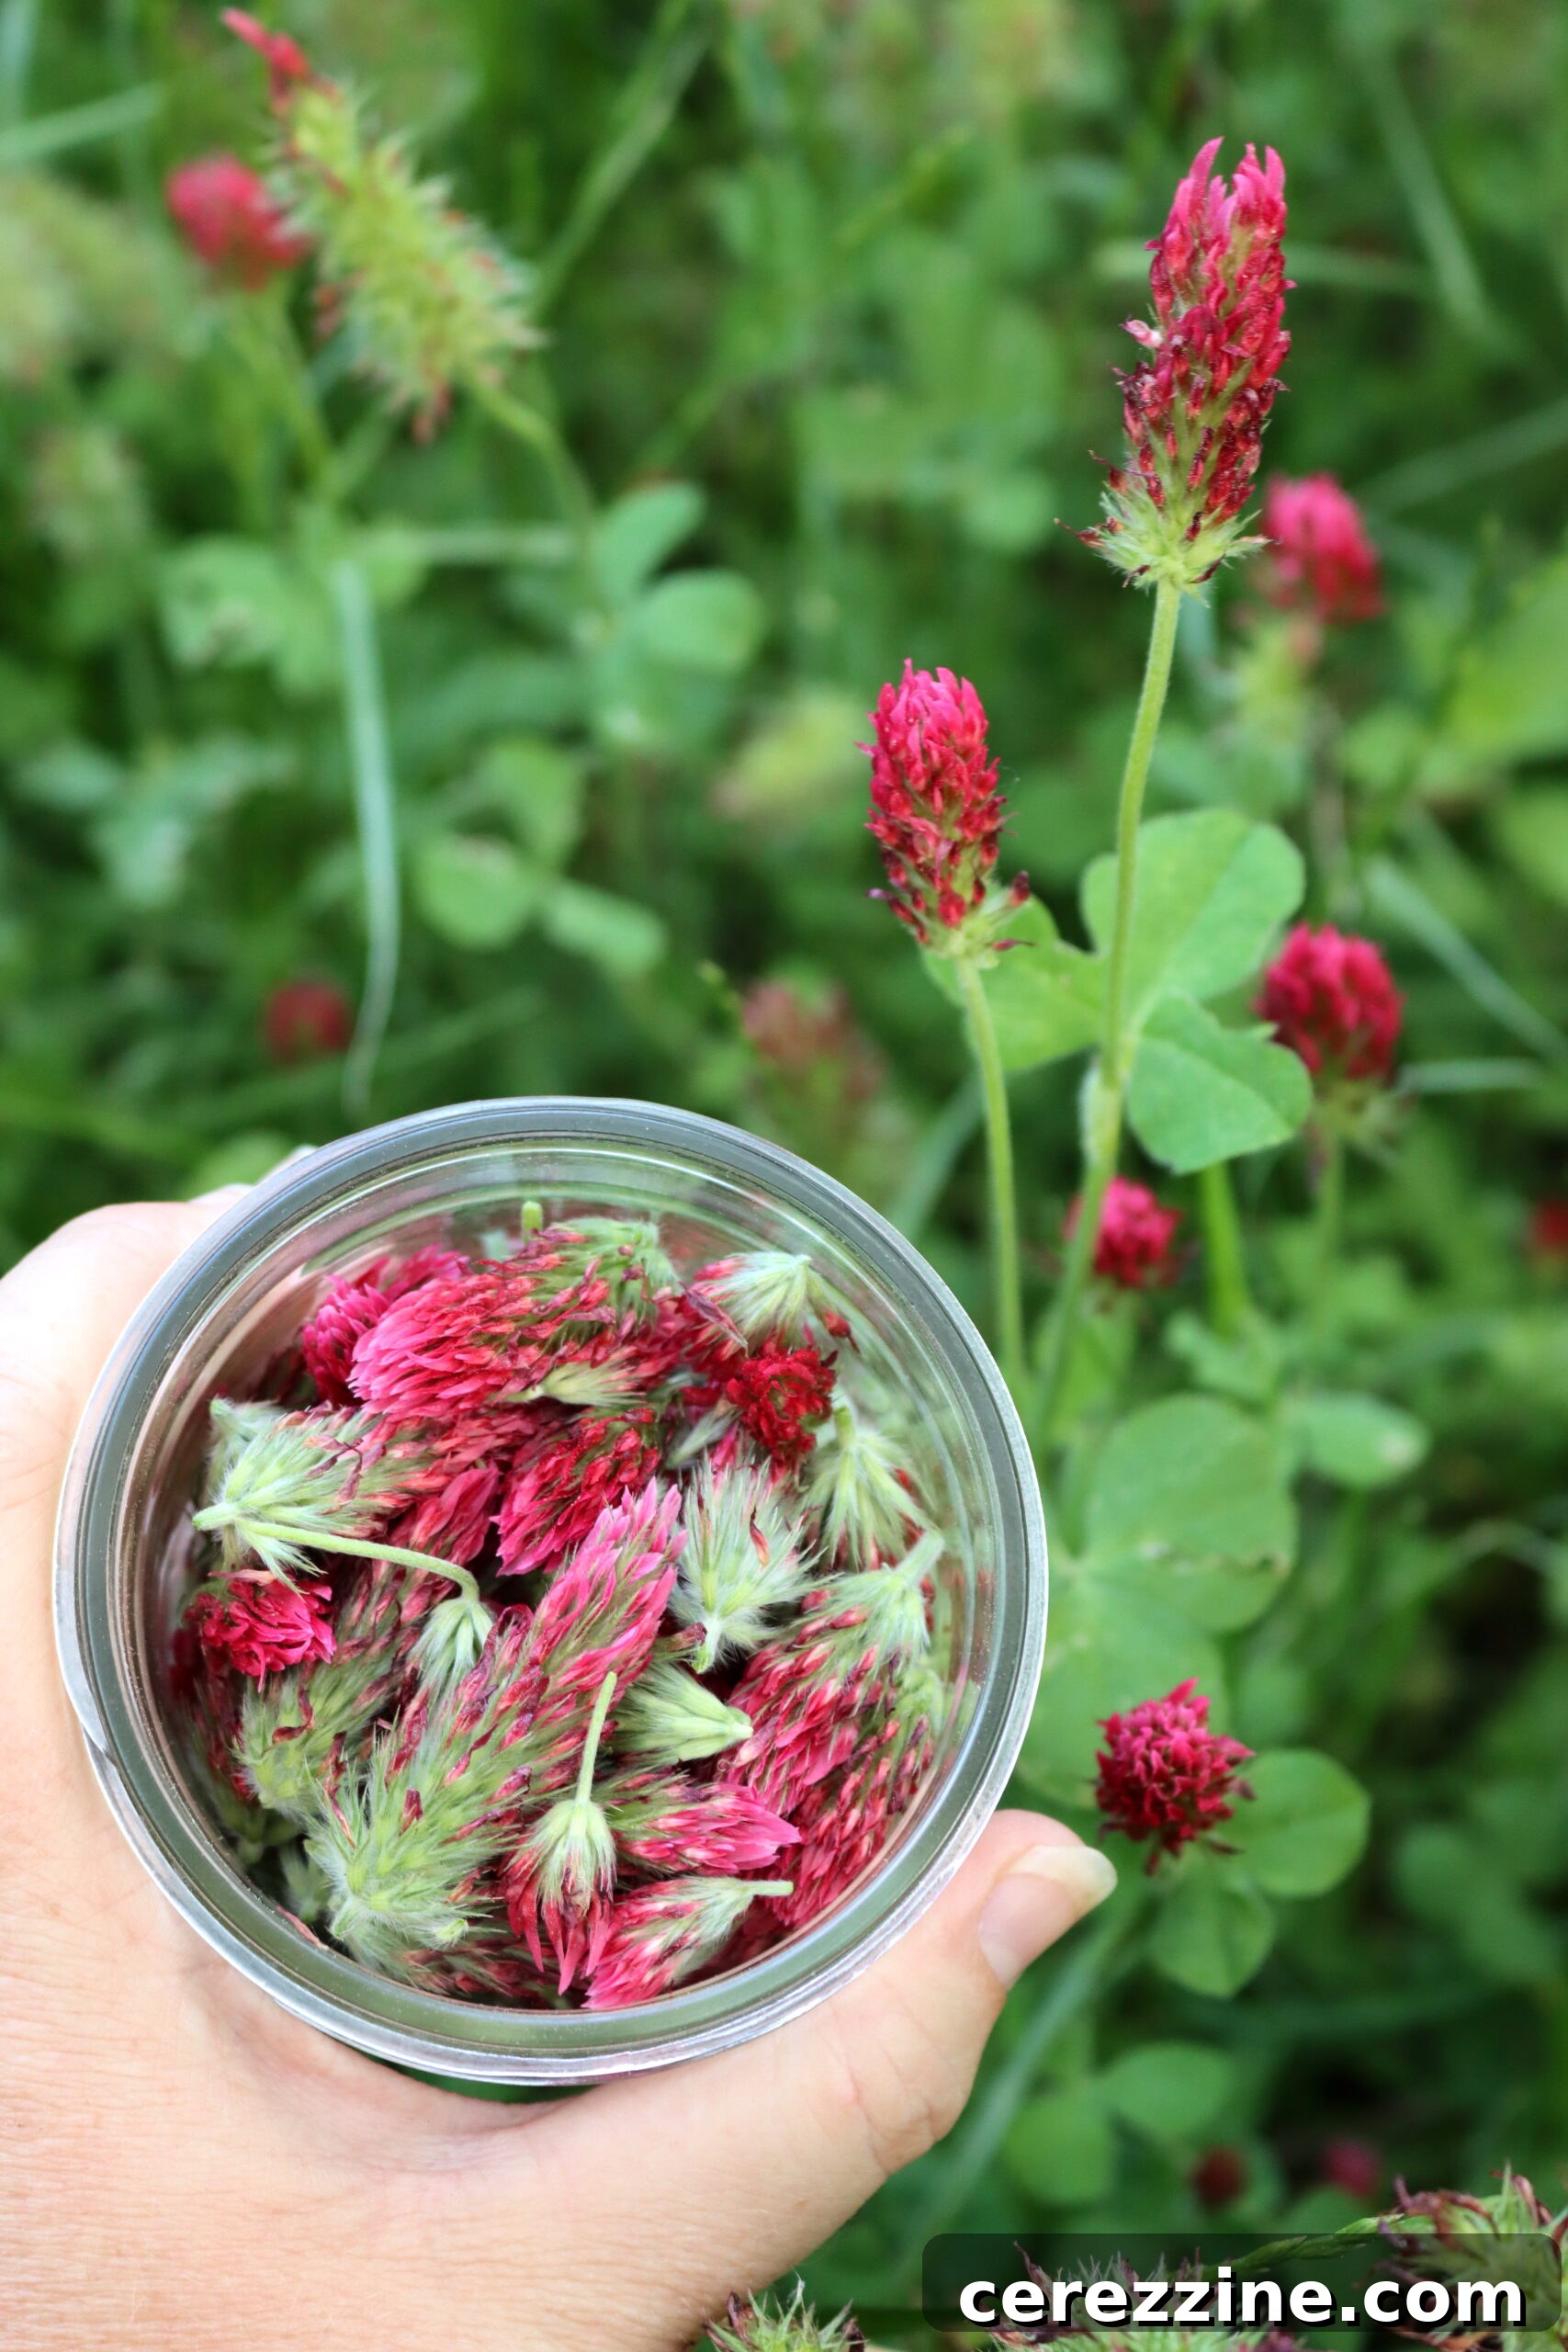
Clover, with its widespread presence and varied bloom colors, offers a fascinating palette of flavors for jelly making. Different clover species yield distinct tastes, allowing for a delightful exploration of nature’s subtle nuances. On our land, we’re fortunate to have an abundance of red clover (often a rich pink hue), classic white clover, and vibrant crimson clover. This past season, we embarked on a delicious experiment, crafting multiple batches of clover jelly from each variety. The results were nothing short of amazing, each batch offering its own remarkable character.
Clover Jelly: Recipe Snapshot
- Recipe Name: Clover Jelly
- Recipe Type: Flower Jelly Recipe, Wild Foraged Preserve
- Canning Method: Water Bath Canning (Optional, but recommended for shelf stability)
- Prep/Cook Time: Approximately 30 Minutes
- Canning Time: 10 Minutes (at sea level)
- Yield: 4 to 5 half-pint jars (depending on sugar level)
- Jar Sizes: Quarter Pint, Half Pint, or Pint
- Headspace: 1/4 inch (essential for canning safety)
- Key Ingredients: Freshly harvested edible clover flowers, water, lemon juice (crucial for flavor and pH), and sugar.
- Difficulty: Easy! If you can brew a cup of tea and follow simple setting instructions, you can make clover jelly.
- Similar Recipes: The method is highly adaptable for other wild-foraged flower jellies, including Elderflower Jelly, Fireweed Jelly, Dandelion Jelly, Redbud Jelly, Grape Hyacinth Jelly, and Violet Jelly.
What Distinct Flavors Does Clover Jelly Offer?
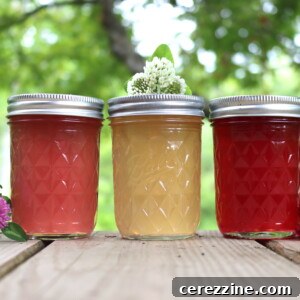
The flavor profile of clover jelly is surprisingly diverse, intrinsically linked to the specific variety and color of the clover flower used. To ensure an unbiased assessment, I conducted a blind taste test with my family. My husband and daughter, unaware they were sampling clover jellies and unable to see the jar colors, provided their honest impressions. The results were truly fascinating:
- Red Clover Jelly: This variety produces a beautiful pink jelly with a delightful taste reminiscent of fresh, ripe plums, complemented by subtle floral undertones. It’s a sweet and gently tart experience that truly captures the essence of summer stone fruits.
- White Clover Jelly: Offering a truly unique culinary adventure, white clover jelly boasts a distinctive tropical flavor profile. Many describe it as being similar to pineapple, yet with an additional layer of complexity that’s wonderfully difficult to pinpoint. It’s bright, refreshing, and utterly unexpected.
- Crimson Clover Jelly: Perhaps the most astonishing of the three, crimson clover jelly tastes almost exactly like classic red currant jelly. Its robust, tangy sweetness is a remarkable mimicry of this popular berry preserve, making it a fantastic alternative for foragers.
I was genuinely impressed by the depth and clarity of these flavors, and I heartily agreed with my family’s assessments. The plum, pineapple, and red currant notes were incredibly distinct. The intensity of the red currant flavor from the crimson clover was particularly striking; given its similar color, it would be a challenge to distinguish it from a traditional red currant jelly in a blind test. It’s an incredible feat for a simple wildflower!
Ethical and Safe Harvesting of Clover for Jelly
Successful clover jelly begins with responsible foraging. It’s paramount to select a clean, uncontaminated harvesting location. Avoid areas that have been sprayed with herbicides or pesticides, as well as high-traffic zones where pets might frequent. Roadsides are also generally unsuitable due to potential pollutants and runoff. Seek out quiet, undisturbed spots in fields, meadows, or even your own backyard if you know it’s free from chemical treatments.
For a full batch of clover jelly, typically requiring a standard box of pectin, you’ll need approximately 4 cups of loosely packed clover blossoms. If you prefer a smaller yield, a half batch can be easily made with 2 cups of blossoms. A standard box of powdered pectin usually contains about 6 tablespoons, so for a half batch, you would use 3 tablespoons and save the remainder for future canning projects.
When harvesting, gently pluck only the flower heads, leaving the stems and leaves behind. This minimizes unwanted green flavors and ensures you’re getting the purest essence of the clover. It’s best to harvest on a dry day, after the morning dew has evaporated but before the heat of the midday sun. This helps preserve the delicate aromatics of the blossoms. Be mindful of pollinators and never take more than a small percentage of the available blooms in any one area, allowing the clover to continue its vital role in the ecosystem.
Essential Ingredients for Perfect Clover Jelly
Crafting exquisite clover jelly requires a few simple yet crucial ingredients: freshly harvested clover blossoms, pure water, granulated sugar, pectin (to achieve that perfect gelled consistency), and a vital touch of lemon juice. Each component plays a specific role in both flavor and preservation.
For a standard batch yielding 4 to 5 jars (each 8 ounces), gather the following:
- 4 cups fresh clover flowers (feel free to use red, white, crimson, or a delightful mix of varieties for nuanced flavors)
- 4 cups water (for steeping the blossoms to create a flavorful “tea”)
- 2 tablespoons lemon juice (freshly squeezed or bottled; approximately ½ teaspoon citric acid powder can be substituted)
- 1 to 4 cups granulated sugar (refer to the detailed note below for sugar quantity guidance, as it depends on your pectin choice)
- 1 box (1.75 oz) powdered pectin (either regular/classic or low-sugar pectin will work, with different sugar requirements)
The Indispensable Role of Lemon Juice
Lemon juice is far more than just a flavor enhancer in jelly making; it’s a critical ingredient that should never be skipped. Firstly, it provides a much-needed tart contrast to the sweetness of the sugar, brightening the subtle floral notes of the clover. More importantly, lemon juice significantly lowers the pH of the mixture. This acidity is essential for two key reasons:
- Pectin Activation: Pectin requires a certain level of acidity to properly activate and form a gel. Without sufficient acidity, your jelly simply won’t set.
- Canning Safety: For jellies to be safely preserved using the water bath canning method, they must have a low enough pH (high acidity) to inhibit the growth of harmful bacteria. Lemon juice ensures this critical safety factor. Learn more about the safety of canning flower jellies here.
If you’re looking for a more neutral flavor profile without the distinct lemon taste, you can substitute the lemon juice with citric acid powder. Citric acid is more concentrated than lemon juice; use 1/4 teaspoon of citric acid for every tablespoon of lemon or lime juice called for in a recipe. For this recipe, that means you’d use ½ teaspoon of citric acid powder per batch.
Understanding Pectin and Sugar Ratios
The type of pectin you choose will dictate the amount of sugar required:
- Regular (Classic) Powdered Pectin: Brands like Sure-Jell Classic Pectin typically require a 1:1 ratio of liquid to sugar to achieve a proper set. For 4 cups of clover tea, you’ll need a full 4 cups of sugar. This results in a traditionally sweet jelly, often referred to as “old-fashioned” in its sweetness level.
- Low-Sugar Powdered Pectin: Products like Sure-Jell Low Sugar Pectin are formulated to gel with much less sugar, or even sugar substitutes. This gives you flexibility to customize the sweetness. For a subtly sweet jelly, you might use as little as 1/2 to 1 cup of sugar. For a lower-sugar yet still sweet jelly, 1 to 2 cups is a good range. Low-sugar pectins are also versatile enough to be used in full-sugar recipes, making them a great pantry staple.
If you prefer Ball Flex Batch Pectin, you will need 6 tablespoons, which is equivalent to a 1.75 oz box of other powdered pectins, whether you’re using their regular or low-sugar canisters.
While this recipe focuses on powdered pectin, it’s worth noting that liquid pectin (where pectin is added last, and sugar first) requires significantly more sugar to set—often around 7 cups of sugar for 4 cups of liquid. Due to these high sugar requirements, liquid pectin is generally not recommended for floral jellies where you want the delicate floral notes to shine through.
Step-by-Step Guide: Crafting Your Own Clover Jelly
Making jelly from clover blossoms follows a similar, straightforward process to other floral jellies. The key is to extract the beautiful essence of the flowers and then set it into a shimmering preserve.
- Prepare Your Blossoms: Begin by gathering 2 to 4 cups of fresh, clean clover blossoms. I find a quart-sized jar is perfect for collecting and then steeping the flowers, ensuring they are contained as you pour water over them.
- Steep the Clover Tea: Bring 4 cups of water to a rolling boil. Carefully pour the boiling water over your collected clover blossoms. Allow the flowers to steep for approximately 15 to 20 minutes. This process extracts their delicate flavor and color, creating a fragrant “clover tea.” For a stronger flavor and deeper color, you can extend the steeping time slightly, but avoid over-steeping, which can sometimes lead to bitter notes.
- Strain and Add Lemon Juice: Once steeped, strain the clover tea through a fine-mesh sieve or a cheesecloth-lined colander into a clean jelly pot or large saucepan. Discard the spent blossoms. To the strained tea, add 2 tablespoons of lemon juice. Remember, the lemon juice is vital for balancing sweetness, enhancing flavor, activating pectin, and ensuring canning safety.
- Initial Boil and Pectin Introduction: Bring the clover tea and lemon juice mixture to a full, rolling boil over high heat. Once boiling, quickly stir in one box (1.75 oz) of powdered pectin. Stir continuously until the pectin is completely dissolved. Continue to boil the mixture for exactly 1 full minute, maintaining a vigorous boil that cannot be stirred down.
- Add Sugar and Final Boil: Now, add the sugar. As discussed, the amount will depend on your pectin type: 4 cups for regular pectin, or 1/2 to 2 cups for low-sugar pectin. Stir diligently until all the sugar is completely dissolved. Once dissolved, return the mixture to a hard, rolling boil on the stove for another 1 minute. This ensures the pectin is fully activated and the jelly will set properly.
- Ladle into Jars: After the final 1-minute boil, remove the jelly mixture from the heat. Carefully ladle the hot jelly into your prepared jars, leaving 1/4 inch of headspace at the top. This headspace is crucial for proper sealing if you plan to can the jelly.
Preserving Your Harvest: Canning Clover Jelly
While storing clover jelly in the refrigerator for several weeks or freezing it in freezer-safe jars for up to six months are viable options, water bath canning offers the convenience of shelf-stable storage. This allows you to enjoy the fresh, bright, and fruity flavor of clover jelly year-round without occupying precious refrigerator or freezer space. It’s also an incredibly satisfying way to preserve the bounty of your foraging efforts.
To safely can your clover jelly, ensure you’ve included the recommended amount of lemon juice, as its acidity is fundamental for the water bath canning process. The low pH created by the lemon juice prevents the growth of spoilage microorganisms, making your preserves safe for pantry storage.
Water Bath Canning Steps:
- Preparation is Key: Before you even start making the jelly, prepare your water bath canner, canning jars, and two-part canning lids. Ensure jars are clean and hot (either by washing in hot, soapy water and rinsing, or keeping them warm in the canner). Lids should be new and simmered in hot (not boiling) water to soften the sealing compound.
- Fill Jars: Once your jelly is cooked, ladle the hot mixture into the prepared canning jars, leaving precisely 1/4 inch of headspace. This small gap is essential for creating a strong vacuum seal during processing.
- Remove Air Bubbles and Wipe Rims: Use a non-metallic utensil (like a plastic spatula or chopstick) to gently remove any trapped air bubbles from the jars. Wipe the rims of the jars thoroughly with a clean, damp cloth to ensure there is no jelly residue that could interfere with the seal.
- Apply Lids and Rings: Center the prepared lids on top of the jars. Screw on the metal bands (rings) until they are finger-tight – just enough to hold the lid in place, but not overtightened.
- Process in Canner: Carefully place the filled jars onto the rack in your water bath canner. Ensure the water level covers the tops of the jars by at least 1 inch. Bring the water to a rolling boil. Once boiling vigorously, start your timer. Process half-pint or pint jars for 10 minutes. If you are at an altitude above 6,000 feet, increase the processing time to 15 minutes to compensate for the lower boiling point of water.
- Cool and Check Seals: After the processing time is complete, turn off the heat and let the canner sit for 5 minutes before carefully removing the jars. Place them on a clean towel on your counter, allowing them to cool undisturbed for 12 to 24 hours. As they cool, you should hear satisfying “pop” sounds indicating the jars are sealing. Once completely cool, check the seals by pressing on the center of each lid; it should be concave and not flex when pressed.
Properly canned and sealed jars of clover jelly will maintain their quality on your pantry shelf for 12 to 18 months. Once a jar is opened, refrigerate it and consume within a few weeks.
Exciting Clover Jelly Variations to Explore
Beyond the inherent flavor differences offered by various clover species, you can further customize your clover jelly with creative additions. These variations allow you to tailor the jelly to your personal taste preferences or complement specific dishes.
Consider these delightful ideas:
- Citrus Swaps: For an even more intense tropical burst, especially with white clover jelly, try substituting lime juice for lemon juice. The bright, zesty notes of lime will perfectly enhance the pineapple-like essence of white clover.
- Warm Spices for Crimson: The rich, red currant flavor of crimson clover jelly pairs beautifully with warming spices. A tiny hint of almond extract or vanilla will deepen its profile, while a whisper of cinnamon or cloves can transform it into a sophisticated, almost festive preserve. Start with a very small amount (e.g., 1/8 to 1/4 teaspoon per batch) and adjust to taste.
- Herbal Infusions: Experiment with adding other subtle herbal notes during the steeping process. A sprig of fresh mint or lemon verbena steeped alongside the clover blossoms can introduce an interesting layer of complexity.
- Pectin-Free Alternatives: If you wish to bypass commercial pectin, you could infuse clover blossoms into a juice made from a high-pectin fruit. However, since clover’s flavor is delicate, you’d need a very mild-flavored fruit to avoid overpowering it. White currant jelly, known for its mild flavor and excellent gelling properties, would be an ideal candidate for such an infusion.
Beyond Jelly: Other Delicious Clover Recipes
Clover blossoms are more versatile than just jelly! If you find yourself with an abundance of these edible wildflowers, consider exploring other creative ways to incorporate them into your culinary repertoire. Their mild, sweet flavor and beautiful appearance can elevate a variety of dishes and drinks.
- Clover Blossom Cordial: A delightful, aromatic syrup perfect for cocktails, mocktails, or drizzled over desserts.
- White Clover Pudding: A creamy, comforting dessert with a subtle floral hint.
- Clover Iced Tea: A refreshing and naturally caffeine-free beverage, ideal for warm weather.
- Sautéed Clover Greens: Young clover leaves can be gently sautéed and enjoyed as a nutritious green side dish.
- Clover Tabbouleh: A wild take on the classic Middle Eastern salad, incorporating fresh clover greens for a unique flavor.
If you tried this Clover Jelly Recipe, or any other recipe on Creative Canning, leave a ⭐ star rating and let me know what you think in the 📝 comments below!
And make sure you stay in touch with me by following on social media!
More Flower Jelly Recipes
Tulip Jelly
Are Flower Jellies Safe for Canning?
Lilac Jelly