Canning chicken soup is a time-honored tradition that brings comfort and convenience to any household. Imagine having a wholesome, homemade batch of chicken soup readily available in your pantry, perfect for those unpredictable moments when you or a loved one needs a soothing meal. Whether it’s to combat seasonal sniffles, recover from a long day, or simply enjoy a delicious, satisfying dinner, home-canned chicken soup is a culinary gift that keeps on giving. This comprehensive guide will walk you through the process of safely canning chicken soup, ensuring you can stock your shelves with this nourishing staple.
The Undeniable Benefits of Home Canned Chicken Soup
Homemade chicken soup holds a special place in our hearts and kitchens. It’s often prescribed as the ultimate pick-me-up when you’re feeling under the weather, but who has the energy to prepare a lengthy meal from scratch when illness strikes? That’s where the magic of home-canned chicken soup truly shines. It transforms a labor-intensive dish into an effortless, heat-and-eat solution.
Beyond its therapeutic qualities, home-canned chicken soup offers numerous advantages:
- Unmatched Convenience: A jar of perfectly preserved chicken soup means a nourishing meal is just minutes away. No last-minute grocery runs, no extensive cooking required.
- Peace of Mind: Knowing you have a supply of wholesome, preservative-free soup made with ingredients you trust provides immense peace of mind, especially during busy weeks or unexpected emergencies.
- Cost-Effective: Canning in batches when ingredients are in season or on sale can be significantly more economical than buying store-bought alternatives, which often contain high sodium and artificial additives.
- Customizable Flavor: You control the ingredients, salt levels, and spices, ensuring the soup caters precisely to your family’s preferences and dietary needs.
- Nutritional Assurance: Preserve the natural goodness of fresh chicken and vegetables without the need for processed ingredients.
While this recipe provides a solid foundation for classic chicken soup, its versatility is a major highlight. You can easily transform it into chicken noodle soup by cooking wide egg noodles separately and adding them just before serving. Similarly, it can become a hearty chicken and rice soup or even chicken and dumplings. The key is to remember that starchy ingredients like noodles, rice, and dumplings are not safe for canning, as they can interfere with heat penetration during the pressure canning process and lead to spoilage. These delicious additions should always be cooked and added at the time of serving. Boiling a batch of pasta takes roughly the same amount of time as reheating your canned soup, making it a simple step.
Essential Equipment for Canning Chicken Soup
Before diving into the recipe, ensure you have the right tools for safe and successful pressure canning. For low-acid foods like chicken soup, a pressure canner is non-negotiable. A water bath canner is only suitable for high-acid foods and will not safely preserve chicken soup.
- Pressure Canner: The most crucial piece of equipment. Ensure it’s in good working order with a calibrated dial gauge or accurate weighted gauge.
- Canning Jars: Use standard Mason jars (pint or quart) with new lids and rings. Always inspect jars for cracks or chips before use.
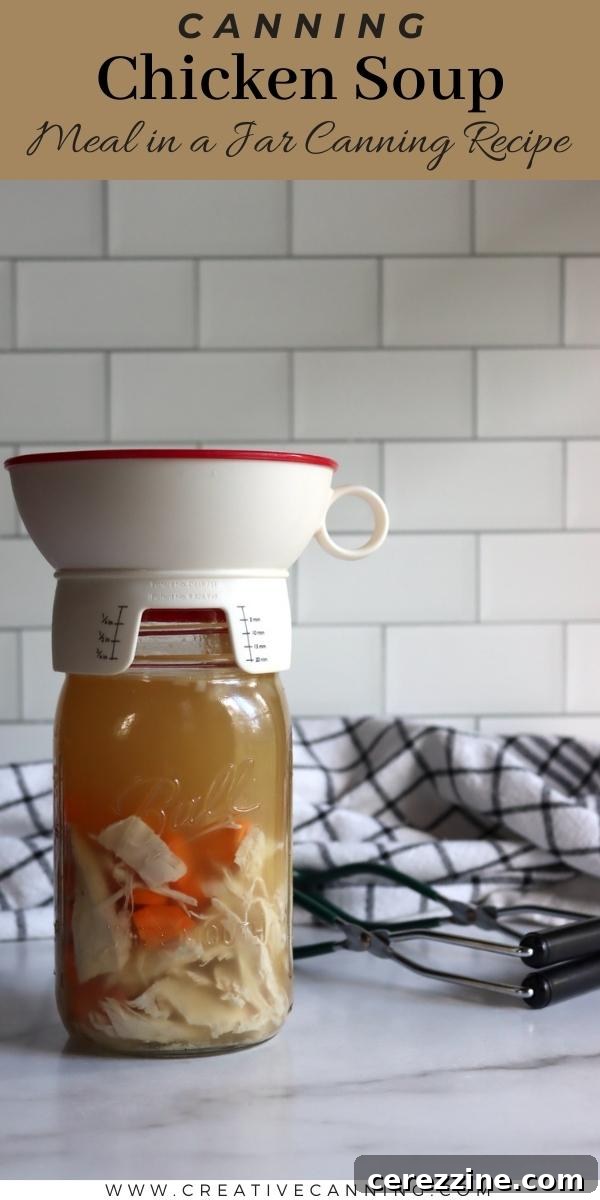
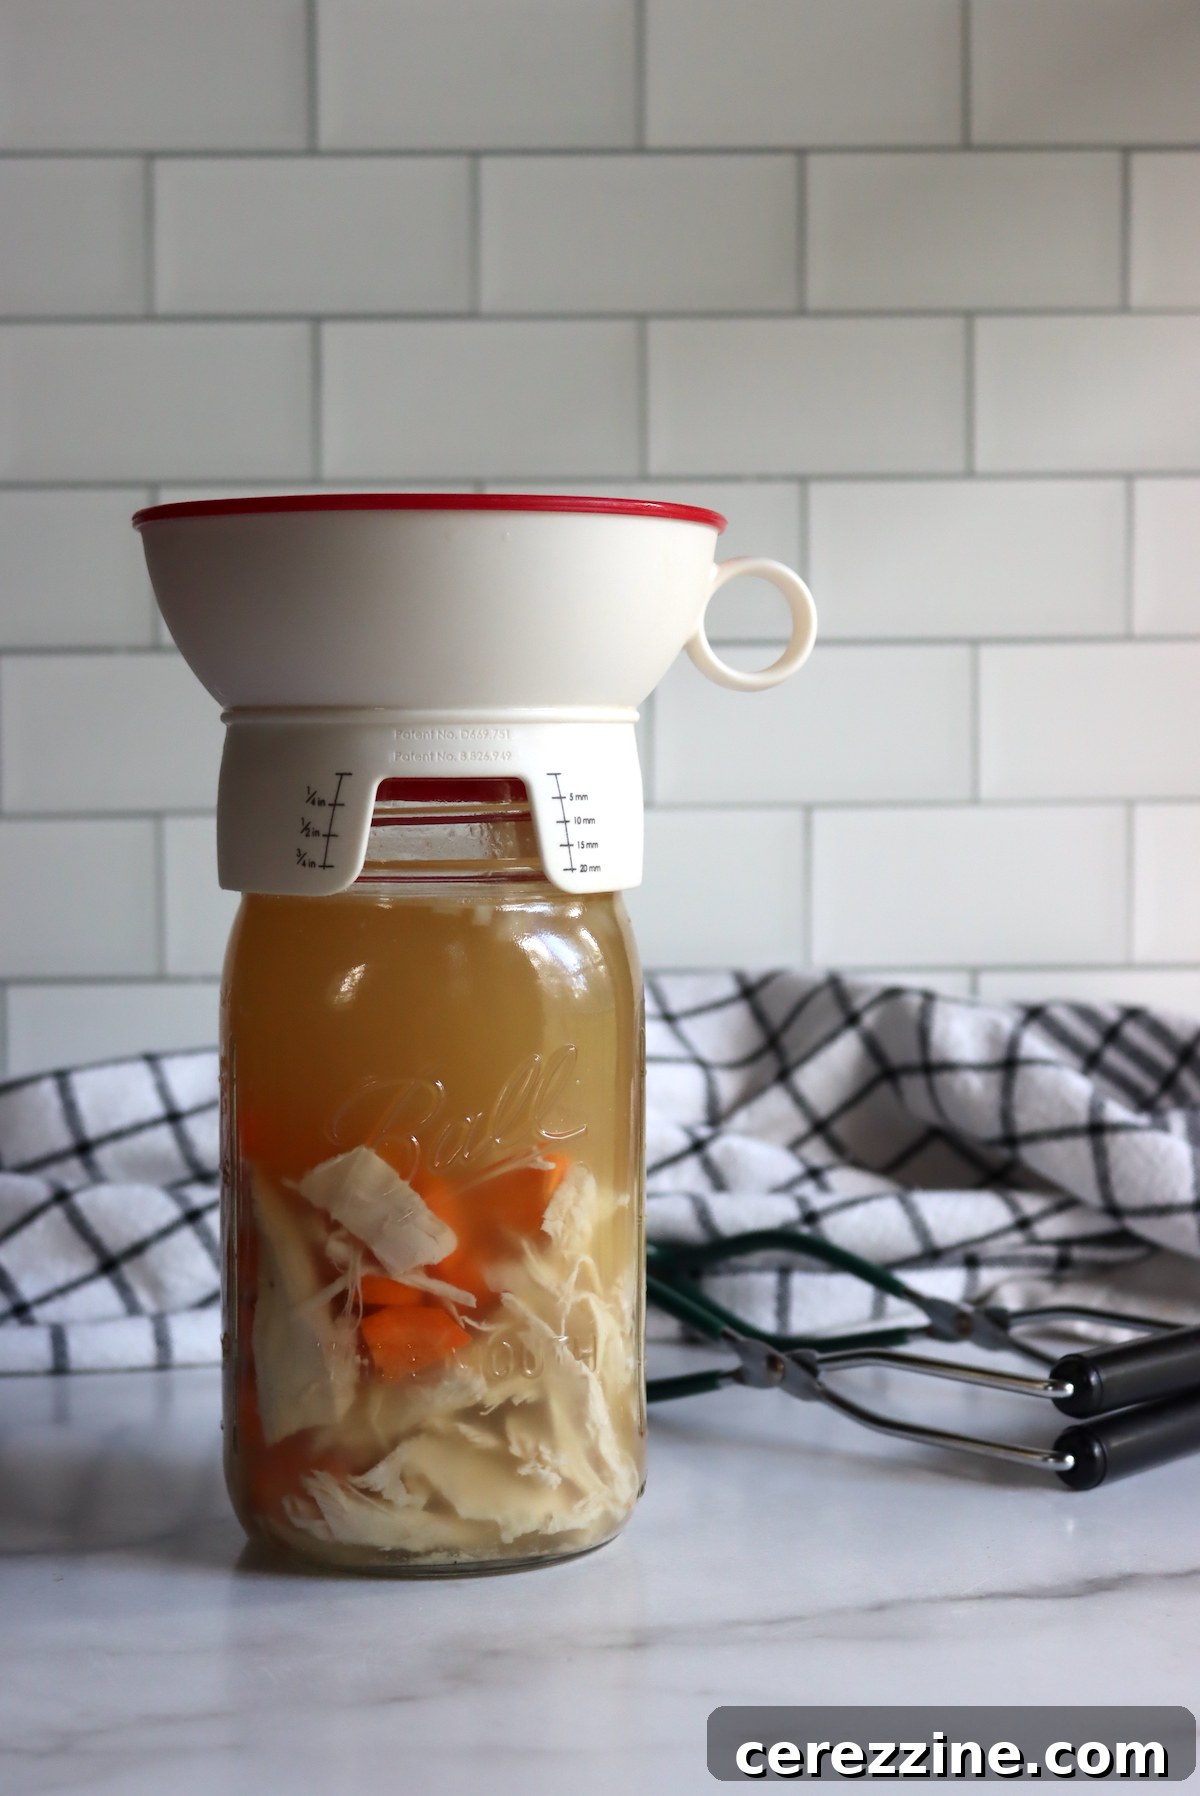
- Canning Funnel: A wide-mouth funnel makes filling jars much cleaner and easier, especially when dealing with hot liquids and solids. Many funnels even have headspace measurements, which are incredibly helpful.
- Jar Lifter: For safely moving hot jars in and out of the canner.
- Bubble Remover/Headspace Tool: To remove air bubbles from jars and ensure accurate headspace.
- Large Stock Pot: For preparing the soup before canning.
- Slotted Spoon: For evenly distributing solids into jars.
- Basic Kitchen Tools: Cutting board, sharp knives, measuring cups and spoons.
Ingredients for Your Perfect Home Canned Chicken Soup
This tested canning recipe for chicken soup is adapted from the Ball Blue Book of Home Canning, a trusted resource for safe home food preservation. The recipe yields approximately 4 quarts (or 8 pints) of delicious, ready-to-eat chicken soup.
To make this batch, you will need:
- 4 quarts (16 cups) rich chicken stock or broth (homemade or low-sodium store-bought)
- 3 cups cooked chicken, diced or shredded (approximately one 3 lb cooked chicken)
- 1 1/2 cups celery, finely chopped (roughly 3 medium stalks)
- 1 1/2 cups carrots, peeled and sliced or diced (roughly 3 medium carrots)
- 1 cup yellow onion, chopped (1 large onion)
- Salt and black pepper to taste (remember, salt is for flavor, not preservation in canning)
- Optional: 3 chicken bouillon cubes (if using unsalted broth and desire more flavor)
The hot pack method is used for this recipe, meaning all ingredients are combined in a stockpot and brought to a boil for a few minutes before being distributed into canning jars. This pre-heating step helps create a stronger vacuum seal and improves food quality.
You’ll notice the recipe calls for slightly more chicken stock than might seem necessary. It’s always better to have a little extra in the pot than to run short, especially after accounting for ingredient absorption and potential evaporation. In practice, you’ll need a bit more than 3 quarts of broth to fill your jars correctly.
Customizing Your Chicken Soup: The USDA “Your Choice” Method
For those who prefer more flexibility, the ingredients for chicken soup are wonderfully adaptable. This recipe closely aligns with the USDA’s “Your Choice Soup Recipe” guidelines, which allow you to create your own soup combinations using ingredients that have established canning guidelines. This means you can omit certain vegetables or adjust quantities to suit your taste preferences, as long as you adhere to critical safety ratios.
The foundation for any homemade chicken soup starts with a flavorful chicken broth, complemented by:
- Shredded or diced cooked chicken
- Carrots, diced or sliced
- Onions, diced
- Celery, diced
- Salt, pepper, and your preferred dry spices
For instance, if you’re not a fan of celery, you can easily omit it without compromising canning safety. The crucial rule when adapting soup recipes for canning is that the “solids” in the soup (chicken and vegetables) can only fill the canning jar halfway. The remaining space must be filled with broth. This ensures proper heat penetration to all ingredients during the pressure canning process.
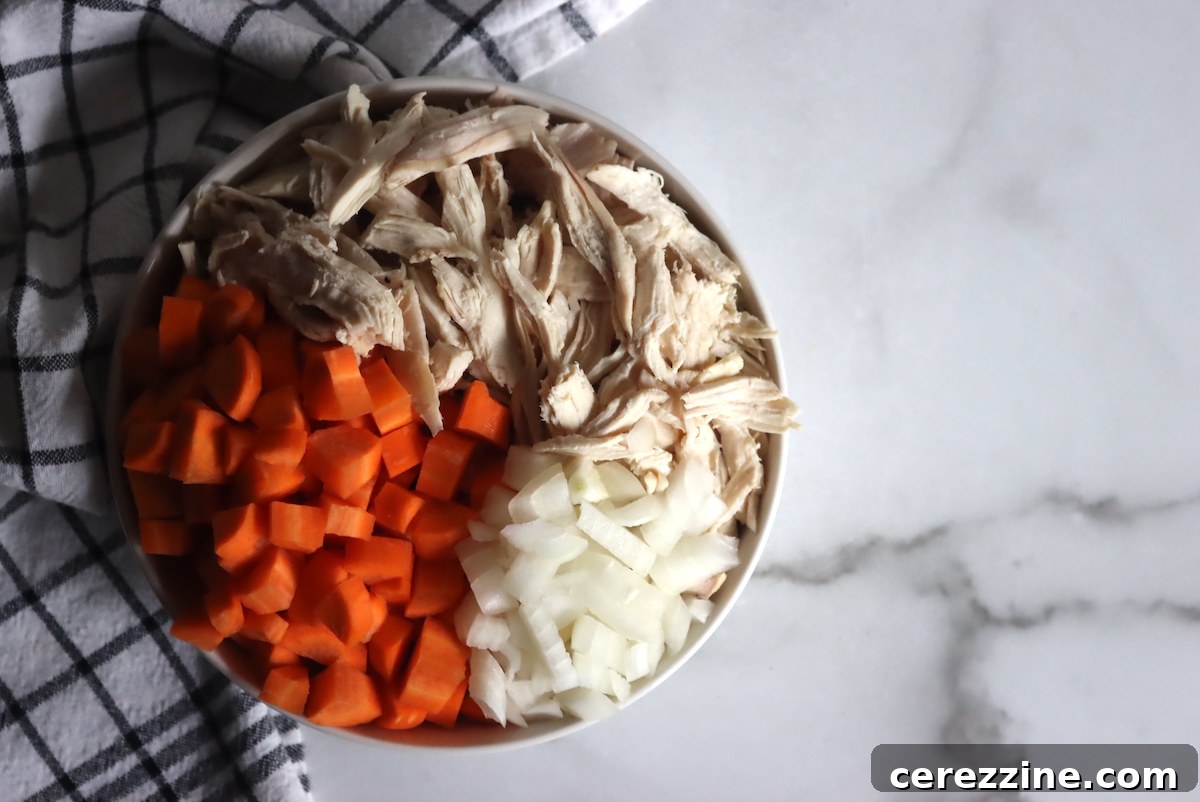
When canning in quart jars, a good guideline is to add approximately 2 cups of solids per quart jar. For example, for each quart jar, you might consider:
- 1 cup shredded chicken
- 3/4 cup sliced carrots
- 1/4 cup diced onion
- (Optional) 1/4 cup diced celery or other preferred vegetable
This combination ensures you hit the 2-cup total for solids, leaving ample room for broth. The balance of the jar is then filled with chicken broth, which can be homemade or store-bought. If you’re roasting a whole chicken to get your shredded meat, you can use the bones to make a rich, flavorful homemade broth – a truly self-sufficient approach. When using store-bought broth or bouillon cubes, always check the sodium content, as they can be quite salty. Opting for low-sodium versions gives you more control over the final taste.
For each quart jar, you’ll generally need about 3 cups of chicken broth to fill the jar correctly, maintaining the 1-inch headspace. Although the total volume inside the jar is typically 4 cups, the “2 cups of solids” measurement is based on dry volume before liquid is added, and the broth will fill the spaces between the solid ingredients.
To recap, for each quart jar of home-canned chicken soup, aim for:
- 1 cup cooked chicken, shredded or diced
- 1/2 cup carrots, sliced or diced
- 1/4 cup onions, diced
- 1/4 cup celery, diced (or replace with more chicken/carrots if omitted)
- Approximately 3 cups chicken broth
- Salt and pepper to taste
If you choose to omit a vegetable, simply increase the quantity of other approved vegetables or chicken to maintain the 2 cups of solids per quart jar. For pint jars, you would halve all these ingredient quantities.
The Pressure Canning Process for Chicken Soup
Canning chicken soup requires meticulous attention to detail to ensure safety and quality. Always follow the instructions provided by your pressure canner manufacturer for specific operating procedures.
Step-by-Step Instructions:
- Prepare Your Pressure Canner: Place the canning rack at the bottom of your pressure canner. Add several inches of hot water, as recommended by your canner’s manual (usually 2-3 inches for pints and quarts). Begin heating the water to a simmer (180°F / 82°C) while you prepare the soup.
- Prepare Ingredients: Peel and chop carrots, dice onions and celery. Ensure your cooked chicken is diced or shredded uniformly.
- Combine and Heat Soup: In a large stock pot, combine all your pre-measured ingredients: chicken stock, cooked chicken, chopped celery, carrots, and onion. Add salt and pepper to taste, and any optional bouillon cubes. Bring the mixture to a rolling boil and simmer for 5 to 10 minutes, ensuring all ingredients are thoroughly heated through. This is the “hot pack” method.
- Prepare Jars: While the soup simmers, wash your canning jars, lids, and rings in hot soapy water. Jars should be kept hot to prevent thermal shock when filled with hot soup. Lids should be prepared according to the manufacturer’s directions (often by simmering in warm water, but some newer lids don’t require this).
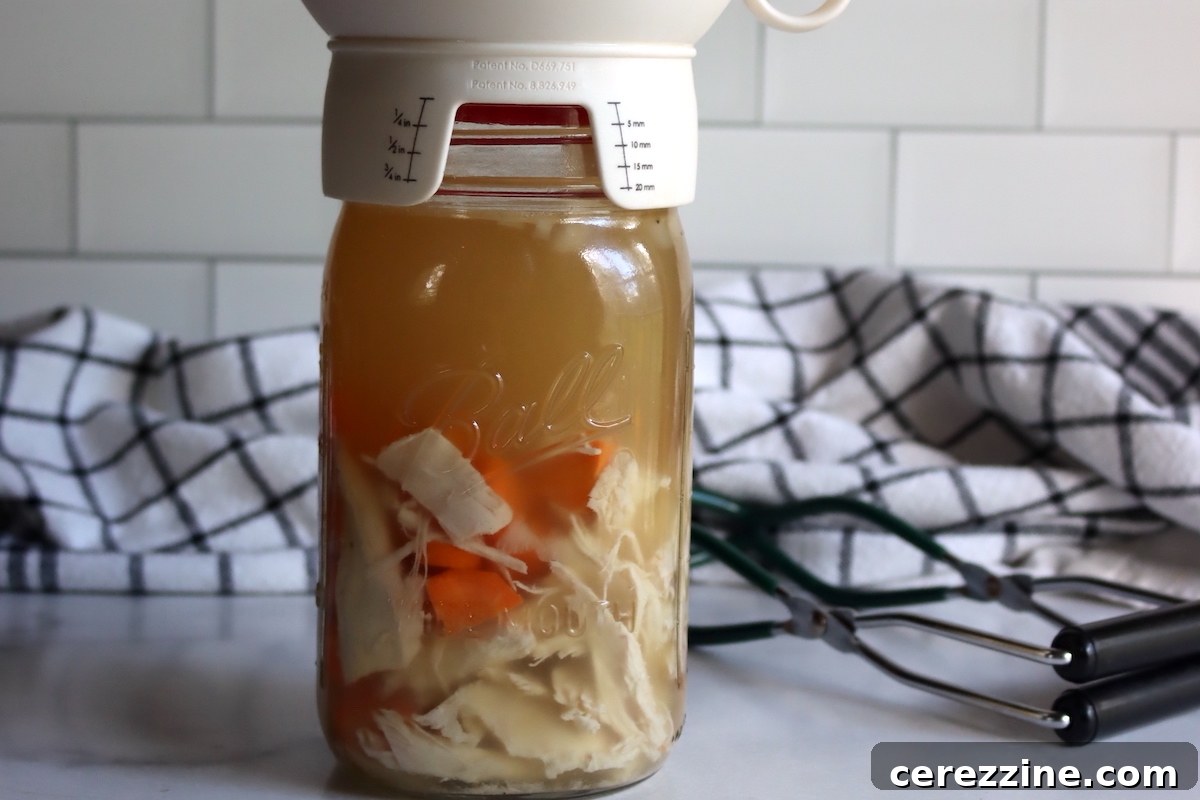
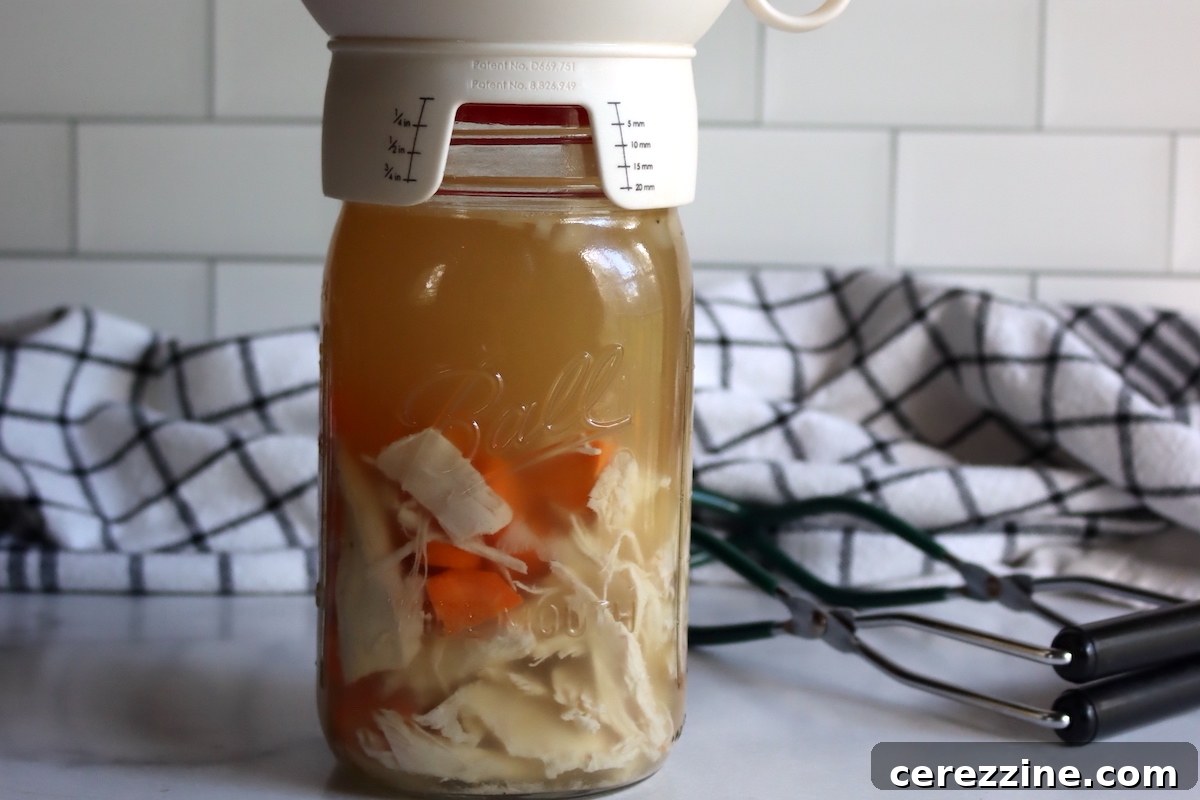
- Fill Jars: Using a canning funnel and a slotted spoon, evenly distribute the solid ingredients (chicken and vegetables) among your hot, clean jars. Remember the rule: fill jars approximately halfway with solids (about 2 cups per quart jar, 1 cup per pint jar).
- Add Broth and Headspace: Ladle the hot chicken broth over the solids, leaving precisely 1 inch of headspace at the top of each jar. Headspace is crucial for proper sealing and to prevent food from siphoning out during processing.
- Remove Air Bubbles: Insert a clean plastic knife or headspace tool between the food and the jar to release any trapped air bubbles. Adjust headspace by adding more hot broth if necessary.
- Wipe Rims and Apply Lids: Wipe the rims of each jar clean with a damp cloth to remove any food residue that could interfere with the seal. Place a prepared lid on each jar, followed by a canning ring, tightened “fingertip tight” (snug but not overly tight).
Pressure Canning Times and Altitude Adjustments
Carefully place the filled, lidded jars onto the rack in your preheated pressure canner. Secure the canner lid according to your manufacturer’s instructions. Bring the canner to a boil over high heat, allowing steam to escape through the vent pipe for a full 10 minutes. This “venting” step is critical to remove all air from the canner, ensuring the correct temperature and pressure are reached inside.
After venting, place the weighted gauge on the vent pipe or close the petcock (for dial gauge canners). Allow the pressure to rise to the recommended level for your altitude. Process the jars for the specified time:
- Pint jars: 75 minutes
- Quart jars: 90 minutes
The canning times listed above are based on the more conservative Ball Blue Book recommendations, which are slightly longer than some USDA generic soup guidelines (60 minutes for pints, 75 for quarts). Using the longer Ball times provides an extra margin of safety and allows for slightly denser soups if you prefer a bit less broth, without compromising quality.
Altitude Adjustments for Pressure Canning
The processing time for canning chicken soup remains consistent regardless of your altitude. However, the required pressure must be adjusted if you are canning at elevations above 1,000 feet above sea level. This ensures that the internal temperature within the jars reaches a safe level to destroy harmful bacteria.
For **dial gauge pressure canners**:
- 0 to 2,000 feet elevation – 11 lbs pressure
- 2,001 to 4,000 feet elevation – 12 lbs pressure
- 4,001 to 6,000 feet elevation – 13 lbs pressure
- 6,001 to 8,000 feet elevation – 14 lbs pressure
For **weighted gauge pressure canners**:
- 0 to 1,000 feet elevation – 10 lbs pressure
- Above 1,000 feet elevation – 15 lbs pressure
Cooling and Storage
- Cool Down: Once the processing time is complete, turn off the heat and allow the pressure canner to cool naturally to room temperature. Do NOT force cool the canner, as this can lead to siphoning, seal failures, and unsafe food. This cooling process can take anywhere from 30 minutes to several hours.
- Remove Jars: Once the pressure gauge reads zero and the lid can be safely opened, carefully remove the jars using a jar lifter and place them on a towel-lined counter or wire rack, ensuring they are not touching each other. Allow them to cool undisturbed for 12-24 hours.
- Check Seals: After cooling, check all jar seals. A properly sealed lid will be concave (curved inward) and will not flex when pressed. Remove the rings and test the seal by gently lifting the lid with your fingertips. If the lid lifts off, the jar is not sealed.
- Store and Enjoy: Any unsealed jars should be refrigerated immediately and consumed within a few days. Properly canned and sealed jars should be wiped clean, labeled with the contents and date, and stored in a cool, dark, dry place. They will maintain peak quality for 12-18 months, though they remain safe to eat for longer as long as the seal is intact. Always refrigerate after opening.
Serving Your Home Canned Chicken Soup
The best part about canning chicken soup is the sheer ease of serving! To enjoy your preserved goodness, simply reheat the soup in a saucepan over medium heat until it’s simmering hot. Serve it as is for a light yet comforting meal, or get creative with additions:
- Noodles: Cook your favorite egg noodles or pasta separately and add them directly to your serving bowl or the reheated soup pot.
- Rice: Serve over freshly cooked white or brown rice for a heartier meal.
- Dumplings: Prepare simple drop dumplings and simmer them directly in the reheated soup until cooked through.
- Fresh Herbs: A sprinkle of fresh parsley, dill, or chives can brighten the flavors.
- Crunchy Toppings: Croutons, crackers, or a dollop of sour cream can add texture and richness.
Generally, about 1 cup of cooked pasta or rice works well for a quart of soup, but adjust to your preference – some prefer a thicker, heartier soup, while others enjoy more broth. Adding starches like rice or pasta is optional and helps stretch the soup further, making it an even more economical meal.
Average Rating: 4.46 from 22 votes
Servings: 16 servings (Makes 4 quart jars or 8 pints)
Canning Chicken Soup
By Ashley Adamant
This simple canning recipe for chicken soup allows you to store homemade chicken soup right on your pantry shelf, providing convenience and comfort whenever you need it.
Prep Time: 10 mins
Cook Time: 10 mins
Canning Time: 1 hr 15 mins (for pints) / 1 hr 30 mins (for quarts)
Total Time: Approximately 1 hr 35 mins (plus cooling)
Equipment
- Pressure Canner
- Canning Jars (Pint or Quart)
- New Lids and Rings
- Canning Funnel
- Jar Lifter
- Bubble Remover/Headspace Tool
- Large Stock Pot
- Slotted Spoon
Ingredients
- 4 Quarts chicken stock (or low-sodium broth)
- 3 cups diced, cooked chicken (about one 3 lb cooked chicken)
- 1 1/2 cups celery, chopped (roughly 3 stalks)
- 1 1/2 cups carrots, sliced or diced (roughly 3 medium)
- 1 cup onion, chopped (1 large)
- 3 chicken bullion cubes, optional (if using unsalted broth)
- Salt and pepper to taste (*see note on salt)
Instructions
- Start by preparing a pressure canner for hot pack based on the manufacturer’s instructions. This usually means adding the bottom trivet, along with several inches of water, and bringing it to a simmer (180°F / 82°C).
- Prepare the soup ingredients for hot pack: peel and chop the carrots, dice the onions and celery. Ensure chicken is cooked and diced/shredded.
- Combine all ingredients (chicken stock, cooked chicken, vegetables, salt, pepper, and optional bullion) in a large stock pot and bring to a boil. Simmer for 5 to 10 minutes, until ingredients are thoroughly heated through.
- Use a slotted spoon to evenly distribute the hot solids among hot, clean 4 quart jars or 8 pint jars, filling them approximately halfway.
- Top with the hot broth, leaving 1 inch headspace. Remove air bubbles using a plastic tool, then adjust headspace if needed.
- Wipe jar rims clean and cap with 2-part canning lids, tightened fingertip tight.
- Process the jars in a prepared pressure canner for 75 minutes for pints and 90 minutes for quarts, adjusting pressure for altitude (see notes section below).
- When the canning time is complete, turn off the heat and allow the canner to cool naturally to room temperature on its own before removing the jars. Do not force cool.
- Once cool, check jar seals. Store properly sealed jars in a cool, dark place. Store any unsealed jars in the refrigerator for immediate use. Properly canned jars will maintain peak quality for 18 months. Refrigerate after opening.
- To serve, reheat in a saucepan and serve over cooked rice or pasta, or enjoy as is.
Notes
*Salt: Chicken soup tends to be salty, which enhances flavor and helps prevent meat from tasting dry. The amount of salt is entirely up to your preference, as it is not required for preservation in canning, only for taste. If using store-bought chicken broth, opt for a low-sodium brand as they are often already quite salty. If adding bouillon cubes, they typically provide enough salt. If using unsalted homemade stock and no bouillon, start with about 1 tsp salt per quart, then taste and adjust before filling jars.
Canning Time
The original Ball Blue Book Recipe recommends canning times of 75 minutes for pints and 90 minutes for quarts for this chicken soup recipe. The USDA’s generic soup canning recipe suggests 60 minutes for pints and 75 minutes for quarts for broth-based soups. We recommend sticking with the more conservative Ball Blue Book times for an added margin of safety and quality, especially when incorporating solids.
Altitude Adjustments
The canning time remains the same regardless of altitude, but the required pressure changes above 1,000 feet in elevation. Refer to your pressure canner’s manual and the following guidelines:
For dial gauge pressure canners:
- 0 to 2,000 feet in elevation – 11 lbs pressure
- 2,001 to 4,000 feet in elevation – 12 lbs pressure
- 4,001 to 6,000 feet in elevation – 13 lbs pressure
- 6,001 to 8,000 feet in elevation – 14 lbs pressure
For weighted gauge pressure canners:
- 0 to 1,000 feet in elevation – 10 lbs pressure
- Above 1,000 feet – 15 lbs pressure
Nutrition
Calories: 118kcal, Carbohydrates: 11g, Protein: 10g, Fat: 4g, Saturated Fat: 1g, Polyunsaturated Fat: 1g, Monounsaturated Fat: 1g, Cholesterol: 19mg, Sodium: 633mg, Potassium: 326mg, Fiber: 1g, Sugar: 5g, Vitamin A: 2055IU, Vitamin C: 2mg, Calcium: 17mg, Iron: 1mg
Nutrition information is automatically calculated and should be used as an approximation only.
Home canning chicken soup is an incredibly rewarding endeavor, transforming simple ingredients into a pantry full of comforting meals. With a little preparation and adherence to safe canning practices, you can enjoy the delicious taste of homemade chicken soup any time hunger calls or a cold strikes. It’s a skill that empowers you to control what goes into your food and ensures your family has access to wholesome, nourishing meals.
More Soup Canning Recipes to Explore
If you’ve enjoyed the process of canning chicken soup and are looking to expand your home-preserved pantry, there’s a world of delicious soup canning recipes waiting for you. Dive into these other comforting options:
- Hearty Beef Stew for Canning
- Garden Vegetable Soup (Your Choice)
- Classic French Onion Soup (for Canning)
- Spicy Tomato Vegetable Soup
- Roasted Tomato Basil Soup