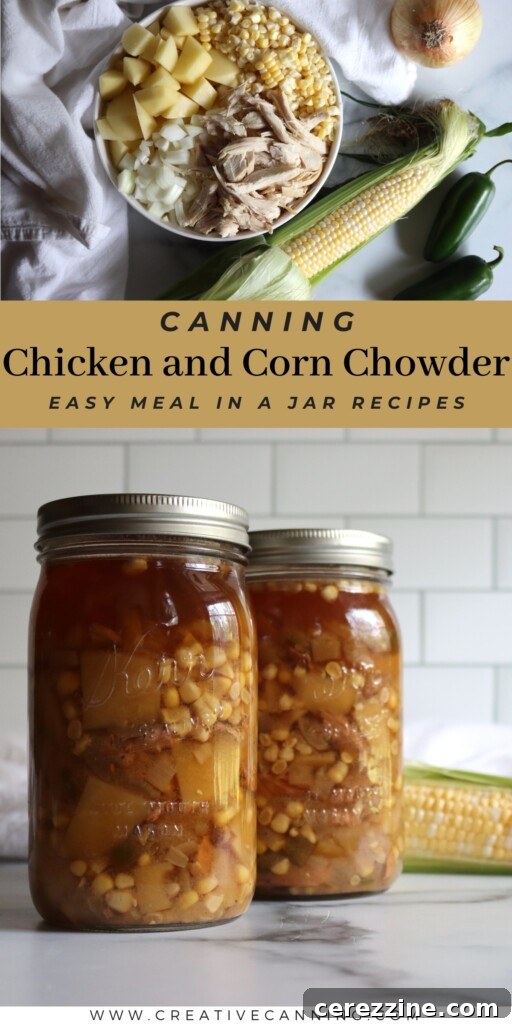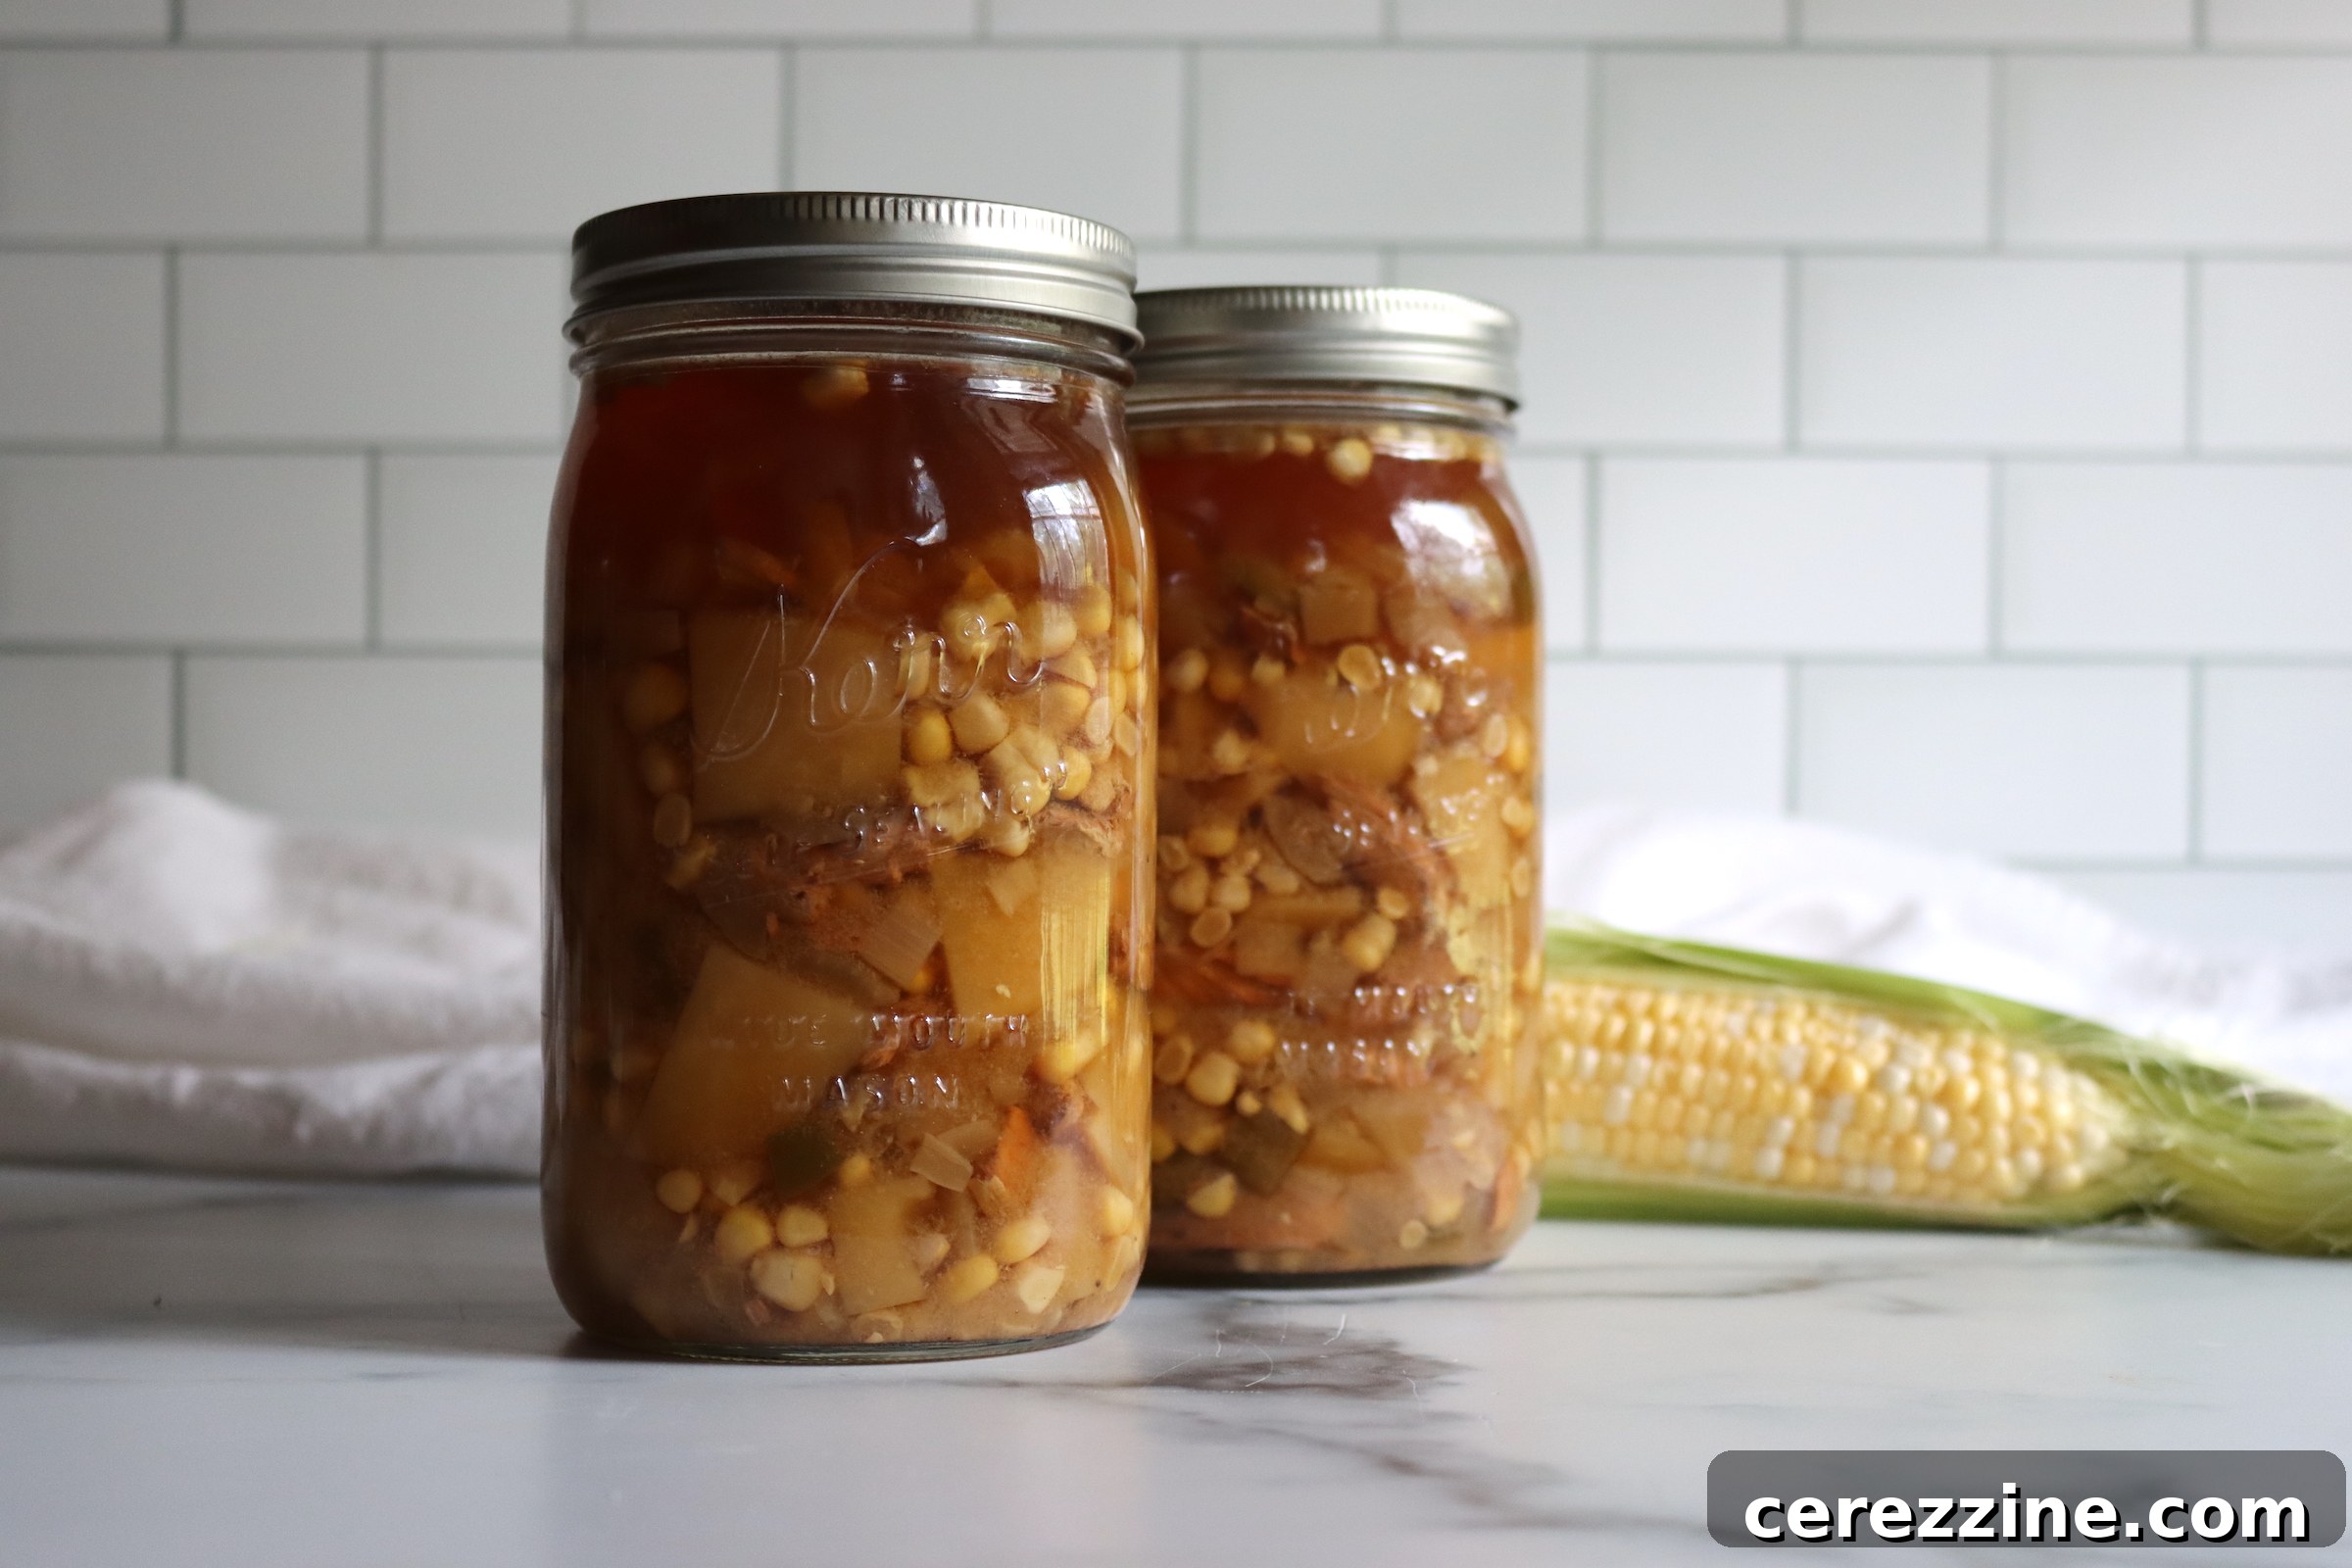
Transform your kitchen into a powerhouse of homemade goodness with pressure canned chicken and corn chowder. This incredibly versatile and shelf-stable soup base offers the ultimate convenience, allowing you to enjoy a hearty meal anytime, anywhere. Whether you’re craving a simple, warming bowl or a gourmet experience enhanced with cream, crispy bacon, fresh herbs, or a kick of jalapeños, this recipe provides the perfect foundation. Imagine having a delicious, ready-to-serve meal waiting in your pantry, eliminating last-minute cooking stress and bringing comfort straight to your table.
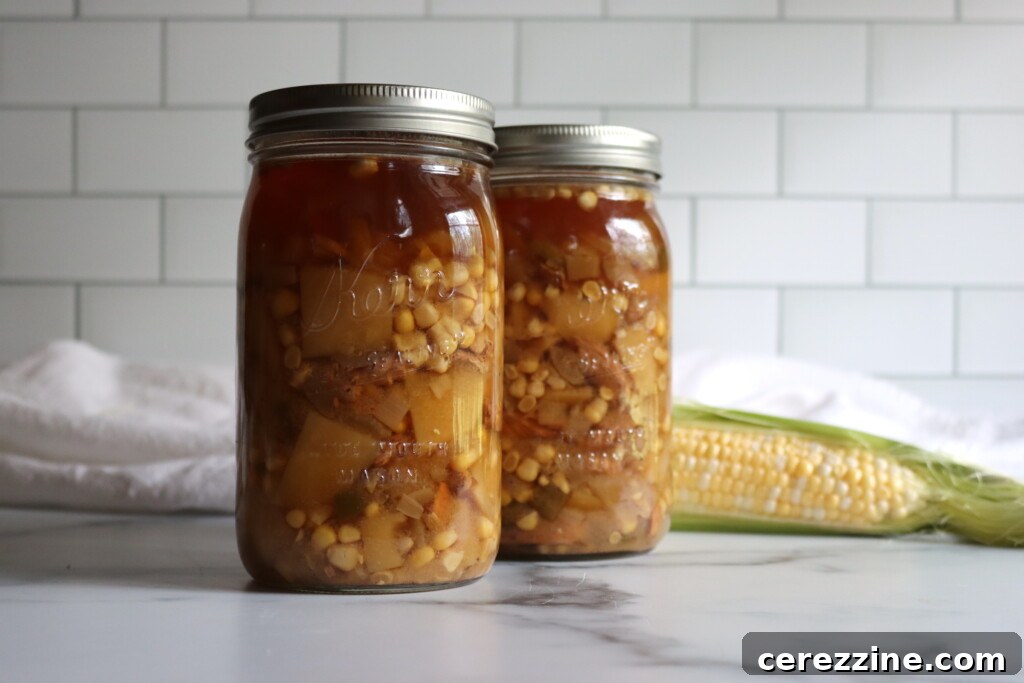
Pressure Canned Chicken and Corn Chowder: The Ultimate Shelf-Stable Comfort Food
There’s nothing quite like a steaming bowl of chicken and corn chowder to evoke feelings of warmth and home. This classic comfort food, rich with savory flavors and packed with wholesome ingredients, becomes an even greater culinary asset when preserved through pressure canning. Inspired by expert canners like Angi Schneider’s insights from Pressure Canning for Beginners and Beyond, this recipe empowers you to create a flexible, flavorful soup base that’s shelf-stable and ready for customization. It’s the quintessential jar meal – a promise of cozy, home-cooked goodness, effortlessly accessible from your pantry, perfect for busy weeknights, emergency preparedness, or just when you need a little taste of comfort.
This method focuses on pressure canning a broth-based chowder. This approach is crucial for safety and versatility, as it allows you to finish the soup at serving time with your preferred creamy additions, thickeners, or an array of fresh toppings. Whether you opt for a decadent swirl of cream, a sprinkle of fresh herbs, or a scattering of crispy bacon bits, this preserved chowder base makes mealtime simple and satisfying. It’s an ideal solution for those who appreciate the convenience of grab-and-go meals without sacrificing the rich, homemade taste.
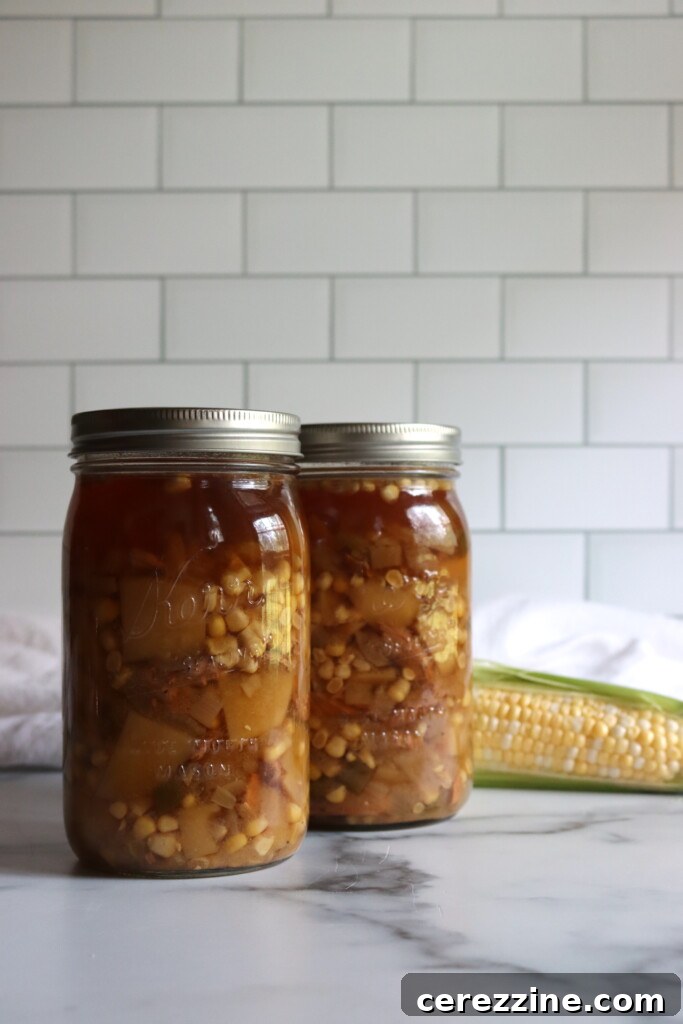
Why Choose Pressure Canning for Your Chicken and Corn Chowder? Benefits for Your Pantry and Peace of Mind
Pressure canning is the only safe method for preserving low-acid foods like this chicken and corn chowder, ensuring it remains safe for long-term storage without refrigeration. Beyond safety, the benefits are numerous. Imagine a fully cooked, delicious meal that requires only reheating, ready for any occasion. This process locks in flavors and nutrients, providing a wholesome option for emergency food supplies, quick weekday lunches, or unexpected guests. The ability to make large batches means you can save time and money, leveraging seasonal produce and bulk chicken purchases. Stocking your pantry with home-canned chowder provides unparalleled convenience and a profound sense of food security, knowing you have nutritious, homemade meals at your fingertips.
Essential Ingredients for a Hearty and Flavorful Chicken and Corn Chowder (Yields 4 Quarts or 8 Pints)
This recipe is designed for both ease and abundance, yielding approximately 4 quarts or 8 pints of delicious chowder, making it perfect for filling a full-size pressure canner. Each ingredient plays a vital role in creating the rich, comforting flavor profile of this beloved dish.
-
Cooked Chicken: The Heart of Your Chowder
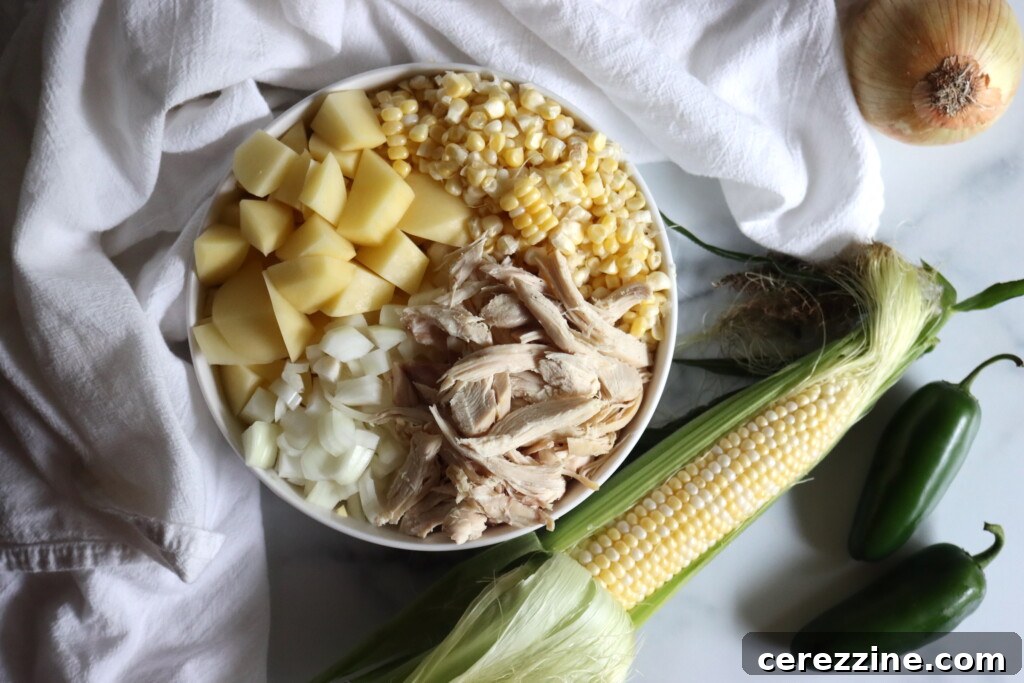
You’ll need 1 ½ pounds of cooked, shredded, and boned chicken. This can be white meat, dark meat, or a combination of both. Leftover roasted chicken, a store-bought rotisserie chicken, or a batch of chicken breasts cooked specifically for canning are all excellent choices. Ensure the chicken is fully cooked and shredded into bite-sized pieces for consistent texture throughout the chowder. Pre-cooking the chicken is crucial for canning safety and helps build the foundational flavor of your soup.
-
Sweet Corn: Freshness in Every Bite
Incorporating 3 cups of corn, either fresh cut from the cob or frozen kernels, adds a burst of natural sweetness and vibrant color. If using fresh corn, aim for about 4 to 5 ears, carefully removing the kernels. Frozen corn is a convenient alternative and requires no thawing before adding to the pot. Choose sweet corn varieties for the best flavor, as this is a key component of any good chowder.
-
Hearty Potatoes & Aromatic Onions: The Classic Chowder Base
3 cups of peeled and diced potatoes provide the essential starchy body that makes chowder so satisfying. Dice your potatoes evenly into ½-inch cubes to ensure they cook consistently in the jar without becoming overly mushy or undercooked. Waxy potatoes like Yukon Golds tend to hold their shape better than starchy Russets, but both can work. For aromatic depth, you’ll need 2 cups of finely chopped onion. Finely chopping helps the onion integrate smoothly into the soup, contributing a subtle sweetness and savory base without large, overpowering chunks.
-
Jalapeños (Optional): A Touch of Zesty Heat
For those who enjoy a little warmth, 2 to 4 chopped jalapeño peppers can be added. This quantity typically provides a mild to moderate kick. Remember to stem and seed the peppers before chopping if you prefer less heat, as most of the capsaicin (the compound responsible for spiciness) resides in the seeds and membranes. Adjust the amount according to your personal preference for spice, or omit them entirely for a milder chowder.
-
Rich Broth & Essential Seasonings: Unifying Flavors
7 cups of quality chicken broth ties all the ingredients together, creating a savory liquid base. Alongside this, simple yet effective seasonings enhance the overall taste: 1 tablespoon of canning salt (crucial for safety and flavor, avoid iodized table salt which can discolor canned goods), 1 teaspoon of black pepper, and 2 teaspoons of garlic powder. To infuse an extra layer of aroma, include 4 bay leaves, placing one in each quart jar during the filling stage. These seasonings are carefully measured to provide a balanced flavor profile that stands alone or welcomes further customization.
Step-by-Step Guide to Safely Pressure Canning Chicken and Corn Chowder
Following these detailed instructions for pressure canning ensures your chicken and corn chowder is not only delicious but also safely preserved for extended pantry storage. Adherence to these steps is critical for food safety and successful canning.
-
Prepare Your Canning Environment and Jars
Begin by preparing your pressure canner according to the manufacturer’s instructions, filling it with the recommended amount of water. For a hot pack method, heat the canner water to approximately 180°F (82°C). Simultaneously, ensure your canning jars (quart or pint size) are clean and free of any chips or cracks. For hot packing, heat your jars by placing them in the canner water or a dishwasher on a hot cycle. Lids and rings should also be clean and ready.
-
Combine and Simmer Your Chowder Base
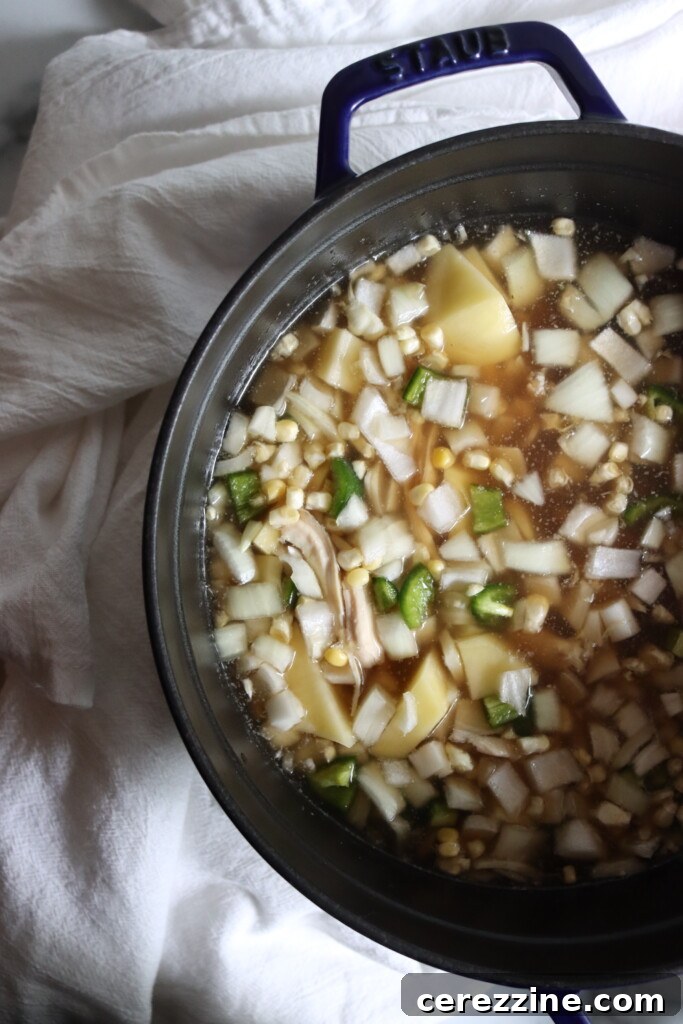
In a large stockpot or Dutch oven, combine all the prepared ingredients: the cooked chicken, corn, chopped onion, diced potatoes, jalapeños (if using), chicken broth, canning salt, black pepper, and garlic powder. Stir all the components thoroughly to ensure an even distribution of ingredients. Bring this mixture to a rolling boil over medium-high heat. Once boiling, reduce the heat to a gentle simmer and let it cook for a full 5 minutes. This step is essential for thoroughly heating all the ingredients, which is part of the hot pack method.
-
Fill and Prepare Your Jars for Canning
Carefully ladle the hot chowder into your prepared, hot canning jars. It’s crucial to leave precisely 1 inch of headspace from the top rim of the jar to the liquid level. This space is necessary for proper vacuum sealing and to prevent food from boiling out during processing. If using quart jars, place one bay leaf into each jar for an added layer of flavor. Use a non-metallic utensil, like a plastic de-bubbler or chopstick, to gently remove any trapped air bubbles from the jars. Recheck the headspace and add more soup if needed to maintain the 1-inch mark. Wipe the jar rims meticulously clean with a damp paper towel or cloth moistened with vinegar to remove any food residue that could interfere with the seal. Finally, center the two-piece canning lids (flats) on the jars and apply the screw bands (rings) to fingertip tightness – meaning tight enough that you can’t twist them easily with one finger, but not so tight that air can’t escape.
-
Process in Your Pressure Canner
Carefully place the filled and lidded jars onto the rack in your preheated pressure canner. Secure the canner lid according to its specific instructions. Bring the canner to a boil and vent steam for 10 minutes to remove all air from inside the canner. After venting, close the vent and allow the pressure to build. Once the canner reaches the specified pressure, begin your timing. Process pint jars for 75 minutes and quart jars for 90 minutes. The pressure required is 10 pounds for weighted gauge canners or 11 pounds for dial gauge canners. It is critically important to maintain a consistent pressure throughout the processing time, adjusting the heat as necessary. If the pressure drops below the recommended level at any point, you must bring it back up to pressure and restart the timing from the beginning.
-
Cool, Check Seals, and Store
Once the processing time is complete, turn off the heat and allow the pressure canner to cool naturally and completely until the pressure gauge reads zero. Do not attempt to rush the cooling process by opening the vent or cooling with water, as this can lead to siphoning (loss of liquid from jars) or jar breakage. Once depressurized, remove the canner lid, tilting it away from your face to avoid steam. Carefully remove the hot jars using a jar lifter and place them on a clean, towel-lined counter or wooden surface, spaced apart to allow air circulation. Let the jars cool undisturbed for 12–24 hours. After cooling, check all seals: the lids should be concave (curved inwards) and should not flex when pressed. Remove the screw bands, wipe the jars clean, label them with the contents and date, and store them in a cool, dark, dry place. Unsealed jars should be refrigerated and consumed within a few days.
Critical Altitude Adjustments for Safe Pressure Canning
Altitude plays a significant role in pressure canning, as water boils at lower temperatures at higher elevations. To compensate for this, you must increase the pressure in your canner to ensure that the internal temperature reaches a safe level to destroy harmful bacteria. While processing times remain consistent regardless of altitude, the required pressure settings will change. Always consult and follow these guidelines based on your specific location:
For dial gauge pressure canners:
- 0 to 2,000 feet in elevation – 11 lbs pressure
- 2,001 to 4,000 feet in elevation – 12 lbs pressure
- 4,001 to 6,000 feet in elevation – 13 lbs pressure
- 6,001 to 8,000 feet in elevation – 14 lbs pressure
For weighted gauge pressure canners:
- 0 to 1,000 feet in elevation – 10 lbs pressure
- Above 1,000 feet – 15 lbs pressure
Creative Serving Suggestions for Your Delicious Canned Chicken and Corn Chowder
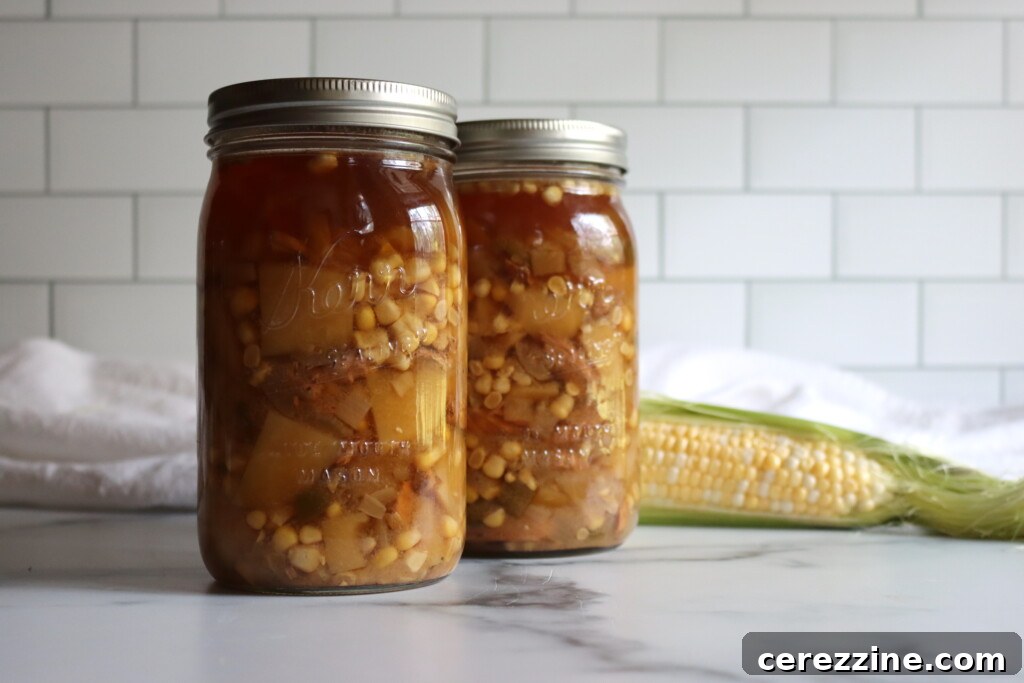
One of the greatest advantages of this pressure canned chicken and corn chowder is its remarkable versatility. It’s fully cooked and bursting with flavor straight from the jar, making it ideal for simply heating and enjoying. However, its broth-based nature makes it a perfect canvas for culinary creativity. Here are some ideas to elevate your chowder:
-
Classic Creamy Chowder
For a traditional, rich, and creamy chowder, gently heat the contents of a jar on the stovetop. Once simmering, stir in a splash of heavy cream, half-and-half, or milk. If you prefer a thicker consistency, whisk in a slurry of cornstarch or potato starch (1-2 tablespoons mixed with an equal amount of cold water) and simmer until thickened to your liking. Avoid adding these thickeners before canning, as they can interfere with safe heat penetration.
-
Southwest Flair
Transform your chowder with a Southwestern twist! Serve with a dollop of sour cream, a sprinkle of fresh cilantro, extra jalapeño slices, and a dash of chili powder or smoked paprika. Crushed tortilla chips or avocado cubes make excellent toppings for an added textural dimension.
-
Hearty Country Comfort
Embrace rustic flavors by topping your reheated chowder with crumbled crispy bacon, freshly cracked black pepper, and chopped green onions or chives. A side of warm, crusty bread or homemade biscuits would complete this wholesome meal.
-
Make it a Full Meal
This chowder makes a fantastic base for more substantial dishes. Serve it over a bed of fluffy rice or quinoa. You could even use it as the base for a quick chicken pot pie – simply thicken, pour into a baking dish, and top with a puff pastry or biscuit crust.
-
Spice it Up
If you like extra heat, consider adding a dash of your favorite hot sauce or a pinch of cayenne pepper when reheating. A squeeze of fresh lime juice can also brighten the flavors beautifully.
No matter how you choose to serve it, this versatile chowder adapts to whatever you’re craving, proving that convenience and gourmet taste can indeed go hand-in-hand.
Frequently Asked Questions (FAQ) About Canning Chicken and Corn Chowder
-
Can I add cream, milk, flour, or other thickeners before canning?
No, absolutely not. Adding dairy products (cream, milk, butter) or flour/cornstarch before canning is unsafe. These ingredients can interfere with the heat penetration during the pressure canning process, potentially allowing harmful bacteria to survive. They can also cause siphoning and an unpleasant texture. Always add these ingredients when you are reheating and serving the chowder.
-
Why did my potatoes turn mushy in the jar?
Mushy potatoes are often a result of either overcooking before canning or uneven dicing. Ensure your potatoes are diced into uniform ½-inch pieces. Simmering for only 5 minutes as directed is crucial – you want them heated through, not fully cooked. Using a firmer potato variety, like Yukon Gold, can also help them maintain their texture better than starchy Russets.
-
What if my jars don’t seal?
If a jar does not seal (the lid is not concave and “pings” when pressed), it means it wasn’t properly preserved. You can re-process the food if it’s within 24 hours. Check the jar rim for chips, replace the lid, and re-process for the full time. Alternatively, store the unsealed jar in the refrigerator and consume its contents within a few days, treating it as fresh food.
-
Can I use different vegetables in this chowder recipe?
Modifying tested canning recipes, especially for low-acid foods, can compromise safety. While you can often swap similar non-starchy vegetables (e.g., green beans for corn, in some cases), adding ingredients with different densities or acid levels can alter heat penetration. Stick to the tested recipe as much as possible for safety. If you wish to experiment, ensure you consult reliable, tested canning guides from reputable sources.
Full Recipe: Pressure Canned Chicken and Corn Chowder for Your Pantry
Chicken and Corn Chowder
This pressure canned chicken and corn chowder is a flavorful soup base packed with tender chicken, sweet corn, and hearty potatoes. Enjoy it straight from the jar, or add cream and your favorite toppings for a rich, cozy chowder. It’s a flexible, ready-to-eat pantry meal that’s easy to customize.
- Servings: 8 servings (4 quarts or 8 pints)
- Prep Time: 10 mins
- Cook Time: 5 mins
- Canning Time: 1 hr 30 mins
- Total Time: 1 hr 45 mins
Equipment
- Pressure Canner
- Large Stockpot or Dutch Oven
- Canning Jars (Quart or Pint size)
- Two-piece Canning Lids (flats and rings)
- Jar Lifter
- Canning Funnel
- De-bubbler or non-metallic utensil
Ingredients
- 7 cups chicken broth
- 1 ½ lb cooked chicken, shredded and boned
- 2 cups onion, chopped finely
- 3 cups corn, removed from the cob (fresh or frozen, about 4 to 5 ears if fresh)
- 3 cups potatoes, peeled and diced into ½-inch cubes
- 2 to 4 jalapeño peppers, stemmed, seeded, and chopped (optional, adjust to taste)
- 1 Tbsp canning salt (do not use iodized table salt)
- 1 tsp black pepper
- 2 tsp garlic powder
- 4 bay leaves (one for each quart jar)
Instructions
- Prepare Canning Setup: Prepare your pressure canner according to its instructions and heat water to approximately 180°F (82°C) for hot pack. Ensure jars are clean and hot.
- Combine Ingredients: In a large stockpot or Dutch oven, combine the cooked chicken, corn, onion, potatoes, jalapeños, chicken broth, canning salt, black pepper, and garlic powder. Stir well to mix all ingredients thoroughly.
- Simmer Chowder Base: Bring the soup mixture to a full boil, then reduce heat and simmer gently for 5 minutes. This ensures all ingredients are heated through for the hot pack method.
- Fill Jars: Carefully ladle the hot soup into clean, hot canning jars, leaving precisely 1 inch of headspace from the rim. Place one bay leaf into each quart jar.
- Prepare Jars for Processing: Use a non-metallic utensil to remove air bubbles. Recheck headspace and add more soup if necessary. Wipe jar rims meticulously clean with a damp cloth to ensure a proper seal. Center lids and apply screw bands to fingertip tightness.
- Process in Canner: Place filled jars in the pressure canner. Process at 10 lbs pressure for weighted gauge canners or 11 lbs for dial gauge canners. Remember to adjust pressure based on your altitude (refer to Altitude Adjustments section).
- Timing: Process pint jars for 75 minutes and quart jars for 90 minutes. Start timing once the canner reaches the correct pressure and maintain it throughout.
- Cool and Store: After processing, turn off heat and allow the canner to cool naturally until pressure reaches zero. Remove jars and let them cool undisturbed on a towel-lined surface for 12–24 hours. Check seals, remove rings, wipe jars, label, and store in a cool, dark, dry place.
Important Canning Notes
- Canning Safety Note: This soup base contains low-acid ingredients and must be pressure canned. Never use a water bath canner for this recipe. Always follow tested guidelines for time, pressure, and altitude adjustments to ensure safety.
- Additions at Serving: Do not add butter, cream, milk, flour, cornstarch, or other thickeners to this recipe before canning. These are not safe for pressure canning and should only be added when reheating and serving.
Nutrition (per serving, approximate)
Calories: 294kcal, Carbohydrates: 32g, Protein: 27g, Fat: 7g, Saturated Fat: 2g, Polyunsaturated Fat: 2g, Monounsaturated Fat: 2g, Cholesterol: 68mg, Sodium: 1998mg, Potassium: 793mg, Fiber: 4g, Sugar: 6g, Vitamin A: 303IU, Vitamin C: 38mg, Calcium: 42mg, Iron: 2mg
Nutrition information is automatically calculated and should only be used as an approximation.
Explore More Delicious Chicken Canning Recipes
If you’ve enjoyed the ease and flavor of this pressure-canned chicken and corn chowder, you’re likely eager to expand your pantry with more hearty and convenient chicken canning recipes. Preserving chicken in various forms ensures you always have a wholesome base for countless meals.
For those craving ultimate cozy comfort, be sure to try my recipe for Canning Chicken Pot Pie Filling. This thick, savory mix, brimming with tender chicken, sweet peas, and carrots, is perfect for topping with fluffy biscuits or baking into a classic pot pie.
A timeless favorite, Canning Chicken Soup offers a lighter, yet equally satisfying option. It’s fantastic on its own, or you can stir in noodles or rice when serving for a more substantial meal.
If you appreciate a hint of spice, explore Chicken Chili Verde, a vibrant Ball Canning recipe featuring white beans and zesty salsa verde. Or, for an adventurous flavor journey, delve into Thai Red Curry Chicken, which delivers an exotic blend of warm spices and bold aromatics.
Finally, for a supremely creamy and rich meal starter, you’ll adore Canning Chicken and Gravy. This recipe creates an excellent base for biscuits or an effortlessly quick pot pie filling with just a touch of added thickener. Stocking these diverse chicken canning recipes means your pantry will always be ready to inspire delicious, homemade meals.