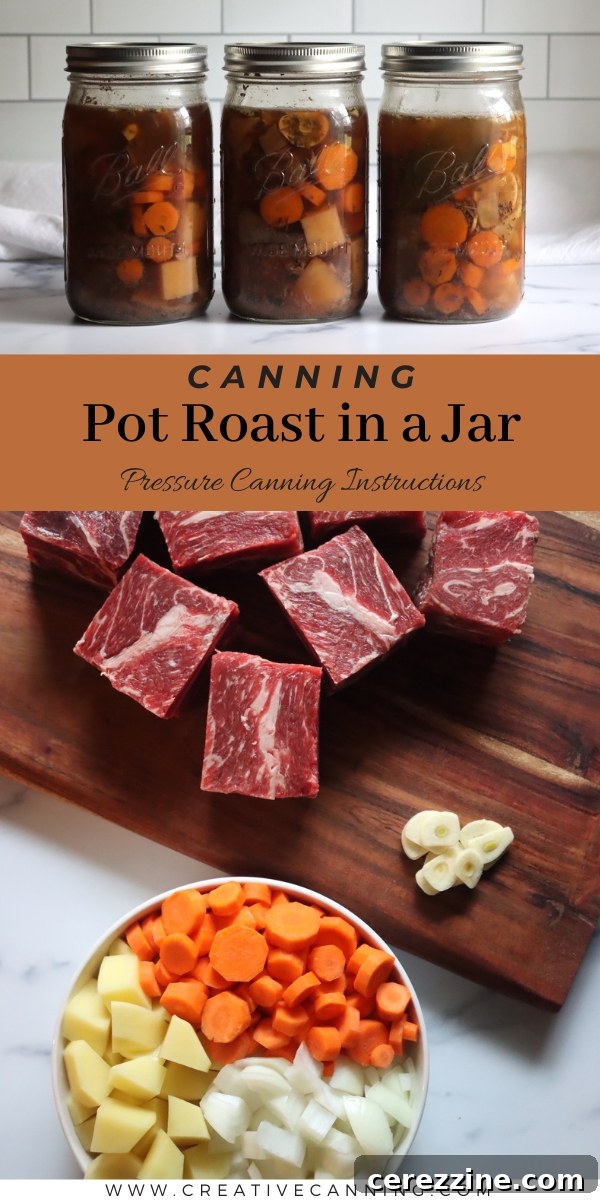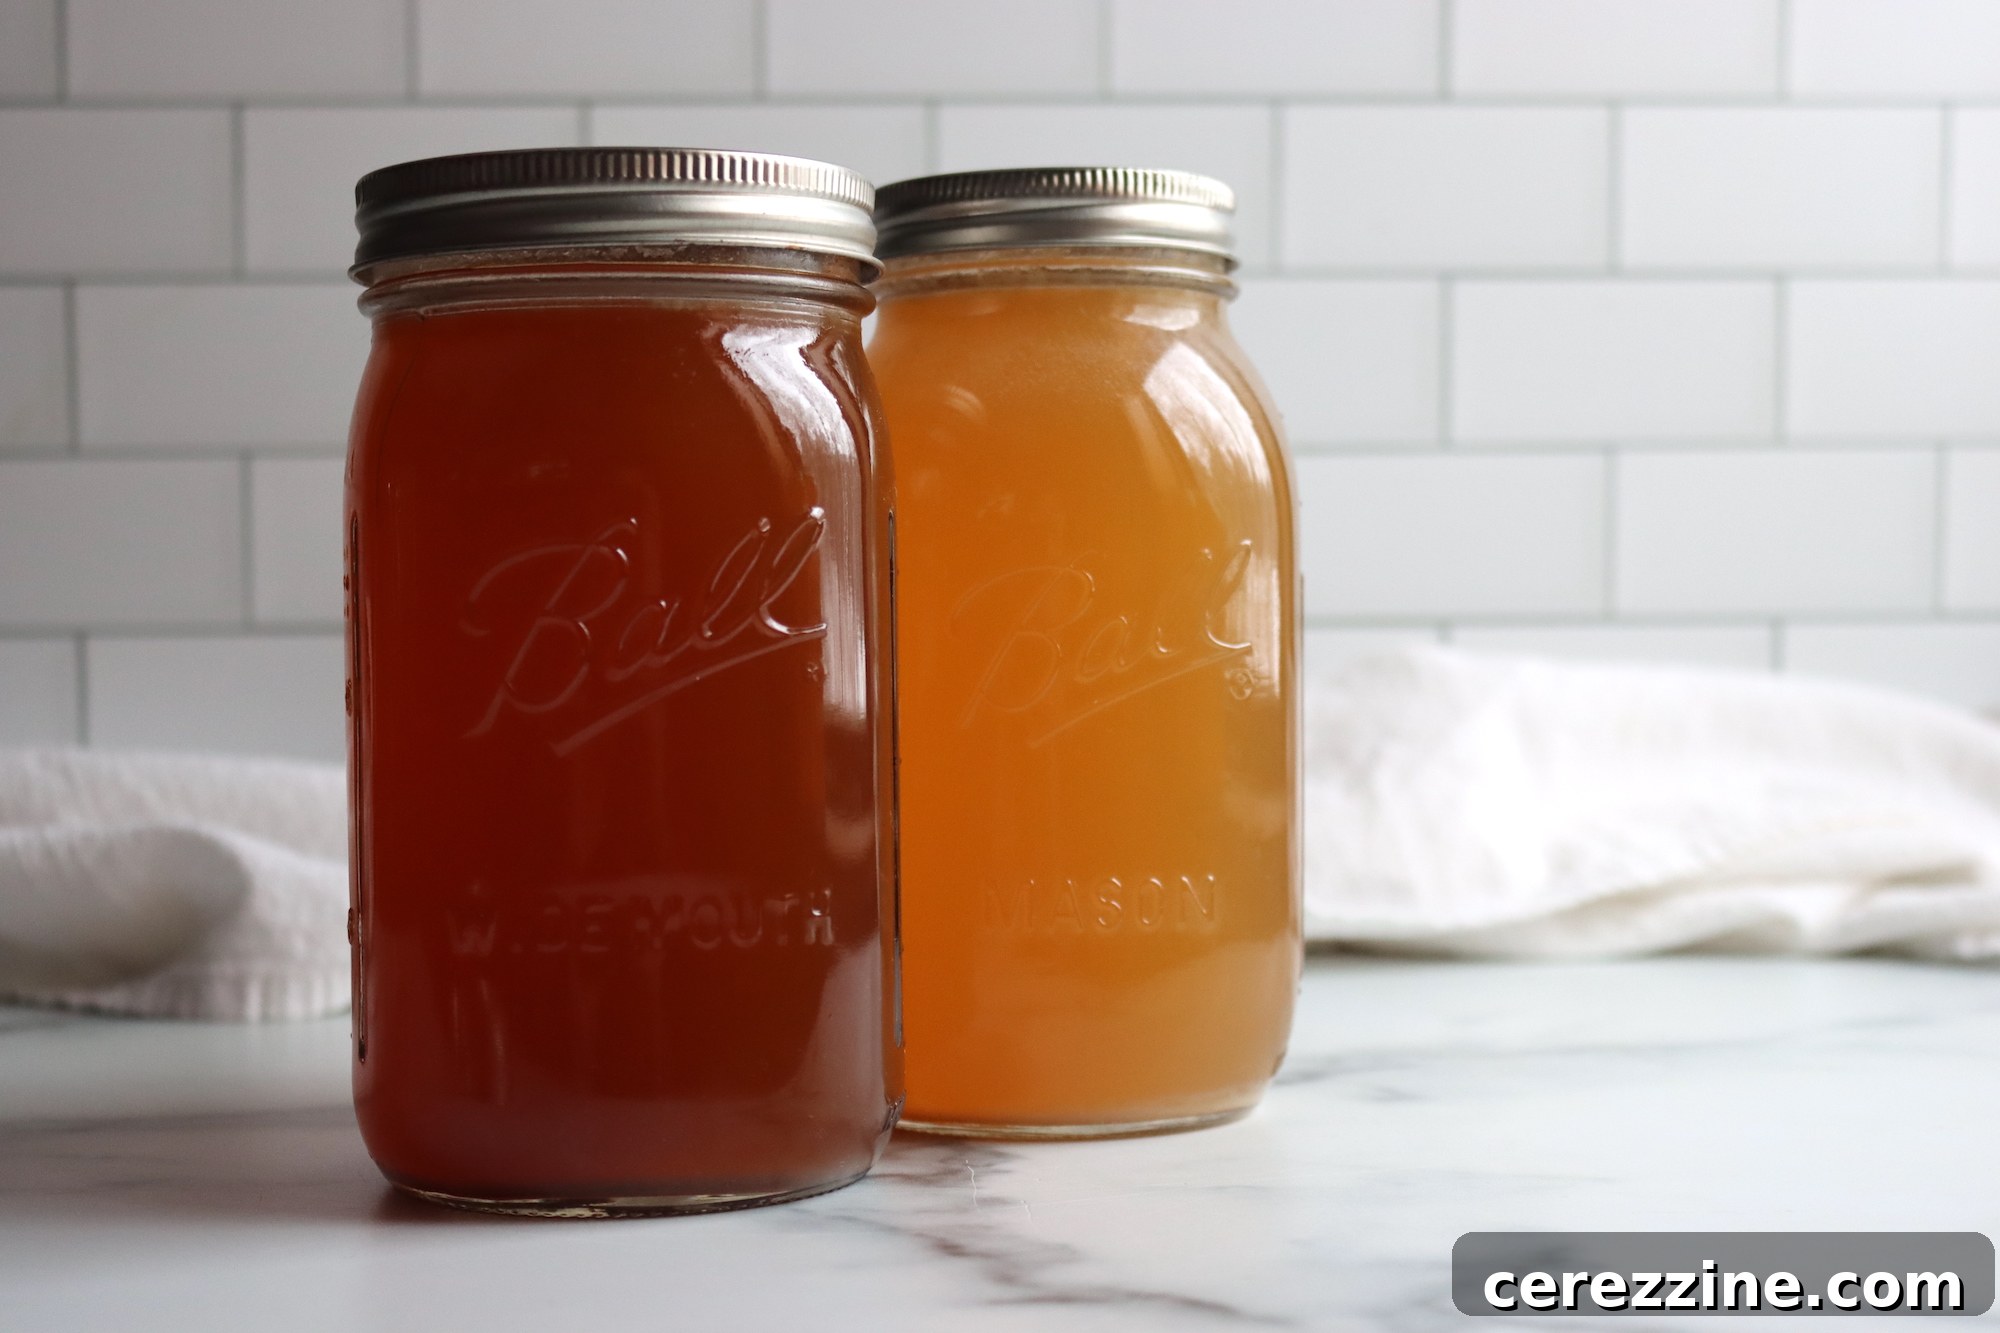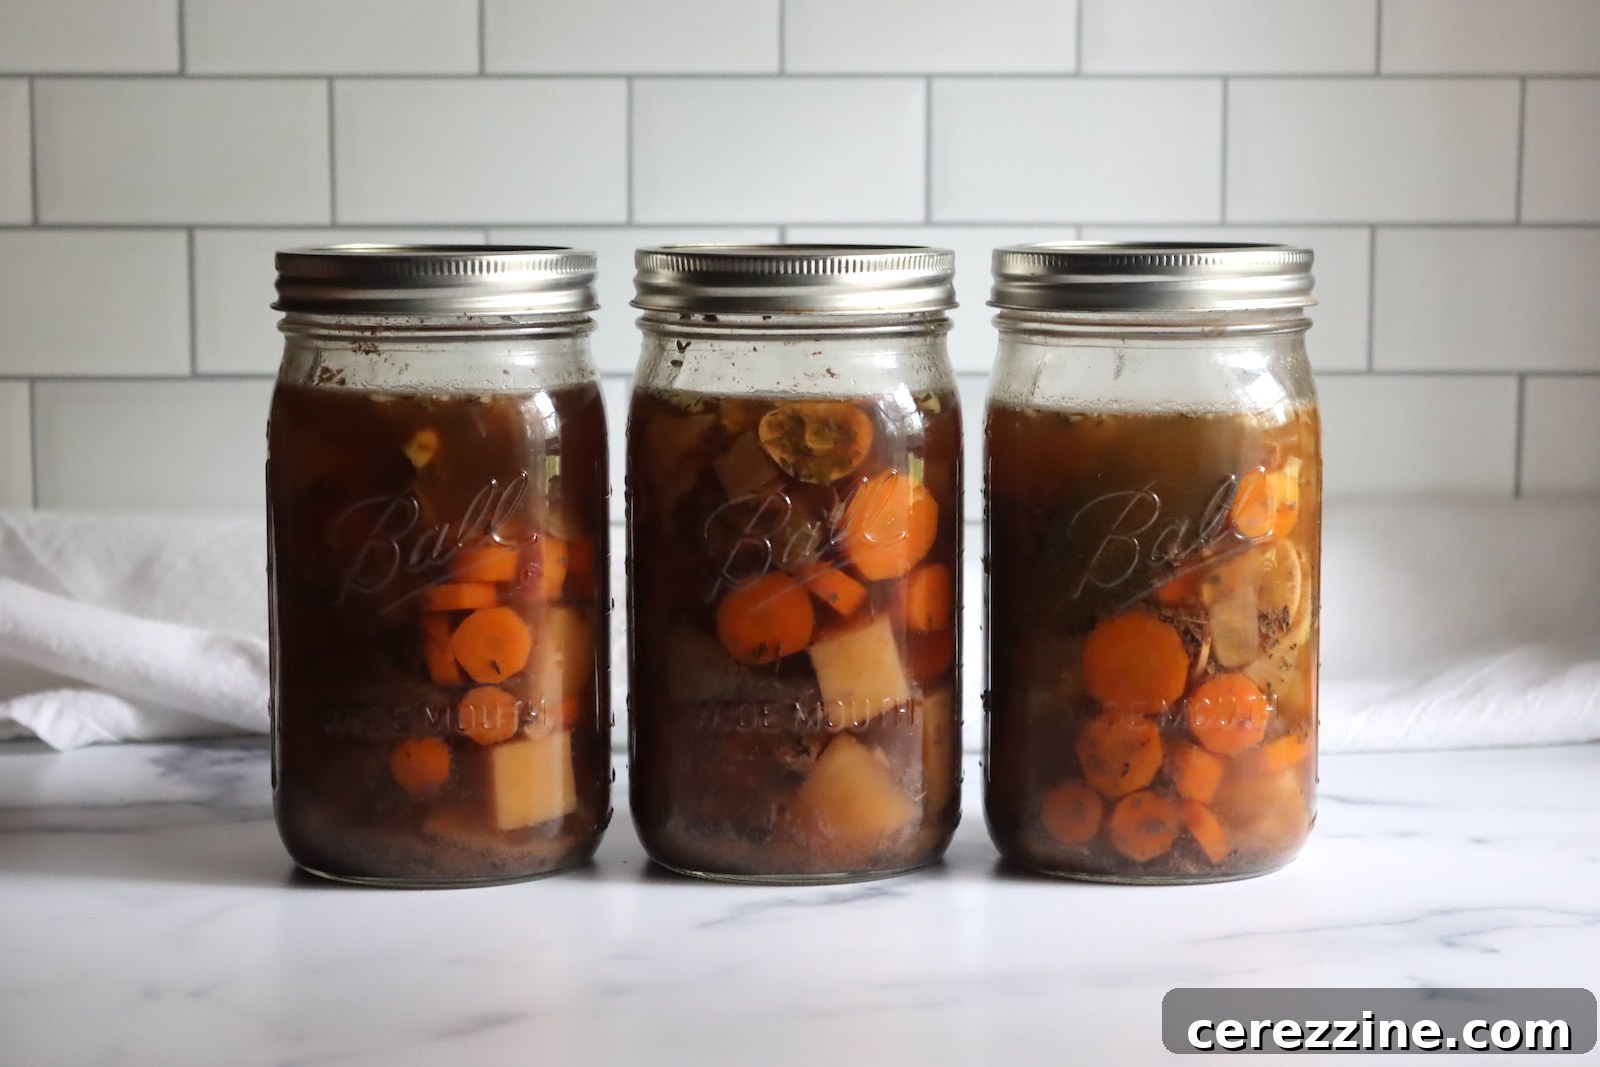
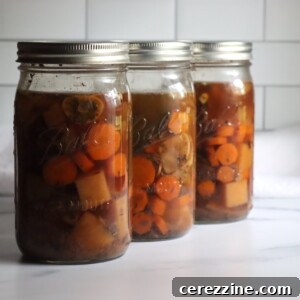
Turn a traditional, slow-cooked Sunday pot roast into an effortless weeknight meal with the magic of pressure canning. Canning pot roast in a jar ensures you have tender, flavorful beef and vegetables ready to heat and eat whenever hunger strikes, all preserved safely and deliciously! This method transforms an all-day culinary commitment into a pantry staple, making wholesome meals accessible with minimal effort.
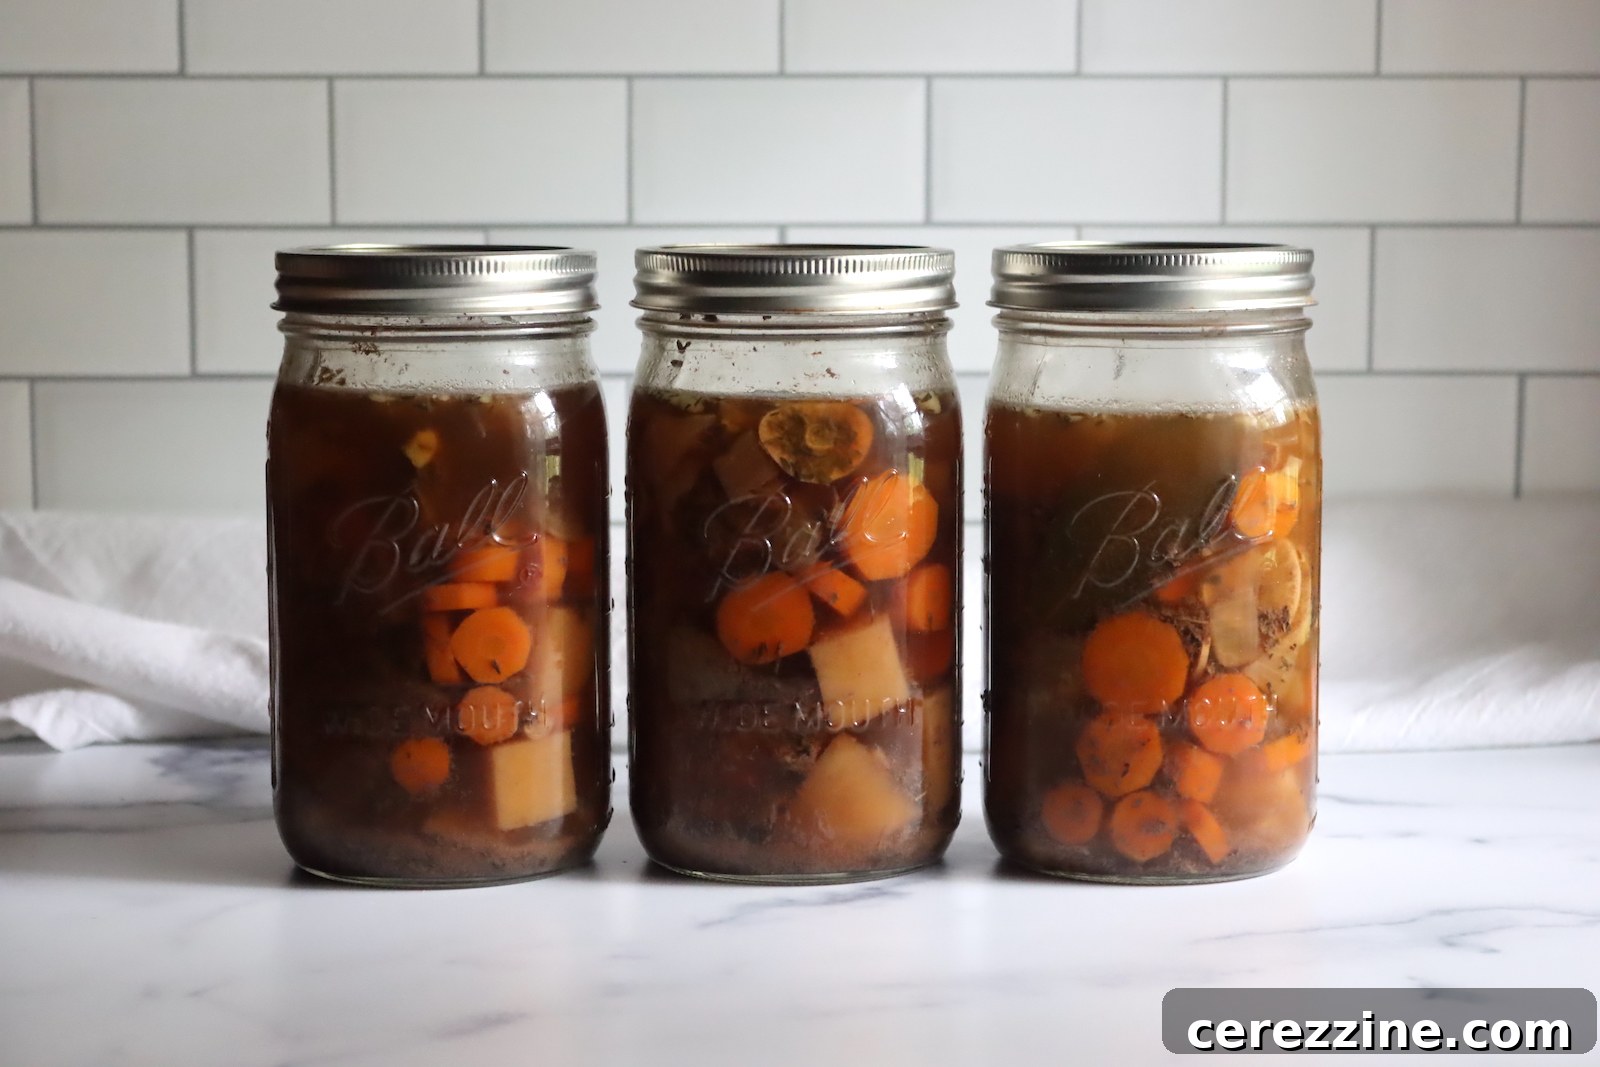
Pressure Canning Pot Roast: Your Ultimate Guide to Flavorful Meals in a Jar
Pot roast stands as a timeless symbol of comfort food, a hearty dish often reserved for leisurely weekends due to its long cooking time. Imagine, however, savoring that same rich flavor and fork-tender beef whenever you desire, without dedicating hours to preparation. This dream becomes a delicious reality through the art of canning pot roast in a jar. It’s a brilliant and efficient method for preserving large batches of your favorite comfort food, ensuring a nutritious and incredibly convenient meal is always within arm’s reach, whether for a busy weeknight, unexpected guests, or emergency preparedness.
This comprehensive guide will walk you through the essential process of pressure canning pot roast. We’ll delve into the raw pack method, explain how to select and prepare your ingredients, provide detailed step-by-step canning instructions, and highlight crucial safety considerations. By the end, you’ll be equipped to stock your pantry with jars of delicious, homemade pot roast, guaranteeing a warm, satisfying, and ready-to-eat meal on demand. Discover the secret to unlocking convenience without compromising on the deep, savory flavors of a classic pot roast.
Why Pressure Can Pot Roast? The Ultimate Homemade Convenience
The decision to pressure can pot roast extends far beyond simple food preservation; it represents a commitment to efficiency, flavor, and control in your kitchen. This method offers a multitude of compelling benefits that make it an indispensable skill for any home cook:
- Unmatched Convenience and Time Savings: Picture this: a demanding day, no energy to cook, yet a craving for something wholesome and fulfilling. Instead of resorting to fast food or takeout, you simply retrieve a jar of homemade pot roast from your pantry. A quick reheat, and a delicious, complete meal is on the table in mere minutes. This is the epitome of fast food, but with the unparalleled quality and flavor of your own cooking. Canning large quantities at once effectively “banks” future meals, freeing up countless hours during busy periods.
- Reliable Emergency Food Supply: Shelf-stable meals are the foundation of any robust emergency food storage plan. Home canned pot roast provides a high-protein, nutrient-rich option that requires no refrigeration, offering invaluable peace of mind during power outages, natural disasters, or other unforeseen circumstances. It’s a comforting and sustaining meal when fresh options are unavailable.
- Significant Cost Savings: Purchasing meat in bulk when it’s on sale and preserving it at home can lead to substantial long-term savings. You gain greater control over your food budget, sidestepping the premium prices often associated with store-bought convenience foods or pre-made meals.
- Superior Quality Control and Customization: When you can your own pot roast, you maintain complete oversight of every ingredient. You can select fresh, high-quality beef and vegetables, precisely control the amount of salt and seasonings, and entirely avoid artificial preservatives, additives, or undesirable ingredients often found in commercial products. Tailor the flavors to your family’s preferences with confidence.
- Exceptional Flavor and Texture: The pressure canning process is renowned for its ability to tenderize meat beautifully, resulting in a texture that rivals hours of slow-cooking. During processing, the flavors of the beef, vegetables, and seasonings meld and deepen, creating an incredibly savory, aromatic, and satisfying meal that tastes freshly prepared.
- Reduce Food Waste: Canning is an excellent way to use up fresh produce from your garden or bulk meat purchases before they spoil, minimizing waste and maximizing your food’s utility.
Understanding the Raw Pack Canning Method for Meat
This recipe specifically utilizes the “raw pack” method, a common and efficient approach for canning meats. In raw packing, all ingredients – the raw beef chunks, fresh vegetables, and chosen seasonings – are placed directly into clean canning jars without any prior cooking. Once packed, the jars are filled with boiling liquid, such as broth or water, and then processed in a pressure canner.
While not universally applicable to all canning recipes, raw packing is an approved and safe method for certain low-acid foods, particularly meats, when stringent guidelines are meticulously followed. This specific pot roast recipe is derived from a rigorously tested and validated recipe by Ball Canning, a highly respected authority in home food preservation. Their endorsement confirms its safety and suitability for the raw pack approach.
Advantages of the Raw Pack Method:
- Simplicity and Efficiency: Raw packing eliminates the need for precooking, which significantly reduces active preparation time and the effort involved in handling hot food during jar filling. This streamlined process makes canning large batches much more manageable.
- Optimized Jar Fill: Meats tend to shrink less during the raw pack processing, resulting in fuller jars and a more appealing presentation compared to some hot pack methods.
- Enhanced Flavor Development: The ingredients slowly cook and gently meld together over the extended period within the pressure canner. This allows the flavors to fully develop, deepen, and infuse throughout the broth, resulting in a remarkably savory and cohesive meal.
- Guaranteed Safety: When executed correctly with tested recipes and proper pressure canning techniques, raw packing meat is just as safe as hot packing. The intense, sustained heat achieved during pressure canning effectively eliminates harmful microorganisms, including the spores of Clostridium botulinum, which are a concern in low-acid, oxygen-free environments like canned goods.
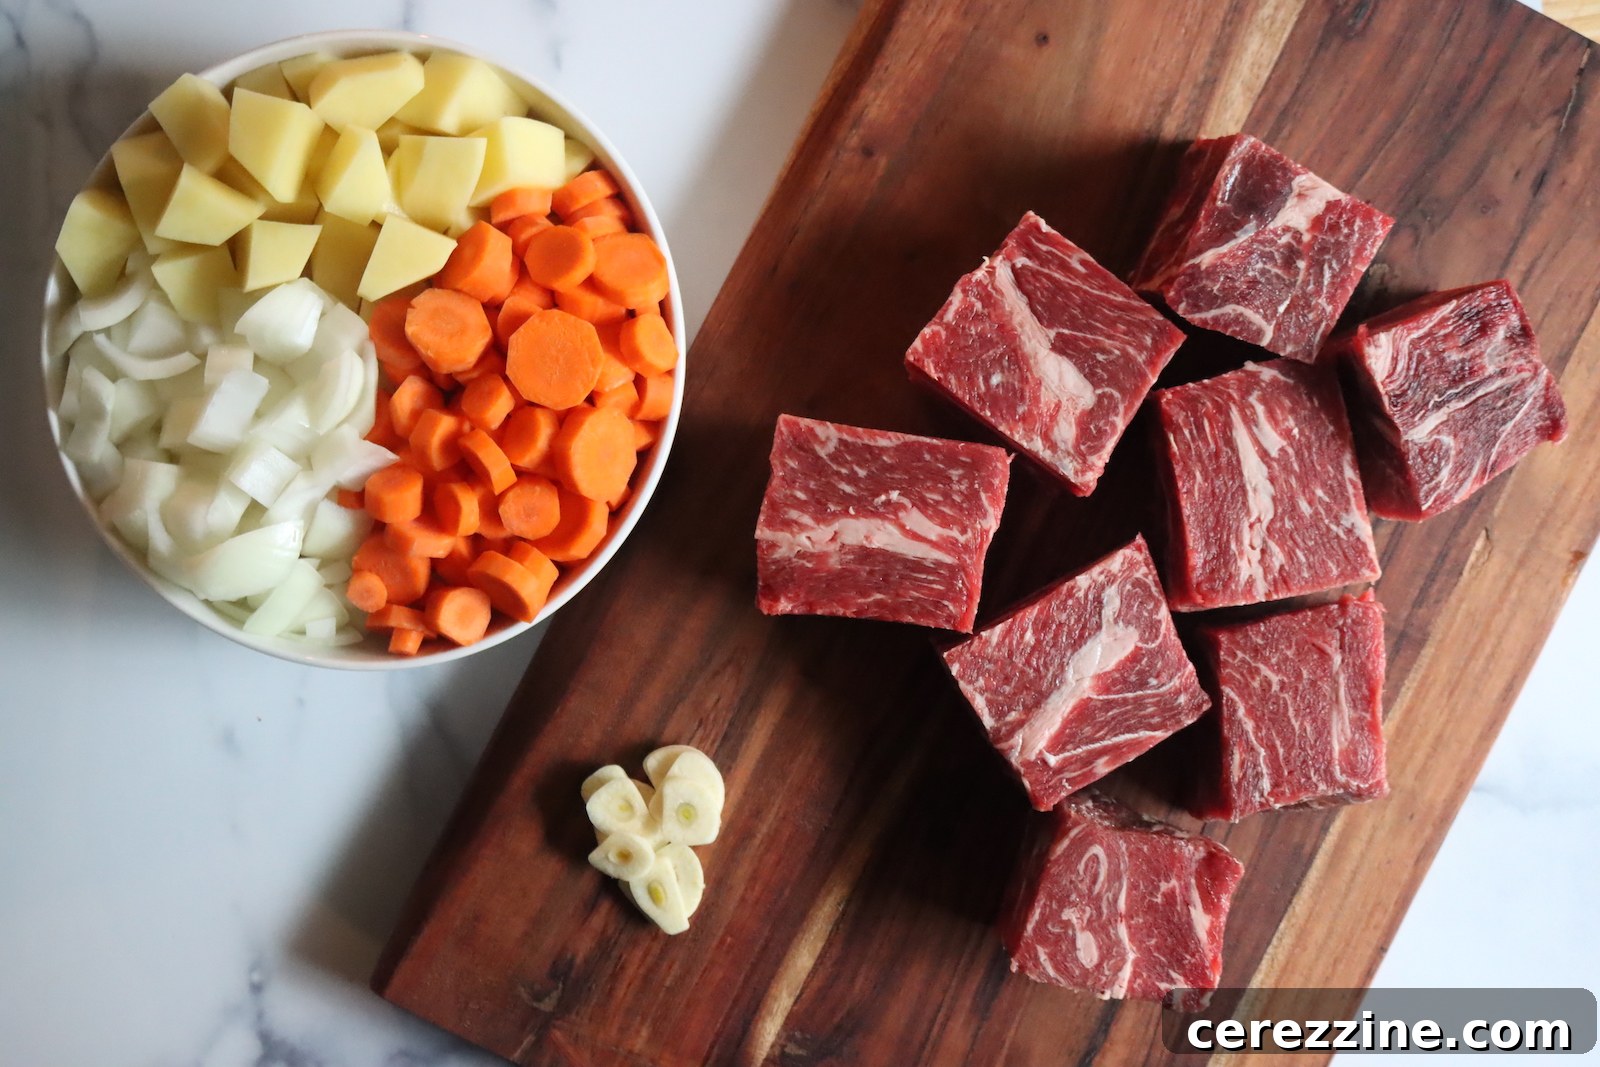
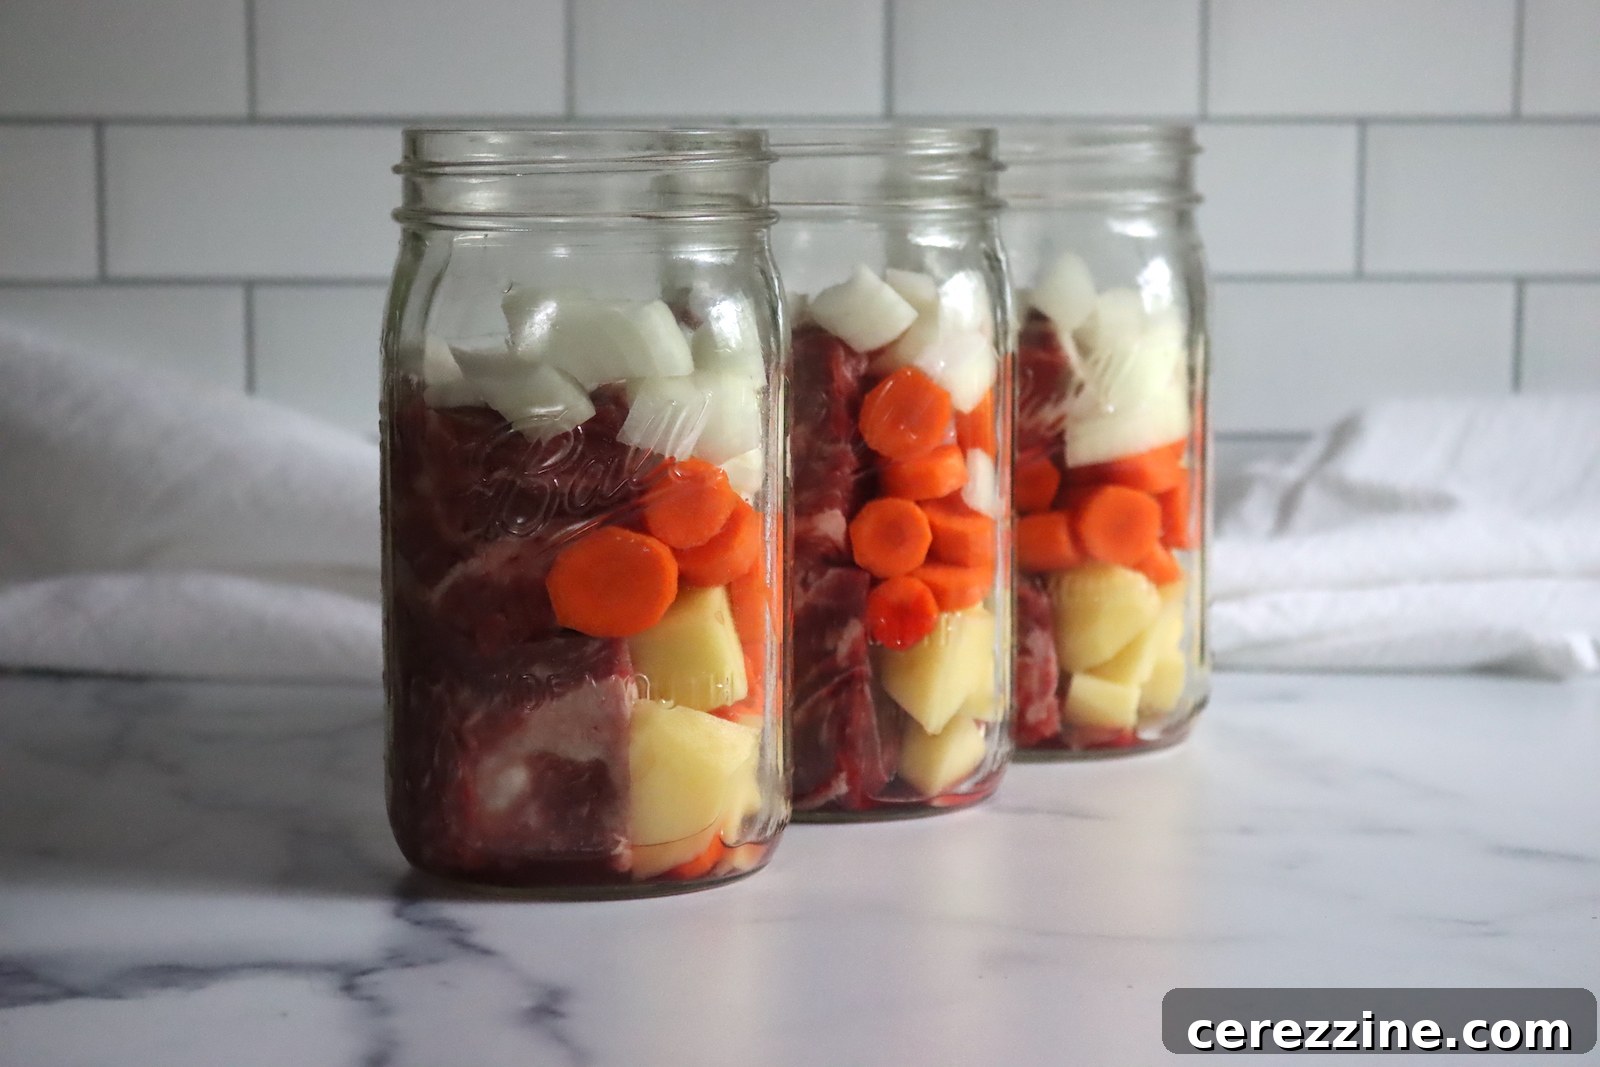
For safe and effective raw packing, it is imperative to cut the meat into uniform, manageable pieces – typically about 2 to 2.5 inches (5-6 cm) square. This size ensures proper heat penetration throughout the jar and allows for easy fitting through the jar opening. Remember to distribute all solid ingredients evenly among your jars to guarantee consistent cooking and flavor across your entire batch. Avoid overpacking, as this can impede heat circulation and compromise canning safety.
Ingredients for Perfectly Canned Pot Roast
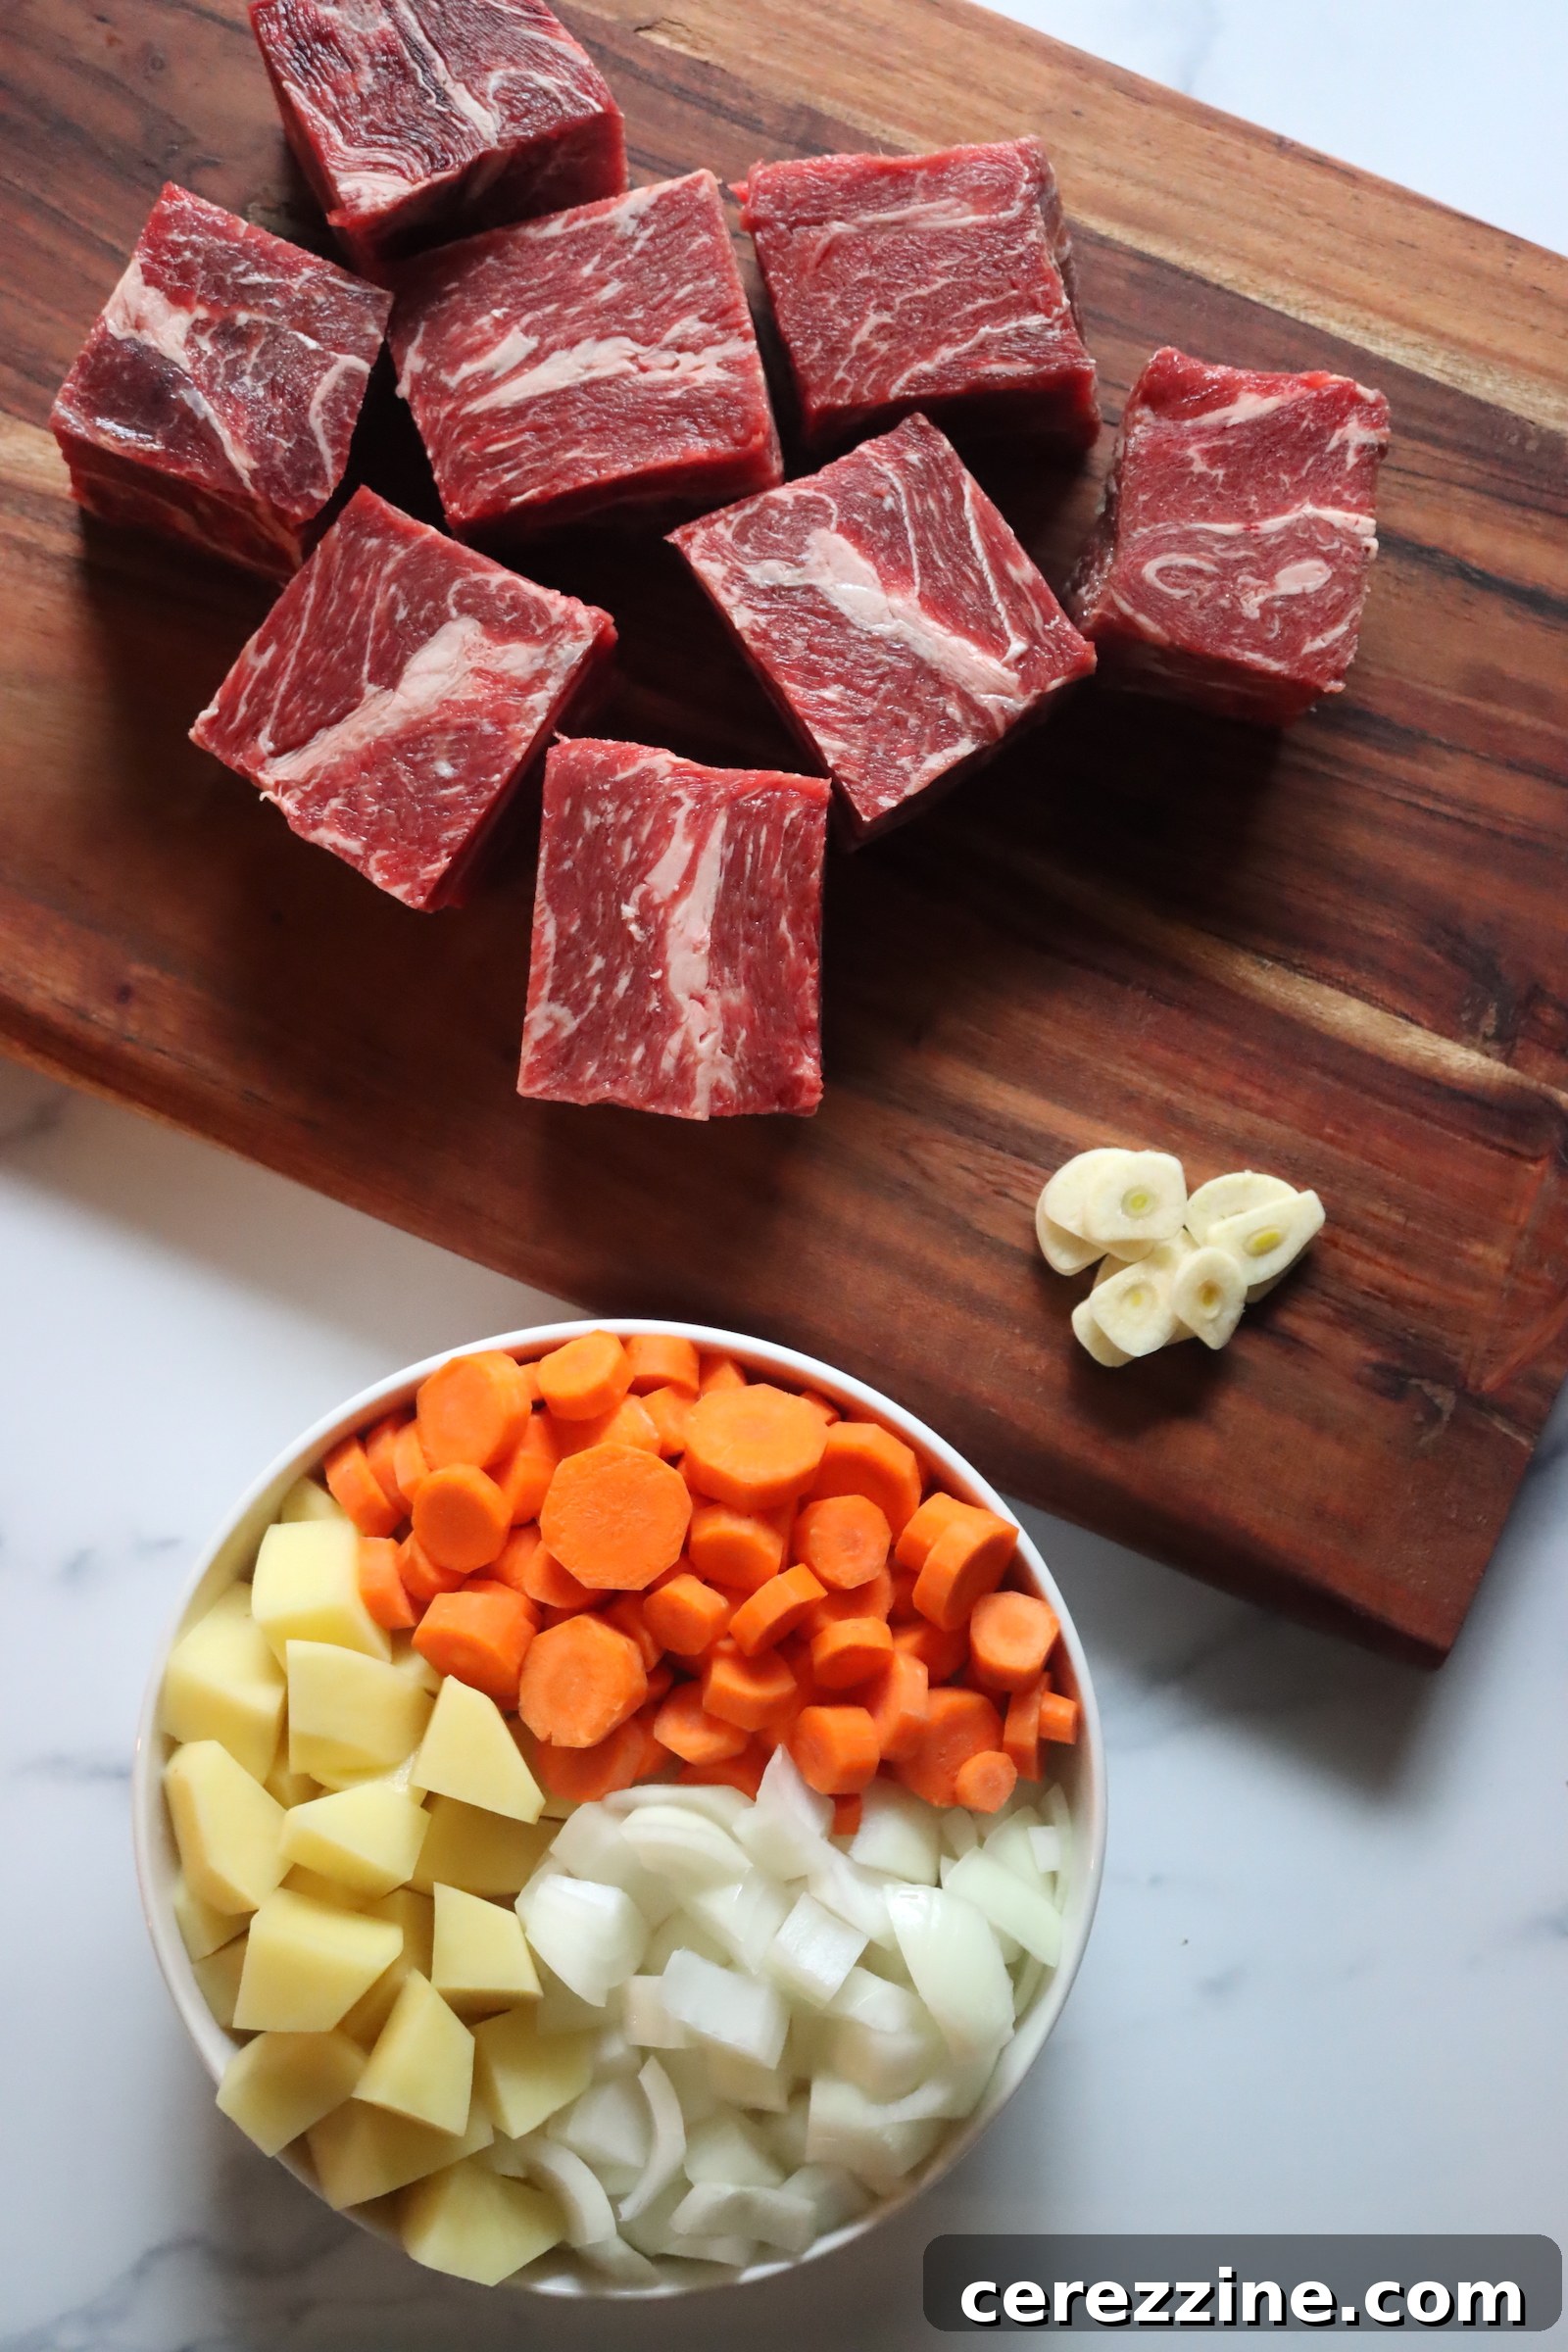
This robust and flavorful recipe is thoughtfully adapted from a tested pot roast canning recipe found in the highly regarded All New Ball Book of Canning and Preserving, specifically from their “Simple One Jar Meals” section. It’s designed to be straightforward, yielding tender and delicious results every time.
To prepare a standard canner batch, which typically makes four pint jars or two quart jars, gather the following high-quality ingredients:
- 2 lb (1 kg) boneless beef chuck roast: Opt for a well-marbled chuck roast; its fat content contributes significantly to flavor and tenderness during the long processing. Trim any excessive surface fat to prevent off-flavors and potential spoilage in storage. Cut the meat into uniform 2-inch (5 cm) chunks, which are ideal for both fitting into jars and ensuring proper heat penetration.
- 2 tsp (10 ml) canning or pickling salt: It’s crucial to use canning or pickling salt, as regular table salt often contains anti-caking agents and iodine that can cause cloudiness or discoloration in your canned goods. This amount is for flavor and does not play a role in preservation safety with pressure canning.
- 1 tsp (5 ml) ground black pepper: Freshly ground black pepper will provide the most vibrant and pungent flavor, enhancing the savory notes of the beef.
- 2 sliced garlic cloves: Fresh garlic adds a wonderful aromatic depth and foundational flavor to the pot roast.
- 2 bay leaves: These contribute a subtle, herbaceous, and slightly floral note that beautifully complements the rich beef and root vegetables.
- 2 tsp (10 ml) dried thyme: Thyme is a classic culinary pairing with beef and root vegetables. Its earthy, slightly minty flavor enhances the overall savory profile of the dish.
- 1 cup (250 ml) dry red wine (optional): A dry red wine, such as a Merlot or Cabernet Sauvignon, adds complexity, depth, and a rich, slightly tangy undertone. If you prefer to avoid alcohol, simply substitute this quantity with an equal amount of high-quality beef broth or water.
- 1 cup (250 ml) sliced carrots: Carrots contribute a natural sweetness, vibrant color, and essential nutrients. Slice them into coin shapes or small chunks.
- 1 cup (250 ml) diced onions: Onions are a fundamental aromatic base for pot roast, providing a savory, slightly pungent flavor that mellows beautifully during canning.
- 1 cup (250 ml) peeled, diced potatoes: Starchy potatoes absorb the rich broth and add significant heartiness to the meal. Consider using varieties like Yukon Gold or red potatoes that tend to hold their shape well after processing.
- ½ cup (125 ml) diced celery (optional): Celery offers an earthy flavor and subtle crunch. If you or your family are not partial to celery, you can confidently omit it without impacting the canning safety of this recipe.
- Boiling water or broth to fill: While plain boiling water works, using a high-quality beef broth will significantly enhance the final flavor of your canned pot roast. Ensure you have extra liquid on hand, as the exact amount needed will vary depending on how tightly your jars are packed.
Ingredient Distribution for Quarts and Pints
When preparing your jars, it’s essential to divide the ingredients evenly. If you’re canning in quart jars (which this recipe is primarily designed for), each jar will receive approximately half of the solid ingredients listed above. This translates to roughly:
- 1 pound of cubed beef chuck roast
- ½ cup of sliced carrots
- ½ cup of diced onions
- ¼ cup of diced celery (if using)
- ½ cup of peeled, diced potatoes
If you opt to include the dry red wine, allocate ½ cup per quart jar. The remaining space in each jar will then be filled with boiling water or broth. You’ll typically need about 1.5 to 2 cups of liquid per quart jar to reach the crucial 1-inch headspace line, but always be prepared with a little extra, as the precise amount can fluctuate.
For pint jars, you would generally halve these quantities again. Remember, while you can safely omit ingredients you don’t like (like celery), it is critical that you do not add any unlisted ingredients in their place or introduce entirely new ingredients without consulting a thoroughly tested canning recipe from a reliable source. Adding non-approved ingredients can alter the acidity, density, or heat transfer properties of the product, potentially compromising the safety of your home-canned food. Always have extra broth or water readily available to compensate for any omissions to ensure proper liquid levels in your jars.
Step-by-Step Guide to Pressure Canning Pot Roast in a Jar
Canning pot roast might seem like a complex endeavor, but with clear, concise instructions and strict adherence to established safety guidelines, it is a highly rewarding and straightforward process. Follow these detailed steps to achieve tender, safely preserved pot roast that will be a joy to have in your pantry:
1. Prepare Your Equipment and Workspace
- Inspect Jars: Carefully examine all canning jars for any cracks, chips, or irregularities, especially around the rims. Only use jars in perfect condition. Wash them thoroughly in hot, soapy water, rinse well, or run them through a dishwasher cycle. Keep them warm (e.g., in a clean sink filled with hot water or a very low-heat oven set to 180°F/82°C) until you are ready to fill them. This prevents thermal shock when adding hot liquid.
- Prepare Lids and Bands: Wash new canning lids and screw bands in warm, soapy water. While older canning advice recommended simmering lids, most modern canning lids do not require pre-heating. Refer to your specific lid manufacturer’s instructions.
- Set Up Pressure Canner: Place your pressure canner on a sturdy stovetop burner. Add 2 to 3 inches (approximately 5-8 cm) of water to the bottom of the canner, or the amount specified by your canner manufacturer. For this raw pack recipe, ensure the water in the canner is just barely warm, around 140°F (60°C). It should not be simmering or boiling before you load the jars, as this can cause the raw-packed ingredients to experience thermal shock too quickly.
2. Combine and Prepare Ingredients
- In a large mixing bowl, combine the uniformly cubed beef chuck roast, measured salt, ground black pepper, sliced garlic cloves, bay leaves, dried thyme, sliced carrots, diced onions, diced potatoes, and diced celery (if you are including it).
- Mix all ingredients thoroughly and gently to ensure an even distribution of seasonings and vegetables throughout the meat.
3. Pack the Jars
- Using a canning funnel, carefully and evenly divide the mixed solid ingredients among your warm pint or quart jars. Pack them relatively firmly but avoid excessive crushing, ensuring there is adequate space remaining for the liquid and proper headspace.
- If you’ve chosen to include dry red wine, add ½ cup (125 ml) to each quart jar (or ¼ cup for pint jars) at this stage.
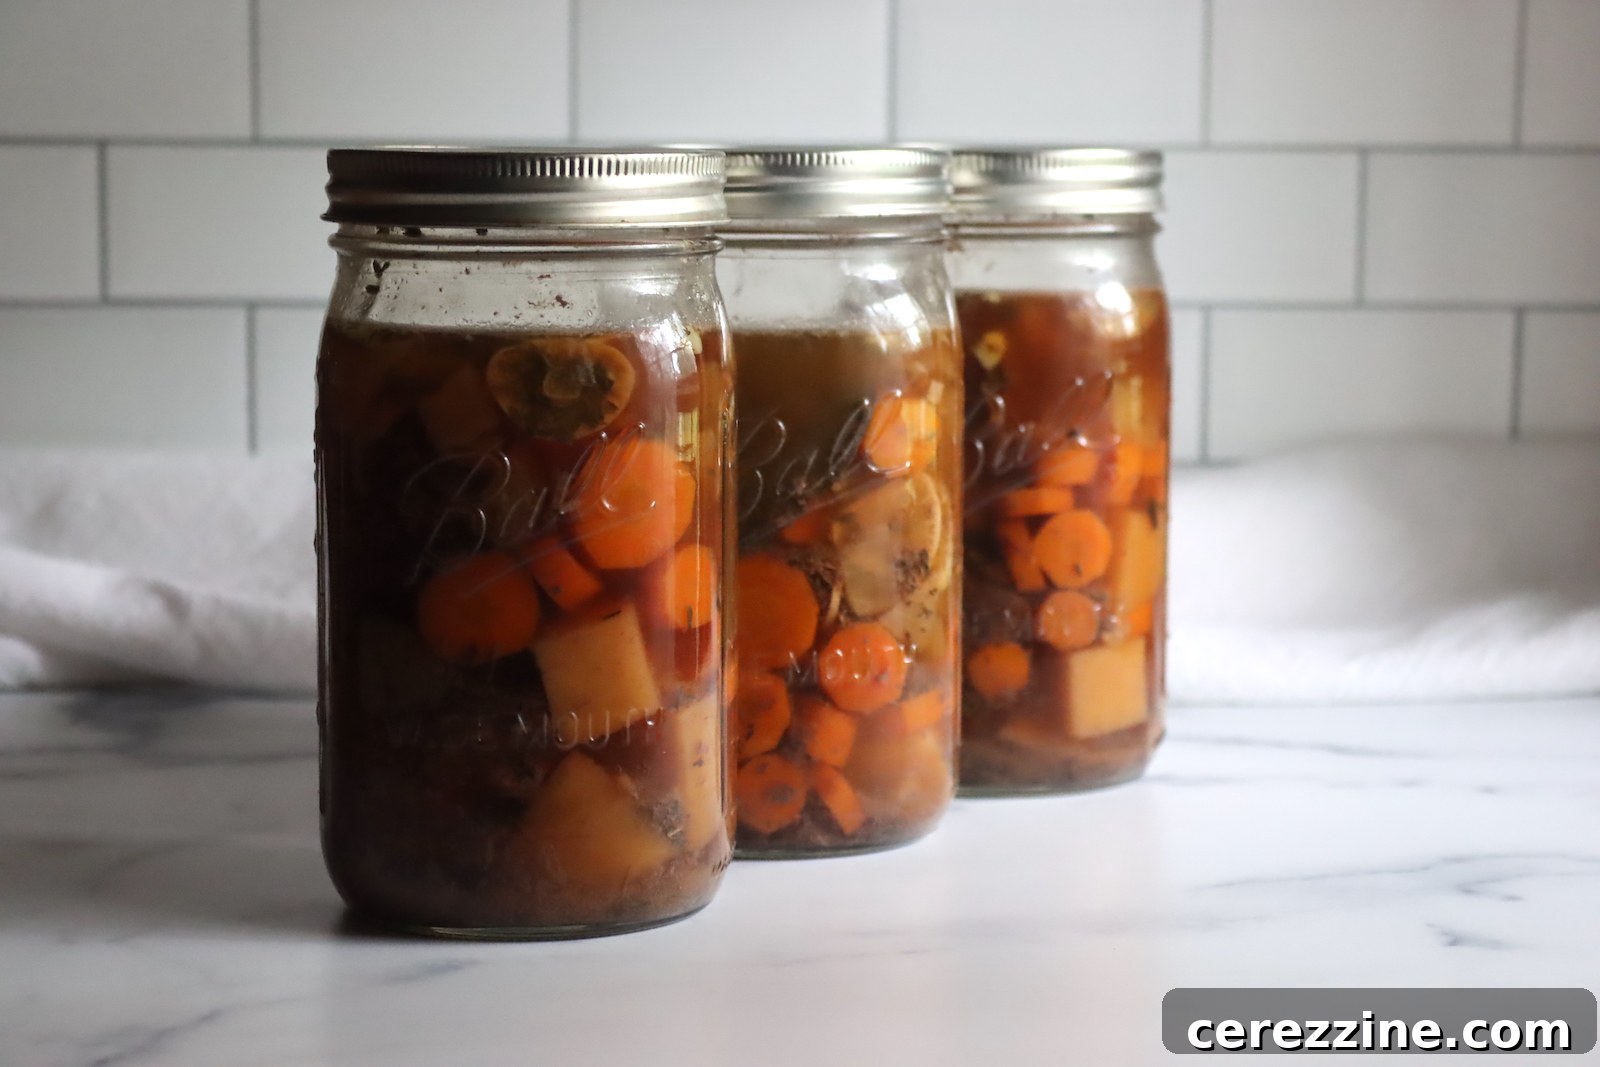
- Carefully pour fresh boiling water or hot broth over the packed meat and vegetables in each jar. Fill the jars, leaving a precise 1-inch (2.5 cm) headspace from the top rim of the jar. This specific headspace is absolutely critical for allowing proper vacuum seal formation and preventing liquid from siphoning out during the high-pressure processing. For quart jars, you’ll generally need between 1.5 to 2 cups of liquid; adjust the quantity as needed to achieve the precise headspace.
4. Prepare Jars for Processing
- Remove Air Bubbles: Insert a non-metallic spatula, chopstick, or plastic bubble wand along the inside edge of each jar, gently moving it up and down to release any trapped air bubbles that may be clinging to the food.
- Re-check Headspace: After removing air bubbles, the liquid level may drop. Re-check the headspace and add more boiling liquid if necessary to bring it back to the required 1-inch level.
- Clean Rims: Using a clean, damp paper towel dipped in white vinegar (to cut through any grease), thoroughly wipe the jar rims. Even tiny food particles or grease spots can prevent a proper seal.
- Apply Lids and Bands: Center a new, prepared canning lid onto each jar. Screw on the bands fingertip-tight. This means tightening until you feel resistance, then giving it just a slight extra turn. Do not overtighten, as a small amount of air must be allowed to escape during the processing for a proper vacuum seal to form.
5. Execute the Pressure Canning Process
- Load Canner: Carefully place the filled and lidded jars onto the rack inside your prepared pressure canner, ensuring that the jars do not touch each other or the sides of the canner.
- Secure Canner: Place the pressure canner lid securely in its locked position, following your specific canner’s instructions. Turn the heat to medium-high.
- Vent Steam: Allow steam to vent steadily and continuously from the vent pipe (or petcock) for a full 10 minutes. This crucial step purges all air from the canner, ensuring that the internal temperature reaches the required level for safe processing. Do not skip or shorten this step.
- Achieve Pressure: After venting for 10 minutes, place the counterweight or weighted gauge onto the vent pipe (or close the petcock for dial-gauge canners). Continue to increase the heat until the canner reaches the specified pressure:
- Weighted-gauge canner: Maintain a steady 10 lbs pressure.
- Dial-gauge canner: Maintain a steady 11 lbs pressure.
Crucial Reminder: Refer to the “Altitude Adjustments for Pressure Canning Pot Roast” section below to determine if you need to adjust your pressure settings based on your elevation.
- Process: Once the correct pressure is achieved and has stabilized, begin timing. Process pint jars for a total of 75 minutes and quart jars for 90 minutes. It is absolutely essential to maintain a consistent pressure throughout the entire processing time. Monitor your gauge closely and adjust heat as necessary. If the pressure drops below the required level at any point, you must bring it back up to pressure and restart the processing timer from the very beginning. This ensures sufficient heat treatment for safety.
6. Cooling, Sealing, and Storage
- Natural Cool Down: When the full processing time is complete, turn off the heat source. Allow the pressure canner to depressurize naturally until the pressure gauge reads zero (or for weighted gauge canners, until no more steam is escaping from the vent, typically about 5 minutes after removing the weight). Do not attempt to speed up this depressurization process by opening the vent or cooling the canner with water, as rapid pressure changes can cause liquid siphoning from jars and compromise proper sealing.
- Carefully Open Canner: Once fully depressurized, carefully remove the canner lid, tilting it away from your face to direct any residual steam safely away.
- Initial Cooling Phase: Allow the hot jars to rest undisturbed in the open canner for 10 minutes. This brief period helps equalize temperatures, reduces siphoning, and encourages a more robust seal.
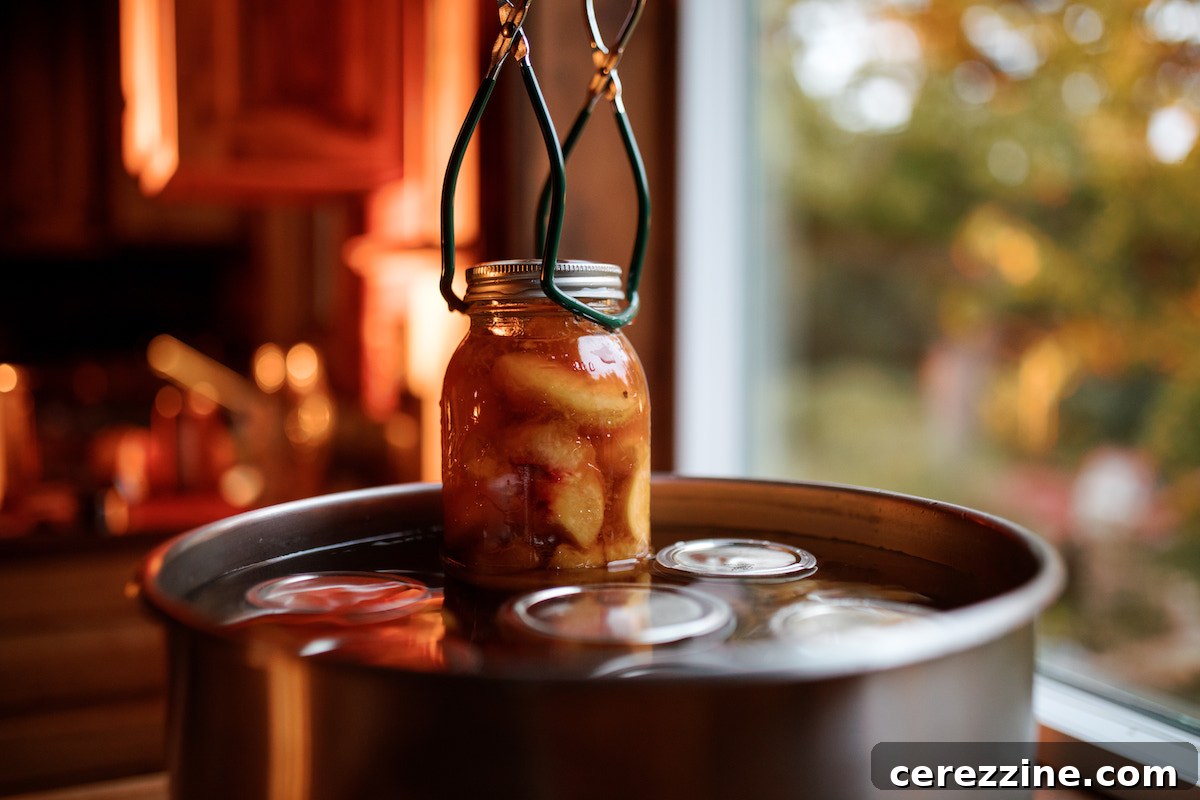
- Final Cooling and Sealing: Using a jar lifter, carefully transfer the hot jars to a clean, thick towel or a wire cooling rack on your countertop, ensuring they are spaced an inch or two apart and not touching each other. Allow them to cool undisturbed at room temperature for a full 12 to 24 hours. During this time, you should hear satisfying “ping” sounds as the lids seal, indicating a strong vacuum.
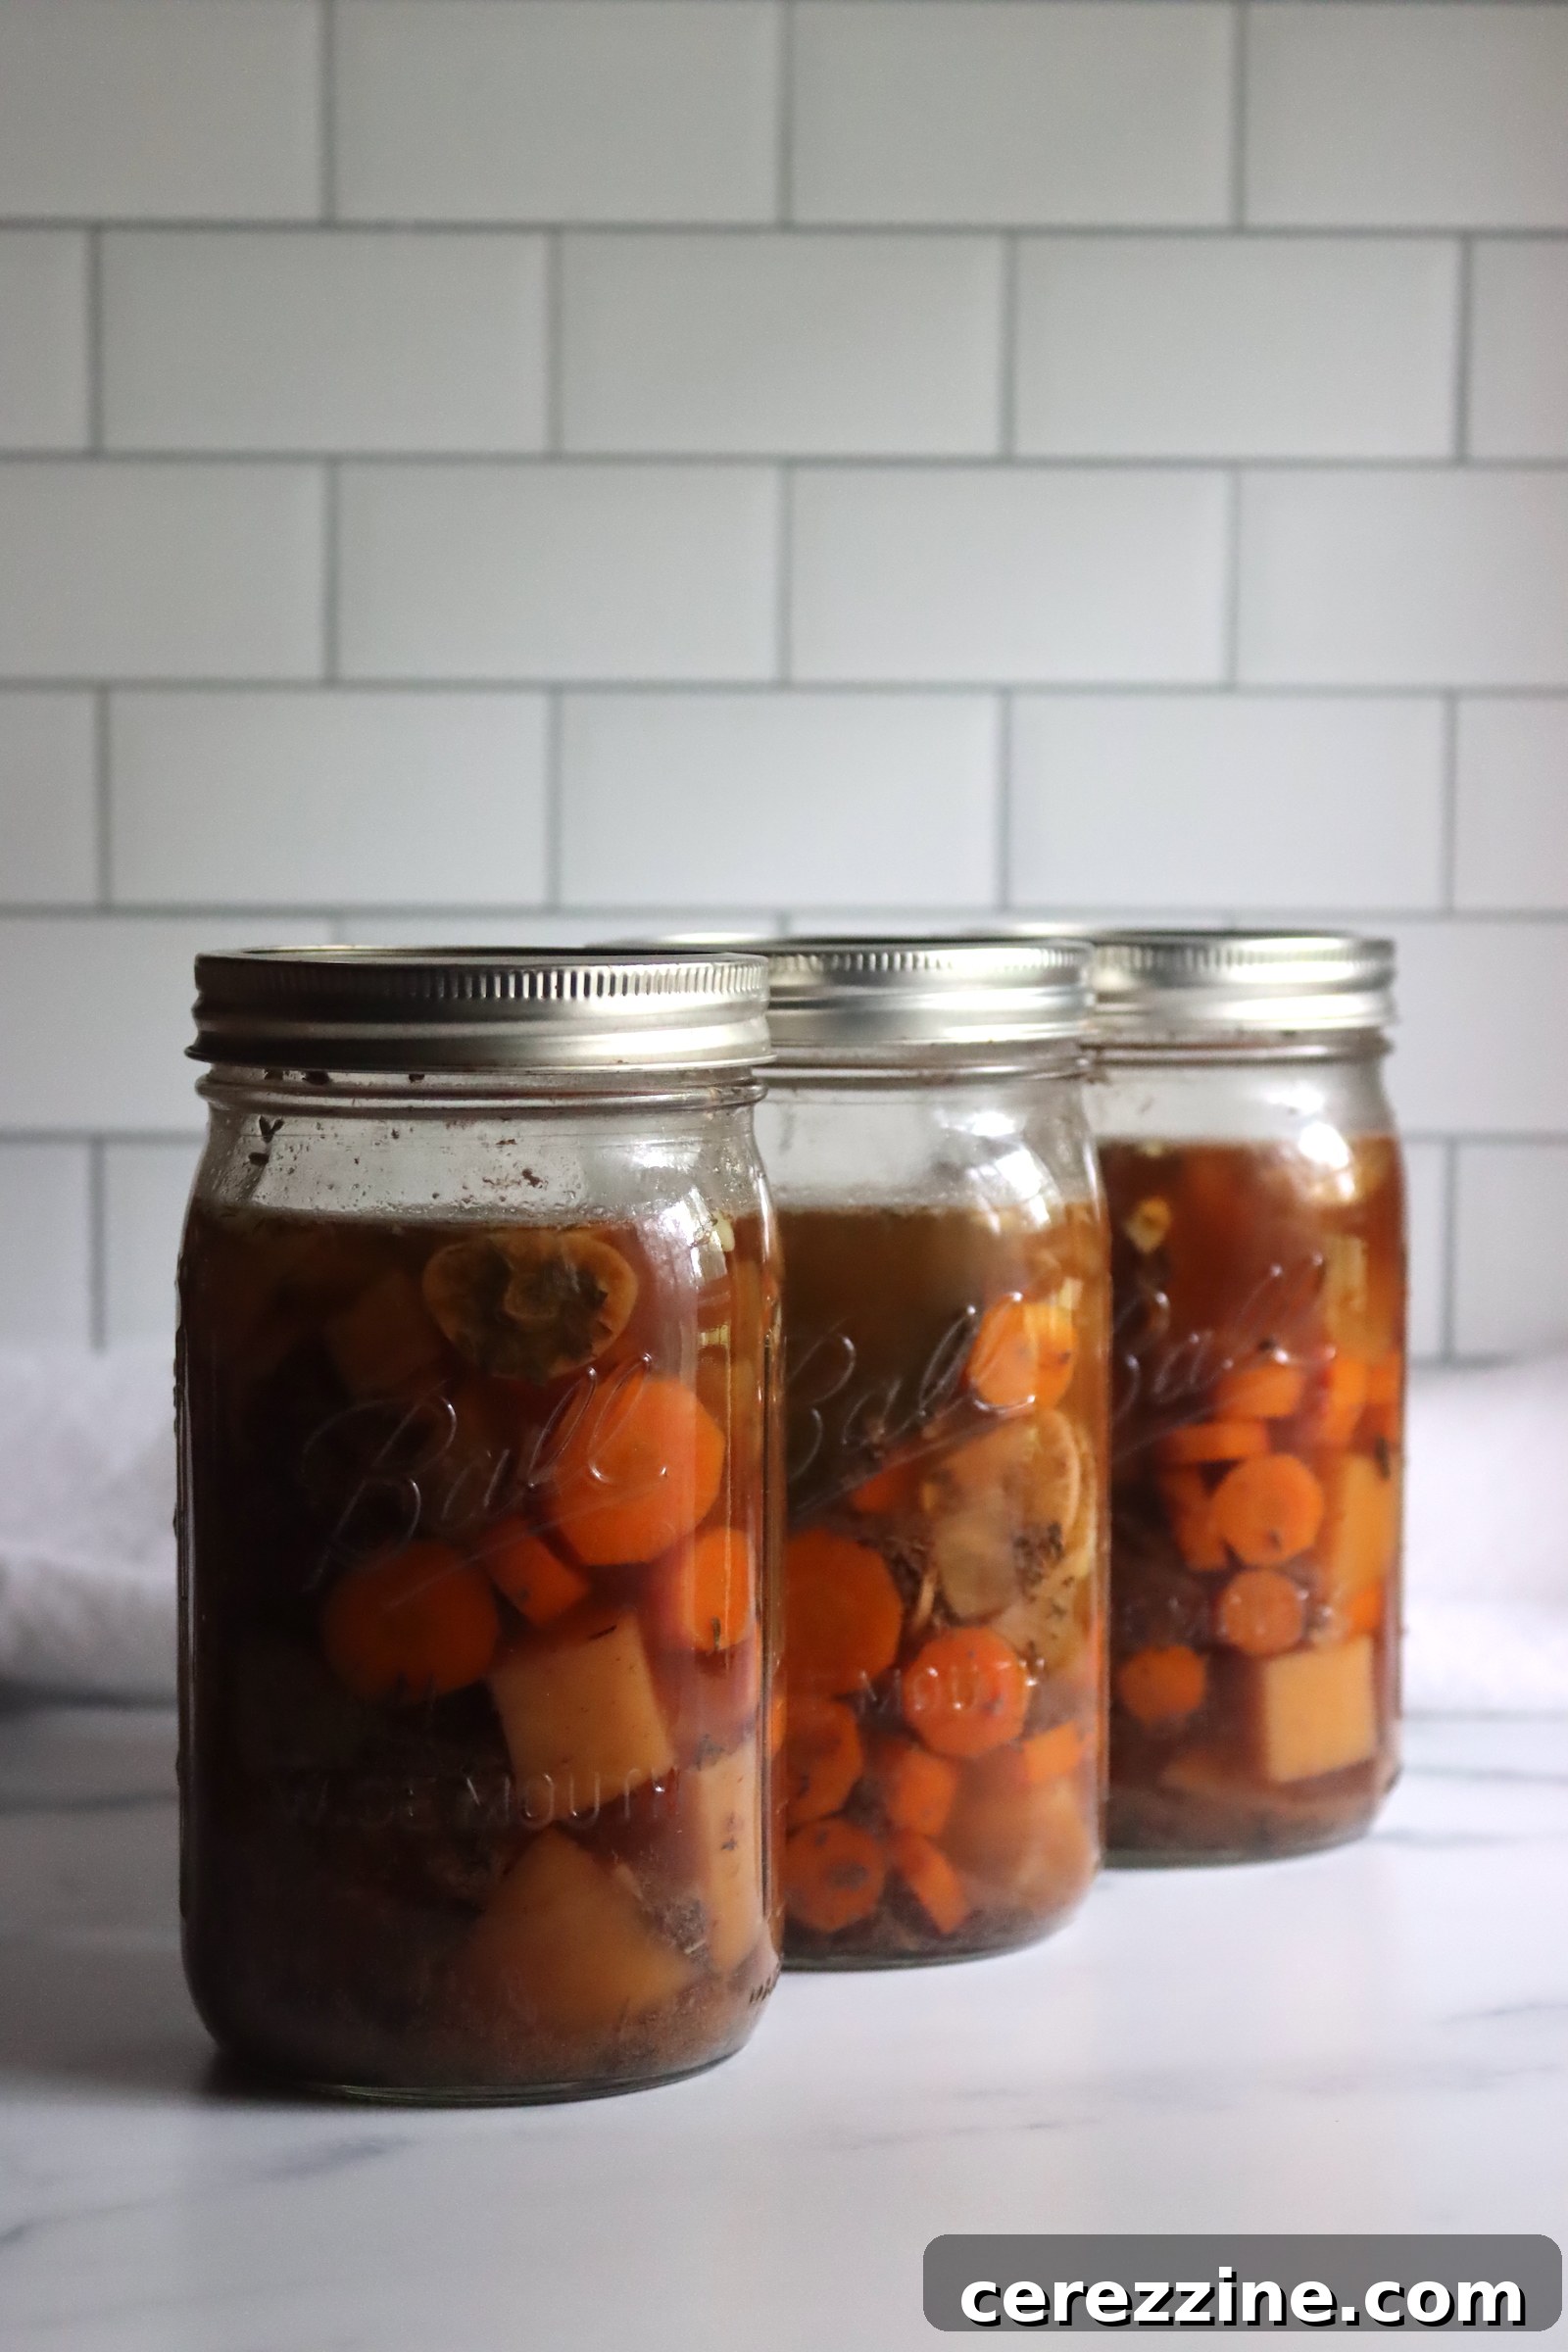
- Check Seals and Store: After the 24-hour cooling period, check all jar seals. Press the center of each lid; if it doesn’t flex or spring back, the jar is properly sealed. Remove the screw bands (these can trap moisture and cause rust), wipe down the jars, label them clearly with the contents and date of canning, and store them in a cool, dark, dry place. Properly canned pot roast can be safely stored for up to one year. Any jars that did not seal must be immediately refrigerated and consumed within a few days.
Altitude Adjustments for Pressure Canning Pot Roast
When engaging in pressure canning, it is paramount to understand that while the processing times remain constant regardless of your elevation, the required pressure must be meticulously adjusted to ensure the internal temperature within the canner reaches the levels necessary for food safety. This is because water boils at progressively lower temperatures as altitude increases. Therefore, increasing the pressure compensates for this effect, ensuring harmful bacteria are destroyed. Always ascertain your exact elevation and adjust your canner’s pressure settings accordingly:
For Dial Gauge Pressure Canners:
- 0 to 2,000 feet (0-610 meters) in elevation: 11 lbs pressure
- 2,001 to 4,000 feet (611-1220 meters) in elevation: 12 lbs pressure
- 4,001 to 6,000 feet (1221-1830 meters) in elevation: 13 lbs pressure
- 6,001 to 8,000 feet (1831-2440 meters) in elevation: 14 lbs pressure
For Weighted Gauge Pressure Canners:
- 0 to 1,000 feet (0-305 meters) in elevation: 10 lbs pressure
- Above 1,000 feet (305 meters): 15 lbs pressure
Can You Can Leftover Pot Roast? Safe Preservation Tips
A common question among home cooks is whether it’s safe and feasible to preserve leftover pot roast after preparing a large batch in a slow cooker or oven. The reassuring answer is yes, in many instances, you can safely can pre-cooked pot roast! However, there are crucial considerations and stringent guidelines to follow, as canning cooked food presents different safety protocols than raw packing.
- Ingredient Compatibility is Key: The most critical factor for canning leftover pot roast is that every single ingredient in your original recipe must be approved for home canning. This unequivocally means you cannot can a pot roast if your recipe included any thickeners such as flour, cornstarch, cream, milk, or other dairy products. Even small amounts of flour used to brown meat or thicken gravy can interfere with proper heat penetration during pressure canning, creating unsafe conditions. Meticulously review your original recipe’s ingredient list before proceeding.
- Ensure Ample Broth and Proper Packing: When canning cooked pot roast, it is essential to ensure the jars are packed with a generous amount of liquid. Fill the jars no more than ½ to ⅔ full of the solid ingredients, ensuring the meat and vegetables are loosely packed, not compressed tightly. This generous space for liquid is vital for effective heat transfer. Then, fill the remaining space with fresh boiling broth, hot water, or the strained liquid from the pot roast itself, carefully maintaining the required 1-inch headspace. The liquid acts as a medium for heat, ensuring all contents reach sterilizing temperatures.
- Follow Standard Pressure Canning Protocols: After packing your cooked pot roast into jars with adequate liquid and headspace, you must follow the same pressure canning instructions as you would for raw-packed pot roast. This includes proper jar preparation, venting the canner, achieving the correct pressure based on your altitude, and processing for the full, appropriate duration for pints or quarts. The intense, sustained heat of the pressure canner will effectively re-cook and sterilize the already cooked ingredients, ensuring their safety for shelf-stable storage.
By diligently adhering to these critical guidelines, you can safely and effectively extend the shelf life of your delicious homemade pot roast, turning leftovers into a convenient, ready-to-eat meal for future enjoyment.
Serving Your Delicious Home-Canned Pot Roast
Once your pot roast is safely canned and stored, the journey from pantry to plate is incredibly simple, opening up a world of culinary possibilities. Reheating and serving this ultimate convenience meal requires minimal effort, allowing you to enjoy a wholesome, home-cooked dish in minutes:
- Basic Reheating: To serve, simply transfer the entire contents of a jar – including the tender meat, vegetables, and savory broth – into a medium saucepan. Gently heat over medium heat, stirring occasionally, until the pot roast is thoroughly warmed through and simmering.
- Creating a Rich Gravy: For a thicker, more traditional gravy-like consistency, you can easily thicken the broth after reheating. For the contents of a quart jar, whisk in 2 tablespoons (30 ml) of all-purpose flour (or a cornstarch slurry for a gluten-free option) into the simmering mixture. For a pint jar, use 1 tablespoon (15 ml) of flour. Continue to stir constantly for about 10 minutes over medium heat, allowing the sauce to thicken evenly and prevent any lumps.
- Classic Accompaniments: This tender pot roast pairs wonderfully with a variety of traditional and comforting sides. Serve it generously over a bed of creamy mashed potatoes, fluffy white rice, wide egg noodles, or even a hearty polenta. A simple green salad or a slice of crusty bread would beautifully complete the meal, soaking up all the delicious gravy.
- Meal Prep Powerhouse: Home-canned pot roast is a meal prepper’s dream come true. Prepare a large batch of jars and you’ll have instant, ready-made components for quick lunches or dinners throughout the week, significantly cutting down on daily cooking efforts.
- Versatile Culinary Applications: Don’t limit yourself to just a basic plate of pot roast. Get creative and explore these diverse meal ideas:
- Hearty Sandwiches: Shred the tender beef and pile it onto toasted buns with a generous spoonful of the thickened gravy for a satisfying and flavorful beef sandwich.
- Easy Pot Pie Filling: Combine the contents of a jar with a bag of frozen mixed vegetables, pour into a baking dish, and top with a store-bought pastry crust for an incredibly quick and comforting pot pie.
- Tacos or Burritos: The shredded beef makes an excellent, flavorful filling for tacos, burritos, or even quesadillas. Just add your favorite toppings!
- Soup or Stew Base: Use the entire jar’s contents as a robust, flavorful base for a larger soup or stew, adding extra fresh vegetables, beans, or pasta as desired.
- Shepherd’s Pie Reinvented: Top the pot roast mixture with a layer of creamy mashed potatoes and bake until golden brown for a comforting and easy Shepherd’s Pie.
With home-canned pot roast, a wholesome, satisfying, and deeply flavorful meal is always just minutes away, offering the ultimate in convenience without ever compromising on quality or taste.
4
Servings (Makes 4 pints or 2 quarts)
Canning Pot Roast in a Jar
Ashley Adamant
15 mins
15 mins
1 hr 30 mins
2 hrs
Equipment
-
Pressure Canner
-
Canning Funnel
-
Wide Mouth Quart Mason Jars
-
Wide Mouth Canning Lids
-
Jar Lifter
Ingredients
-
2
lb
beef chuck roast,
boneless, fat trimmed and meat cut into 2-inch (5 cm) chunks -
2
tsp
salt (canning or pickling) -
1
tsp
Ground black pepper -
2
cloves
garlic,
sliced -
2
bay leaves -
2
tsp
dried thyme -
1
cup
dry red wine
(optional, substitute with broth or water) -
1
cup
carrots,
sliced -
1
cup
onions,
diced -
1
cup
potatoes,
peeled, diced -
½
cup
celery,
diced (optional) -
Boiling Water or Broth to Fill,
approximately 1 quart total for the batch
Instructions
-
Prepare your pressure canner and warm jars as outlined in the “Prepare Your Equipment” section above.
-
In a large bowl, combine the cubed beef chuck roast, salt, black pepper, sliced garlic, bay leaves, dried thyme, carrots, onions, potatoes, and celery (if using). Mix thoroughly.
-
Evenly pack the mixed solid ingredients into the warm jars. If using, add dry red wine to each jar (½ cup per quart, ¼ cup per pint).
-
Pour boiling water or hot broth over the packed ingredients, ensuring a 1-inch headspace from the rim of each jar.
-
Remove any trapped air bubbles using a non-metallic tool. Re-check the headspace and add more liquid if necessary. Wipe jar rims clean with a damp cloth. Center new, prepared lids on the jars and apply screw bands fingertip-tight.
-
Place the filled and lidded jars onto the rack in the pressure canner. Secure the canner lid.
-
Turn the heat to medium-high and allow steam to vent steadily from the canner’s vent pipe for a full 10 minutes to purge all air.
-
After venting, place the counterweight or weighted gauge on the vent pipe (or close petcock for dial-gauge). Bring the canner to 10 lbs pressure for weighted-gauge canners or 11 lbs pressure for dial-gauge canners. Adjust pressure for your altitude if above 1,000 feet (refer to Altitude Adjustments section).
-
Once the correct pressure is achieved and maintained, process quart jars for 90 minutes or pint jars for 75 minutes. Maintain consistent pressure throughout; if it drops, bring it back up and restart the timer from the beginning.
-
When processing time is complete, turn off the heat and allow the canner to depressurize naturally. Once the pressure gauge reads zero (or after 5 minutes of no steam for weighted-gauge canners), carefully remove the lid.
-
Allow the jars to cool in the canner for 10 minutes, then carefully remove them to a protected surface (like a towel-lined countertop) to cool undisturbed for 12-24 hours.
-
After cooling, check all jar seals. Remove screw bands, wipe jars clean, label with contents and date, and store in a cool, dark, dry place for up to one year. Refrigerate any unsealed jars and consume within a few days.
Notes
Altitude Adjustments for Pressure Canning Pot Roast:
For safe canning, pressure settings must be adjusted based on your elevation. Refer to the detailed “Altitude Adjustments for Pressure Canning Pot Roast” section earlier in this article for precise guidance.
Ingredient Customization: While you can omit ingredients you dislike (e.g., celery), do not substitute or add new ingredients without consulting a tested canning recipe to ensure safety and proper processing.
Nutrition
Per Serving (Approximate, based on 4 servings for 2 lbs beef):
- Calories: 534 kcal
- Carbohydrates: 19g
- Protein: 46g
- Fat: 26g
- Saturated Fat: 12g
- Polyunsaturated Fat: 2g
- Monounsaturated Fat: 13g
- Trans Fat: 2g
- Cholesterol: 156mg
- Sodium: 1384mg
- Potassium: 1185mg
- Fiber: 3g
- Sugar: 4g
- Vitamin A: 5459 IU
- Vitamin C: 16mg
- Calcium: 85mg
- Iron: 6mg
Nutrition information is automatically calculated and provided as an approximation only. It may vary based on specific ingredients and preparation methods.
Enjoyed this recipe or have canning tips to share? Leave a comment below!
Explore More Beef Canning Recipes
Beef is an incredibly versatile protein that lends itself exceptionally well to pressure canning, creating a diverse array of shelf-stable meals. If you’re looking to diversify your pantry with more hearty options, consider exploring these other fantastic beef canning recipes. Each offers a unique flavor profile and a convenient meal solution:
- Canning Beef Stew: A complete and satisfying meal in a jar, perfect for a cold evening.
- Canning Ground Beef: Ideal for quick weeknight dinners like tacos, chili, or casseroles.
- Canning Sloppy Joe Filling: A classic family favorite, ready in minutes for an easy meal.
- Canning Chili con Carne: A hearty, robust, and flavorful chili to stock your shelves for instant warmth.
- Canning Beef Pot Pie Filling: Everything you need for a comforting pot pie, requiring only the addition of a crust.
Discover Convenient Meal-in-a-Jar Canning Recipes
Expand your repertoire of home-canned meal options with these diverse “meal in a jar” recipes. Each is thoughtfully designed for ultimate convenience and delicious flavor, making meal prep and emergency planning a breeze:
- Boston Baked Beans: A classic side dish or a hearty main, rich with molasses and savory notes.
- Thai Curry Duck (or Chicken): Bring vibrant, exotic flavors to your pantry for an adventurous meal.
- White Bean Chicken Chili: A lighter, yet equally satisfying and flavorful chili option.
- Cajun Red Beans and Sausage: Spicy and flavorful, this recipe is perfect served with a side of rice for a taste of Louisiana.
Explore Diverse Meat Canning Recipes
Beyond beef, there’s a whole world of meat canning to explore, offering incredible versatility for your pantry. Pressure canning is the gold standard for safely preserving a wide variety of proteins. Dive into these additional recipes to further expand your self-sufficiency and meal options:
- 20+ Chicken Canning Recipes: A comprehensive collection of versatile and delicious ways to can chicken.
- Canning Leftover Turkey: A brilliant way to prevent holiday leftovers from going to waste, ensuring tender turkey year-round.
- Canning Chicken Chili Verde: A vibrant, zesty, and subtly spicy chili option featuring tender chicken.
- Canning White Bean Chicken Chili: Another delicious, hearty chicken chili with a creamy, comforting base.
- Canning Chicken Soup: Homemade goodness in a jar, perfect for when you’re feeling under the weather or need a quick, nourishing meal.