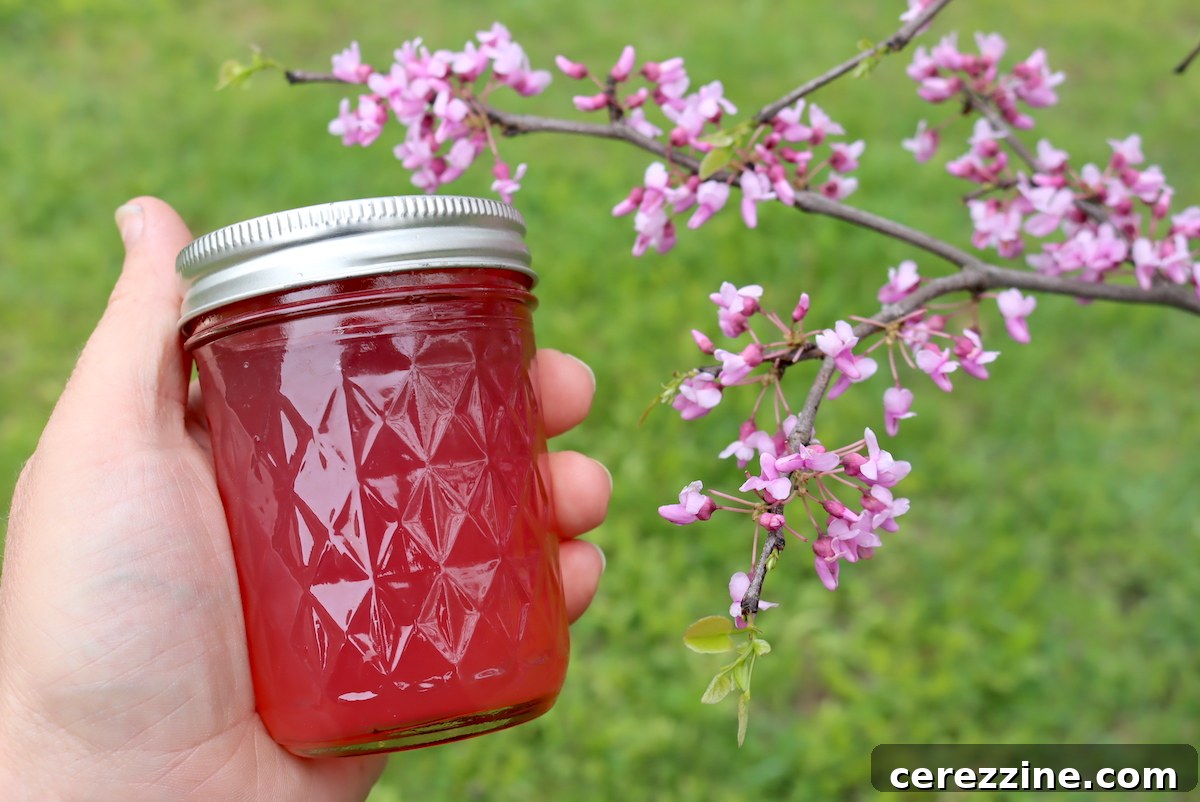
Welcome to the enchanting world of homemade preserves, where nature’s ephemeral beauty transforms into delectable treats. Among the many treasures that spring bestows upon us, the vibrant blossoms of the Redbud tree stand out not only for their striking aesthetic but also for their delightful culinary potential. Each spring, as these hardy trees burst forth in a spectacular display of tiny, magenta-pink flowers, they offer a unique opportunity to craft something truly special: Redbud Jelly or its equally charming counterpart, Redbud Syrup.
This comprehensive guide will walk you through the simple yet rewarding process of transforming delicate redbud flowers into a luscious jelly, perfect for spreading on toast, enhancing desserts, or stirring into beverages. Whether you’re a seasoned forager or a curious beginner, you’ll discover the joy of capturing the essence of spring in a jar, ready to be savored year-round. The primary distinction between making jelly and syrup lies in the addition of pectin; omit it for a versatile syrup that can elevate creative drinks, cocktails, and a variety of sweet dishes. Embrace the seasonal abundance and prepare to be charmed by the subtle floral notes and beautiful hue of this unique homemade delicacy.
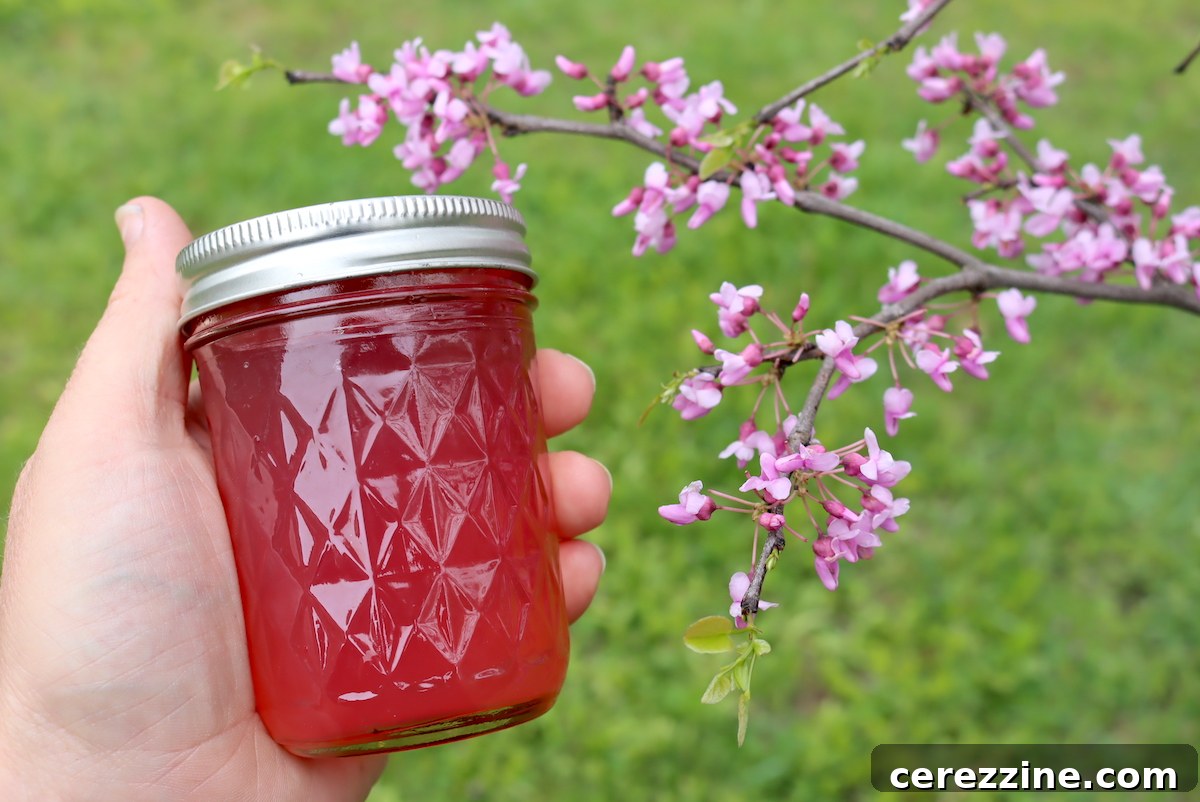
The arrival of spring brings with it a vibrant array of edible flowers, and for those of us who cherish the fleeting beauty of blossoms, preserving their essence is a cherished annual ritual. Here in Vermont, where winter’s grip lingers, the emergence of the first redbud flowers in May is a particularly joyous occasion. It’s a signal that warmer days are truly here, and with them, a bounty of natural ingredients waiting to be transformed. Crafting flower jellies is a fantastic way to extend the sensory delight of fresh blooms, allowing you to experience their unique aroma and flavor long after the snow has returned in mid-winter.
Just last year, a chance encounter with a magnificent redbud tree adorned with its full spring glory sparked an impromptu culinary adventure, culminating in our first batch of exquisite redbud jelly. This experience reaffirmed the simple pleasure of foraging and the deep satisfaction of creating delicious, wholesome food from nature’s pantry.
Redbud Jelly & Syrup: Recipe Snapshot
- Recipe Name: Redbud Jelly (or Redbud Syrup)
- Recipe Type: Flower Jelly / Flower Syrup
- Preservation Method: Water Bath Canning (optional for syrup)
- Preparation Time: 30 Minutes active (plus 24 hours steeping)
- Canning Time: 10 Minutes
- Yield: Approximately 4 to 5 half-pint (8 oz) jars
- Recommended Jar Sizes: Quarter Pint, Half Pint, or Pint
- Headspace: 1/4 inch
- Key Ingredients: Fresh Edible Redbud Flowers, Water, Lemon Juice (essential for color and set), Sugar, Pectin (for jelly only)
- Difficulty Level: Easy! Essentially, you’re brewing a vibrant floral tea and setting it with pectin to create a delightful spread.
- Similar Floral Jelly Recipes: The method closely mirrors that of other wild-foraged floral jellies made in spring, such as Dandelion Jelly, Grape Hyacinth Jelly, Violet Jelly, Clover Jelly, Elderflower Jelly, Fireweed Jelly, or Rose Petal Jelly.
Foraging and Harvesting Redbud Flowers
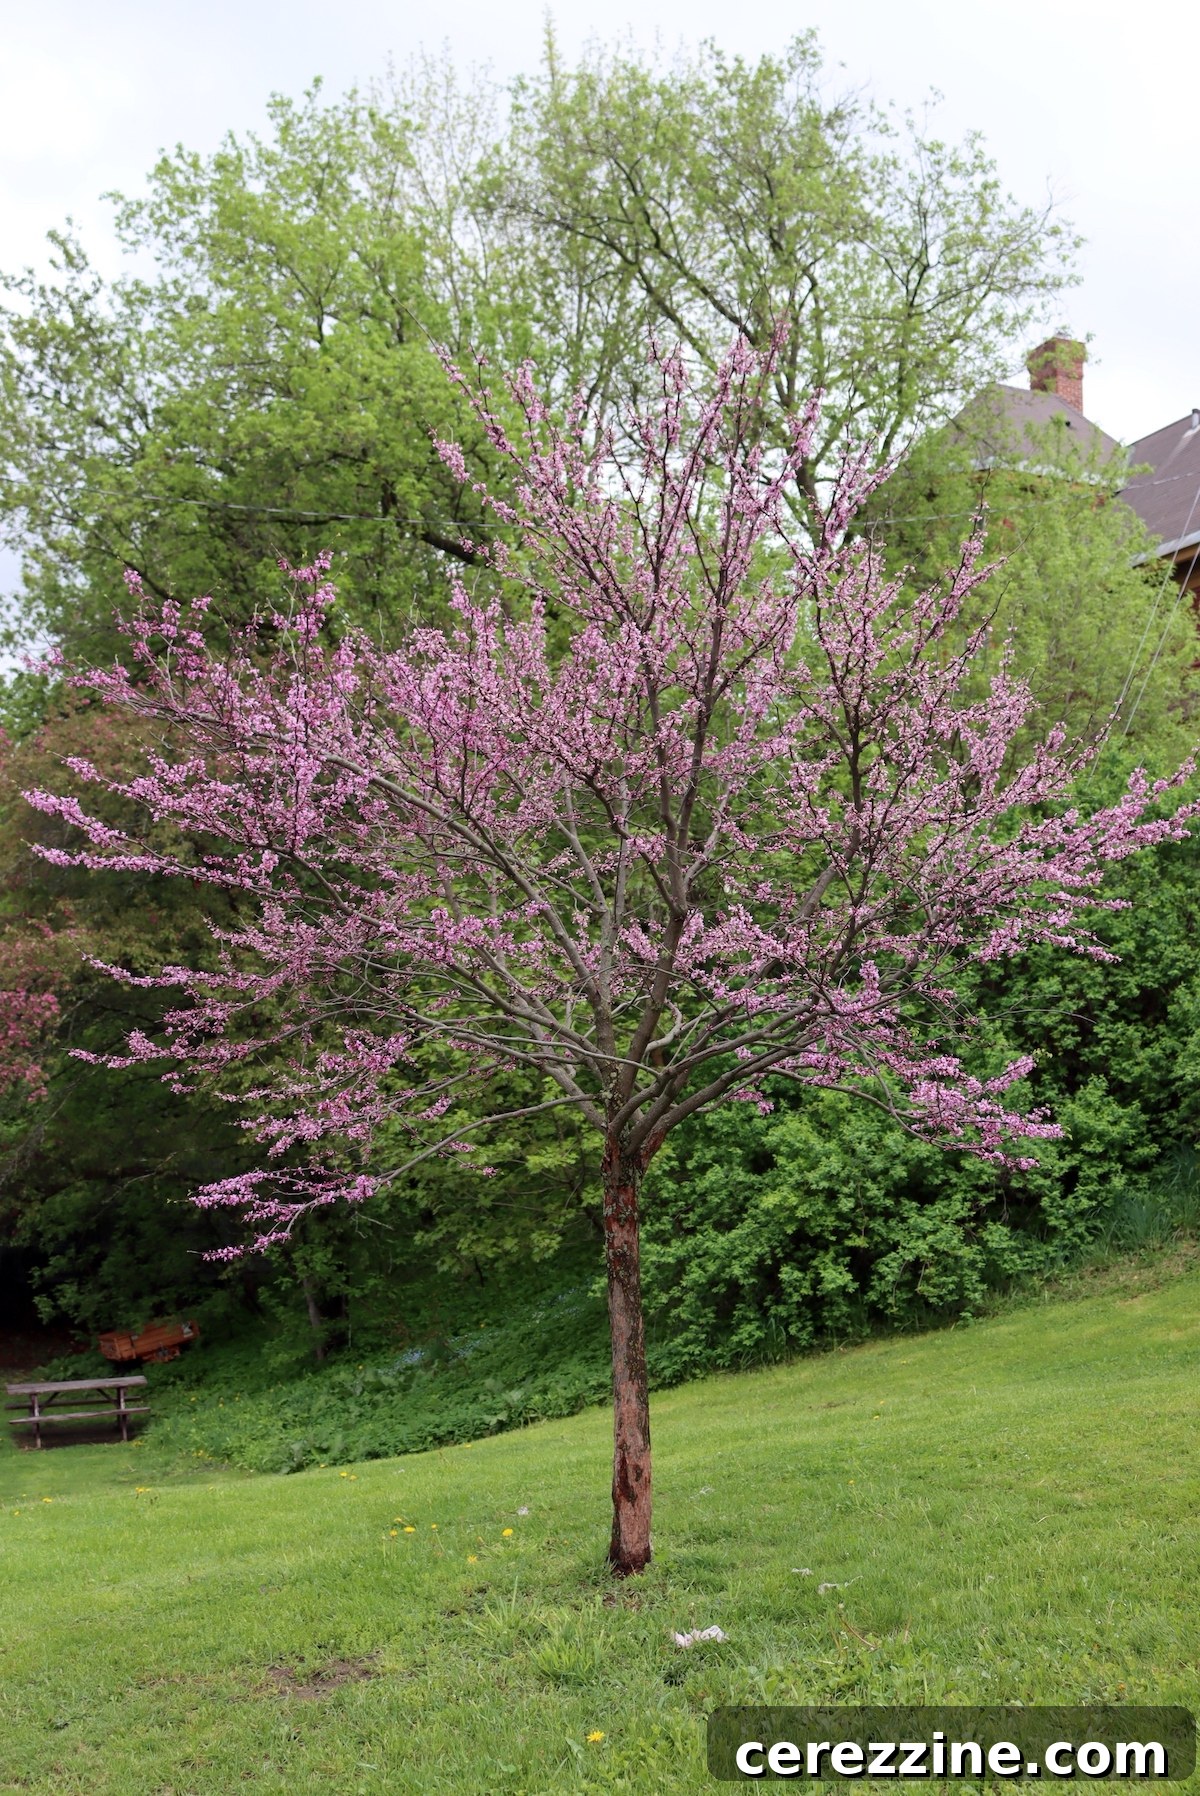
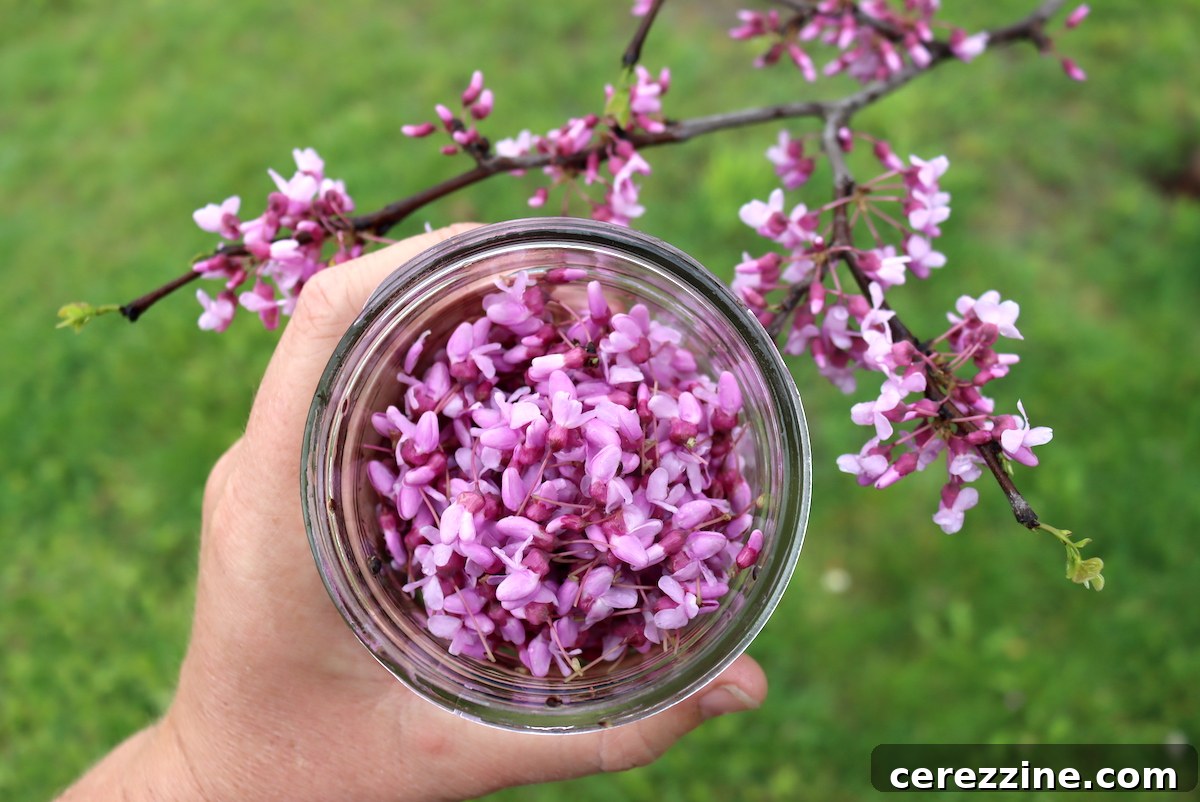
The Eastern Redbud (Cercis canadensis) is a sight to behold in early spring, often one of the first trees to announce the season’s arrival with its breathtaking display of magenta-pink flowers. Generally, redbud trees come into bloom around the same time as the first dandelions, typically in early spring, often as early as March in many parts of the country. However, in colder northern regions like Vermont, we eagerly await their appearance until May, a testament to winter’s longer stay. This delayed bloom only intensifies our appreciation for the fresh, vibrant colors and flavors they bring.
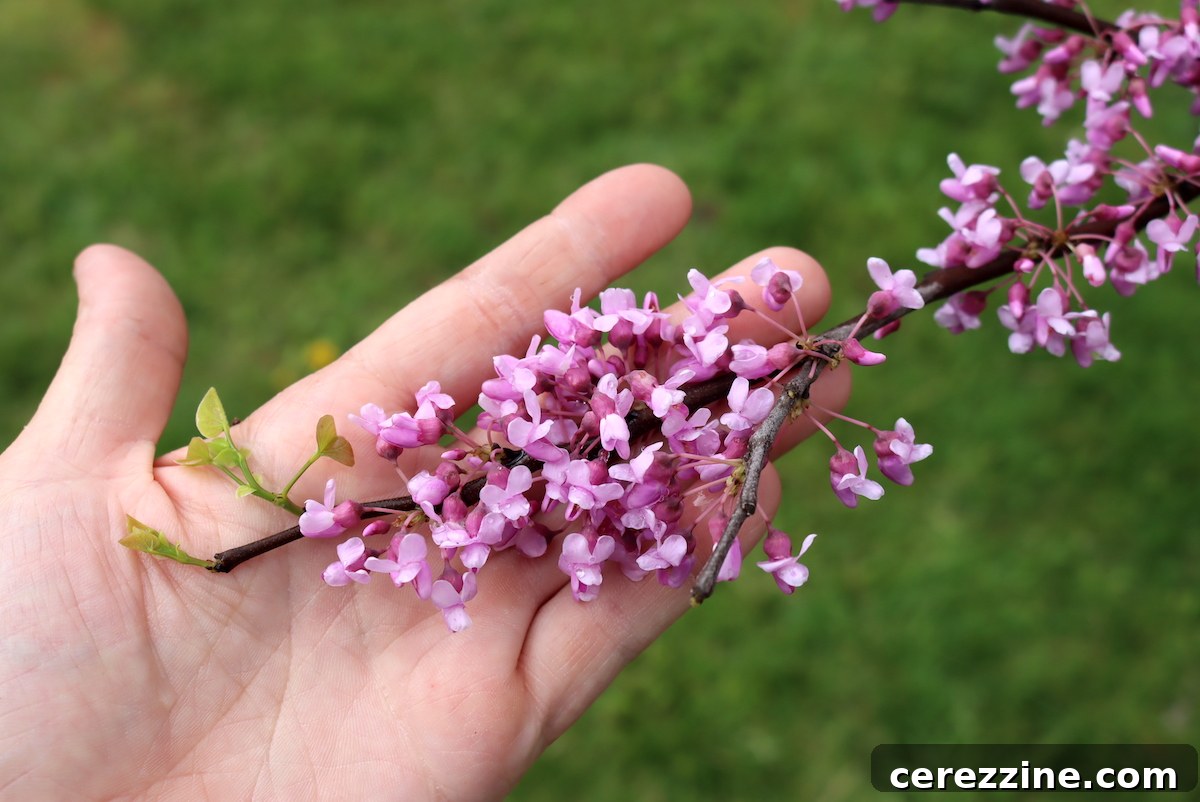
Identifying a redbud tree is relatively straightforward, even for novice foragers. Look for a tree completely blanketed in clusters of tiny, pea-like pink to purplish-pink flowers. These charming blossoms emerge directly from the branches, and even from the trunk, a phenomenon known as cauliflory. The bark of a mature redbud is often thin, somewhat shaggy, and tends to peel in small scales, though it’s crucial not to peel it away as this can harm the tree. Typically, the flowers appear before the heart-shaped leaves fully develop, providing an unmistakable signal. If you find the tree towards the end of its flowering season, you might notice small, emerging leaves at the branch tips, alongside the last of the blossoms. Always ensure positive identification before consuming any wild plant. Look for the distinct, small, heart-shaped leaves if they have begun to emerge, and the unique pea-like flower structure. Foraging responsibly means harvesting only a small portion from any single tree, ensuring its continued health and future blooms for both nature and fellow foragers.
Essential Ingredients for Redbud Jelly & Syrup
Creating a batch of five (8-ounce) jars of exquisite redbud jelly requires a few simple, yet carefully selected, ingredients. Here’s what you’ll need:
- 4 cups redbud flower petals, carefully de-stemmed
- 4 cups water
- 2 Tbsp. fresh lemon juice (from one or two lemons)
- 1 to 4 cups sugar* (amount varies based on pectin type; see notes below)
- 1 box (1.75oz) powdered pectin (either regular or low-sugar variety)
For making a delightful redbud syrup: The ingredient list remains identical to that for jelly, with one crucial omission: pectin. All the preparation steps are the same until you reach the point of adding pectin. Simply skip this ingredient, and you’ll create a beautifully fragrant floral syrup that can be refrigerated for immediate use or processed in a water bath canner for longer storage. The lemon juice remains a vital component for both color and preservation.
When preparing your redbud flowers, it’s essential to use only the petals, carefully removing any green stems, small leaves, or bits of bark. While a few unopened buds might find their way into your collection, taking the time to thoroughly clean and de-stem the flowers will result in a purer flavor and a clearer, more vibrant jelly. This step is key to avoiding any bitterness that can come from the green parts of the plant.
For the lemon juice, I highly recommend using freshly squeezed lemons. The bright, acidic notes from fresh citrus not only provide a superior flavor but also interact more effectively with the other ingredients. A large, juicy lemon can yield about two tablespoons, but it’s always wise to have an extra on hand just in case. Bottled lemon juice concentrate can also be used as a convenient alternative, but fresh is often preferred for its nuanced flavor.
Lemon juice is far from an optional ingredient in your jelly-making process; it’s absolutely critical! You might worry that its acidity will overshadow the delicate floral flavor of the redbud, but in fact, it enhances and brightens it. More importantly, the lemon’s natural acidity is indispensable for successful gelling. It works in conjunction with pectin and sugar to ensure the jelly sets properly. Beyond texture, lemon juice also acts as a natural preservative, helping to create an acidic environment that is crucial for safely canning and storing your jelly, ensuring its longevity and safety.
Another important decision concerns the type of pectin you choose. For this recipe, I typically use regular pectin (such as Sure-Jell). With regular pectin, a 1:1 ratio of liquid to sugar is generally required for a proper set. Since our recipe yields 4 cups of redbud tea, we will use 4 cups of sugar. This type of jelly, often referred to as “old-fashioned” jelly, is known for its deliciously sweet profile.
If you prefer a less sweet jelly, a low-sugar pectin alternative is an excellent choice (look for the pink box of low-sugar Sure-Jell). While this may result in a slightly smaller yield, it allows you to use the same amount of liquid with significantly less sugar, making it a fantastic option for those who monitor their sugar intake or prefer a tarter flavor, including diabetic jelly lovers.
Step-by-Step: Crafting Your Redbud Jelly
Once you’ve gathered your pristine, fresh redbud flowers, the initial and most important step is to prepare the infusion that will form the base of your jelly. This floral tea needs ample time to steep, allowing the delicate petals to fully release their vibrant color and subtle flavor. Plan to make this tea the day before you intend to finalize your jelly, as a 24-hour steeping period is essential for optimal results.
- Prepare the Infusion: Place the de-stemmed redbud flowers into a clean, quart-sized mason jar. It’s important not to pack the flowers down too tightly; allow them space to infuse properly with the water.
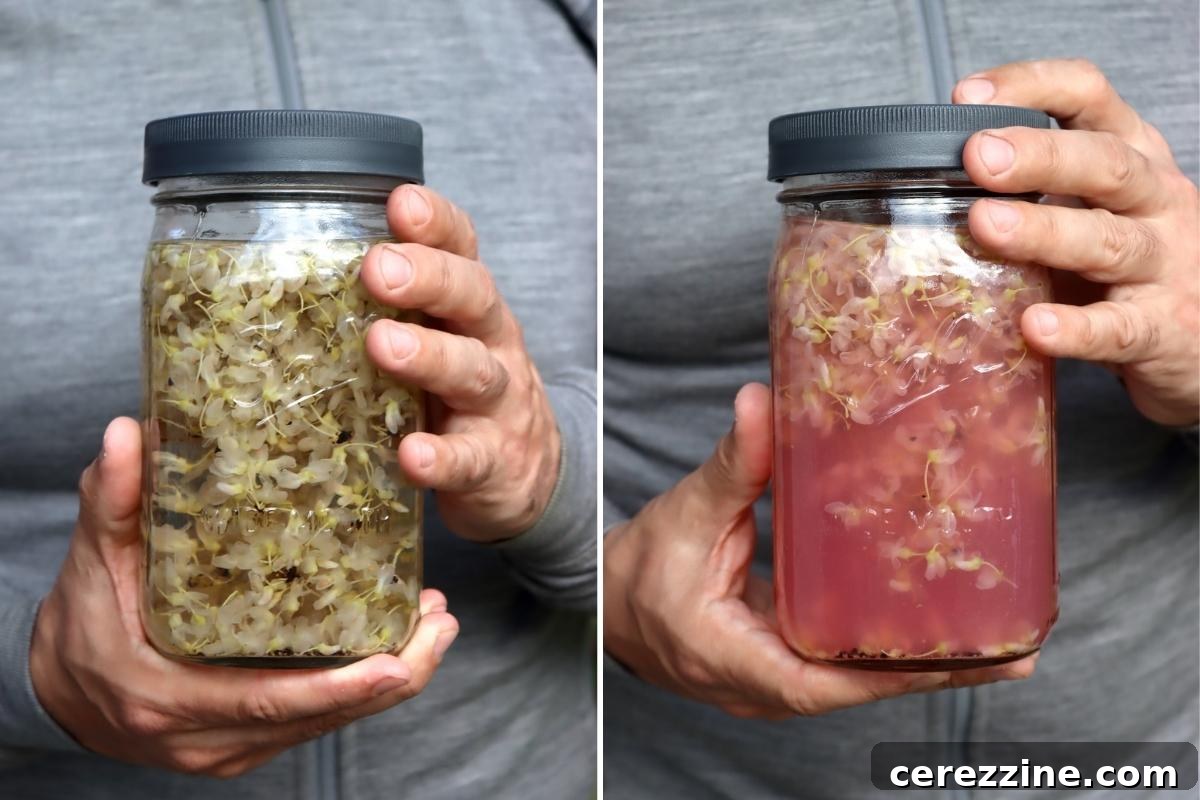
- Add Hot Water and Lemon: Heat 4 cups of water to a rolling boil either in a microwave or on a stovetop. Carefully pour the boiling water over the redbud flowers in the jar. Immediately add the lemon juice at this stage. This is a crucial step often overlooked: the acidity of the lemon juice reacts with the pigments in the redbud petals, helping to extract and stabilize their beautiful color and rich flavor during the steeping process.
- Steep for 24 Hours: Allow this mixture to steep at room temperature for approximately 2 to 4 hours. After this initial period, it’s a good idea to move the jar to the refrigerator for the remainder of the 24-hour steeping time. While many flower jellies require less steeping, the extended infusion time significantly enhances both the color and depth of flavor in redbud jelly. By the next day, you should be greeted by a gorgeous, vibrant pink liquid – your redbud tea!
- Strain the Infusion: Using a fine-mesh strainer lined with cheesecloth (or simply a fine strainer if you prefer), carefully pour the infused liquid from the jar into a large saucepan or jam pot. Gently press or squeeze the cheesecloth (if used) to extract as much liquid and concentrated flavor from the spent flowers as possible. Discard the petals.
- Prepare for Gelling: Bring the redbud tea (which already contains the lemon juice) to a rapid boil over medium-high heat. Do not add the sugar at this stage.
- Incorporate Pectin: Once the tea and lemon juice mixture is at a full, rolling boil, slowly sprinkle in the powdered pectin, stirring continuously as you add it to ensure it dissolves completely. It’s important to prevent the formation of pectin lumps; however, any small clumps should dissolve as the mixture continues to boil and you keep stirring.
- Boil with Pectin: Maintain a full, vigorous boil for exactly one minute, stirring constantly. (Important Note for Syrup: If you are making redbud syrup, skip this pectin-addition step entirely and proceed directly to the sugar addition, or if skipping sugar as well, bottle the plain syrup. For jelly, this step is vital: pectin must be added first and fully dissolved before sugar, or your jelly will not set properly.)
- Add Sugar: Slowly add the pre-measured sugar to the boiling tea, continuing to stir constantly until all the sugar is completely dissolved.
- Final Boil: Once again, bring the entire mixture back to a full, rolling boil, stirring continuously. Allow it to boil for 1 to 2 minutes. Be careful not to boil the jelly mixture for too long (e.g., more than 5 minutes after adding sugar), as this can prevent it from gelling effectively.
- Fill Jars: Carefully ladle or pour the hot jelly mixture into your pre-sterilized jelly jars, leaving precisely ¼ inch of headspace at the top of each jar. A canning funnel with a ¼” lip can make this process considerably easier and less messy.
- Seal Jars: Wipe the rims of the jars thoroughly with a clean, damp cloth to remove any sticky residue, which can interfere with the seal. Cap them with two-part canning lids (flats and rings).
- Cool and Set (for uncanned jelly/syrup): If you do not plan on canning your jelly or syrup, simply allow the filled jars to cool completely to room temperature on your counter. Once cool, store your redbud jelly or syrup in the refrigerator for up to 1 month, or freeze it for up to 6 months. For longer preservation and shelf-stable storage, continue to the canning instructions below.
Water Bath Canning Redbud Jelly for Shelf Stability
Water bath canning is a fantastic and straightforward method for preserving your redbud jelly, ensuring it remains fresh and delicious for year-round enjoyment. This process creates an airtight seal, allowing you to store your homemade preserves safely in your pantry for an extended period. If you’re new to canning, or simply need a refresher, consider reviewing a comprehensive beginner’s guide to water bath canning for detailed instructions on equipment and safety protocols. The following steps outline the process specific to redbud jelly:
- Prepare Jars: Ensure your canning jars, lids, and rings are clean and ready. Jars should be hot (sterilized or heated in the canner) before filling to prevent thermal shock.
- Fill Jars: After boiling your jelly with the sugar added for 1-2 minutes as per the recipe, carefully ladle or pour the hot jelly into the prepared hot jars, leaving exactly ¼ inch of headspace from the rim.
- Clean Rims: Using a clean, damp cloth, meticulously wipe the rims of each jar. Any jelly residue or stickiness on the rim can prevent a proper seal, compromising the shelf stability of your preserves.
- Apply Lids and Rings: Place a sterile canning lid (the flat disk) onto each jar. Then, screw on the canning rings until they are “finger-tight.” This means tightening just enough so they are secure, but not overtightening, as this allows air to escape during processing and helps create a vacuum seal.
- Load Canner: Using a jar lifter, carefully load the filled and lidded jelly jars into your prepared hot water bath canner. Ensure the jars are upright and not touching each other.
- Ensure Water Coverage: Make sure the water level in the canner completely covers the tops of the jars by at least 1-2 inches. Add more boiling water if necessary.
- Process Jars: Bring the water in the canner back to a rolling boil. Once boiling, set your timer and process the jars for 10 minutes. If you reside at elevations above 6,000 feet, increase the processing time to 15 minutes to account for lower boiling points.
- Cool and Check Seals: Once the processing time is complete, turn off the heat and carefully remove the jars from the canner using your jar lifter. Place them on a wire rack or a towel-lined surface, ensuring there’s space between them for air circulation. Allow them to cool undisturbed for 12-24 hours. As they cool, you should hear a “ping” sound, indicating that the lids have sealed.
- Store Properly: After 24 hours, check the seals on all jars. The center of the lid should be concave and not flex when pressed. Any jars that have not sealed properly should be stored in the refrigerator for immediate use and consumed within 1 month. Properly canned and sealed jars will maintain their quality in a cool, dry, dark pantry for 12-18 months. Always refrigerate the jelly once opened.
Redbud Jelly Variations & Serving Suggestions
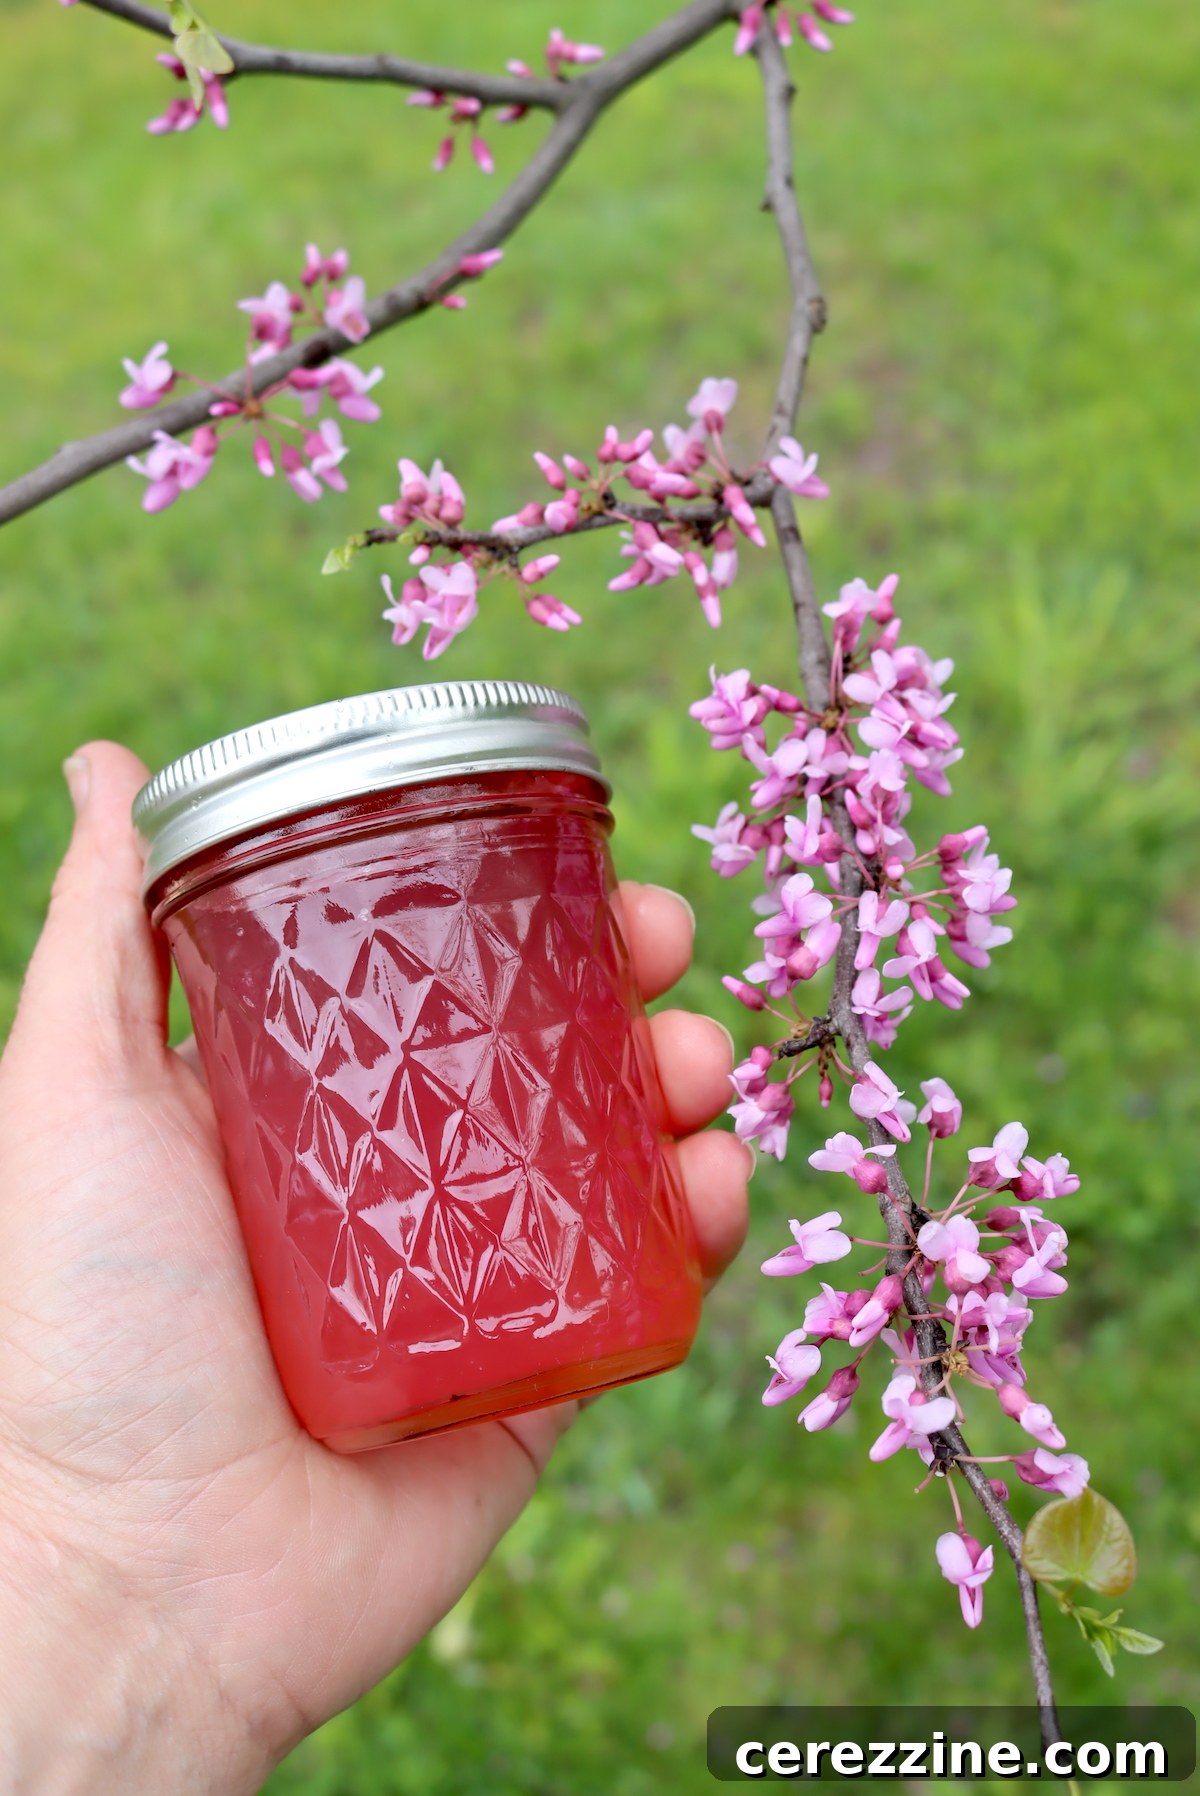
Redbud flower jelly, with its inherently delicate and sweet character, boasts a hint of subtle floral tones that are enchanting on their own. However, its versatile flavor profile also lends itself beautifully to creative variations. Consider infusing your redbud jelly with other complementary edible flowers, such as a touch of fragrant lavender or the vibrant tartness of hibiscus. These additions can introduce new layers of flavor and aroma, transforming your basic redbud jelly into an even more complex and intriguing preserve.
This jelly’s gentle sweetness and unique floral notes make it incredibly versatile in the kitchen. Here are some delightful ways to enjoy your homemade redbud jelly:
- Classic Spreads: The most common and satisfying way to enjoy redbud jelly is spread generously on your favorite breakfast items. It’s divine on warm toast, flaky croissants, chewy English muffins, or any type of freshly baked bread.
- Breakfast Enhancer: Elevate your breakfast muffins, scones, or corn bread with a dollop of redbud jelly. It adds a gourmet touch to everyday meals.
- Dessert Topping: Drizzle the jelly (or syrup) over vanilla ice cream, yogurt, or panna cotta for an elegant and floral dessert.
- Cheese Pairings: Its delicate flavor pairs wonderfully with soft, creamy cheeses on a charcuterie board.
- Glazes and Marinades: The syrup version can be reduced slightly to create a lovely glaze for poultry or pork, offering a sweet and tangy finish.
Beyond Jelly: Culinary Uses for Fresh Redbud Flowers
The culinary journey with redbud flowers doesn’t have to end with jelly! These edible blossoms are wonderfully versatile and can add a pop of color and a unique flavor to a variety of dishes. Their slightly tart, pea-like flavor makes them a fantastic addition to both sweet and savory creations. Here are more ideas for incorporating fresh redbud flowers into your cooking:
- Redbud Sour Cocktail: Infuse spirits with redbud flowers to create a visually stunning and flavorful base for cocktails.
- Redbud, Lemon and Cornmeal Loaf Cake: Sprinkle fresh redbud flowers into cake batters or use them as a beautiful garnish for baked goods.
- Redbud Salad: Toss a handful of fresh redbud blossoms into your spring salads for a burst of color and a delicate, tangy crunch.
- Garnish: Use fresh flowers to garnish desserts, drinks, or main courses for an elegant touch.
- Infused Vinegar or Oil: Steep redbud flowers in vinegar or a light oil to create unique culinary infusions.
We hope you found this Redbud Jelly Recipe inspiring! If you tried this, or any other recipe from Creative Canning, please leave a ⭐ star rating and share your thoughts in the 📝 comments below!
Stay connected with us for more seasonal canning ideas and delicious recipes by following on social media!
- Substack
Explore More Edible Flower Jellies
Tulip Jelly
Are Flower Jellies Safe for Canning?
Lilac Jelly
Redbud Jelly & Syrup Recipe
Equipment
- Water Bath Canner
- Large saucepan or jam pot
- Quart-sized mason jar
- Fine-mesh strainer or cheesecloth
- Canning funnel (optional but recommended)
- Jar lifter
Ingredients
- 4 cups redbud flower petals, de-stemmed
- 4 cups water
- 2 Tbsp. lemon juice
- 1 to 4 cups sugar (amount varies depending on pectin used, see notes below)
- 1 box powdered pectin (1.75 oz. pectin or 6 Tbsp), Regular or Low Sugar (see notes below)
Instructions
- Place the clean, de-stemmed redbud flower blossoms into a quart-size mason jar.
- Bring 4 cups of water to a boil using a microwave or stovetop. Carefully pour the boiling water into the jar containing the redbud flowers.
- Add the lemon juice to the flower/water mixture immediately. This encourages a vibrant color change while the tea is steeping.
- Allow the flowers and water to steep for 24 hours. The resulting redbud tea should have a beautiful bright pink color when fully steeped. Transfer to the refrigerator after 2-4 hours of initial steeping at room temperature.
- Pre-measure the sugar and set it aside for later use.
- Use a fine strainer (or a bowl covered with cheesecloth) to strain the flower petals from the liquid. Pour the tea into a large saucepan or jam pot. Press or squeeze the cheesecloth (if used) to extract as much liquid as possible from the flowers.
- Turn the burner to high heat and bring the redbud tea to a rolling boil.
- Slowly add the powdered pectin, stirring continuously to dissolve the powder completely and prevent lumps.
- Return the mixture to a full, rolling boil and allow it to boil vigorously for one minute, stirring constantly. (Skip this step for syrup).
- Continuing to stir, slowly add the pre-measured sugar to the mixture, ensuring it fully dissolves.
- Again, bring the mixture back to a full, rolling boil, stirring while boiling for 1-2 minutes. Avoid boiling for more than 5 minutes to ensure proper gelling.
- Ladle or pour the hot jelly into prepared hot jelly jars, leaving ¼” headspace. Wipe the rims of the jars with a clean, damp cloth.
- Affix the two-part canning lids (flats and rings), tightening them to “finger-tight.” At this point, you can either proceed with the water bath canning process (recommended for shelf-stable storage) or allow the jars to cool and set up on the counter for 24 hours for refrigerator storage.
- Store properly canned jelly in a cool, dry place for up to 18 months. Uncanned jelly can be stored in the refrigerator for up to 1 month or in the freezer for 6 months. For all jelly, refrigerate once opened.
Notes
Redbud Syrup
To make redbud syrup, follow the same instructions as above but omit adding the pectin. The syrup can be stored in the refrigerator for immediate use, or canned in a water bath canner following the same processing instructions for jelly (10 minutes). Do not skip the lemon juice, as it is essential for both extracting the vibrant color and aiding in preservation.
Sugar Amounts & Pectin Types
When using standard pectin (such as regular Sure-Jell pectin), it is generally necessary to use a 1:1 ratio of liquid to sugar for the jelly to set correctly. This means for 4 cups of redbud tea, you will need to use 4 cups of sugar. This type of jelly is often called “old-fashioned” jelly and is known for its sweet flavor profile.
If you prefer to use less sugar, opt for a low-sugar pectin instead of regular pectin and reduce the sugar significantly (you can use as little as 1 to 1½ cups). I frequently use Sure-Jell low-sugar pectin (found in the pink box) for most of my jelly-making, and it has consistently provided reliable results.
If you choose to use Pomona’s Universal Pectin, another popular brand and a two-part low-sugar pectin, note that its instructions differ. For this redbud jelly recipe, you should follow the specific instructions provided within the Pomona’s box for making mint jelly, adjusting quantities as needed.
*Please be aware that lowering the sugar content will typically result in a lower yield. The yield of 4-5 half-pints listed in this recipe is based on a full-sugar recipe.
Finally, if considering liquid pectin, the order of ingredient addition is different from the methods described above (pectin is added last, and sugar first). Liquid pectin often requires a significant amount of sugar to set (up to 7 cups of sugar for 4 cups of liquid), resulting in a very sweet jelly. Due to the high sugar requirements for setting, I generally use liquid pectin less frequently.
Nutrition Information (Approximate)
Nutrition information is automatically calculated and should only be used as an approximation. Actual values may vary based on ingredients and preparation methods.
- Calories: 29 kcal
- Carbohydrates: 8g
- Protein: 0.01g
- Fat: 0.03g
- Saturated Fat: 0.001g
- Polyunsaturated Fat: 0.002g
- Sodium: 5mg
- Potassium: 1mg
- Fiber: 0.1g
- Sugar: 6g
- Vitamin A: 0.1 IU
- Vitamin C: 0.4mg
- Calcium: 1mg
- Iron: 0.05mg
Edible Flower Recipe Guides
Redbuds are just one of many delightful blossoms you can forage and transform into delicious treats. Exploring the world of edible flowers opens up a realm of unique flavors, aromas, and colors for your culinary adventures. From sweet jellies to savory infusions, each flower offers a distinct character to enhance your dishes. Dive into these guides to discover more about nature’s edible floral bounty:
- Lilac Recipes: Discover how to use the fragrant and beautiful lilac blossoms in various culinary applications.
- Rose Recipes: Learn to incorporate the classic and aromatic rose petals into your cooking and baking.
- Elderflower Recipes: Explore the delicate and honey-scented elderflowers, perfect for cordials, fritters, and more.
More Delightful Flower Jelly Recipes
Once you’ve experienced the simple pleasure of making redbud jelly, you’ll likely be eager to explore other edible flower jellies. Each flower imparts its own unique flavor and captivating color, making the world of floral jellies an endless source of inspiration for home canners and food enthusiasts. Expand your repertoire with these wonderful recipes:
- Dandelion Jelly: A sunny yellow jelly with a surprisingly honey-like flavor.
- Forsythia Jelly: Captures the bright yellow hues of early spring with a subtle, earthy taste.
- Elderflower Jelly: A delicate, fragrant jelly reminiscent of summer days.
- Black Locust Flower Jelly: Offers a sweet, almost vanilla-like flavor from these fragrant white blossoms.
- Rose Petal Jelly: A romantic and aromatic jelly with a beautiful pink hue.
- Violet Jelly: Transforms tiny purple violets into a stunning, jewel-toned spread with a nuanced flavor.
Wild Foraged Canning Recipes: Preserving Nature’s Bounty
Foraging for wild edibles and preserving them through canning is a time-honored tradition that connects us deeply with the rhythms of nature. Beyond floral jellies, there’s a vast world of wild-foraged ingredients that can be transformed into delicious, shelf-stable preserves. Each season brings new opportunities to gather ingredients from your local landscape and create unique additions to your pantry. Here are more ideas for putting up a little wild-foraged goodness:
- Autumn Olive Jam: A sweet and tangy jam made from the abundant autumn olive berries.
- Pin Cherry Jelly: Utilizes the small, tart pin cherries for a vibrant and flavorful jelly.
- Pickled Ramps: Preserve the pungent and sought-after wild leeks for year-round enjoyment.
- Wild Grape Jelly: Capture the robust, classic flavor of wild grapes in a homemade jelly.
- Aronia Jelly: Made from the nutrient-dense aronia berries, offering a tart and rich flavor.
- Black Locust Flower Jelly: A unique and aromatic jelly from the fragrant black locust blossoms.
- Clover Jelly: A delicate and subtly sweet jelly made from common clover flowers.
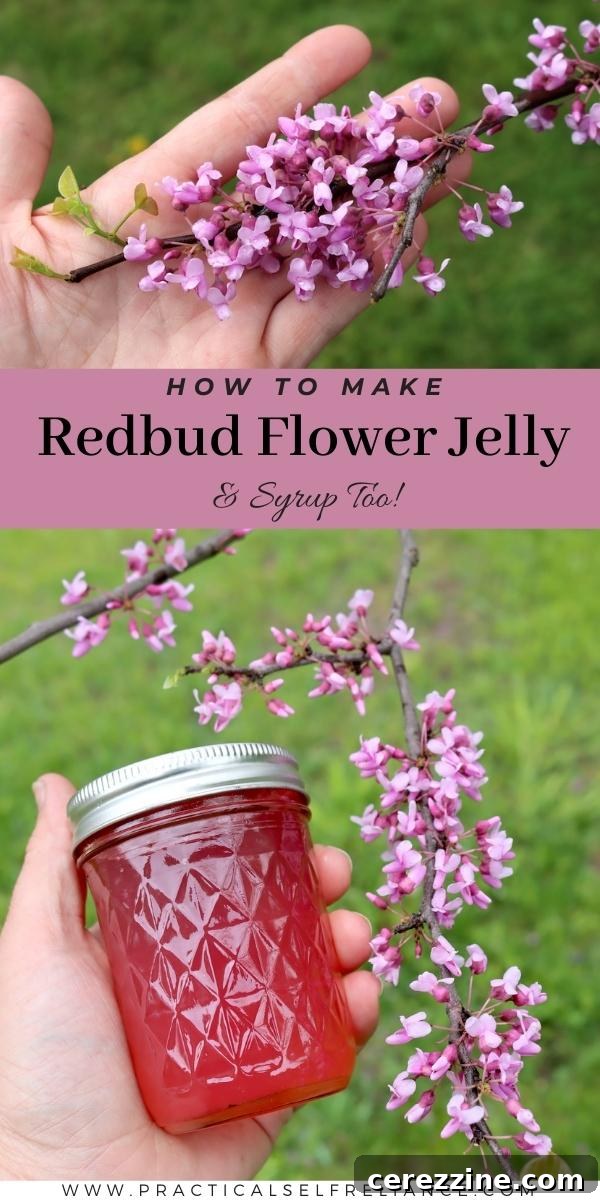
Making redbud jelly is more than just a recipe; it’s an experience—a delightful way to connect with nature, savor the fleeting beauty of spring, and create something truly unique and delicious. Whether you choose to enjoy it fresh, share it as a thoughtful gift, or preserve it for a taste of spring in the depths of winter, this floral jelly promises to bring a touch of enchantment to your table. Happy foraging and happy canning!