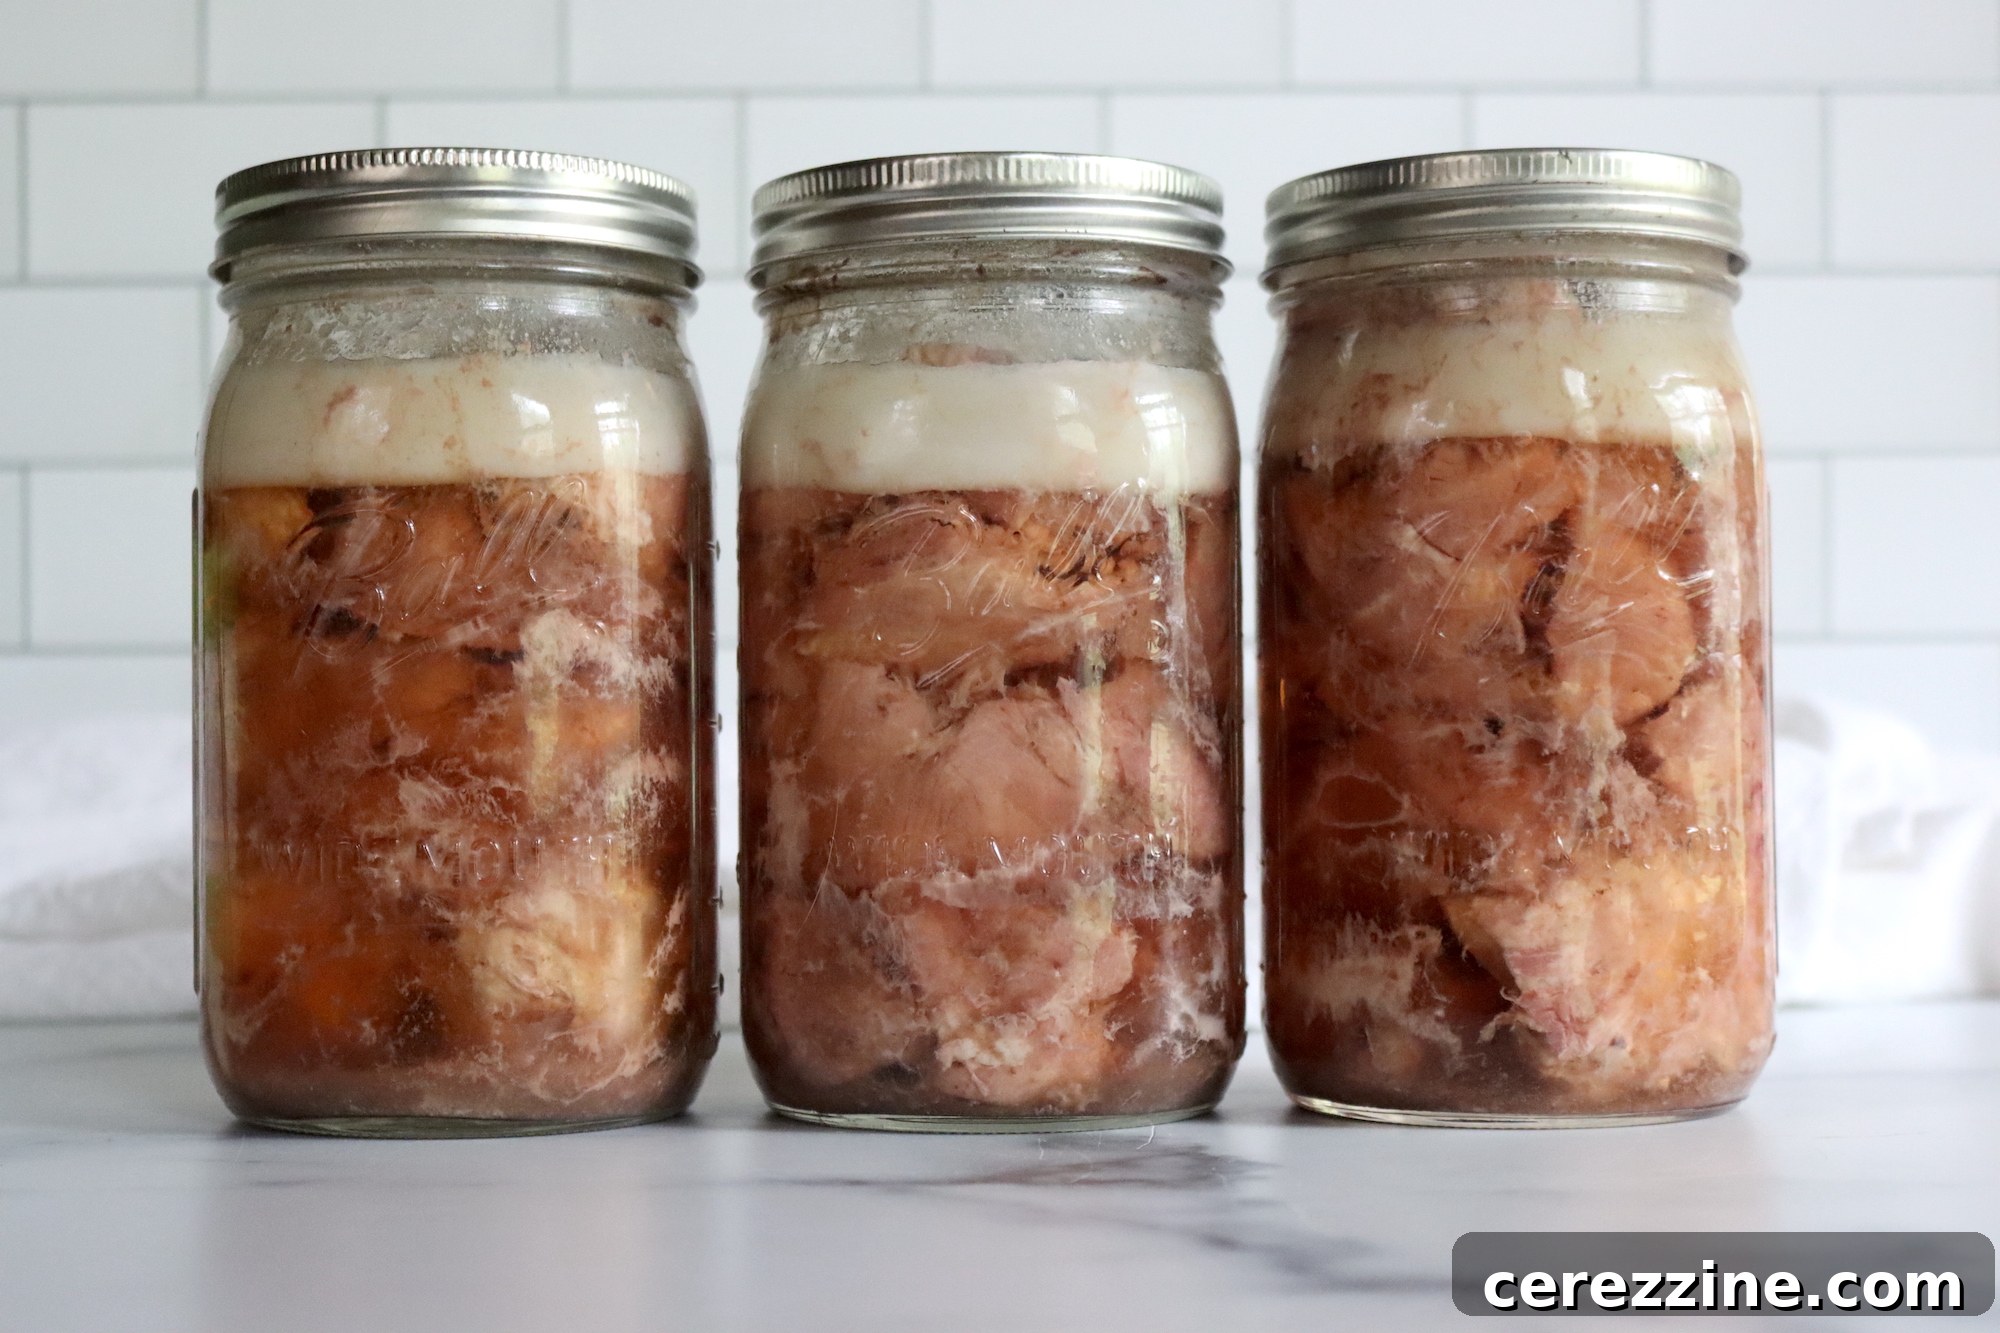
Mastering Pressure Canning Pork: Your Guide to Tender, Shelf-Stable Meals
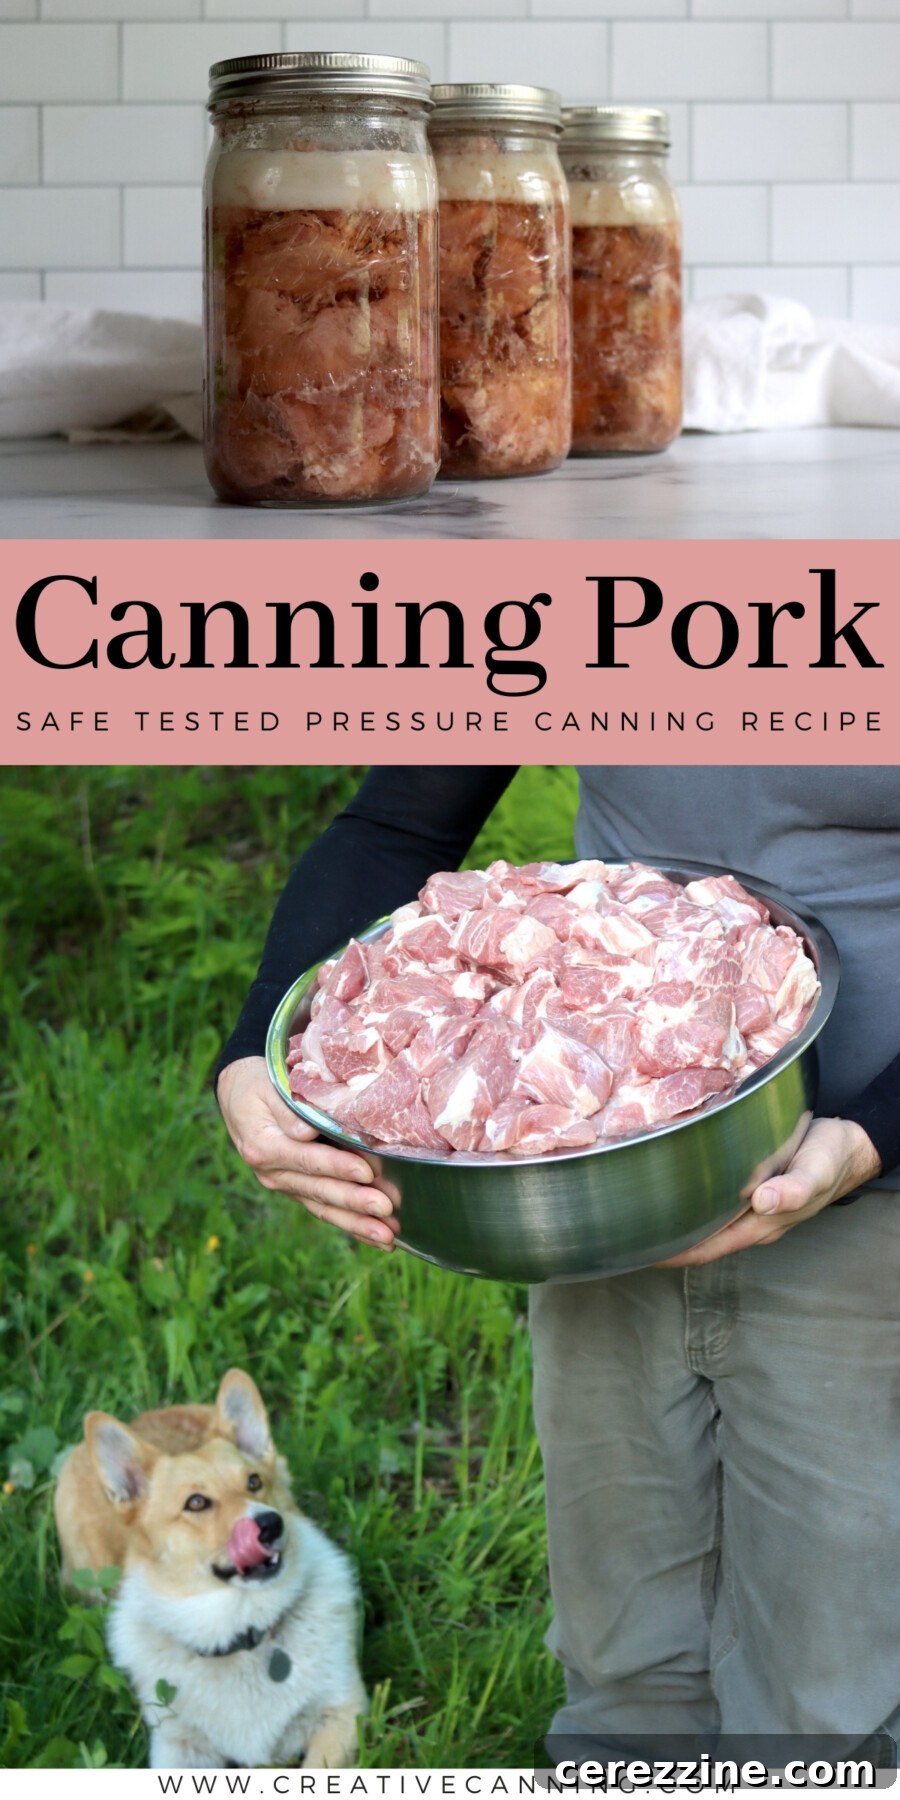
Canning pork is among the most valuable and straightforward pressure canning projects you can undertake. This method efficiently transforms an affordable cut of pork into succulent, ready-to-use meat, becoming an indispensable ingredient for crafting quick and hearty weeknight meals right from your pantry.
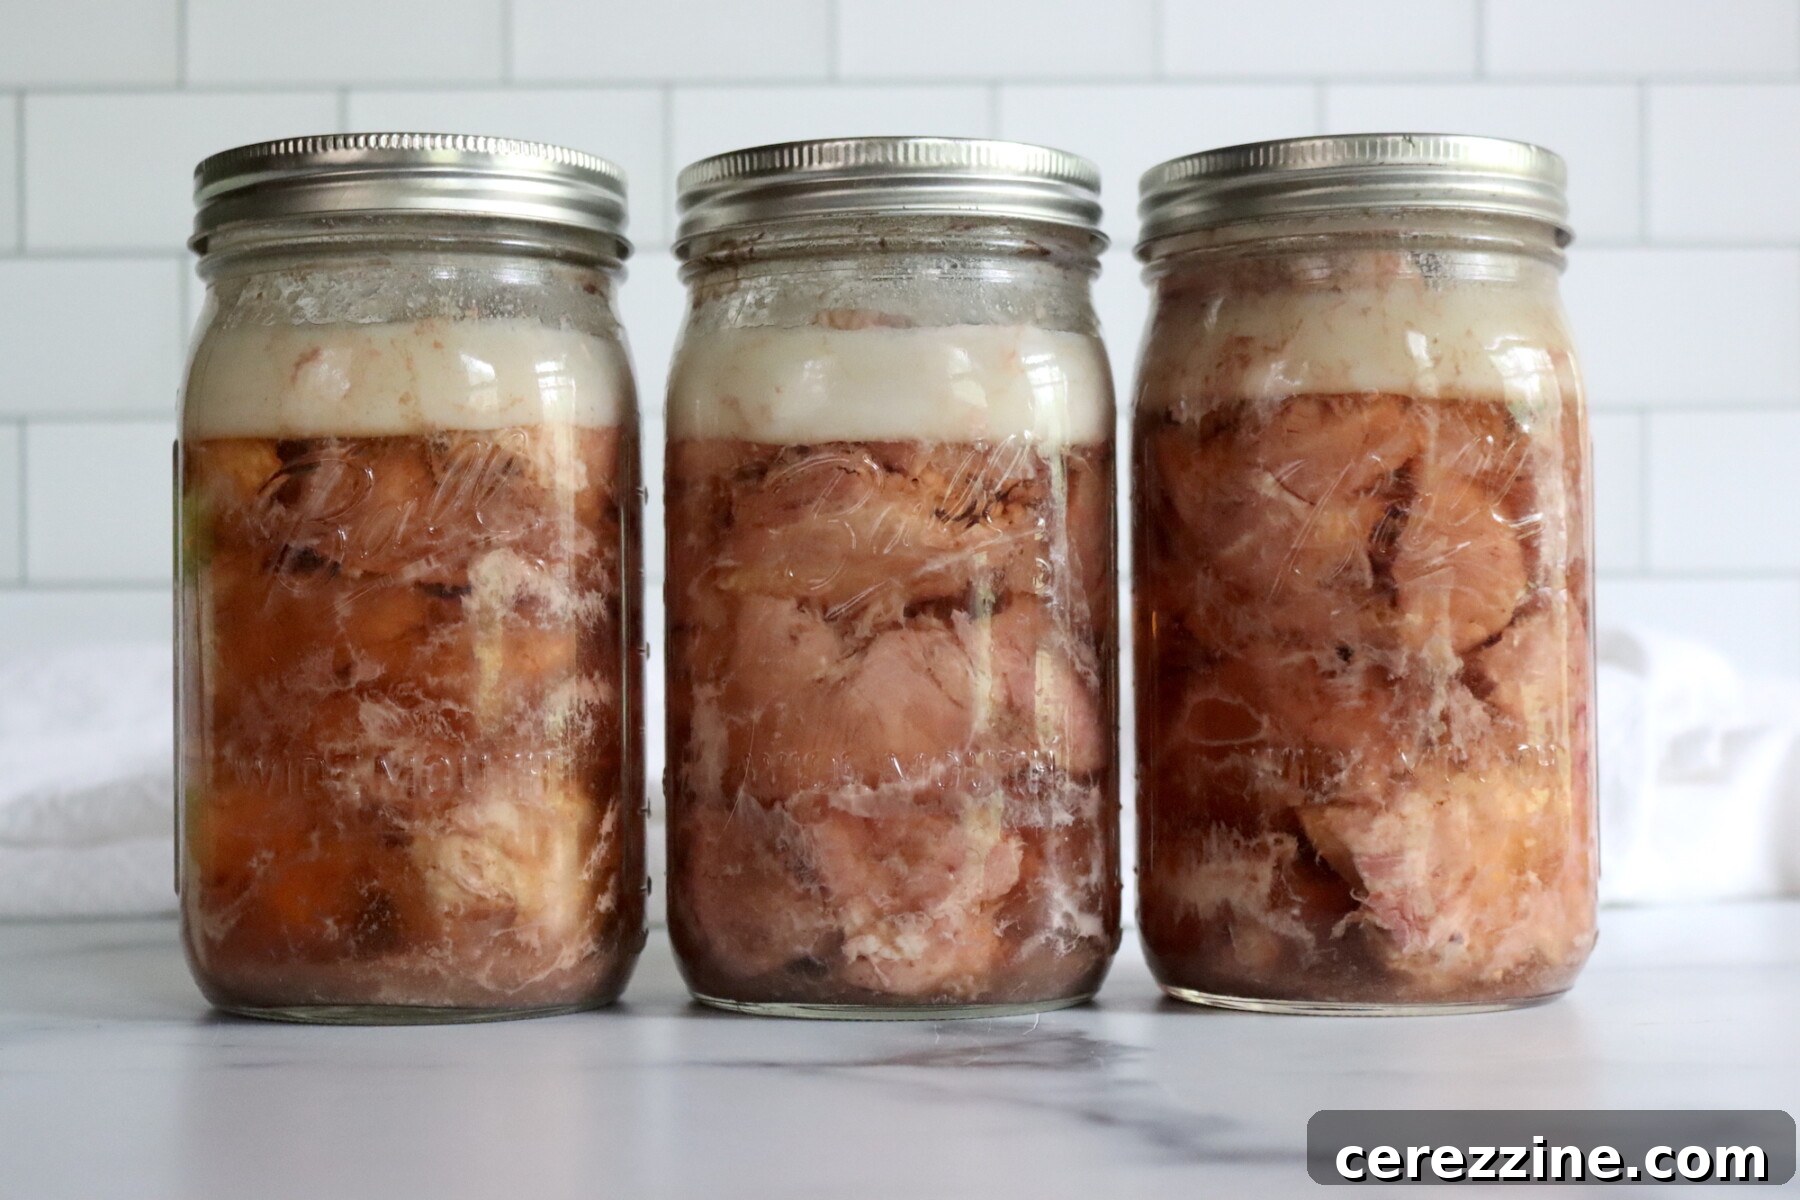
This comprehensive recipe has been rigorously reviewed for safety and accuracy by a Master Food Preserver, certified through the authoritative University of Cornell Cooperative Extension.
Our detailed guide strictly adheres to the proven instructions provided by the National Center for Home Food Preservation (NCHFP) for canning pork. It is designed specifically for pressure canning, which is the only safe method for preserving low-acid foods like meat. This classic, no-fuss approach empowers you to create delicious, shelf-stable meat that can be effortlessly incorporated into a wide array of dishes, from flavorful tacos to robust soups, often in just a matter of minutes.
While there are numerous pork canning recipes available, the most fundamental and universally useful is plain canned pork. This is particularly true when you use chunky cuts of pork shoulder, which consistently achieve a remarkably tender texture within the canning jar, making them incredibly versatile for future culinary creations.
Pork offers flexibility in its preparation for canning, allowing for two main methods: raw pack or hot pack. The raw pack technique involves placing raw meat into jars without any additional liquid, as the meat naturally releases its own juices during the processing. In contrast, the hot pack method requires pre-cooking the meat and then packing it into jars with added broth or other approved liquids. Both methods utilize the same pressure canning times and pressure settings, with the primary difference lying in how the meat is prepared before it enters the canning jar.
For those looking to explore specific cuts or alternative preparations, consider our dedicated recipes for canning sausage, canning pork ribs, canning pork shoulder in spicy broth, or our detailed instructions for canning pulled pork.
The Advantages of Home Canning Pork: Why You’ll Love This Recipe!
Embracing the art of home canning, particularly for a staple like pork, offers a wealth of benefits that extend far beyond simply preserving food. This straightforward pork canning recipe provides numerous reasons to become a cherished part of your culinary routine:
- Unmatched Efficiency with Raw Pack: The raw pack method is a cornerstone of this recipe, prized for its remarkable speed and minimal fuss. Once the pork is skillfully trimmed and cubed, it goes directly into the jars without any need for pre-cooking. This dramatically cuts down on active preparation time, making it an ideal candidate for those ambitious batch-cooking days when you want to maximize your output with less effort.
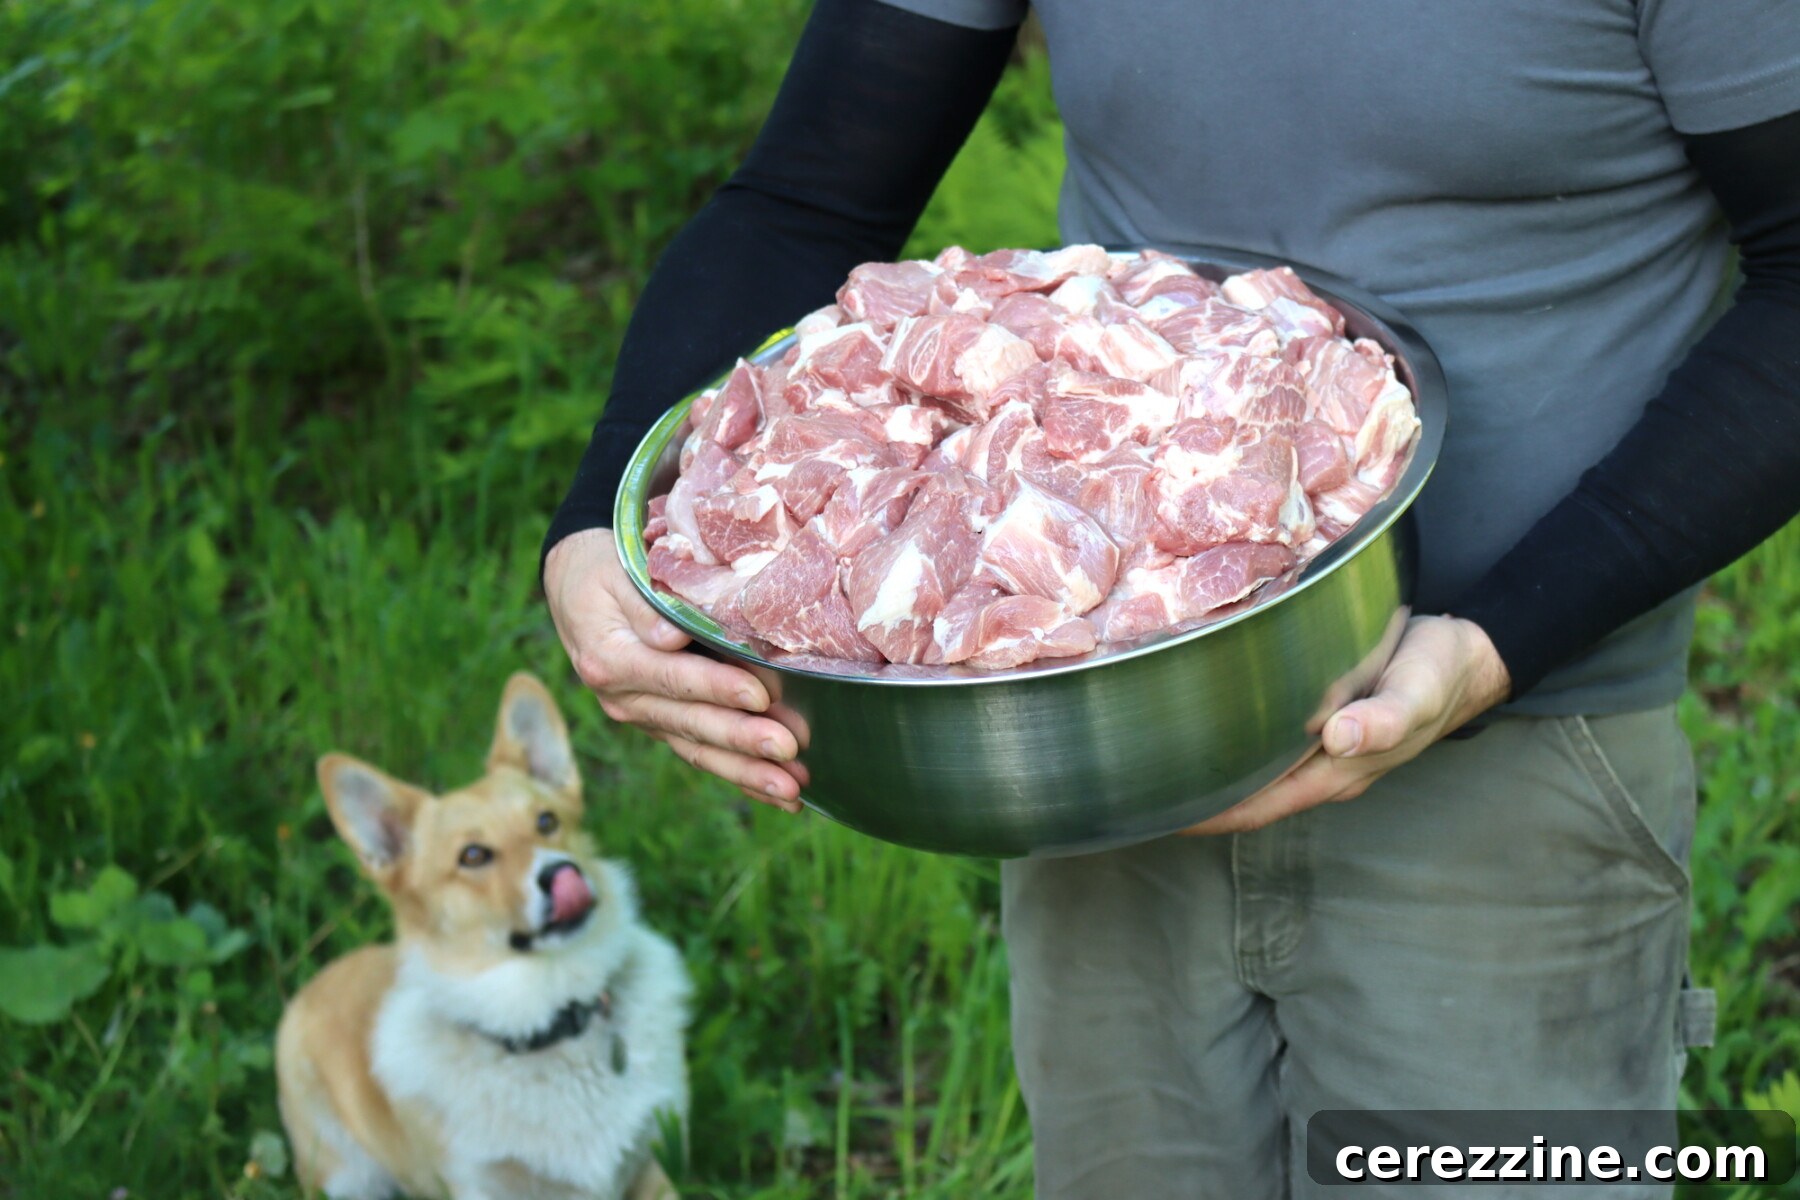
- Pork Shoulder: The Forgiving Champion: Pork shoulder truly shines in the pressure canner. This cut boasts an optimal balance of intramuscular fat and connective tissue (collagen), which, under the high pressure and heat of canning, breaks down beautifully. The result is consistently juicy, wonderfully tender meat that retains its shape without becoming dry or stringy. Its robust nature makes it forgiving even for novice canners, ensuring delicious results every time.
- A True Pantry Powerhouse: I personally advocate for canning pork shoulder because it’s a cut that’s often available in larger, more economical quantities, and it transforms into an incredibly versatile pantry staple. Imagine those busy evenings when you’re short on time and energy: a jar of perfectly home-canned pork is your instant solution. It converts the daunting question of “what’s for dinner?” into a simple assembly task, freeing up precious time and mental bandwidth.
- Year-Round Convenience and Savings: This canning project offers a tangible return on investment that you’ll notice throughout the year. While canning day does involve some upfront effort, the subsequent convenience is immense. Having ready-to-use, pre-cooked meat means less last-minute grocery shopping, reduced food waste from bulk purchases, and quick access to wholesome protein for an endless variety of meals. It’s truly a project that pays dividends in both convenience and peace of mind.
Canning Pork: At a Glance
Before diving into the full recipe, here’s a concise overview of what you need to know about pressure canning pork:
- Recipe Title: Canning Pork (Plain Chunks)
- Category: Meat Canning Recipe
- Preservation Method: Pressure Canning (Absolutely essential for safety)
- Preparation Time (Meat Only): Approximately 15-20 minutes for trimming, cubing, and packing.
- Pressure Canning Time: 75 minutes for Pint jars, 90 minutes for Quart jars.
- Estimated Yield: Varies based on meat density, but typically around 1 pound of raw pork per pint jar, or 2 pounds per quart jar.
- Recommended Jar Sizes: Pint or Quart standard canning jars.
- Critical Headspace: 1 inch (space between the food surface and the rim of the jar).
- Core Ingredients: Pork (ideally shoulder), optional canning salt, and boiling broth/water/tomato juice for hot pack.
- Safety Standards: Compliant with NCHFP Meat Canning Guidelines.
- Skill Level: Easy! The process primarily involves simple meat preparation, proper jar packing, and adherence to standard pressure canner operation.
- Comparable Recipes: The methodology is very similar to other home-canned meats and poultry, such as canning chicken, canning duck, or canning beef short ribs.
Best Pork Cuts for Pressure Canning
Choosing the correct cut of pork is paramount to achieving delicious and safe home-canned meat. The intensive heat and pressure of the canning process mean that not all cuts respond equally well. The ideal cuts are those that retain moisture, maintain their structure, and become exquisitely tender without drying out. This generally means favoring cuts with some connective tissue and intramuscular fat over extremely lean options. Here’s a breakdown:
- Pork Shoulder (Boston Butt or Picnic Shoulder): This is the undisputed champion for canning pork in chunks. Its generous marbling and high collagen content are key. During the long processing time, the fat keeps the meat moist, and the collagen breaks down into gelatin, resulting in incredibly juicy, fork-tender pork that holds its shape beautifully. It’s also straightforward to cube and pack, making it perfect for raw packing.
- Pork Belly: Rich in fat and connective tissue, pork belly becomes luxuriously tender when pressure canned. It’s an excellent choice for dishes where you appreciate a higher fat content, such as adding richness to ramen or hearty stews. While the fat content is high, careful trimming of excess surface fat and ensuring clean jar rims can prevent sealing issues. Remember, only use fresh, uncured pork belly; cured bacon is not suitable for this canning method.
- Fresh Ham (Uncured Leg Roast): If you can acquire a fresh, uncured ham or leg roast—meaning the raw back leg of a pig, not the cured product commonly referred to as “ham”—it serves as a solid option for canning. It’s leaner than shoulder, so the final product might not be quite as succulent, but it still maintains good texture and offers a clean pork flavor. For this cut, the hot pack method, which includes added liquid, can help ensure better moisture coverage and a more “brothy” jar.
- Pork Loin (Including Sirloin Roast): Pork loin can technically be canned, but its inherent leanness presents a challenge. After 75-90 minutes under pressure, it can emerge drier and firmer than fattier cuts, especially with the raw pack method. While easy to trim due to minimal fat, plan to use canned pork loin in recipes where it can rehydrate and absorb moisture, such as saucy tacos, stir-fries, curries, or barbecue dishes.
- Pork Tenderloin: This cut is generally considered too lean and often too expensive to justify for pressure canning. Its primary culinary appeal lies in quick cooking to preserve its delicate tenderness. Prolonged pressure processing tends to dry out pork tenderloin, making it a less than ideal use of this premium cut. While not unsafe, the quality outcome is typically disappointing.
It is absolutely vital to avoid canning any pork product that has been cured, smoked, or heavily salted, such as conventional ham, bacon, or corned pork. These items are not tested for safety in standard home canning recipes. The curing agents and high salt content can interfere with the heat penetration and safety parameters of home pressure canning. (Note: A very select few bean canning recipes might include a minimal amount of bacon or ham for flavor, but these are specific exceptions and should not be confused with canning plain meat.)
Furthermore, ground pork and sausage require distinct canning processes due to their altered texture, increased surface area, and different fat distribution. They are not interchangeable with chunks of meat. For safe preservation of ground pork, please refer to our separate instructions on canning sausage.
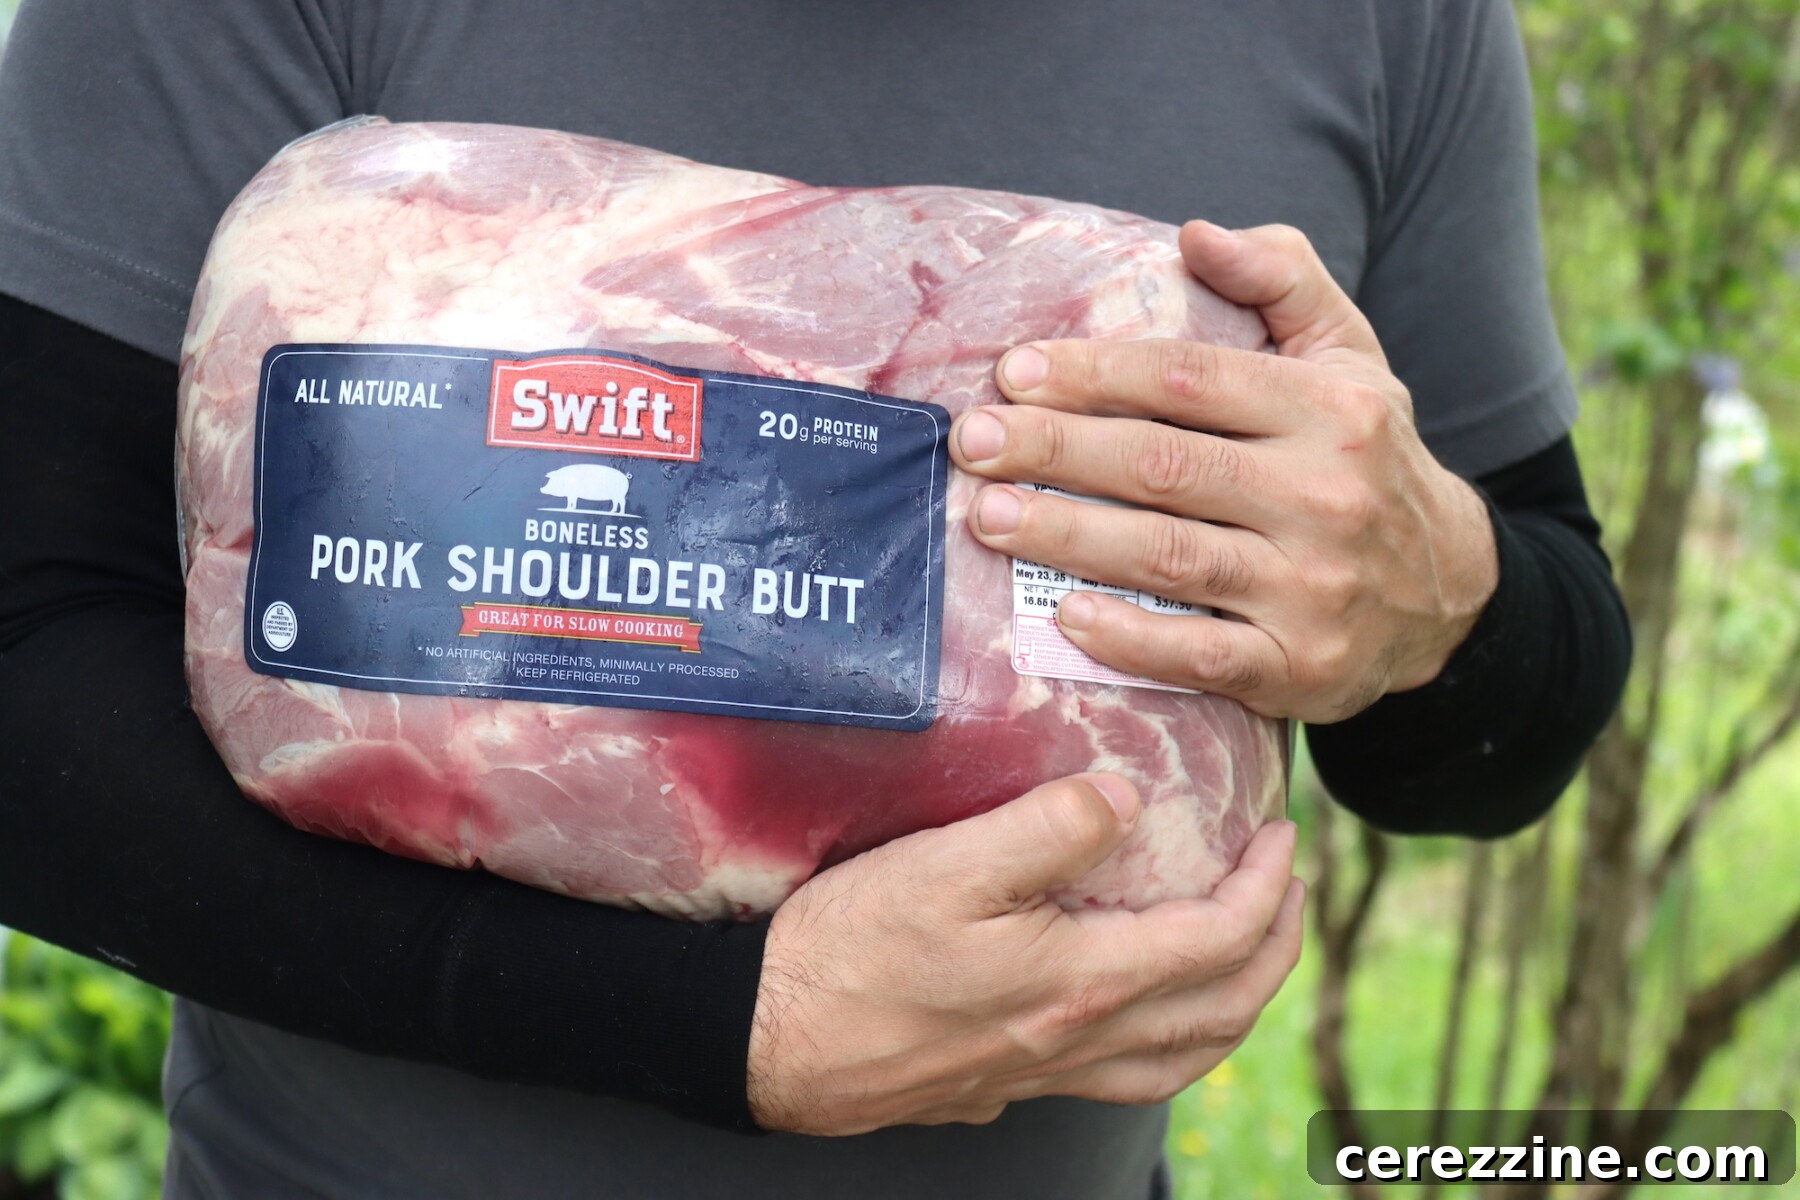
Essential Ingredients for Canning Pork
This method for canning pork is designed for simplicity, emphasizing the natural quality and flavor of the meat itself. A minimal ingredient list means that the primary focus remains on selecting excellent pork and preparing it correctly.
- Pork Shoulder (Boston Butt or Picnic Shoulder): This is our top recommendation and the best all-around cut for pressure canning in chunks. It consistently yields a superior, tender texture after processing. Any “low and slow” cooking cut with good marbling and connective tissue will perform admirably.
- Canning Salt (Optional): Salt is included solely for flavor enhancement and plays no role in the safety of the canned product. If you opt to use it, ensure it’s non-iodized canning or pickling salt to prevent any potential discoloration or cloudiness in your jars.
- Boiling Broth, Water, or Tomato Juice (for Hot Pack Only): These liquids are necessary for the hot pack method to ensure the meat is fully covered and to help maintain a consistent heat transfer during processing.
While pork shoulder is highly recommended for its ideal balance, other quality cuts like fresh uncured leg roasts or even leaner pork loin can be used. Just be aware that leaner cuts tend to yield a drier product, and excessively fatty cuts might result in a more prominent layer of fat in the jar after cooling. Pork shoulder offers the perfect sweet spot for texture and flavor.
You may safely add modest amounts of dry seasonings directly into the jars, such as cumin, paprika, chili powder, or garlic powder, to infuse flavor. However, it is absolutely crucial to never add any thickeners like flour, cornstarch, gravy mixes, pasta, rice, or other starches to your canning jars. These ingredients can impede proper heat penetration, preventing safe processing and posing a risk to food safety.
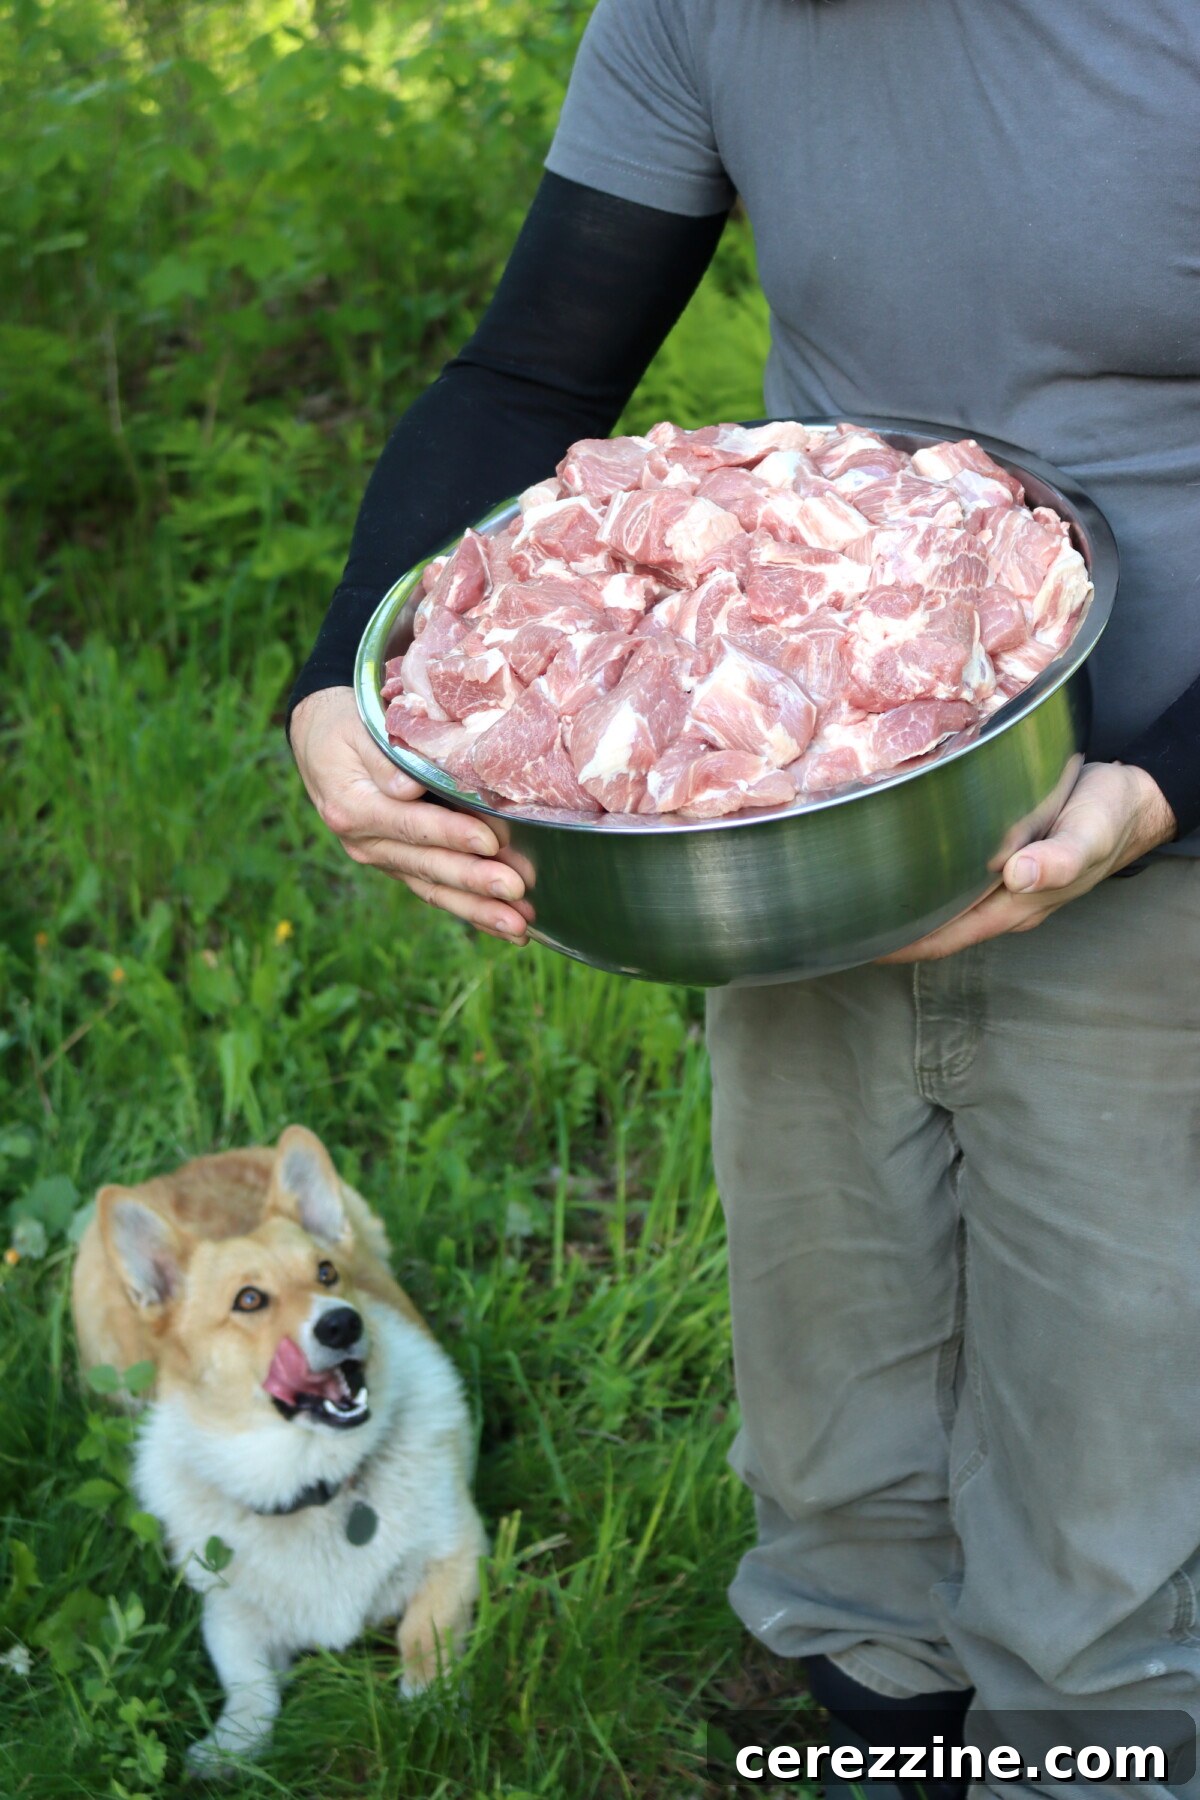
Preparing Pork for Canning: Raw Pack vs. Hot Pack Methods
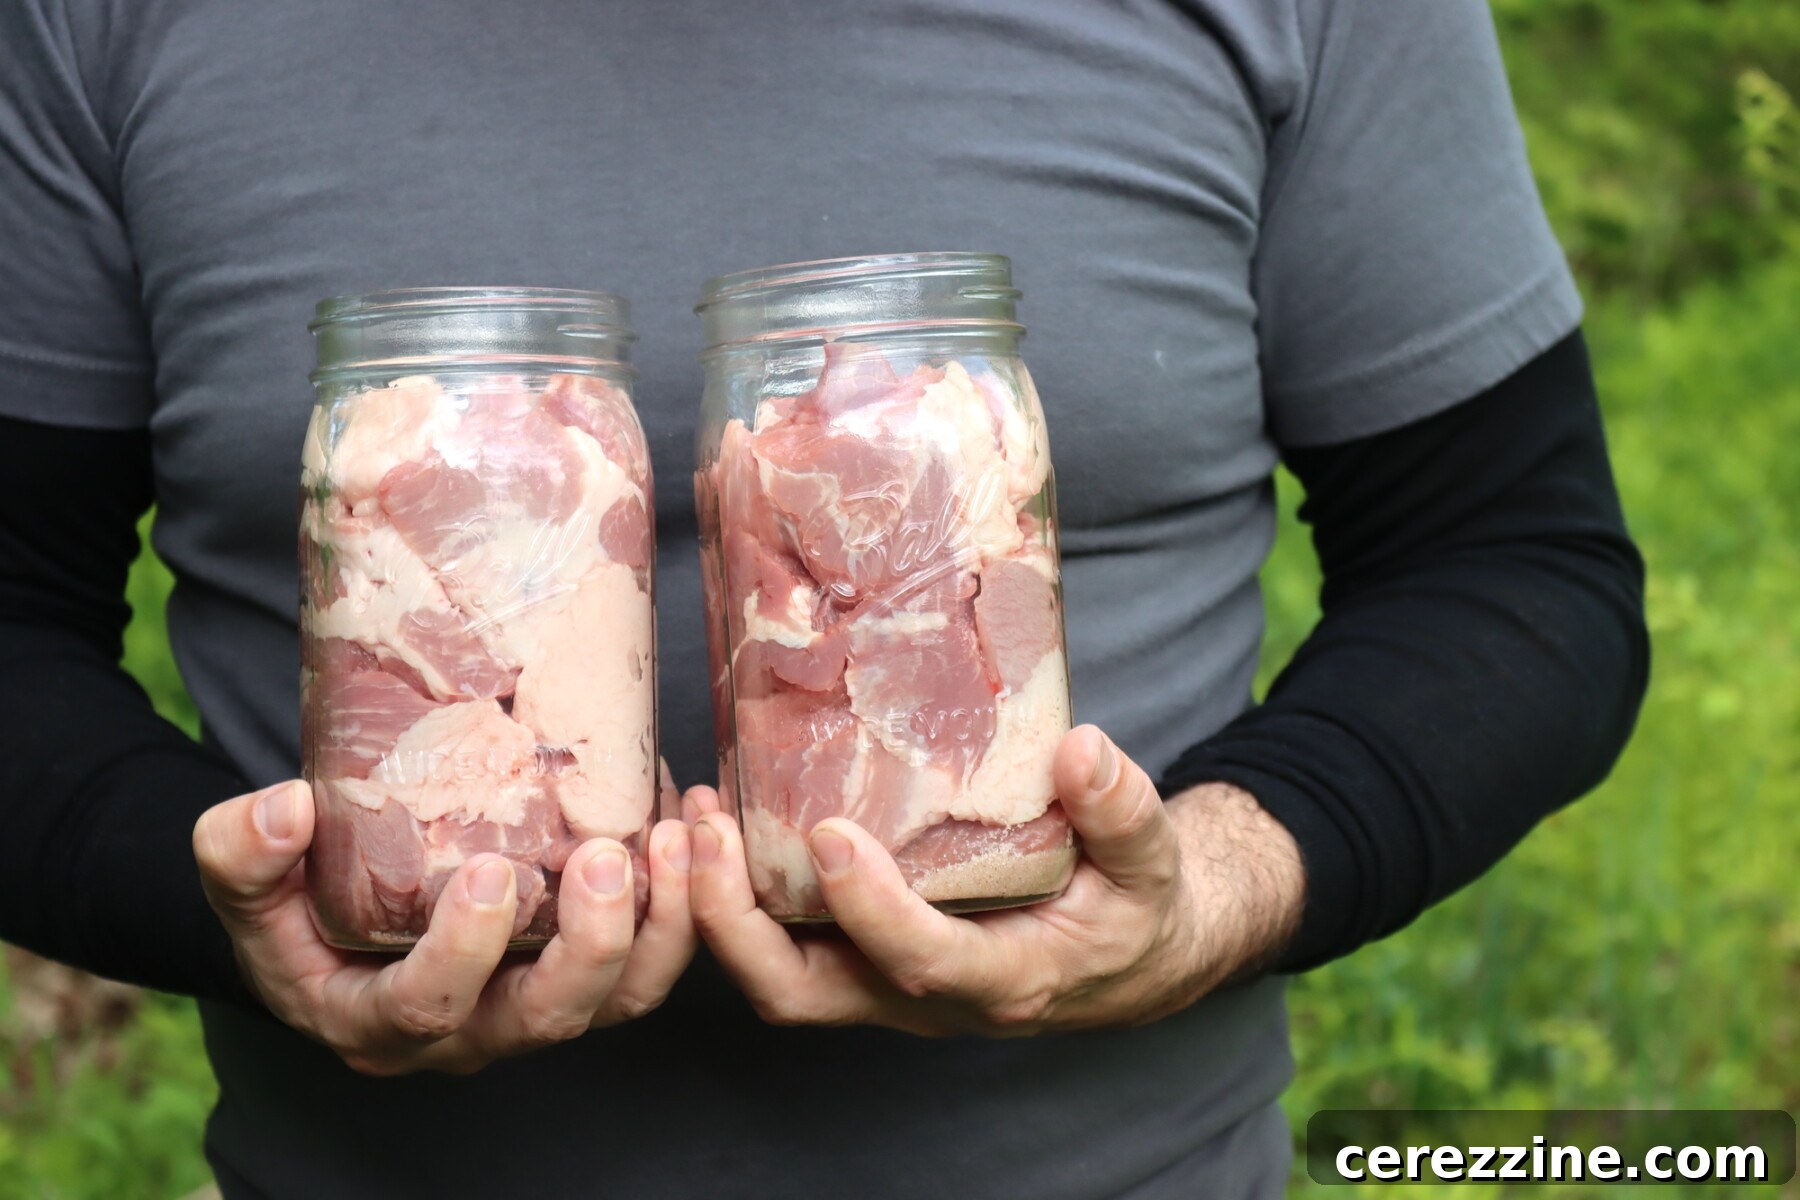
Before initiating the pressure canning process, your pork needs to be properly prepared. You have two tested and safe options: the raw pack method or the hot pack method. While the subsequent pressure canning instructions are identical for both, the initial meat preparation differs. The accompanying images primarily depict the raw pack method, but both approaches are equally effective for safe preservation.
Raw Pack Pork
The raw pack method is highly favored for its simplicity and the minimal hands-on time it requires, as it bypasses any pre-cooking steps.
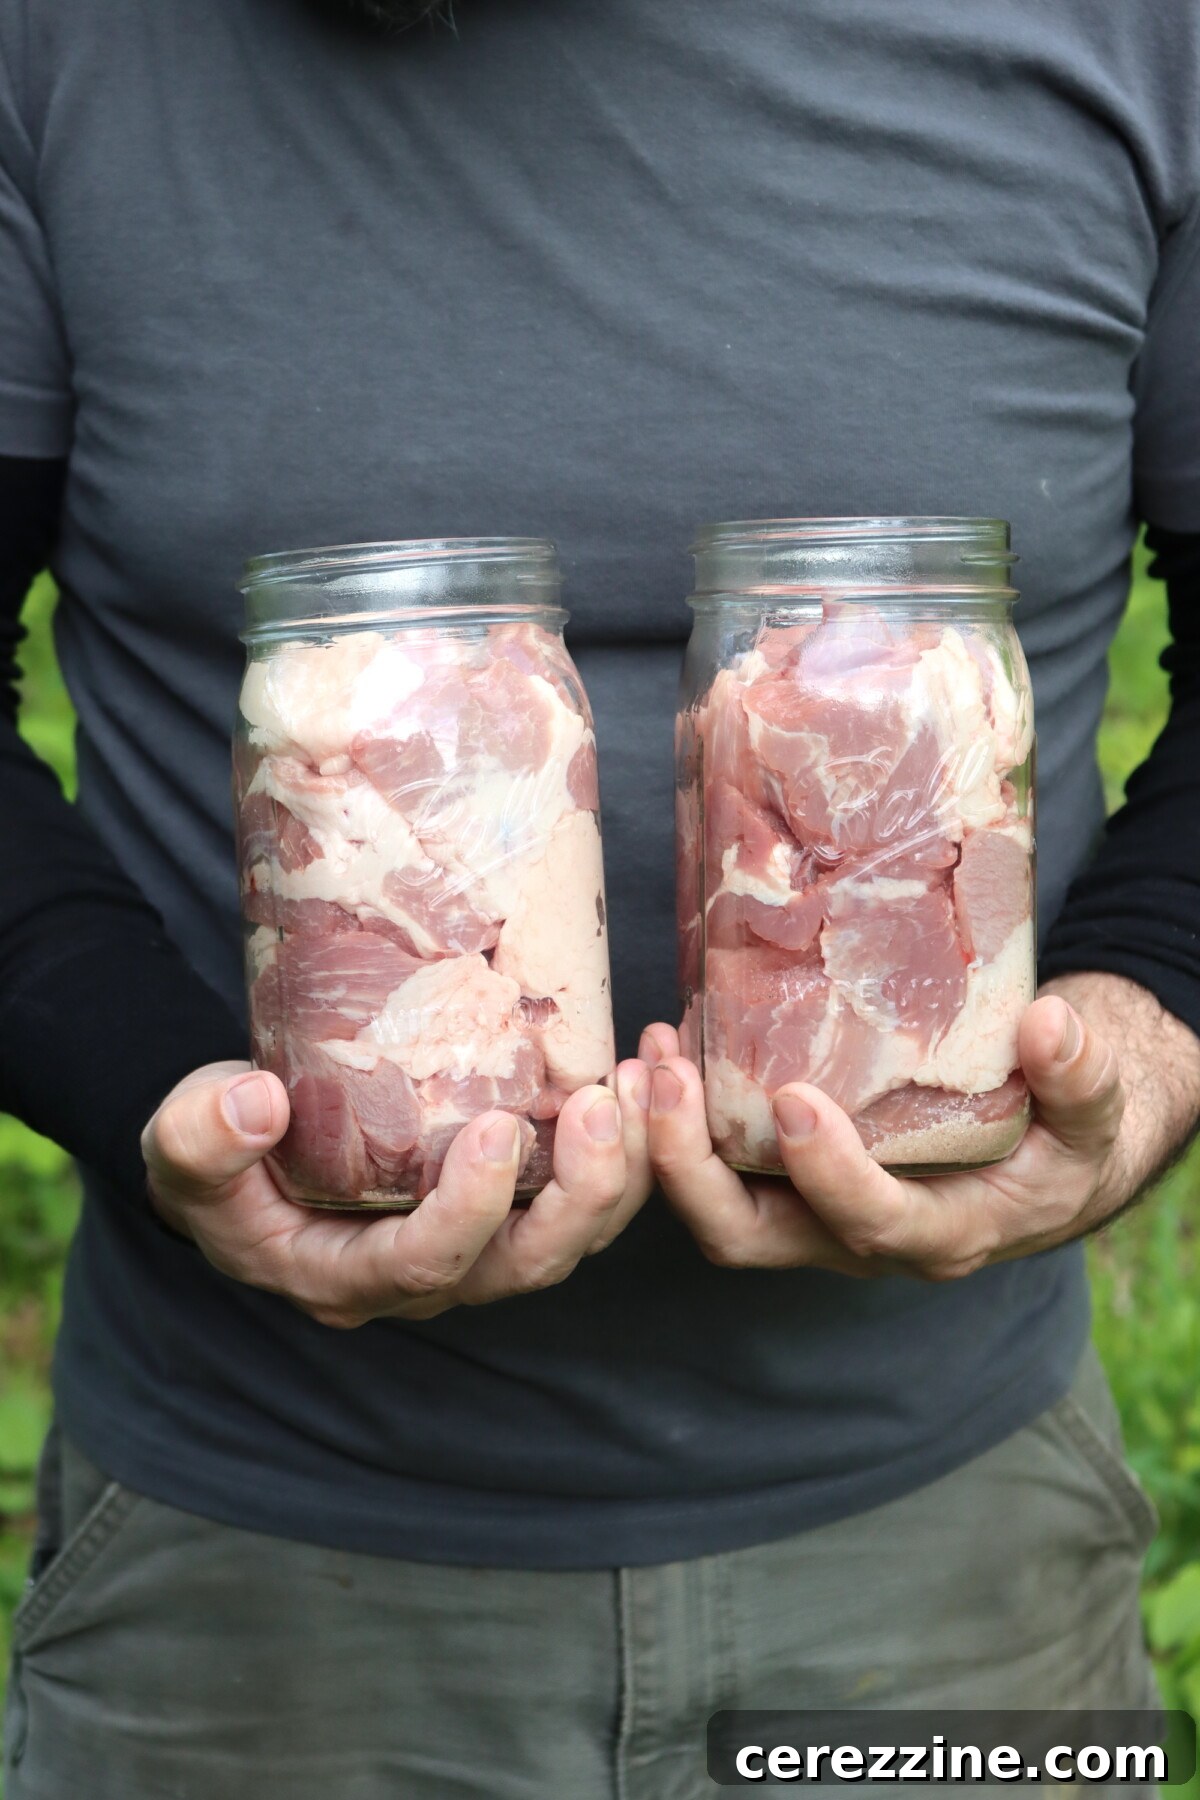
- Trim and Cube the Pork: Start with well-chilled pork shoulder (or your preferred canning cut). Chilling the meat makes it significantly firmer and easier to trim neatly. Carefully remove any excess surface fat, tough gristle, bones, or glands. Then, cut the meat into uniform strips, cubes, or chunks, ideally 1 to 2 inches in size. Ensure the pieces are appropriately sized to pack snugly into your jars without leaving large air pockets.
- Add Optional Salt: If you choose to use canning salt for flavor, add it to the bottom of each hot, clean canning jar before you begin packing the meat. A standard measurement is 1/2 teaspoon for pint jars or 1 teaspoon for quart jars. Remember, salt is entirely optional and does not contribute to the safety of the canned product.
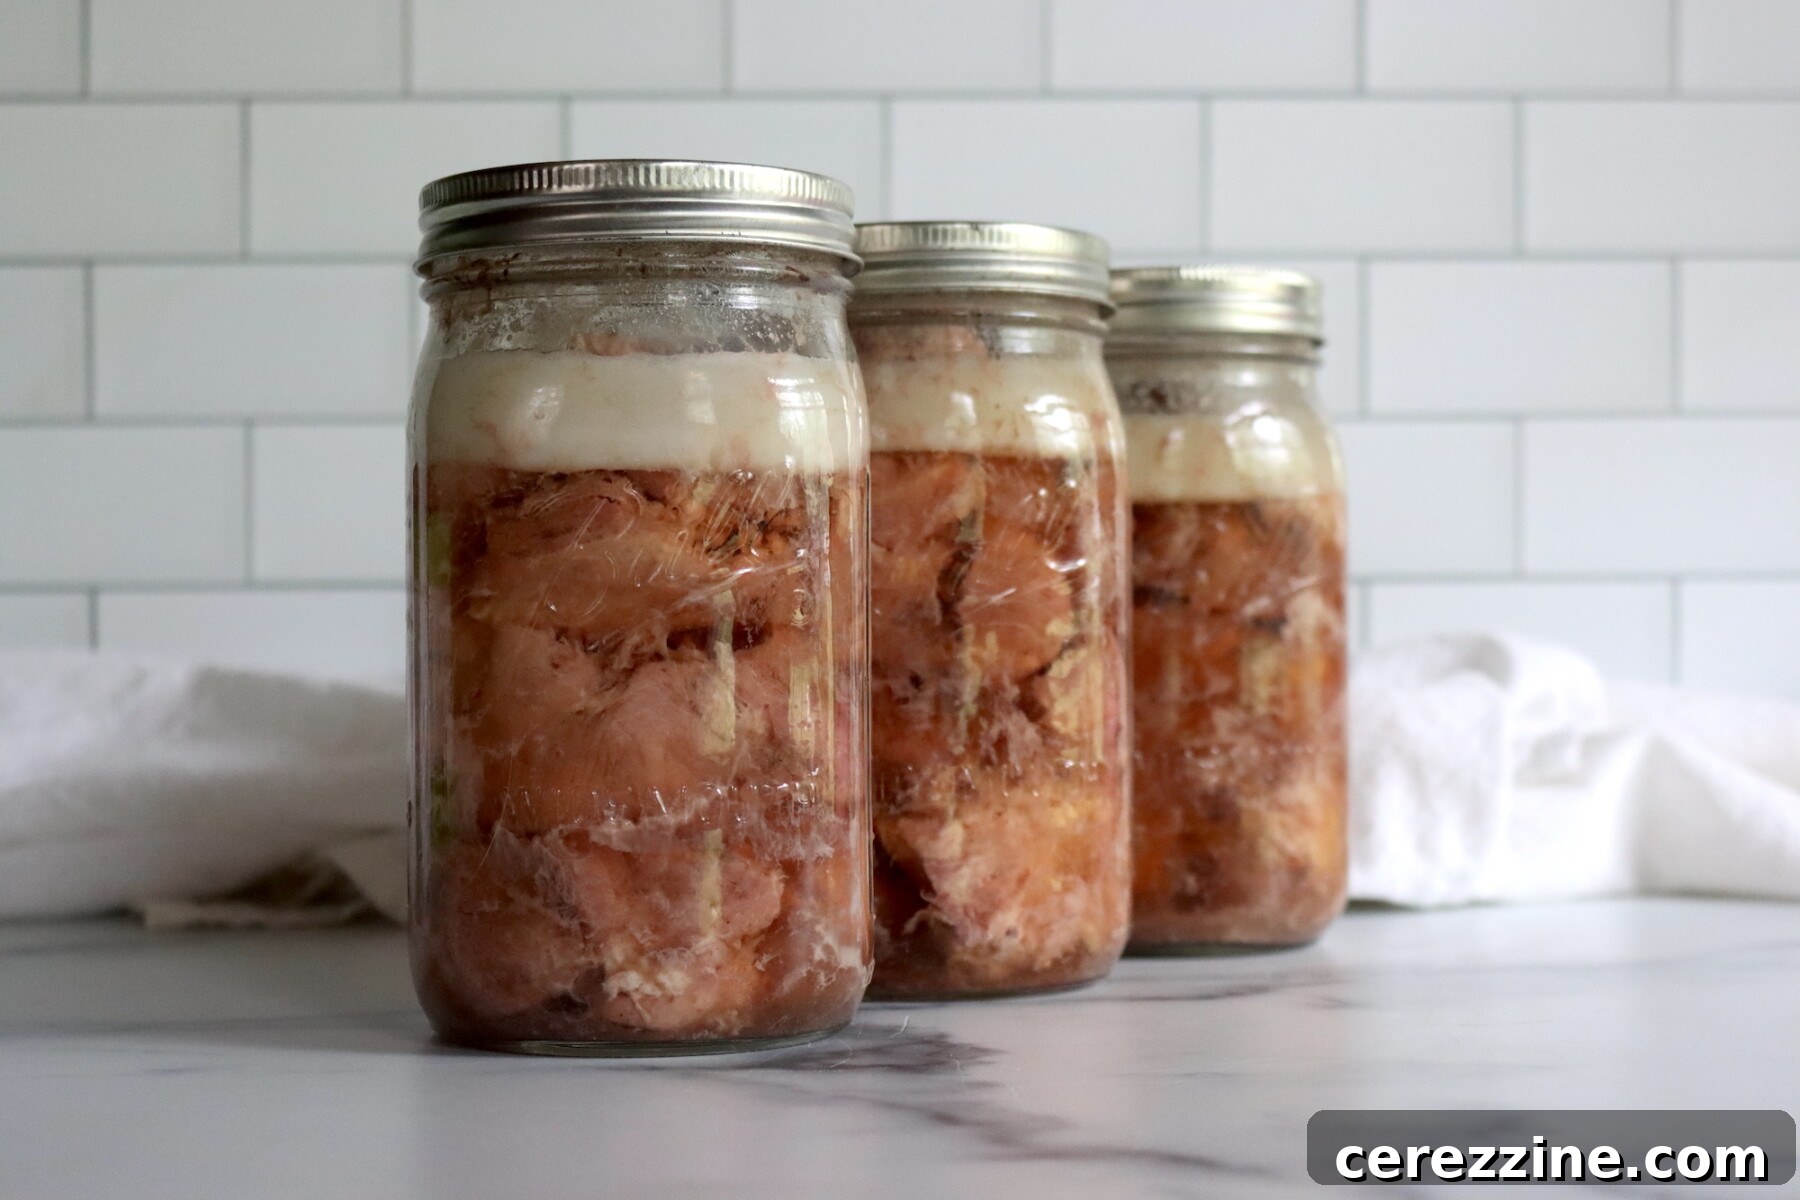
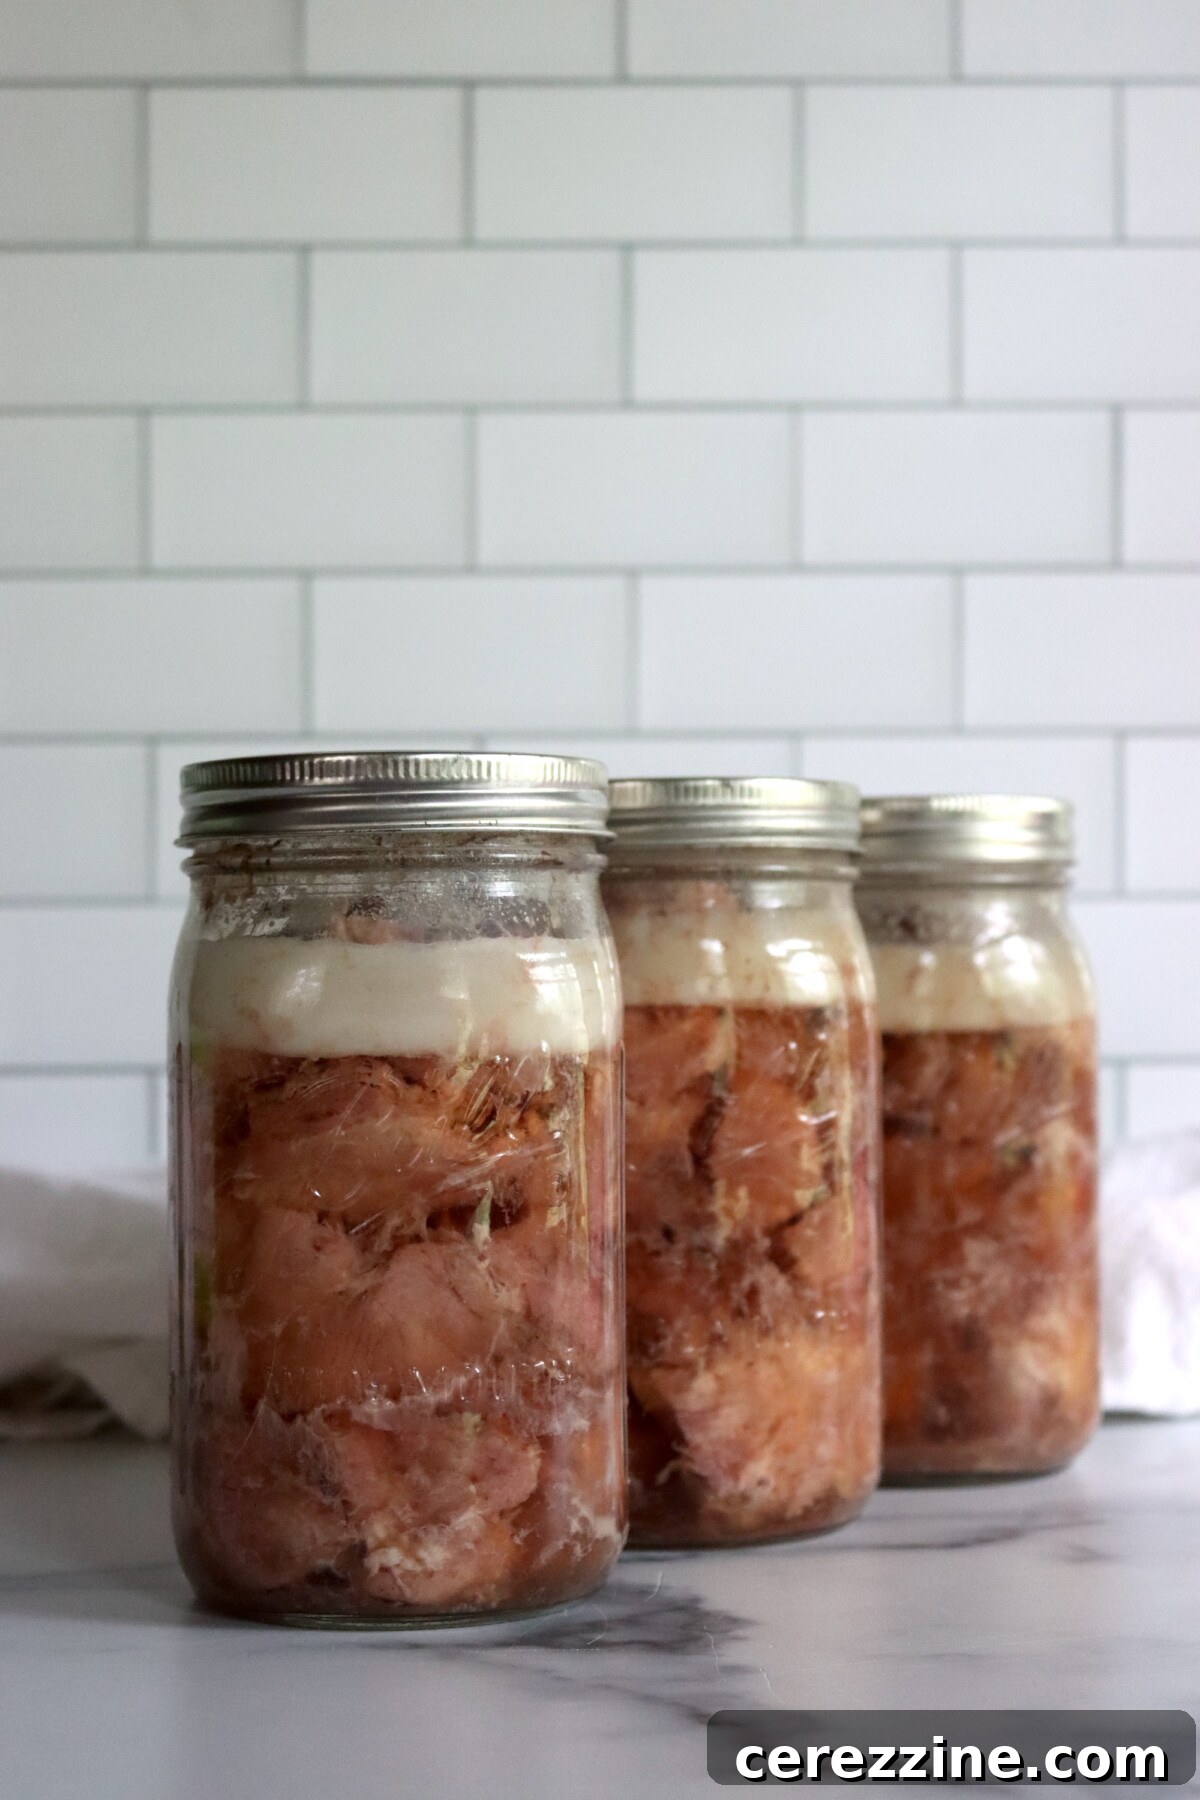
- Pack the Jars: Tightly pack the raw pork chunks into your hot, clean canning jars, ensuring you leave a precise 1 inch of headspace. Headspace is a critical factor for successful sealing and to allow for the natural expansion of the meat during processing. For the raw pack method, it is crucial to not add any additional liquid to the jars. The pork will release its own natural juices as it processes under pressure, creating a rich, flavorful broth.
- Prepare for Canner: Using a clean, damp cloth, meticulously wipe the rims of each jar. This removes any stray fat particles or food residue that could prevent a proper seal. Apply clean, new canning lids and screw bands (rings), tightening them finger-tight. The jars are now prepared and ready to be transferred directly to your pressure canner.
Hot Pack Pork
The hot pack method often results in jars with more consistent liquid levels and a visually “cleaner” or more appealing presentation.
- Prepare and Pre-cook the Pork: Begin by trimming and cutting the pork into 1 to 2-inch strips, cubes, or chunks, following the same sizing as for the raw pack. Next, precook the meat until it is lightly browned or just rare. This can be achieved through roasting, stewing, or quickly browning it in a skillet. The objective is to thoroughly heat the meat and set the proteins, not to fully cook it through.
- Utilizing Leftovers (If Applicable): If you are canning fully cooked leftover pork, ensure that it contains only canning-safe ingredients. This means the meat should be free from any starches, thickeners, gravies, or non-approved vegetables that could compromise the safety of the canned product.
- Pack Jars with Hot Meat and Liquid: Pack the hot, precooked pork into hot, clean canning jars, maintaining a 1 inch headspace. If using salt, add 1/2 teaspoon per pint or 1 teaspoon per quart. Then, cover the meat with boiling broth, meat drippings, hot water, or tomato juice, ensuring that the 1-inch headspace is carefully preserved. Using hot meat and hot liquid helps to prevent thermal shock, which can cause jars to crack.
- Prepare for Canner: Gently remove any trapped air bubbles from the jars by carefully sliding a non-metallic spatula or chopstick along the inside edge of the jar. Recheck the headspace and add a little more hot liquid if needed to maintain the 1-inch gap. Wipe the jar rims meticulously clean with a damp cloth to ensure a perfect seal. Apply new canning lids and tighten screw bands finger-tight. Proceed immediately to the pressure canner.
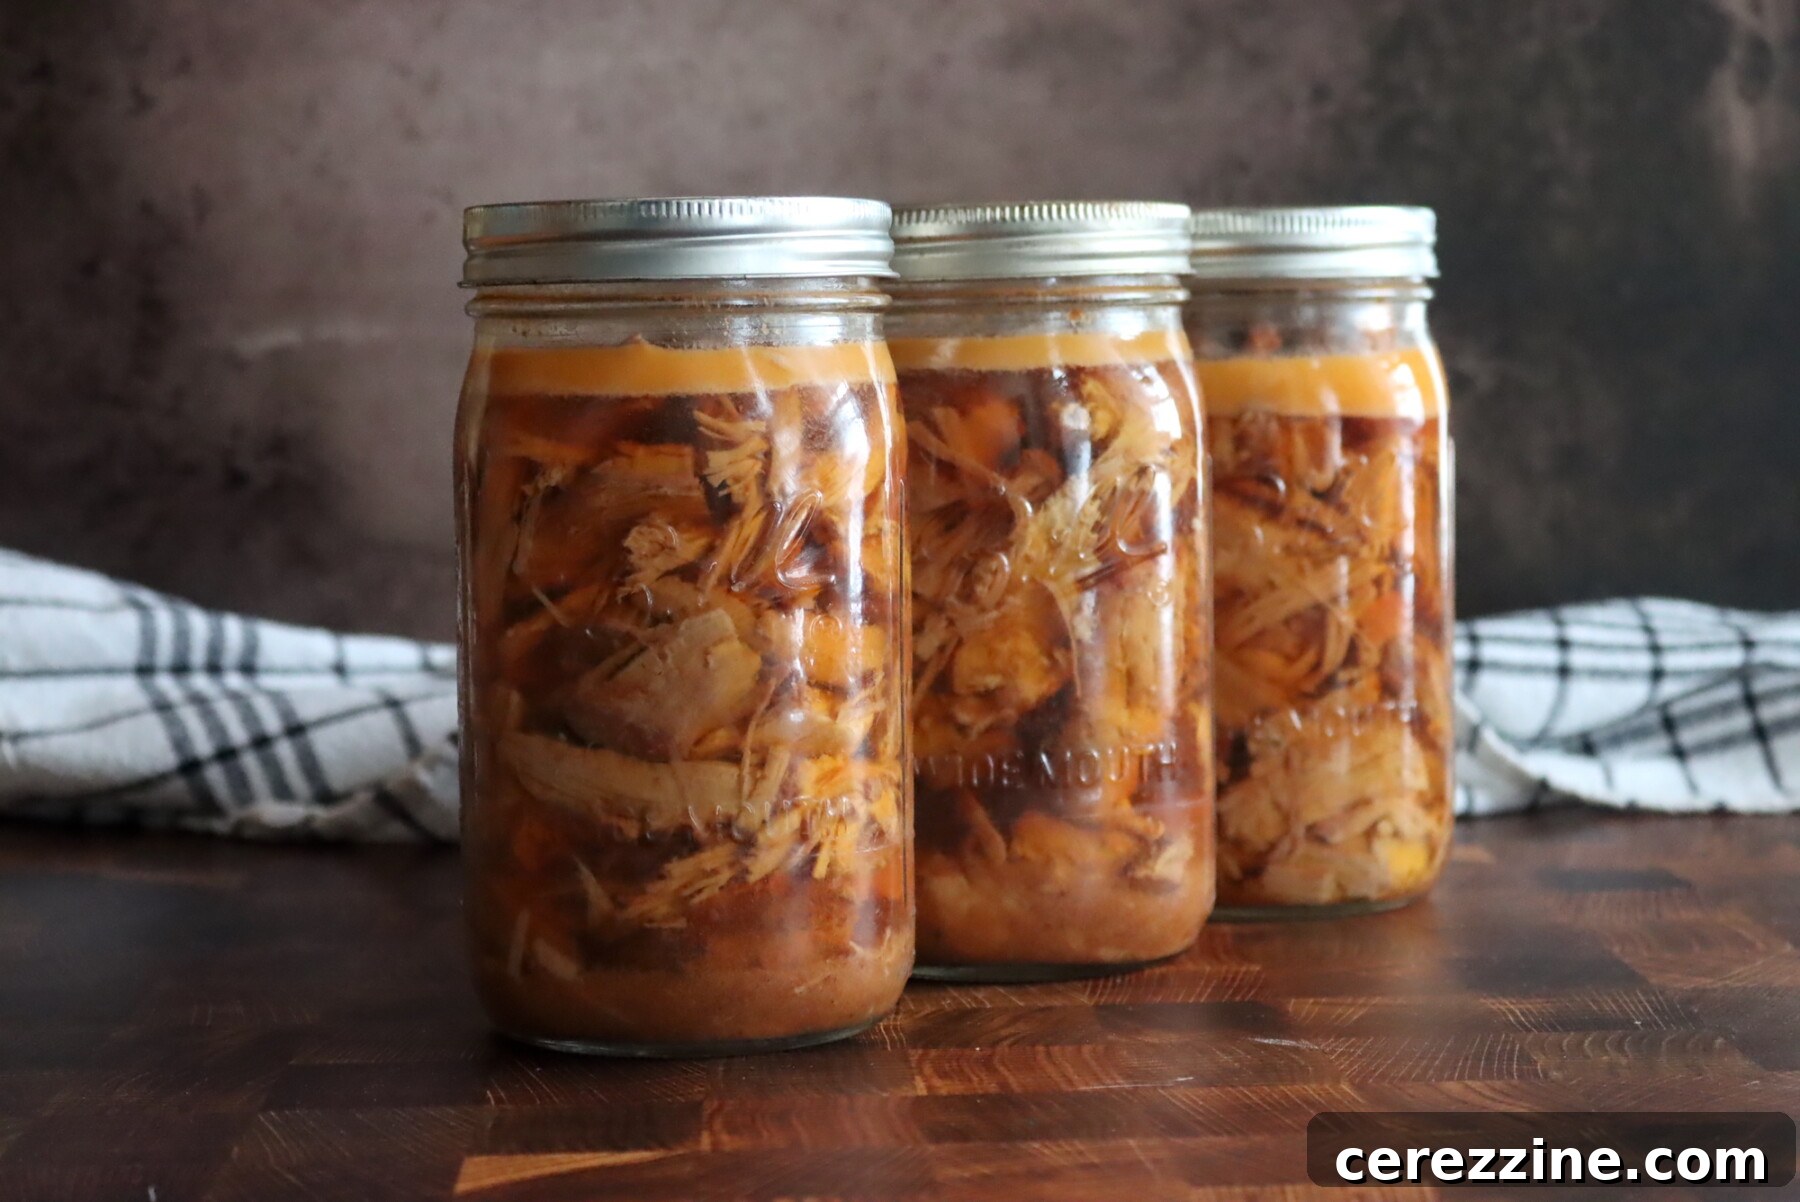
Pressure Canning Pork Safely: Step-by-Step Instructions
After your jars are meticulously packed using either the raw pack or hot pack method, the crucial next step is processing them in a pressure canner. It is imperative to understand that pork, like all meats, is a low-acid food. This means it absolutely requires the high temperatures achievable only through pressure canning to safely eliminate the risk of harmful bacteria, such as Clostridium botulinum. Water bath canning is never a safe or approved method for preserving any type of meat product.
- Prepare Your Pressure Canner: Place the filled and properly prepared jars onto the rack inside your pressure canner. Add the specific amount of water recommended by your canner’s manufacturer (this is typically 2 to 3 inches of water). Ensure the water is hot but not actively boiling when you place the jars, to prevent any thermal shock that could cause jar breakage.
- Seal and Vent the Canner: Securely lock the lid of the pressure canner into place. Turn the heat source to high and allow the canner to heat until a strong, steady column of steam begins to escape consistently from the vent pipe (or petcock). Once you observe this continuous flow of steam, allow it to vent for a full 10 minutes. This critical “venting” step is vital for expelling all ambient air from the canner, guaranteeing that the internal temperature reaches the necessary level for safe processing.
- Achieve and Maintain Pressure: After the 10-minute venting period, apply the weighted gauge (rocker) or close the petcock (for dial gauge canners) to begin building pressure inside. Continue heating until the canner reaches the correct pressure for your specific altitude (please refer to the altitude adjustment chart below).
- Start Processing Time: Once the required pressure is achieved, immediately start your processing timer. It is absolutely crucial to maintain this precise and consistent pressure throughout the entire canning period. Adjust the heat source as necessary to prevent any fluctuations in pressure.
- For Pint jars: Process for 75 minutes.
- For Quart jars: Process for 90 minutes.
- Allow Natural Depressurization: When the processing time is successfully completed, turn off the heat source completely. Allow the pressure canner to depressurize naturally. It is extremely important not to attempt to force-cool the canner by running cold water over it or by opening the vent prematurely. Doing so can cause liquid to siphon out of your jars (known as siphoning) and can compromise the integrity of the jar seals. Wait patiently until the pressure gauge reads zero (or until the safety lock mechanism drops, depending on your specific canner model).
- Cooling and Checking Seals: After the pressure has fully returned to zero, wait an additional 5 to 10 minutes. Then, carefully remove the weighted gauge or open the vent, and unlock the lid, always tilting it away from your face to allow any residual steam to escape safely. Using a jar lifter, carefully lift the hot jars straight up out of the canner and place them on a towel-lined counter or a sturdy wire rack. Ensure there is adequate space between each jar to allow for even cooling, and let them cool undisturbed for a period of 12 to 24 hours.
- Final Storage: Once the jars have completely cooled, meticulously check all jar seals. A properly sealed lid will be concave (curved inwards) and will not flex or spring back when you press down on its center. Remove the screw bands (rings), wipe the jars clean, then label each jar clearly with its contents and the date of canning. Store your sealed jars in a cool, dark, and dry pantry. Any jars that did not achieve a proper seal must be immediately refrigerated and consumed within a few days.
Pressure Canning Altitude Adjustments
For absolute food safety in pressure canning, it is critical to adjust the required pressure based on your geographical altitude. While the processing times for specific foods remain constant regardless of elevation, the necessary pressure increases at higher altitudes to compensate for the lower boiling point of water. Please consult the following adjustments:
For Dial Gauge Pressure Canners:
- 0 to 2,000 feet in elevation – Maintain 11 lbs pressure
- 2,001 to 4,000 feet in elevation – Maintain 12 lbs pressure
- 4,001 to 6,000 feet in elevation – Maintain 13 lbs pressure
- 6,001 to 8,000 feet in elevation – Maintain 14 lbs pressure
For Weighted Gauge Pressure Canners:
- 0 to 1,000 feet in elevation – Use a 10 lbs weighted gauge
- Above 1,000 feet in elevation – Use a 15 lbs weighted gauge
Creative Serving Ideas for Your Home-Canned Pork
The remarkable versatility and unparalleled convenience of home-canned pork make it an invaluable addition to any kitchen. A simple jar of this tender, shelf-stable meat serves as a foundational ingredient, capable of transforming countless meals with minimal effort. Here are some inspiring ideas to turn your canned pork into quick, delicious, and satisfying dishes:
- Effortless Pulled Pork Sandwiches: Gently warm the canned pork along with its natural juices. With two forks, effortlessly shred the succulent meat. Toss it generously with your favorite barbecue sauce, pile it high on soft, toasted buns, and serve alongside a refreshing coleslaw for an incredibly quick and satisfying comfort meal.
- Rapid Fajitas or Tacos: Drain the pork chunks and crisp them beautifully in a hot skillet until they achieve a delightful golden-brown. Add thinly sliced onions and bell peppers, sautéing until they are tender-crisp. Season generously with your preferred fajita or taco seasoning blend. Serve in warm tortillas with all your favorite toppings for a lightning-fast fiesta any night of the week.
- Hearty & Flavorful Bean Dishes: Stir the canned pork (and a little of its rich broth for added moisture and flavor) into a simmering pot of beans—whether you prefer black beans, white beans, or classic baked beans. The pork instantly imparts a deep, savory flavor and substantial protein, giving the dish the impression of having simmered for hours, without the wait.
- Quick & Comforting Soups: Utilize both the natural broth and tender meat directly from the jar as an instant, robust base for a nourishing soup. Add cubed potatoes, chopped cabbage, carrots, and your favorite herbs for a simple yet incredibly satisfying pork-and-vegetable soup. For those who enjoy a bit of heat, incorporate green chilies and hominy for a delicious, posole-inspired creation.
- Savory Fried Rice in Minutes: In a wok or large skillet, quickly sauté aromatic vegetables such as minced garlic, grated ginger, and sliced scallions. Add cooked rice and your preferred stir-fry vegetables. Finally, gently fold in the drained, chunky pork at the very end, just long enough to warm it through, ensuring it retains its delightful texture. Finish with a drizzle of soy sauce and a touch of sesame oil.
- Gourmet Ramen Shortcut: Warm the canned pork and season it with a vibrant mix of fresh ginger, garlic, and soy sauce. Prepare your favorite ramen noodles. Combine the seasoned pork, cooked noodles, a splash of the savory home-canned pork broth from the jar, and a handful of fresh greens like spinach or bok choy for an astonishingly easy and deeply flavorful homemade ramen bowl.
Pork Canning: Frequently Asked Questions (FAQs)
- Can I water bath can pork?
- Absolutely not. Pork is classified as a low-acid food. For safe preservation and to completely eliminate the risk of botulism, which is a severe foodborne illness, meat products like pork must be pressure canned. Water bath canning does not reach the high temperatures necessary to destroy the dangerous bacteria that can thrive in low-acid environments.
- Do I have to add liquid when canning pork?
- The requirement for adding liquid depends on the packing method you choose. If you are using the raw pack method for chunks of meat, you do not add any external liquid. The raw pork will naturally release its own juices during the pressure canning process, creating a flavorful, natural broth within the jar. However, if you opt for the hot pack method, you will need to cover the pre-cooked meat with boiling broth, water, or tomato juice. The typical amount of liquid needed is approximately 1 to 2 cups per quart jar, or 3/4 to 1 cup per pint jar, though this can vary slightly based on how densely the meat is packed into the jars.
- Is hot pack or raw pack better for canning pork?
- Both raw pack and hot pack are scientifically tested and safe methods for canning pork, so the “better” choice often comes down to personal preference and convenience. Raw pack is generally quicker and simpler because it eliminates the need for a pre-cooking step, making it an excellent choice for processing large quantities, especially with cuts like pork shoulder. The main difference is that raw pack may sometimes result in slightly less liquid in the jar as the meat can shrink. Hot pack is often preferred by those who desire more consistent liquid coverage, a visually more uniform and “brothy” appearance in the jar, and occasionally a slightly more tender final texture. The pre-cooking step in hot packing also allows for initial browning and flavor development.
- How long does home-canned pork last on the shelf?
- For optimal quality, including best flavor and texture, it is generally recommended to consume home-canned pork within 12 to 18 months from the date of canning. While properly pressure-canned pork remains safe to eat for several years as long as the jar’s seal remains intact and it’s stored in a cool, dark, and dry pantry, the overall quality (taste, texture, and nutritional value) will begin to gradually decline after approximately 18 months. Always remember to refrigerate any opened jars immediately and use the contents within a few days.
Explore More Pork Canning Recipes
If you’re eager to expand your pork canning repertoire and transform bulk meat purchases into convenient, ready-to-use meals, explore our comprehensive collection of diverse recipes designed to make the most of your pantry:
20+ Pork Canning Recipes (Soup, Chili, and Meal-in-a-Jar Options)
Unlock the full potential of your pork with these creative and delicious canning ideas, perfect for stocking your pantry with homemade goodness.
Recipe: Pressure Canning Pork Chunks
This recipe provides a safe and easy method for pressure canning pork shoulder, resulting in tender, ready-to-use pork chunks perfect for a variety of quick meals. Choose between the raw pack or hot pack method, then follow a single set of pressure canning instructions to ensure safe, shelf-stable jars for your pantry.
Recipe Details
- Servings: Approximately 56 servings, which typically yields about 7 quart jars (based on 2 lbs pork per quart).
- Prep Time: 15 minutes (active time for trimming and cubing the meat).
- Canning Processing Time: 1 hour 30 minutes (processing time for quart jars at pressure).
- Total Time: Approximately 1 hour 45 minutes (excluding canner depressurization and jar cooling).
Essential Equipment
- Pressure Canner (A non-negotiable item for safe canning of low-acid foods).
- Canning jars (pint or quart size, with new lids and screw bands).
- Basic canning tools: jar lifter, canning funnel, non-metallic spatula or chopstick (for removing air bubbles).
Ingredients
- 14 lbs Pork shoulder: Boneless, thoroughly trimmed of excess fat, gristle, and glands, then cut into uniform 1 to 2-inch chunks (aim for approximately 2 lbs per quart jar, or 1 lb per pint jar).
- Canning Salt: 1/2 tsp per pint jar, or 1 tsp per quart jar (optional; added purely for flavor).
- Boiling Broth, Water, or Tomato Juice: Required only for the Hot Pack method. Add as needed to cover meat, typically 1 to 2 cups per quart, but the exact amount varies based on how densely the meat is packed.
Instructions
Raw Pack Method:
- Prepare & Pack Jars: Pack raw pork chunks tightly into clean, hot quart or pint jars, ensuring a precise 1-inch headspace. If you are adding salt, place 1 tsp per quart (or 1/2 tsp per pint) into the bottom of the jar before adding the meat. Do not add any liquid. The meat will release its own juices during the pressure canning process.
- Remove Air & Seal: Gently tap the filled jars on the counter to help release any trapped air bubbles; adjust pork pieces if needed to maintain headspace. Thoroughly wipe jar rims with a clean, damp cloth to remove any grease or food residue. Center new canning lids on the jars and apply screw bands, tightening them finger-tight.
Hot Pack Method:
- Pre-cook Pork: Lightly precook the pork chunks until they are rare (not fully cooked) by roasting, stewing, or browning them in a skillet. The goal is to heat the meat through and begin some flavor development.
- Pack Jars & Add Liquid: Pack the hot, precooked pork into clean, hot quart or pint jars, leaving 1 inch of headspace. If using salt, add 1 tsp per quart (or 1/2 tsp per pint). Cover the meat with boiling broth, water, or tomato juice, ensuring the 1-inch headspace is carefully maintained.
- Remove Air & Seal: Use a non-metallic spatula or chopstick to remove any air bubbles from the jars. Recheck headspace and add more hot liquid if necessary to maintain the 1-inch space. Wipe jar rims clean, center new lids, and tighten screw bands finger-tight.
Pressure Canning (for Both Raw and Hot Pack Methods):
- Load Canner: Place the prepared jars onto the rack inside your pressure canner. Add the amount of hot water recommended by your canner manufacturer (typically 2-3 inches). Lock the canner lid securely into place.
- Vent Canner: Heat the canner on high until a steady, vigorous column of steam vents from the vent pipe. Allow the canner to vent continuously for a full 10 minutes to ensure all air is purged and the correct internal temperature is achieved.
- Bring to Pressure: After venting, apply the weighted gauge (rocker) or close the petcock. Continue heating until the canner reaches the correct pressure for your specific altitude (refer to the “Pressure Canning Altitude Adjustments” notes below).
- Process Jars: Once the target pressure is achieved, start your timer. Process pint jars for 75 minutes, and quart jars for 90 minutes. It is critical to maintain a consistent pressure throughout the entire processing time by adjusting the heat as needed.
- Depressurize Naturally: When the processing time is complete, turn off the heat source. Allow the pressure canner to cool down and depressurize naturally until the pressure gauge reads zero (or the safety lock drops). Do not attempt to force-cool the canner, as this can lead to siphoning and seal failure.
- Remove & Cool Jars: After the pressure has fully dropped, wait an additional 5-10 minutes. Carefully remove the weighted gauge/open the vent, then unlock the lid, tilting it away from your face to release any remaining steam. Using a jar lifter, carefully remove jars straight up and place them on a towel-lined counter, leaving adequate space between them to cool undisturbed for 12 to 24 hours.
- Check Seals & Store: After cooling, check all jar seals (lids should be concave and not flex). Remove screw bands, wipe jars clean, label with contents and date, and store in a cool, dark, dry pantry. Any jars that did not seal properly must be refrigerated immediately and used within a few days.
Notes on Pressure Canning
Both the raw pack and hot pack methods are safe and follow the exact same pressure canning instructions. Your choice between them depends solely on your preference for initial meat preparation and the desired final appearance of the liquid in your jars.
Pressure Canning Altitude Adjustments
For safe pressure canning at any elevation, it is crucial to adjust the required pressure. While processing times for a given food product remain constant, the pressure must increase at higher altitudes to ensure the internal temperature of the canner reaches the necessary level for safe food preservation.
For Dial Gauge Pressure Canners:
- 0 to 2,000 feet in elevation – Maintain 11 lbs pressure
- 2,001 to 4,000 feet in elevation – Maintain 12 lbs pressure
- 4,001 to 6,000 feet in elevation – Maintain 13 lbs pressure
- 6,001 to 8,000 feet in elevation – Maintain 14 lbs pressure
For Weighted Gauge Pressure Canners:
- 0 to 1,000 feet in elevation – Use a 10 lbs weighted gauge
- Above 1,000 feet in elevation – Use a 15 lbs weighted gauge
Approximate Nutrition Information
Please note: This nutrition information is automatically calculated and should be used as an approximation only. Actual values may vary.
- Calories: 102 kcal
- Protein: 14g
- Fat: 5g
- Saturated Fat: 2g
- Polyunsaturated Fat: 1g
- Monounsaturated Fat: 2g
- Cholesterol: 46mg
- Sodium: 53mg
- Potassium: 236mg
- Vitamin A: 4 IU
- Vitamin C: 1mg
- Calcium: 10mg
- Iron: 1mg
Loved This Recipe? Share Your Thoughts!
If you’ve tried this Pork Pressure Canning Recipe, or any other recipe from Creative Canning, we encourage you to leave your feedback in the 📝 comments below!
Stay connected and receive more canning tips and delicious recipes by following us on social media!
- Substack
More Delicious Meat Canning Recipes
Expand your home food preservation skills and fill your pantry with these other delicious and safely canned meat and meal recipes:
Canning Boston Baked Beans
Learn the safe method for preserving homemade Boston baked beans, creating a convenient and flavorful pantry staple for quick meals.
Canning Sausage Potato and Kale Soup (Copycat Zuppa Toscana)
Preserve a hearty and flavorful sausage, potato, and kale soup in jars, perfect for quick, warming, and delicious meals anytime.
Canning Taco Soup
Enjoy the vibrant flavors of taco night whenever you please with this easy-to-can, family-favorite taco soup recipe.
Find Your Next Perfect Canning Recipe
Searching for something specific? Enter keywords below to discover the ideal recipe for your next home canning project!