Mastering Pressure Canning Beef Burgundy: A Timeless French Classic for Your Pantry
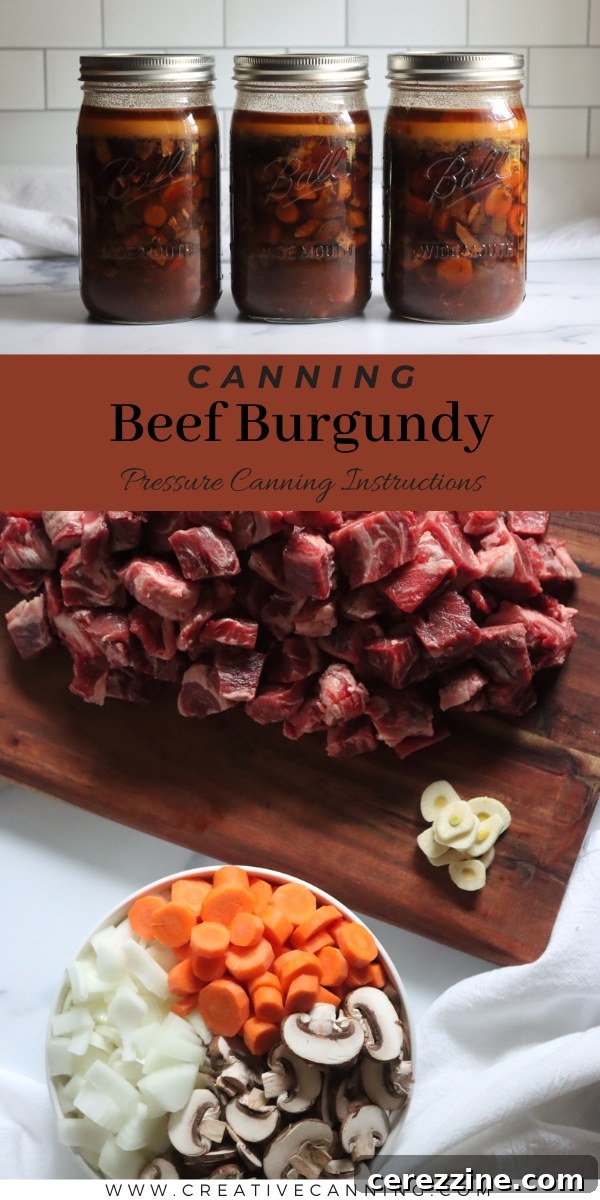
Imagine savoring the rich, complex flavors of classic Beef Burgundy, a renowned French comfort food, any night of the week without hours of preparation. With the magic of pressure canning, this culinary masterpiece can be safely stored on your pantry shelf, transforming into a convenient, heat-and-eat gourmet meal whenever the craving strikes. This guide will walk you through transforming savory, tender beef, cooked in a luscious red wine sauce with onions, mushrooms, and carrots, into a shelf-stable delight, ready to impress.
Beef Burgundy, or Boeuf Bourguignon, is more than just a stew; it’s a celebration of robust flavors and tender textures, traditionally simmered low and slow for hours. While its depth of flavor is undeniable, the time commitment can be a deterrent for modern, busy lifestyles. This is where the many benefits of pressure canning come into play. By preserving your homemade Beef Burgundy, you can lock in its exquisite taste and melt-in-your-mouth tenderness, ensuring you always have a sumptuous, effortless meal at your fingertips. Prepare it once, and enjoy the convenience of multiple servings from your thoughtfully stocked pantry.
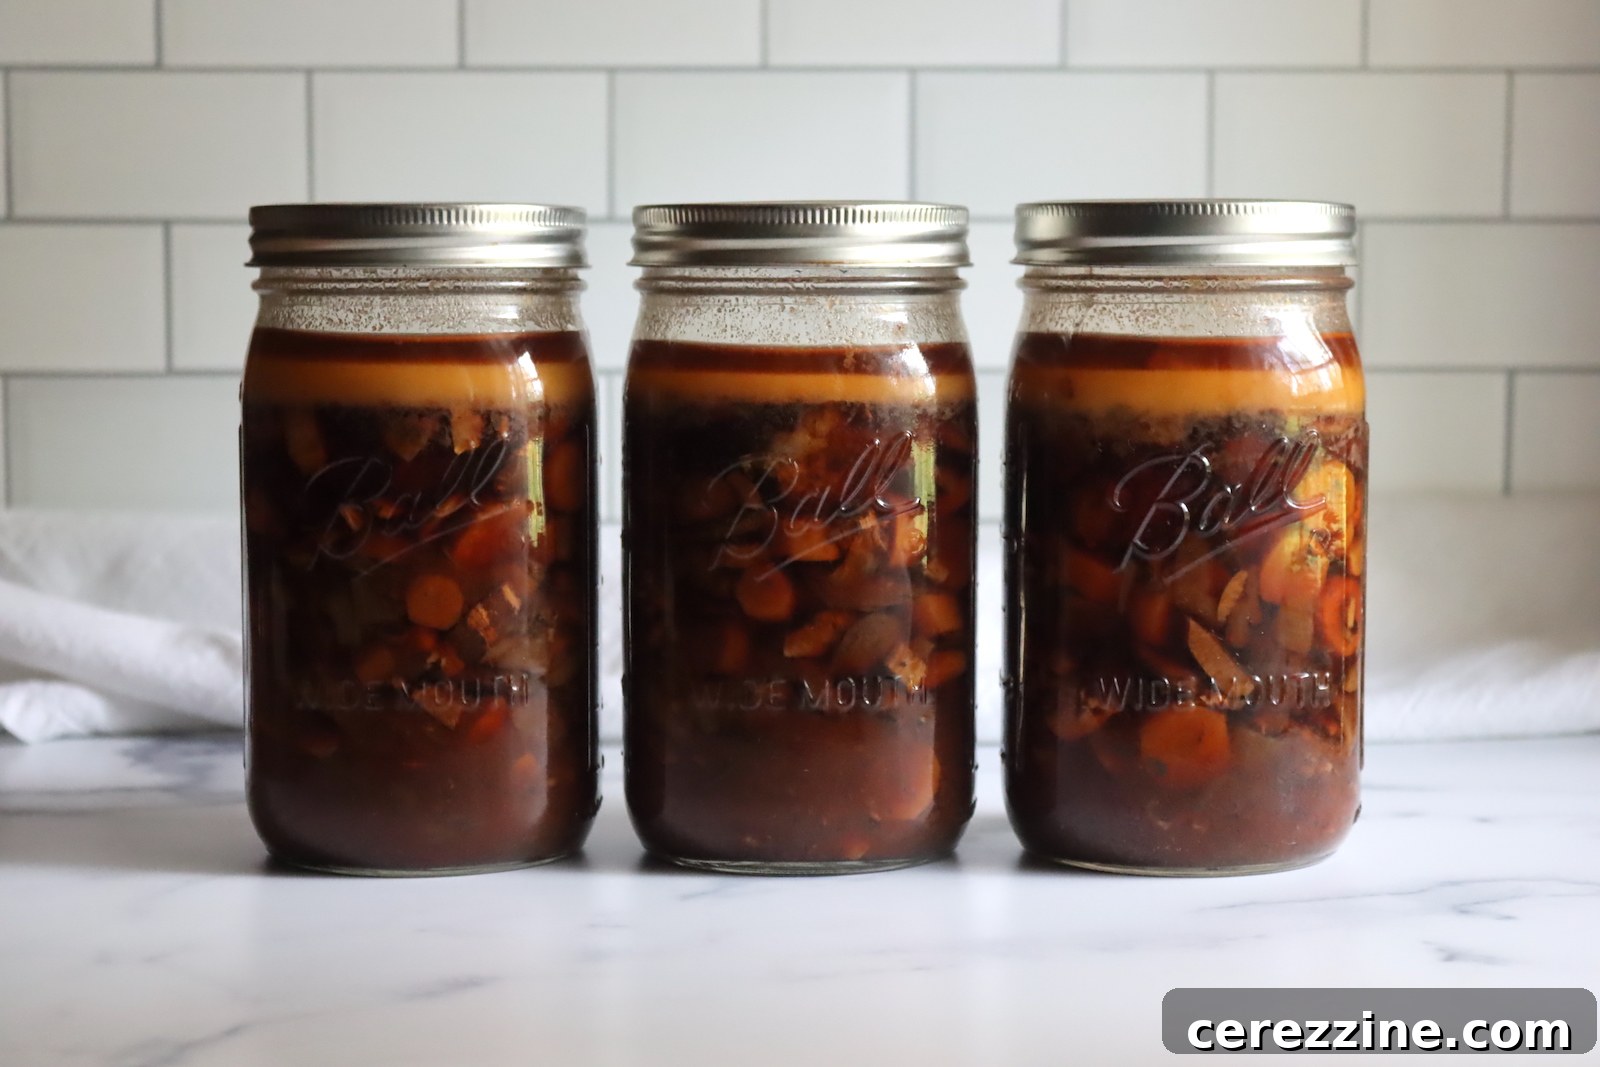
Pressure canning ensures not only food safety but also results in incredibly tender beef, as the high-pressure environment works its magic. The prolonged processing time allows all the ingredients to meld beautifully, creating a harmonious flavor profile that often improves with storage. This method offers unparalleled convenience, allowing you to prepare large batches and store them for future enjoyment, making gourmet dining accessible even on your busiest days.
Essential Ingredients for Your Canned Beef Burgundy
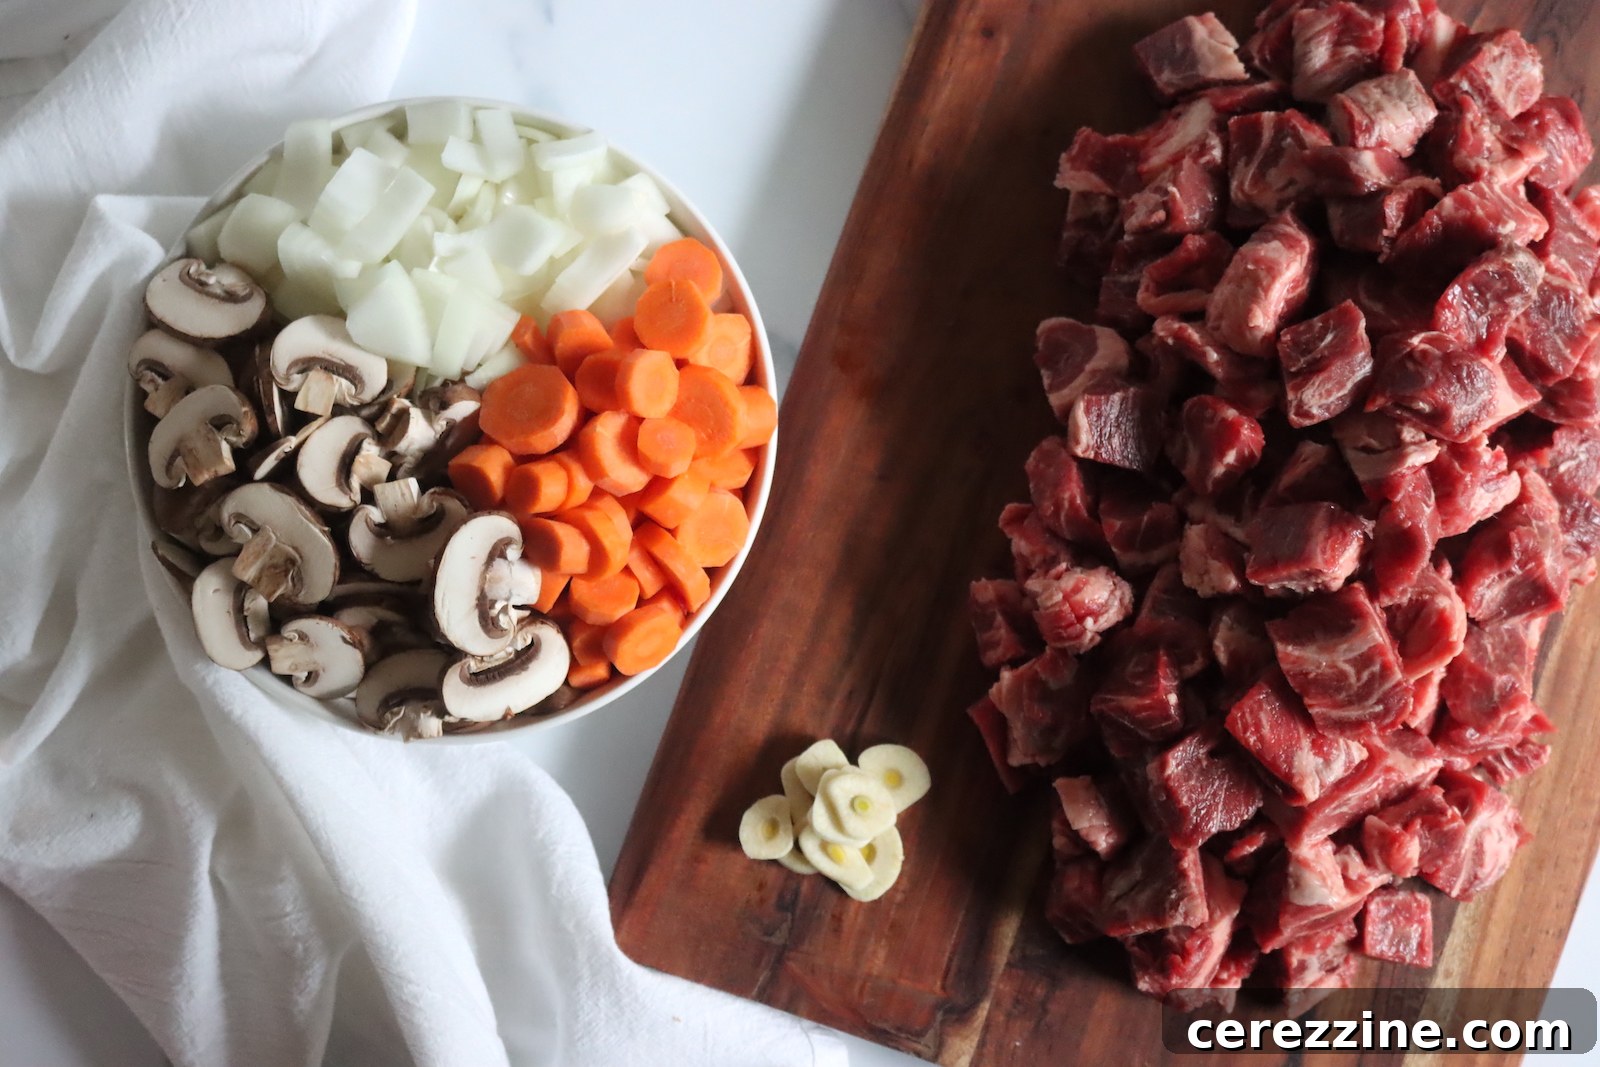
Crafting exceptional Beef Burgundy begins with selecting quality ingredients. This pressure canning recipe, thoughtfully adapted from “Pressure Canning for Beginners and Beyond” by Angi Schneider, incorporates additional spices to closely align with Julia Child’s revered traditional recipe, ensuring an authentic and deeply flavorful experience.
To prepare a full canner batch, yielding approximately seven quart (1 liter) jars of this hearty dish, you will need the following:
- ¼ lb (113 g) chopped bacon
- 4 lbs (1.8 kg) cubed round or chuck roast (cut into 1-inch or 2.5 cm pieces)
- 6 cups (768 g) peeled and sliced carrots (approximately 2 ¼ lbs or 1 kg unprepared)
- 4 cups (640 g) chopped onions (approximately 1 ½ lbs or 680 g unprepared)
- 2 lbs (907 grams) sliced mushrooms (about 7 cups)
- 14 cloves minced garlic
- 2 Tbsp dried parsley
- 1 Tbsp dried thyme
- 1 quart (960 ml) beef broth (or water for a lighter flavor)
- 2 cups (480 ml) dry red wine
- 6 oz can tomato paste (optional, for deeper flavor and color)
- ¼ cup Worcestershire sauce
- 1 Tbsp salt (adjust to taste after initial cooking)
Choosing the Best Ingredients for Flavor and Canning Safety
For the beef, chuck roast or round roast are excellent choices. These cuts are rich in connective tissue, which breaks down during the long cooking and canning process, resulting in incredibly tender, succulent meat that holds up well without becoming mushy. Ensure the beef is cut into uniform 1-inch (2.5 cm) cubes for even cooking.
When it comes to vegetables, fresh is always best. Any type of carrots and onions will work, though sweet yellow onions are a classic choice. For a slight variation, parsnips can be substituted for carrots, or leeks/shallots for onions, but onions and carrots contribute significantly to the traditional Beef Burgundy flavor profile. For mushrooms, Crimini or white button varieties are recommended as they are cultivated and widely tested for canning. Avoid wild mushrooms, such as morels, as their canning safety has not been established.
The choice of red wine is crucial. A dry red wine is essential for this recipe. While the name “Burgundy” suggests a Pinot Noir from the Burgundy region of France, any dry red wine like Merlot, Cabernet Sauvignon, or even a Zinfandel will provide the necessary depth and acidity. The alcohol will cook off during preparation and canning, leaving behind only the rich, fruity notes of the wine.
Beef broth will impart a richer, more profound flavor than water. The tomato paste, though optional, adds a wonderful layer of umami and helps thicken the sauce slightly, enhancing its color and depth. The herbs, parsley and thyme, are quintessential to French cuisine and provide aromatic complexity. Remember, any thickening agents like cornstarch should only be added when serving the canned beef burgundy, not before canning, as they can interfere with heat penetration during processing and compromise safety.
Is Canning Bacon Safe in This Recipe? Understanding the Guidelines
The inclusion of bacon in pressure canning recipes, particularly those containing cured meats, often raises questions regarding safety. Currently, the USDA and the National Center for Food Preservation (NCFP) in the US have only conducted limited testing on recipes containing bacon and have not developed comprehensive guidelines for canning bacon or other cured meats on their own, primarily due to funding limitations.
Out of an abundance of caution, they generally advise against canning bacon in recipes other than a few specifically tested ones, such as Boston Baked Beans. This recommendation stems from concerns that cured meats might possess different thermal properties than fresh meats, potentially affecting heat penetration during the canning process and compromising safety.
However, it’s important to note that canning practices vary globally. In many countries outside the US, small amounts of bacon are commonly incorporated into soups and meal-in-a-jar recipes for flavoring. It is generally understood that cured meats like ham and bacon are not canned as standalone products in home kitchens, but their use as a minor flavoring component within a recipe is more common.
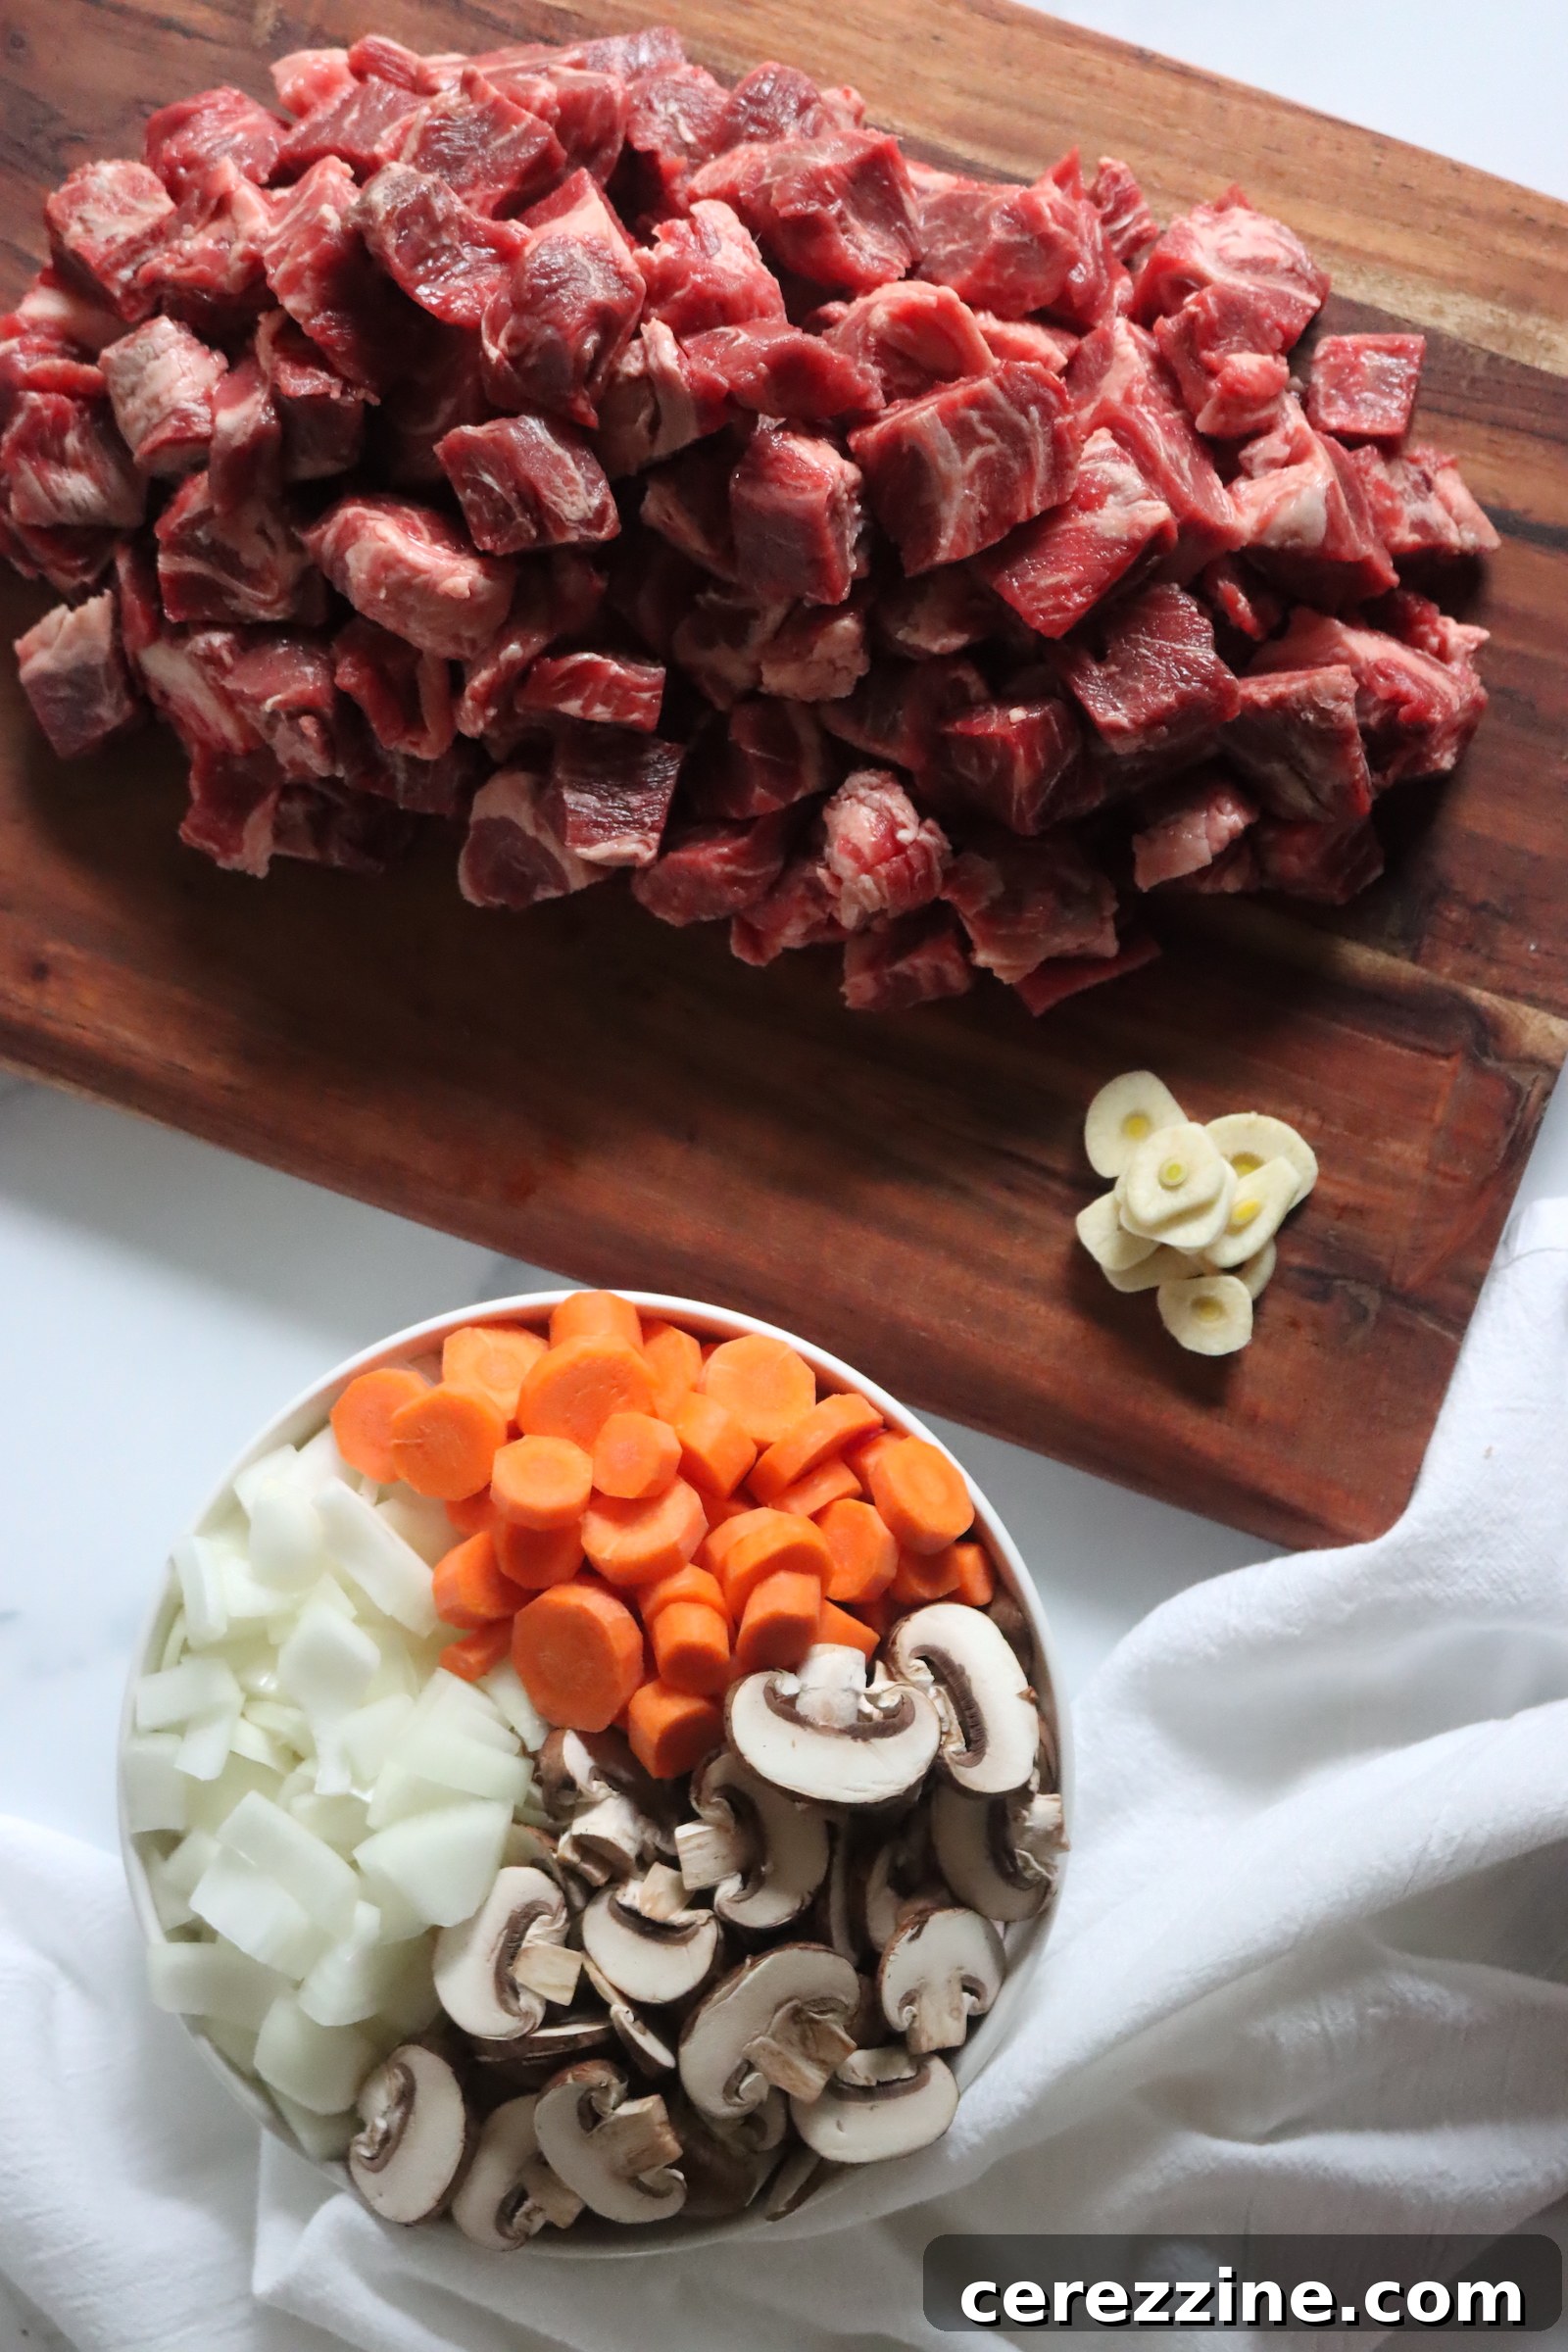
In this particular Beef Burgundy recipe, only ¼ pound of finely chopped bacon is used for seven quart jars. This translates to less than a tablespoon per jar, a significantly smaller amount than what is found in denser recipes like canned baked beans. Many home canners, including Angi Schneider, the author of the book this recipe is based on, feel comfortable with this quantity in their personal canning practices. Nevertheless, when home canning, exercising your own best judgment is paramount.
The primary role of the bacon in this recipe is to render flavorful fat for searing the beef and sautéing the vegetables, adding a smoky depth to the overall dish. If you prefer to err on the side of caution regarding the bacon bits themselves, you have alternatives:
- You can fry the bacon, remove the crispy bits with a slotted spoon (and discard them or use them for another purpose), and then use only the rendered bacon fat to cook the remaining ingredients. This allows you to impart the bacon flavor from the fat without canning the cured meat pieces.
- Alternatively, you can skip the bacon entirely. Instead, use lard or olive oil to fry the vegetables and beef. To mimic the smoky flavor profile, add a tiny dash of salt, a pinch of sugar, and either a splash of liquid smoke or a generous pinch of smoked paprika to the sauce.
Ultimately, the decision to include bacon or use an alternative rests with you. Either approach will result in a delicious, safely canned Beef Burgundy, provided all other canning guidelines are meticulously followed.
Step-by-Step Guide to Pressure Canning Beef Burgundy
Pressure canning Beef Burgundy requires careful attention to detail to ensure safety and quality. Follow these instructions precisely:
1. Prepare Your Canning Equipment
Begin by thoroughly washing and sterilizing your canning jars, lids, and bands. For this recipe, you will need seven 1-quart (1-liter) jars. Fill your pressure canner with several inches (approximately 3 inches or 8 cm) of water, or according to your manufacturer’s recommendations. Place the canner on the stove over low heat with the empty jars inside. This keeps the jars warm and prevents thermal shock when adding hot ingredients, as this is a hot pack recipe (jars should be at least 180°F or 82°C).
2. Cook the Bacon and Sear the Beef
In a large stockpot or Dutch oven, fry the chopped bacon over medium-high heat for about 10 minutes until it is crispy and its fat has rendered. Using a slotted spoon or spatula, remove the crispy bacon bits from the pot, leaving the flavorful bacon grease behind. Set the bacon aside.
Next, use the rendered bacon grease to sear the cubed beef. Work in batches if necessary to avoid overcrowding the pot, which can steam the meat instead of browning it. Stir frequently to ensure all sides of the beef cubes are adequately browned. Browning is essential for developing deep flavor. Once each batch is seared, remove the beef and keep it warm in a covered container off to the side of the stove. Once all the beef is browned, return all seared meat to the stockpot.
3. Sauté Vegetables and Combine Ingredients
To the same stockpot, add the sliced carrots, chopped onions, sliced mushrooms, and minced garlic. Sauté these vegetables in the remaining pot drippings until the onions are translucent and fragrant, and the mushrooms have released some of their moisture.
Now, add the previously cooked bacon back into the pot. Pour in the beef broth, dry red wine, Worcestershire sauce, and the optional tomato paste. Stir in the dried parsley, thyme, and salt. Bring the entire mixture to a rolling boil, then reduce the heat to a low simmer and let it cook for five minutes. This hot pack method ensures the ingredients are thoroughly heated before going into the jars, promoting better flavor and reducing air pockets.
4. Fill Jars and Prepare for Processing
Remove the stockpot from the heat. Carefully ladle the hot Beef Burgundy mixture into the prepared warm quart jars, ensuring an even distribution of solids and liquids. It’s often helpful to add the solid ingredients first, then top with the liquid. Leave precisely 1 inch (2.5 cm) of headspace from the rim of the jar. This headspace is crucial for proper sealing and to allow for expansion during processing.
Using a non-metallic bubble removal tool, gently run it around the inside of each jar to release any trapped air bubbles. Recheck the headspace, and if it has fallen below 1 inch, add additional boiling water or hot broth to adjust. Wipe the rims of each jar clean with a damp cloth or paper towel dipped in vinegar to remove any food residue, which could prevent a proper seal. Place the clean, warm lids on the jars, followed by the bands, tightening them to “fingertip-tight” – firm but not overtightened.
5. Pressure Process Your Beef Burgundy
Carefully load the filled and sealed jars into your prepared pressure canner. Secure the canner lid according to your manufacturer’s instructions. Bring the canner up to pressure gradually. Once the canner begins to vent steam steadily (usually for 10 minutes, refer to your canner manual), place the weighted gauge or close the petcock (for dial gauge canners) and allow the pressure to rise to the specified level. Process the quart jars at 10 lbs of pressure for 90 minutes.
Altitude Adjustments for Pressure Canning Beef Burgundy
It’s vital to adjust the processing pressure based on your altitude to ensure food safety. While processing times remain consistent, the required pressure changes with elevation:
For Dial Gauge Pressure Canners:
- 0 to 2,000 feet in elevation – 11 lbs pressure
- 2,001 to 4,000 feet in elevation – 12 lbs pressure
- 4,001 to 6,000 feet in elevation – 13 lbs pressure
- 6,001 to 8,000 feet in elevation – 14 lbs pressure
For Weighted Gauge Pressure Canners:
- 0 to 1,000 feet in elevation – 10 lbs pressure
- Above 1,000 feet – 15 lbs pressure
6. Cooling and Storage
Once the 90-minute processing time is complete, turn off the heat and allow the pressure canner to depressurize naturally. Do NOT try to force cool the canner, as this can lead to siphoning (liquid loss from jars) and potential seal failures. Once the pressure gauge reads zero and the lid safety lock is disengaged, carefully remove the lid, tilting it away from your face to avoid steam. Remove the hot jars using a jar lifter and place them on a towel-lined counter or a wire rack, ensuring they are not touching each other. Allow them to cool undisturbed for 12 to 24 hours.
After cooling, check the seals. A properly sealed lid will be concave (curved inwards) and will not flex when pressed. If any jars have not sealed, refrigerate them and consume within a few days. For sealed jars, remove the bands, wipe the jars clean, label them with the contents and date, and store them in a cool, dark, dry place for up to one year. Remove the bands before storage to prevent rust and allow for easier detection of false seals.
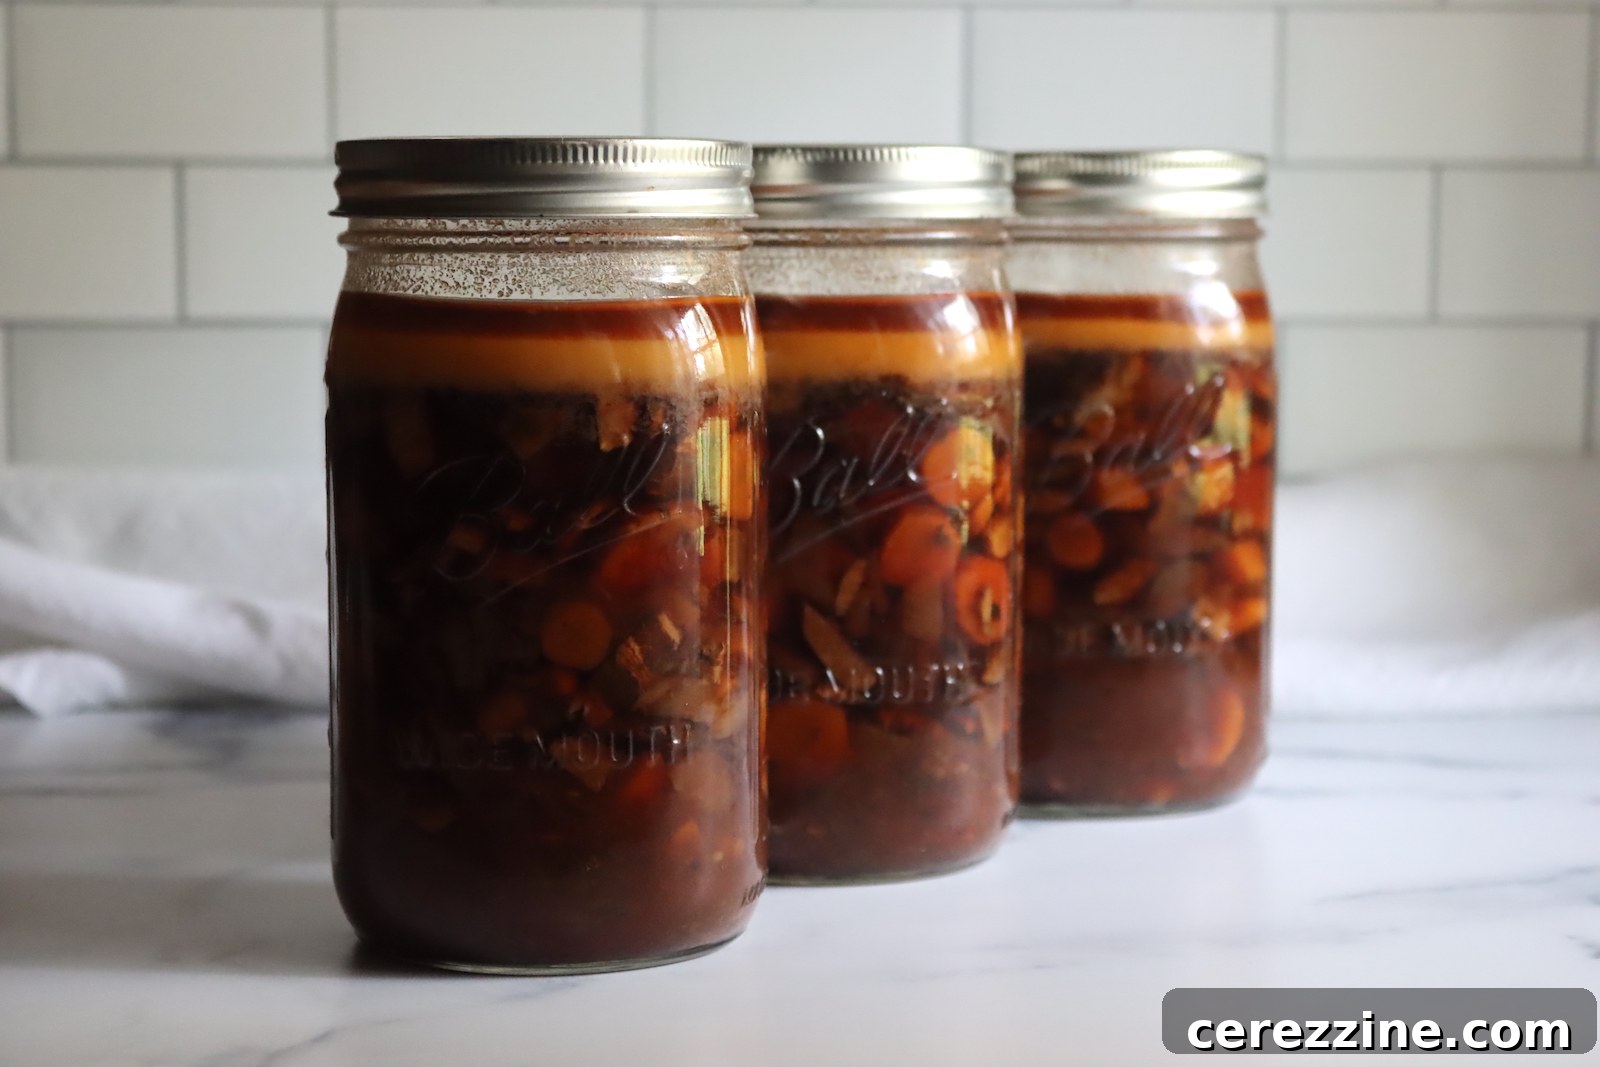
Serving Your Delicious Canned Beef Burgundy
When you’re ready to enjoy your homemade Beef Burgundy, simply retrieve a jar from your pantry. This dish is designed to be a convenient heat-and-eat meal, requiring minimal effort at serving time.
To reheat, pour the liquid portion of the jar into a medium stockpot and heat over medium heat for approximately 10 minutes, or until it’s hot and gently bubbling. If you prefer a thicker sauce, now is the time to add a cornstarch slurry (a mixture of equal parts cornstarch and cold water). Whisk it into the hot liquid and simmer for another minute or two until it reaches your desired consistency.
Once the sauce is heated and thickened (if desired), add the meat and vegetables from the jar into the stockpot. Gently simmer for another five to seven minutes, stirring occasionally, until everything is thoroughly heated through. Be careful not to overcook, as the beef is already wonderfully tender from the canning process.
Beef Burgundy pairs beautifully with a variety of classic accompaniments. Serve it alongside creamy mashed potatoes, hearty egg noodles, fluffy white rice, or creamy polenta to soak up the rich sauce. A side of crusty bread is also an excellent choice. Garnish with fresh chopped parsley for a pop of color and freshness. With your pressure-canned Beef Burgundy, a gourmet meal is just minutes away, proving that convenience and exceptional flavor can indeed go hand-in-hand.
Servings: 14 servings, Makes 7 quarts
Canning Beef Burgundy (Julia Child’s Recipe)
By Ashley Adamant
Classic Beef Burgundy is a delicious meal in a jar canning recipe.
Prep: 30 mins
Cook: 1 hr 30 mins
Total: 2 hrs
Equipment
-
Pressure Canner
Ingredients
- ¼ lb bacon, chopped, *See notes on bacon safety
- 4 lbs chuck roast, cubed into 1″ or 2.5 cm pieces
- 6 cups carrots, peeled and sliced
- 4 cups onions, chopped
- 2 lbs mushrooms, sliced
- 14 cloves garlic, minced
- 2 Tbsp parsley
- 1 Tbsp thyme
- 1 Quart beef broth, or water
- 2 cups dry red wine
- 6 oz tomato paste, 1 small can, optional
- 1/4 cup Worcestershire sauce
- 1 Tbsp salt, or more to taste
Instructions
- Begin by preparing the canning jars, lids, and pressure canner. Fill the canner with several inches (8 cm) of water, depending on your manufacturer’s recommendations, and place the canner on the stove. Place it on low heat with the jars inside to stay warm.
- Fry the bacon in a large stockpot, cooking pot over medium-high heat or for about 10 minutes (it will be crispy). Remove the bacon with a spatula or slotted spoon. Keep the bacon grease in the pan.
- Use the bacon grease to sear the cubes of beef. Stir often to make sure the edges are adequately browned but don’t stick to the bottom of the pan.
- If you were working in batches, add all the beef back into the pan once it’s all browned.
- Add the carrots, onions, mushrooms, and garlic.
- Add the bacon next, along with the remaining ingredients, including spices, broth, wine and tomato paste (if using).
- Bring everything to a boil, then turn the heat to a low simmer for five minutes.
- Remove the stockpot from the heat, then ladle the mixture among the jars, dividing evenly. Put the solids in the jars first, then add the liquids. Leave an inch (2.5 cm) of headspace.
- Using a bubble removal tool, remove the bubbles. Double-check the headspace if you’re short on liquid, you can top the jars off with boiling water.
- Wipe the rims clean with a damp cloth, then put the bands and lids on the jars. Tighten each one until it is fingertip-tight. Load them into the pressure canner.
- Process the jars, based on the pressure canner manufacturer’s instructors, at 10 lbs of pressure for 90 minutes. Adjust for altitude if necessary (see detailed section in article).
- Once the processing time has finished, you can let the canner depressurize naturally. Then, remove the jars and allow them to cool on the counter for 12 hours. Check the seals, label the jars, and store for up to one year.
Notes
For detailed information on altitude adjustments and bacon safety in canning, please refer to the main sections of this article.
Nutrition
Nutrition information is automatically calculated, so should only be used as an approximation.
Explore More Canning Adventures: Beef, Meals, and Meats
The world of home canning extends far beyond Beef Burgundy! If you’re looking to expand your food preservation skills and fill your pantry with convenient, homemade meals, explore these additional resources:
Beef Canning Recipes
There’s more than one way to put beef in a jar, offering incredible versatility for quick and hearty meals. These beef canning recipes will keep things interesting and your family well-fed:
- Canning Beef Stew
- Canning Ground Beef
- Canning Sloppy Joe Filling
- Canning Chili con Carne
- Canning Beef Pot Pie Filling
Meal in a Jar Canning Recipes
Transform your favorite comfort foods and quick dinners into shelf-stable “meals in a jar.” These recipes are perfect for busy weeknights, camping trips, or emergency preparedness:
- Boston Baked Beans
- Thai Curry Duck
- White Bean Chicken Chili
- Cajun Red Beans and Sausage
General Meat Canning Recipes
Working with other types of meat? Master the art of preserving various proteins to create a diverse and well-stocked pantry. Check out these comprehensive meat canning recipes:
- 20+ Chicken Canning Recipes
- Canning Leftover Turkey
- Canning Chicken Chili Verde
- Canning White Bean Chicken Chili
- Canning Chicken Soup