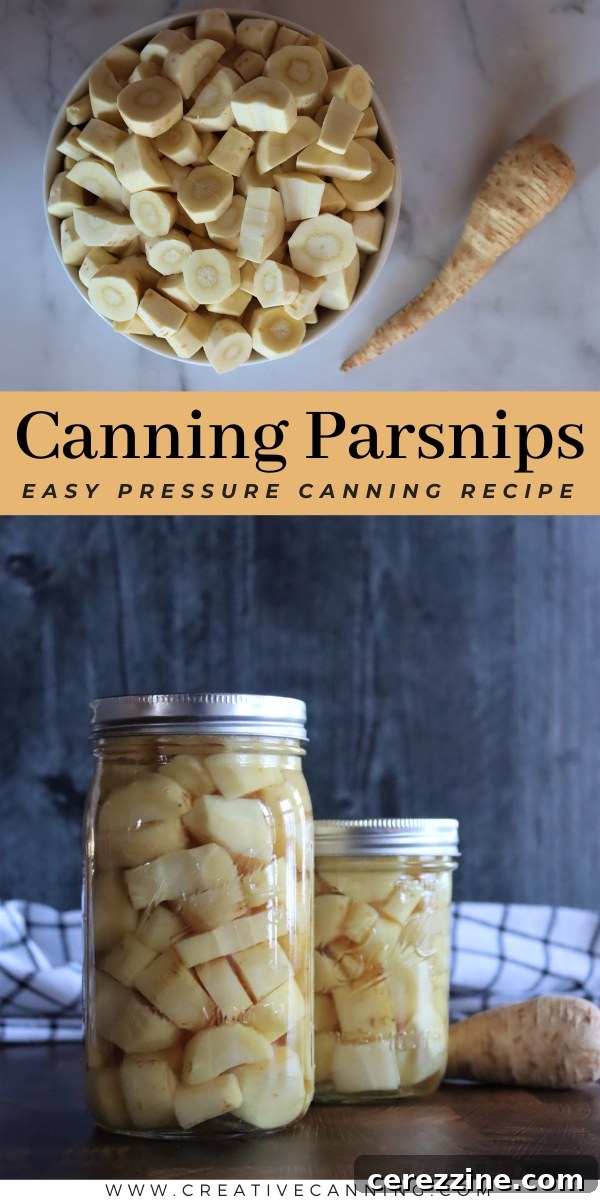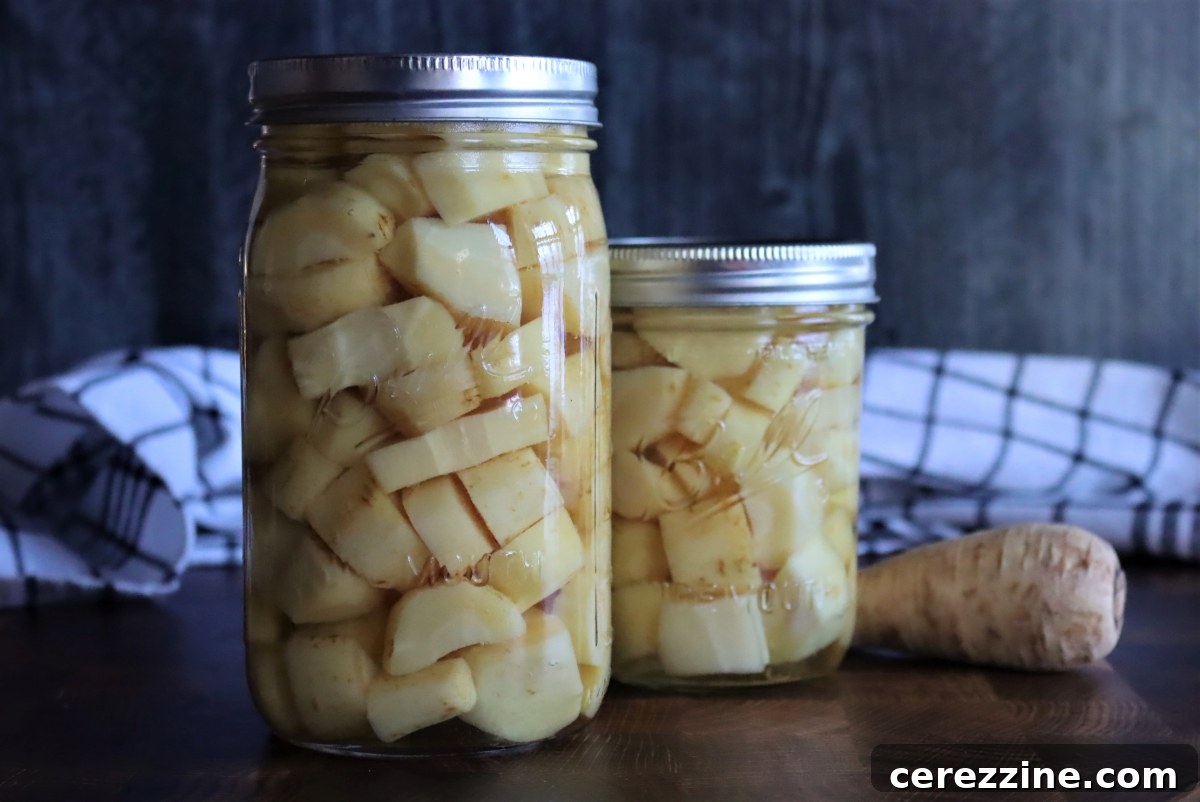
Unlock the incredible versatility of parsnips by canning them with a pressure canner. This process transforms fresh parsnips into a convenient pantry staple, ready to elevate an array of comforting cold-weather dishes such as hearty soups, classic shepherd’s pie, stews, and so much more. Imagine having the sweet, earthy flavor of parsnips at your fingertips, regardless of the season, and drastically reducing your meal prep time.
Why Embrace Home Canning for Parsnips?
Parsnips, in my humble opinion, are often underestimated in the realm of root vegetables. Their distinct sweetness and subtle herbaceous notes make them a culinary delight that I love to incorporate into meals all year long. For passionate home gardeners like my family, who enjoy a bountiful parsnip harvest, the challenge often lies in utilizing the entire crop before it spoils. Fresh parsnips, while delicious, are not the most resilient vegetables; they can quickly lose their crispness, become limp, or develop a tough, fibrous texture, especially as they mature.
While some fortunate individuals can overwinter parsnips directly in the garden, digging them up as needed even from under a blanket of snow, this method doesn’t always align with the demands of modern life. There are evenings when speed and accessibility triumph over the charm of freshly dug, peeled, and prepped vegetables. This is where canned parsnips truly shine, offering an unparalleled level of convenience and efficiency in the kitchen.
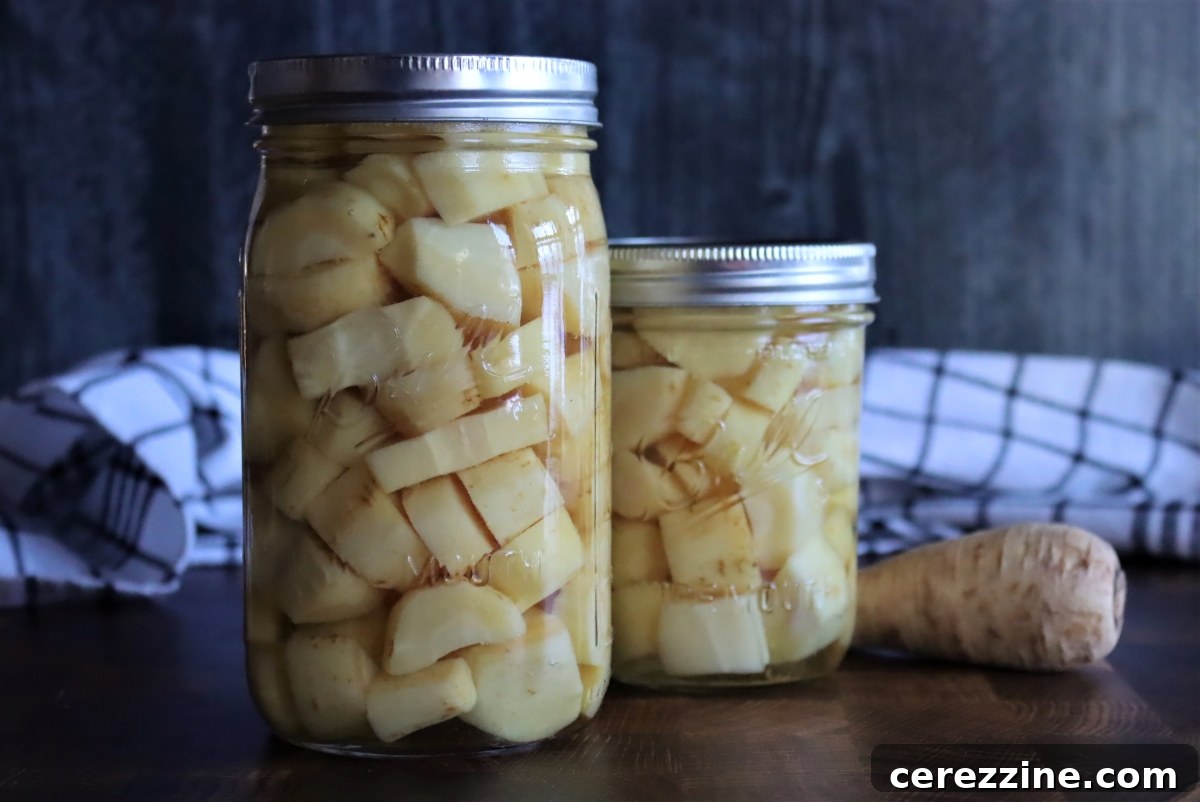
Canned parsnips become an invaluable asset on those busy weeknights when energy levels are low, but a nutritious, homemade meal is still desired. Hot-packed in a simple liquid (with salt being entirely optional, allowing you to control sodium intake) and processed safely in a pressure canner, these parsnips faithfully retain their delicate sweetness and pleasant, slightly grassy flavor for at least a year, and often even longer. This preservation method ensures that the essence of fresh parsnips is locked in, providing a taste of the garden throughout the colder months.
Once you have a supply of pre-chopped, perfectly tender parsnips ready in your pantry, you’ll find countless ways to incorporate them into your cooking. From enriching the broth of a winter soup to adding depth to a classic shepherd’s pie, or even lending a unique twist to winter salads, the possibilities are vast. They’re even delightful on their own, perhaps seasoned with a pinch of coarse salt and freshly ground black pepper for a quick, wholesome snack.
Selecting and Preparing Parsnips for Canning
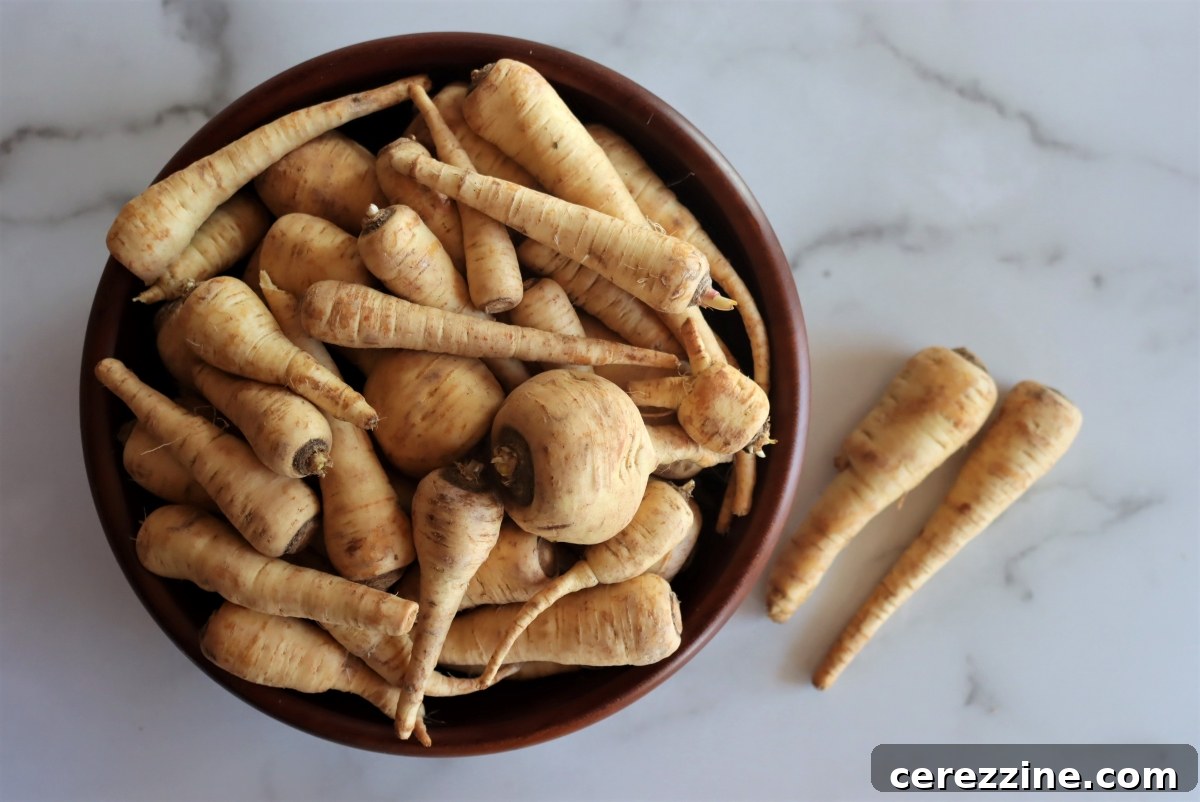
The journey to perfectly canned parsnips begins with careful selection. For the best flavor and texture in your preserved goods, opt for small to medium-sized parsnips. These younger roots tend to be sweeter and less fibrous than their larger, more mature counterparts. When inspecting parsnips, avoid any that appear wrinkled, have long, spindly tips, or possess a rubbery texture, as these are indicators of age or poor quality and won’t yield the best results for canning.
Like all root vegetables destined for canning, parsnips must be thoroughly peeled. This crucial step is not just about aesthetics or removing the sometimes overly earthy outer layer; it’s a vital safety measure. Root vegetables grow directly in the soil, which is a natural habitat for botulism spores. While botulism is rare, it is an extremely serious, potentially fatal foodborne illness. Peeling root vegetables significantly reduces this risk by removing the surface where these spores are most likely to reside. This principle applies equally when canning carrots or canning potatoes.
For efficient peeling, a Y-shaped peeler (often called a Swiss peeler) is highly recommended, as it makes quick work of the task. However, any sharp, high-quality vegetable peeler will suffice. After peeling, the parsnips should be cut into uniformly shaped and sized chunks. This consistency is key for ensuring that all pieces process evenly in the canner. Parsnips naturally taper, making some pieces quite small. Don’t discard these smaller bits; they can be finely diced and saved for adding to soups, stews, stir-fries, or even homemade veggie burgers.
Some canners prefer to remove the fibrous core from parsnips, particularly from larger specimens. However, if you stick to younger, small to medium parsnips, you’ll often find that the core’s taste and texture are virtually indistinguishable from the outer layers, making this step unnecessary.
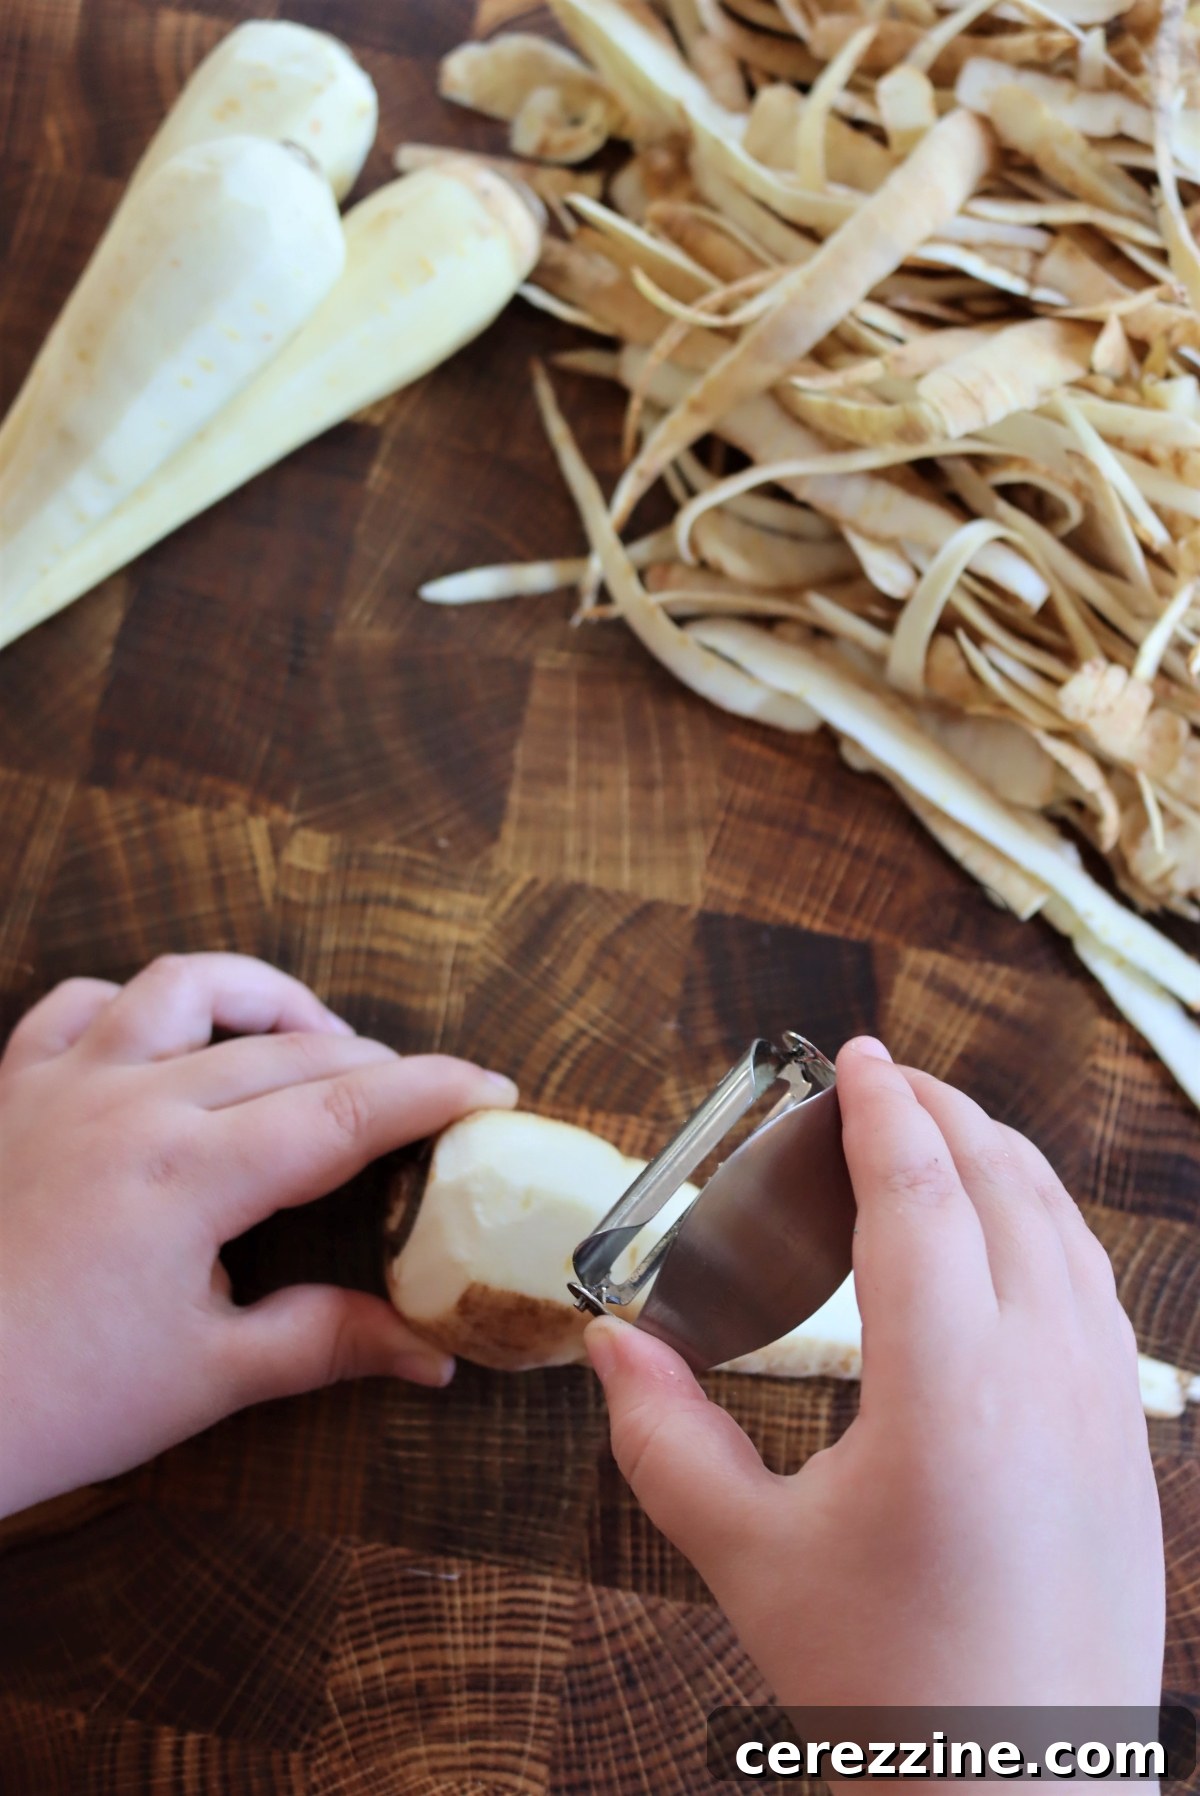
For a standard pressure canner batch, you will need approximately 16 to 18 pounds of parsnips to fill 7 quart jars, or 10 to 12 pounds for 9 pint jars. This quantity ensures you have enough produce for an efficient canning session.
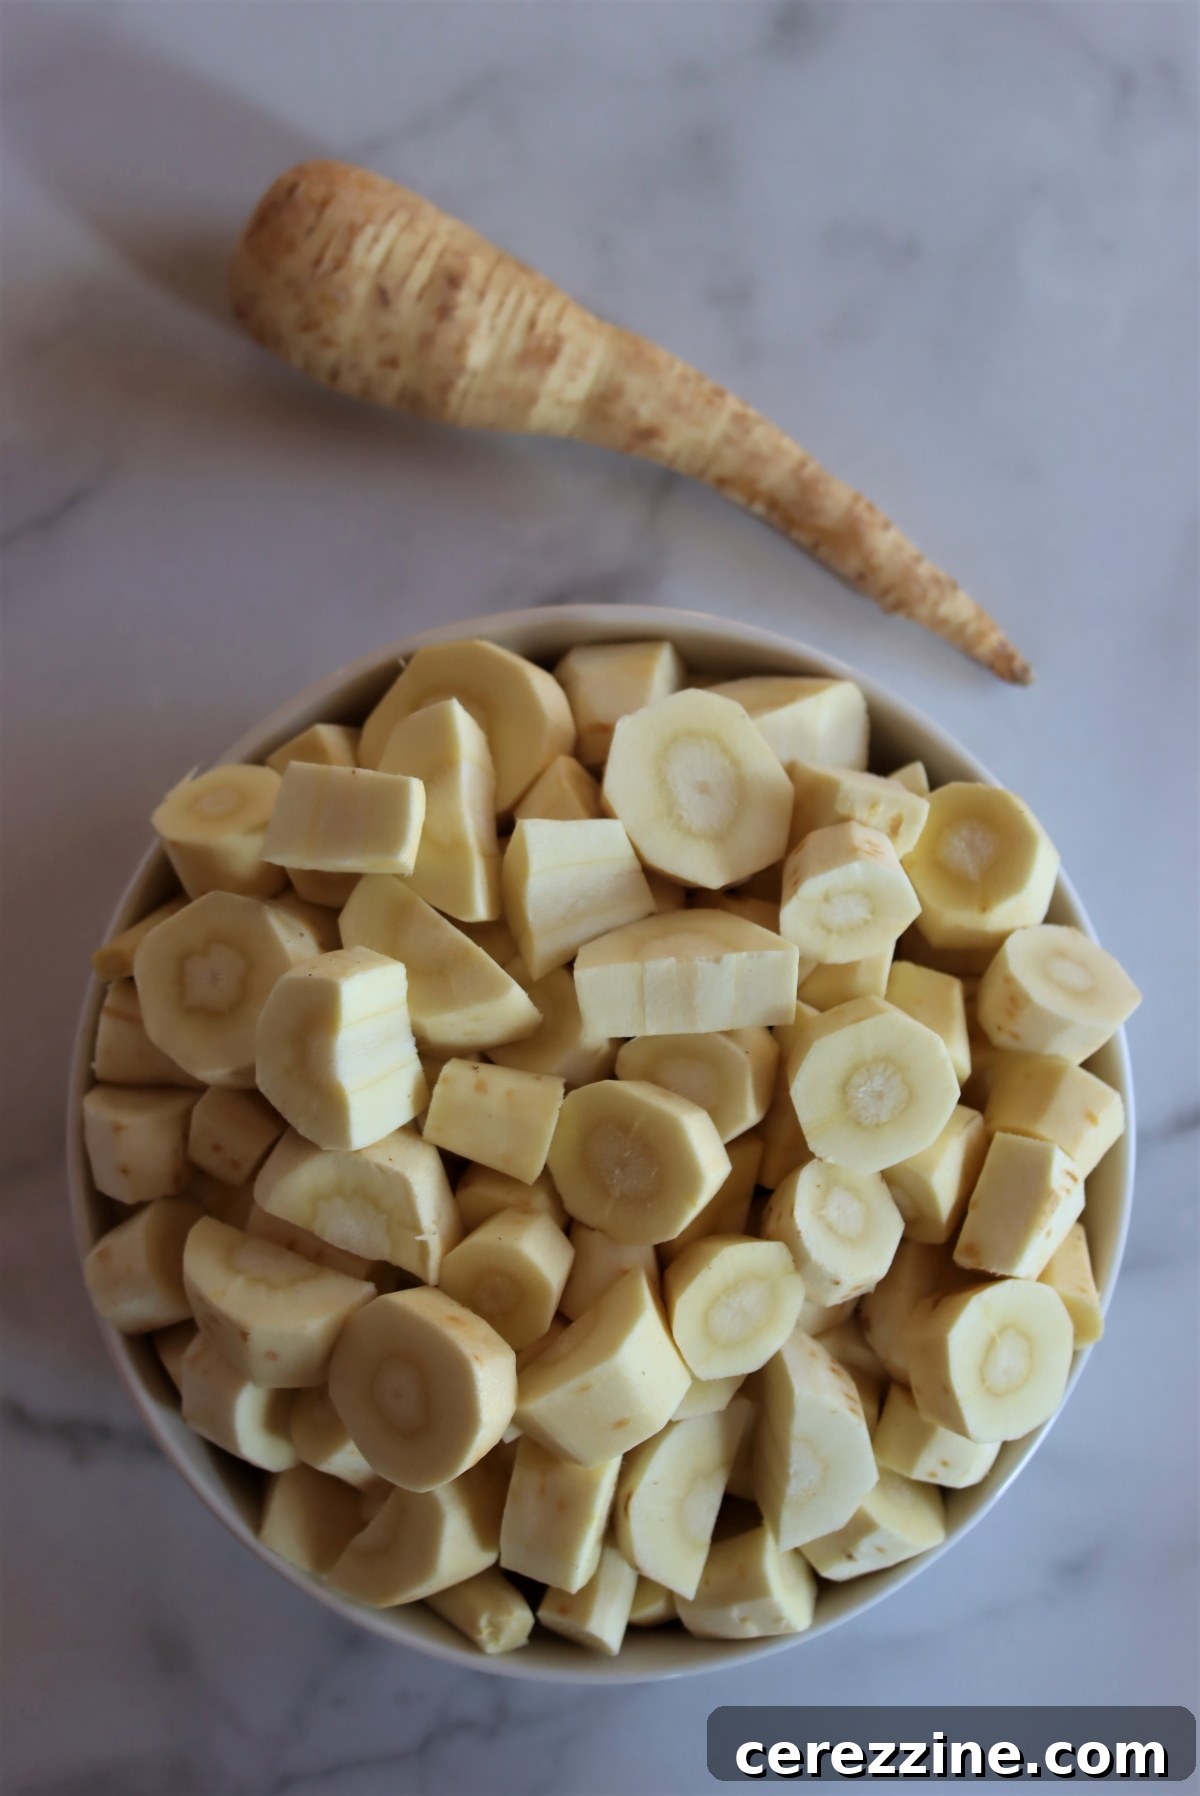
Blanching and Hot Packing for Optimal Results
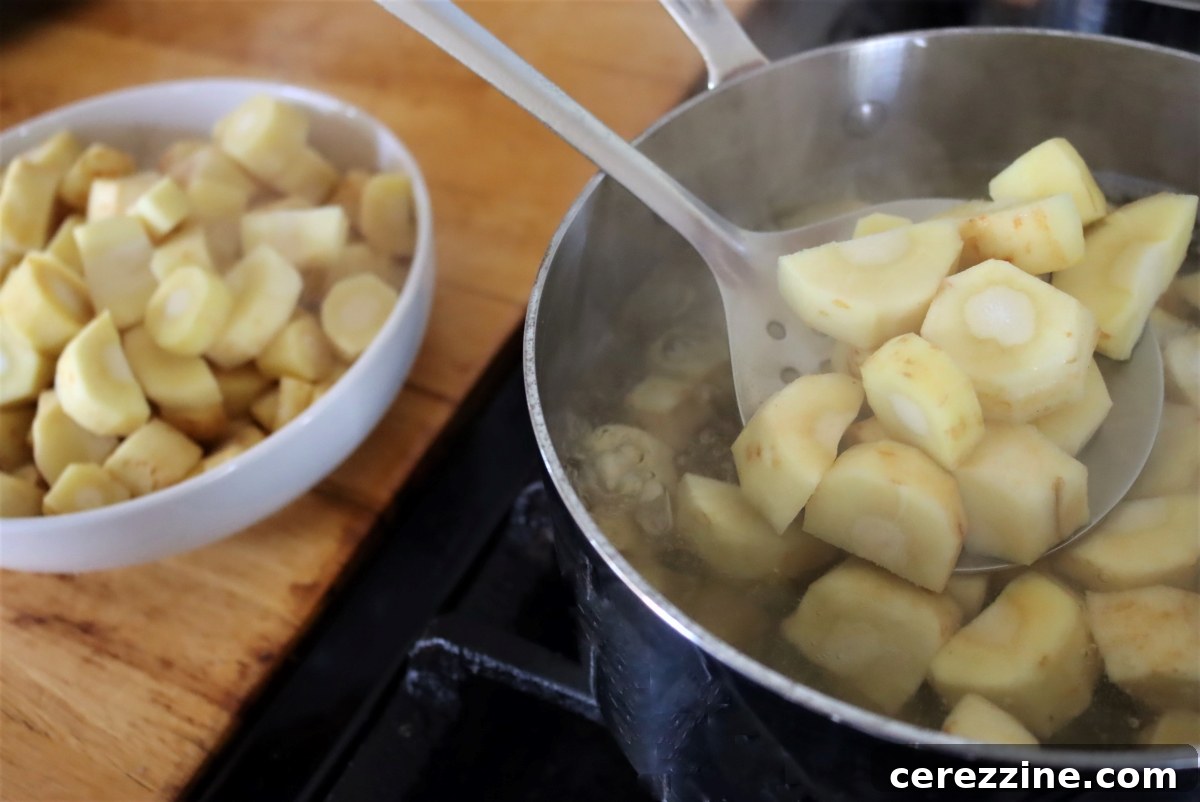
The next critical step in canning parsnips is blanching, or hot packing, the chopped parsnips. This involves submerging them in boiling water for 5 minutes. Blanching serves several important purposes: it helps to remove trapped air from the vegetable tissue, which prevents discoloration and ensures a better seal; it also slightly cooks the parsnips, making them more pliable and easier to pack into jars, ultimately leading to a superior final product with improved texture and appearance.
When blanching, ensure the water has reached a rolling boil before adding the parsnips. It’s crucial to start your 5-minute timer only once the water has returned to a boil after the parsnips have been added. If you’re working with a smaller pot, blanch the parsnips in several smaller batches to prevent overcrowding, which can lower the water temperature too much and compromise the blanching process.
Once blanched, carefully transfer the still-hot parsnips into clean, prepared pint or quart canning jars. It’s essential to leave a consistent 1-inch headspace at the top of each jar. This headspace is critical for proper sealing and to allow for food expansion during the canning process. If you wish to add salt for flavor, now is the time: use 1/2 teaspoon per pint jar or 1 teaspoon per quart jar. Salt is optional and primarily for taste, not for preservation, so adjust according to your preference.
Next, cover the parsnips with the boiling hot blanching liquid, ensuring that the 1-inch headspace is maintained. Using a clean kitchen towel, meticulously wipe the rims and sides of each jar to remove any food particles or liquid that could interfere with the seal. Finally, apply two-piece canning lids, tightening the bands only until fingertip tight. Over-tightening can prevent proper air venting and sealing.
Safe Pressure Canning of Parsnips: A Step-by-Step Guide
It is imperative to note that parsnips, being a low-acid food, MUST be pressure canned. Hot water bath canners do not reach or sustain the high temperatures required to safely process low-acid vegetables and eliminate the risk of botulism. You will need either a dial-gauge or a weighted-gauge pressure canner for this recipe. Always refer to your canner’s instruction manual and follow tested canning recipes precisely. For beginners, a comprehensive guide to pressure canning can offer invaluable tips and troubleshooting solutions.
Begin by placing the filled jar rack into your pressure canner. Add approximately 2 inches of water to the canner. Secure the lid firmly, ensuring it’s properly aligned and locked. Heat the canner over high heat. Allow a steady stream of steam to vent from the canner’s vent port for at least 10 minutes. This crucial “venting” step removes all air from the canner, creating a pure steam environment, which is essential for achieving the necessary high temperatures for safe processing. After venting, add the weighted gauge or close the petcock to allow the canner to pressurize. Start your timer only once the gauge reaches the desired pressure.
Dial-Gauge Pressure Canner Instructions:
- 0-2,000 feet altitude: Process at 11 PSI for 30 minutes (pints) or 35 minutes (quarts).
- 2,001-4,000 feet altitude: Process at 12 PSI for 30 minutes (pints) or 35 minutes (quarts).
- 4,001-6,000 feet altitude: Process at 13 PSI for 30 minutes (pints) or 35 minutes (quarts).
Weighted-Gauge Pressure Canner Instructions:
- 0-1,000 feet altitude: Process at 10 PSI for 30 minutes (pints) or 35 minutes (quarts).
- 1,001 feet and above altitude: Process at 15 PSI for 30 minutes (pints) or 35 minutes (quarts).
Once the processing time is complete, turn off the heat and allow the pressure canner to cool naturally until it fully depressurizes. Do NOT attempt to rush the cooling process by running cold water over the canner, as this can be dangerous and may damage your jars and seals. Once the pressure gauge reads zero and no steam escapes when the vent is nudged, slowly remove the weighted gauge or open the petcock. Wait another 2 minutes before unfastening and carefully removing the canner lid, tilting it away from your face to avoid residual steam.
Using a jar lifter, carefully remove the hot jars from the canner. Place them on a clean, dry surface lined with a kitchen towel, ensuring there is at least an inch of space between each jar. This allows for even cooling. Let the canned parsnips cool completely to room temperature, which typically takes anywhere from 12 to 24 hours.
After the jars have cooled, remove the screw bands and check the seals. A properly sealed lid will be concave (curved inwards) and will not flex when pressed. If any jars have unsealed lids, their contents MUST be reheated to a boil and reprocessed immediately in a clean jar with a new lid, or stored in the refrigerator for immediate consumption. Do not attempt to reprocess jars that have cooled or if more than 24 hours have passed.
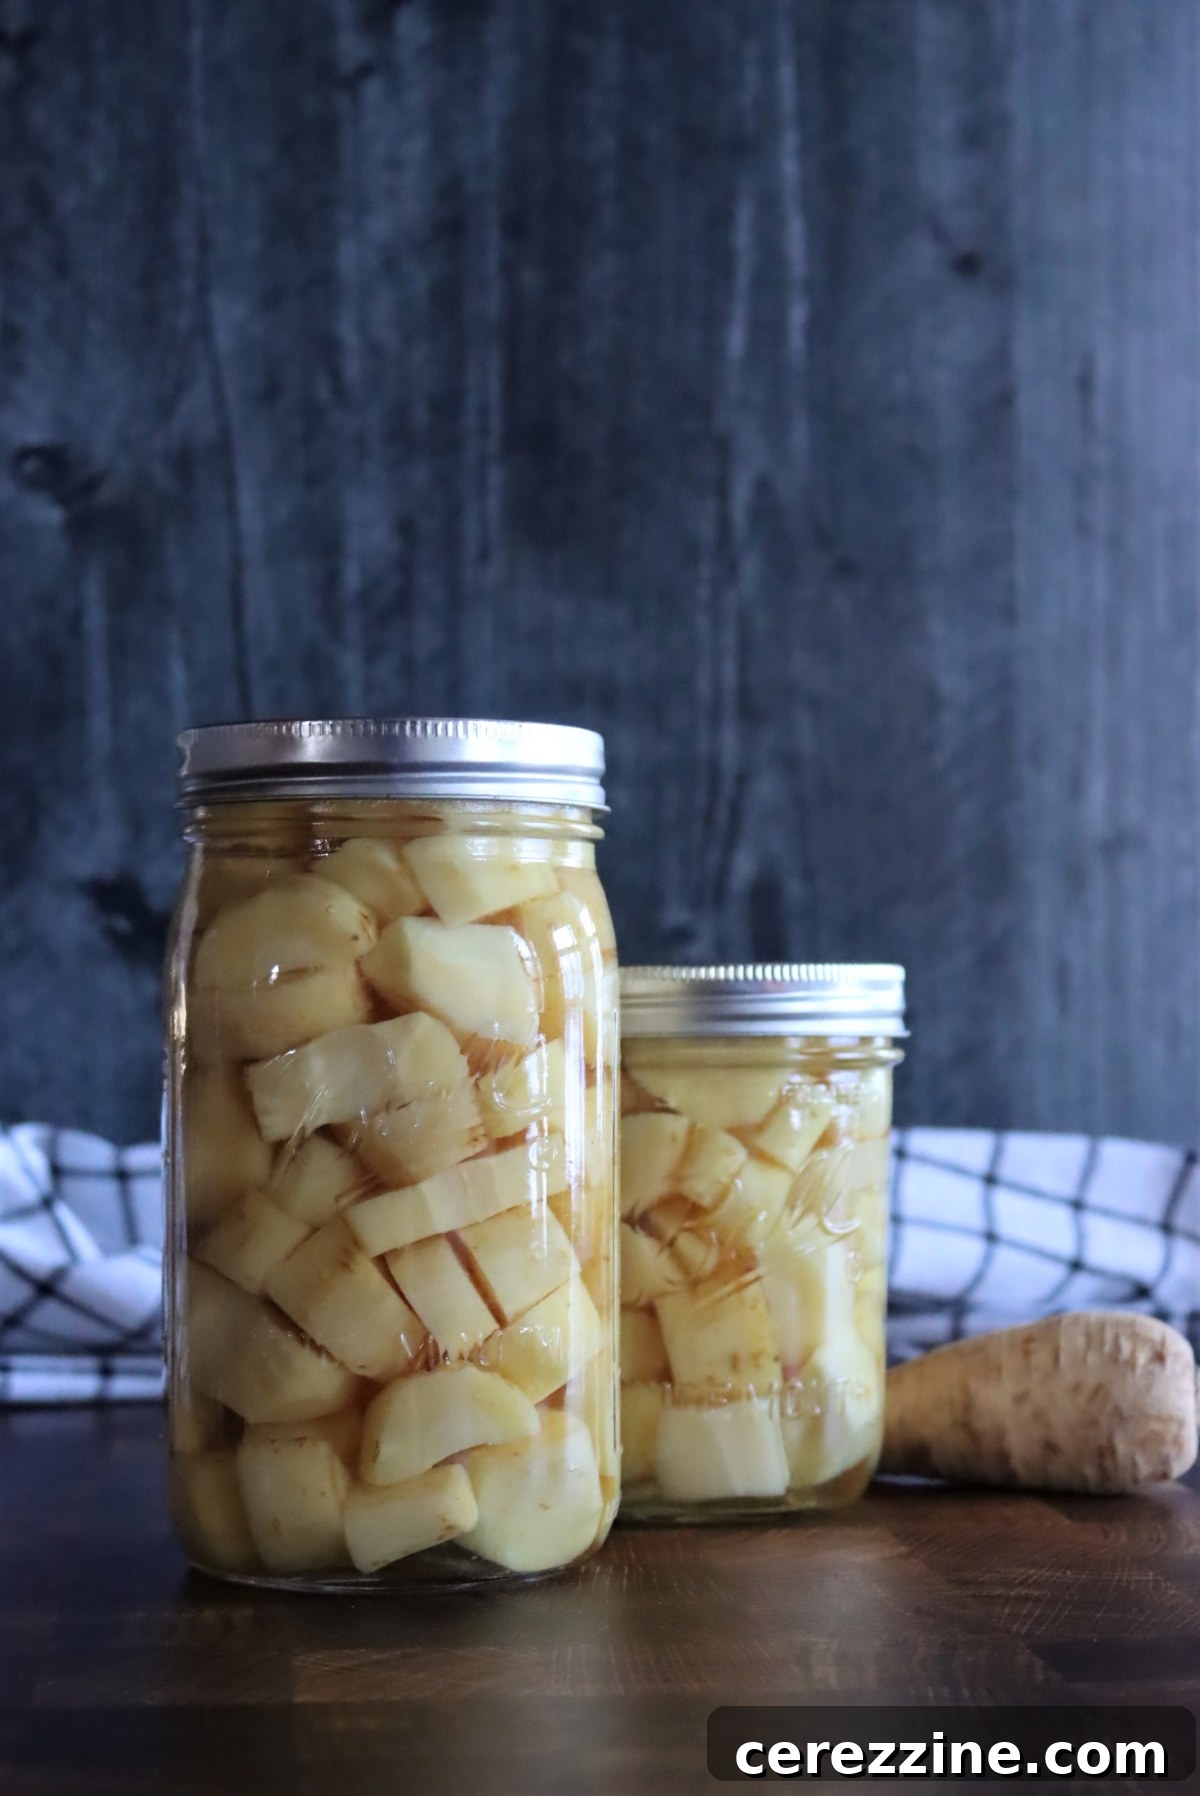
Label your sealed jars with the contents and date. Store them in a cool, dry place away from direct light. For the best quality, canned parsnips are best enjoyed within one year, although they often remain safe and delicious for up to 18 months.
Creative Ways to Use Your Canned Parsnips
Having a supply of canned parsnips in your pantry truly opens up a world of culinary possibilities, making it easier to incorporate this nutritious and flavorful root vegetable into your daily cooking. Here are some inspiring ideas to make the most of your home-canned parsnips:
- Hearty Casseroles: Canned parsnips are a natural fit for classic pot pie and shepherd’s pie recipes. Their tender texture and sweet flavor meld beautifully with meats and other vegetables, adding a unique depth that frozen or fresh parsnips might take longer to achieve.
- Soups and Stews: Elevate your favorite soup and stew recipes by adding canned parsnips. They are already cooked, so they can be added towards the end of the cooking process, requiring minimal simmering to heat through and absorb the flavors of the broth.
- Stir-fries: For a quick and healthy weeknight meal, toss canned parsnips into your stir-fries. Their pre-cooked state makes them ideal for fast cooking, adding a sweet and earthy element without the need for extensive prep.
- Winter Salads: While unconventional, blanched and canned parsnips can add a delightful warmth and sweetness to robust winter salads. Try pairing them with roasted root vegetables, pecans, and a vinaigrette dressing.
- Creamy Mashes and Purees: Mash canned parsnips as a standalone side dish, perhaps with a touch of butter and herbs, or combine them with other root vegetables like celeriac, turnips, or even creamy white beans for a diverse and flavorful puree.
- Simple Glaze: One of my personal favorite ways to enjoy canned parsnips is to gently heat them in a skillet and cover them with a simple glaze. A mixture of maple syrup, a knob of butter (or a drizzle of olive oil for a dairy-free option), and a pinch of salt creates a wonderfully caramelized and irresistible side dish that’s perfect for any meal.
- Roasted or Baked: Lightly roast canned parsnips in the oven with some olive oil, rosemary, and garlic for a quick side dish. Their soft texture means they’ll crisp up beautifully on the outside while remaining tender within.
The convenience of canned parsnips means you’re more likely to experiment and enjoy this delicious root vegetable in a variety of dishes, adding flavor and nutrition to your table with minimal effort.
Other Methods for Preserving Parsnips
Beyond pressure canning, there are other excellent ways to preserve parsnips, allowing you to choose the method that best suits your needs and resources:
- How to Store Parsnips: Learn about short-term storage methods to keep your fresh parsnips crisp and flavorful for longer.
- Freezing Parsnips: A convenient method for preserving parsnips, suitable for those who prefer freezing over canning for certain recipes.
Canning Parsnips: A Pressure Canning Recipe
A comprehensive guide to safely canning parsnips using a pressure canner, transforming them into a versatile pantry staple for delicious meals year-round.
Author: Ashley Adamant
Prep Time: 15 minutes
Cook Time: 10 minutes
Canning Time: 30-35 minutes
Total Time: Approximately 1 hour (plus cooling time)
Yields: 56 servings (equivalent to 7 quarts or 9 pints)
Equipment
- Pressure Canner (Dial-gauge or Weighted-gauge)
- Large pot for blanching
- Y-shaped peeler or sharp vegetable peeler
- Sharp knife and cutting board
- Canning jars (pint or quart size), lids, and bands
- Jar lifter
- Clean kitchen towels
Ingredients
- Parsnips: 16-18 lbs for a 7-quart canner load; 10-12 lbs for a 9-pint canner load
- Salt (optional): 1 tsp per quart jar or 1/2 tsp per pint jar
- Boiling water: For blanching and filling jars
Instructions
- Prepare Parsnips: Thoroughly wash, peel, and trim the parsnips. Cut them into uniformly sized chunks (about 1-inch pieces).
- Blanch Parsnips: Bring a large pot of water to a rolling boil. Add the chopped parsnips to the boiling water (in batches if necessary to maintain boil) and blanch for 5 minutes. Start timing only after the water returns to a boil.
- Pack Jars: Carefully pack the still-hot blanched parsnips into clean, prepared pint or quart jars, leaving a consistent 1-inch headspace.
- Add Salt (Optional) and Liquid: If desired, add 1/2 tsp of salt per pint or 1 tsp per quart. Cover the parsnips with the hot blanching liquid, ensuring the 1-inch headspace is maintained.
- Seal Jars: Wipe the rims of the jars clean with a damp cloth. Apply two-piece canning lids until fingertip tight.
- Process in Pressure Canner: Load the filled jars into your prepared pressure canner. Add 2 inches of water, secure the lid, and heat over high heat. Vent steam for 10 minutes, then pressurize the canner. Process according to the specific times and PSI levels based on your canner type and altitude (see notes below).
- Depressurize and Cool: Once the processing time is complete, remove the canner from heat and allow it to depressurize naturally. After it’s fully depressurized, carefully remove the lid.
- Check Seals and Store: Using a jar lifter, carefully remove the hot jars and place them on a clean towel-lined surface, ensuring at least 1 inch of space between each jar. Let them cool undisturbed for 12-24 hours. After cooling, remove screw bands and check all seals. Any unsealed jars MUST be reprocessed immediately or refrigerated for prompt consumption.
- Label and Store: Label sealed jars with contents and date, then store in a cool, dry place away from direct light. For best quality, consume within 1 year, though they remain good for up to 18 months.
Important Notes on Processing Times:
For Dial-Gauge Pressure Canners:
- 0-2,000 feet altitude: 11 PSI for 30 minutes (pints) or 35 minutes (quarts)
- 2,001-4,000 feet altitude: 12 PSI for 30 minutes (pints) or 35 minutes (quarts)
- 4,001-6,000 feet altitude: 13 PSI for 30 minutes (pints) or 35 minutes (quarts)
For Weighted-Gauge Pressure Canners:
- 0-1,000 feet altitude: 10 PSI for 30 minutes (pints) or 35 minutes (quarts)
- 1,001 feet and above altitude: 15 PSI for 30 minutes (pints) or 35 minutes (quarts)
Always consult official extension service guidelines or your canner’s manual for precise instructions.
Nutrition (Approximate per serving)
- Calories: 109 kcal
- Carbohydrates: 26 g
- Protein: 2 g
- Fat: 0.4 g
- Saturated Fat: 0.1 g
- Polyunsaturated Fat: 0.1 g
- Monounsaturated Fat: 0.2 g
- Sodium: 15 mg
- Potassium: 547 mg
- Fiber: 7 g
- Sugar: 7 g
- Vitamin C: 25 mg
- Calcium: 52 mg
- Iron: 1 mg
Nutrition information is automatically calculated and should be used as an approximation. Actual values may vary based on ingredients and preparation.
Explore More Root Vegetable & Pressure Canning Recipes
If you’re passionate about preserving and looking to expand your home canning repertoire, particularly with other delicious root vegetables, you’re in the right place. Beyond parsnips, there’s a wealth of knowledge and recipes to discover. Delve into these additional resources to fill your pantry with nutritious, homemade staples:
Root Vegetable Canning Recipes:
- Canning Carrots: A sweet and versatile addition to your canned goods, perfect for soups and stews.
- Canning Plain Beets: Preserve the earthy goodness of beets for various culinary uses.
- Pickled Beets: A tangy and flavorful way to enjoy beets with a longer shelf life.
- Pickled Golden Beets: A unique twist on pickled beets, offering a milder flavor and vibrant color.
Essential Pressure Canning Recipes:
Mastering your pressure canner opens up a world of possibilities for preserving low-acid foods. Continue your canning journey with these reliable pressure canning recipes:
- Canning Beef: Prepare tender, ready-to-use beef for quick meals.
- Canning Potatoes: Have pre-cooked potatoes on hand for instant mashed potatoes or hearty additions to dishes.
- Canning Pumpkin: Perfect for pies, soups, or any recipe calling for pumpkin puree.
- Canning Sweet Potatoes: A sweet and nutritious staple, ideal for both savory and sweet recipes.
- Canning Corn: Preserve the taste of summer corn to enjoy throughout the year.