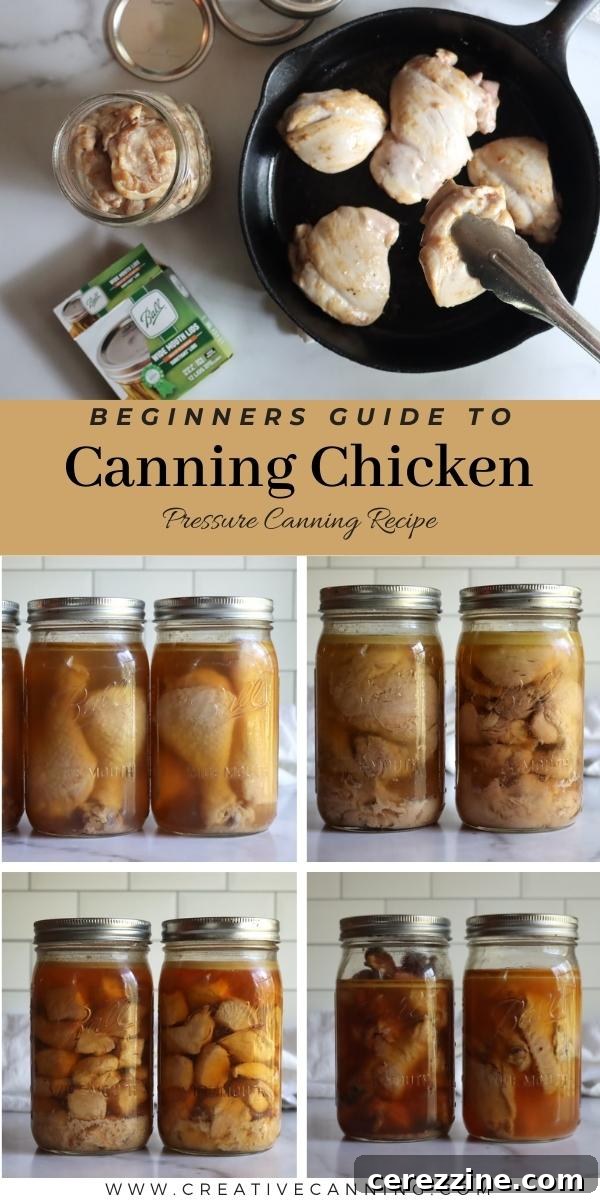
Transforming fresh chicken into shelf-stable jars is a highly practical skill for any home cook. Pressure canning chicken eliminates the reliance on freezer space and constant electricity, offering unparalleled convenience and peace of mind. Imagine reaching for a jar of perfectly cooked, ready-to-eat chicken straight from your pantry shelf, ready to become the foundation of a quick, wholesome meal. This comprehensive guide will walk you through every step of canning chicken safely and deliciously, ensuring you have a steady supply of this versatile protein.
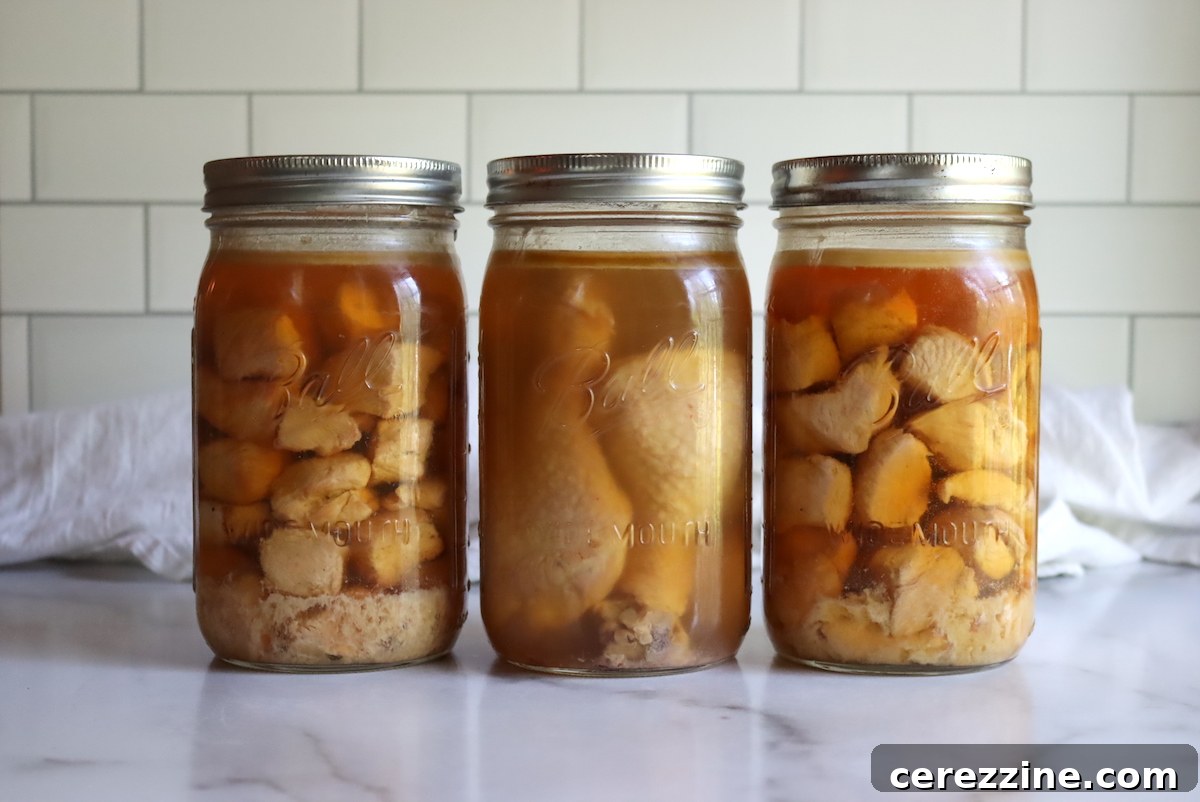
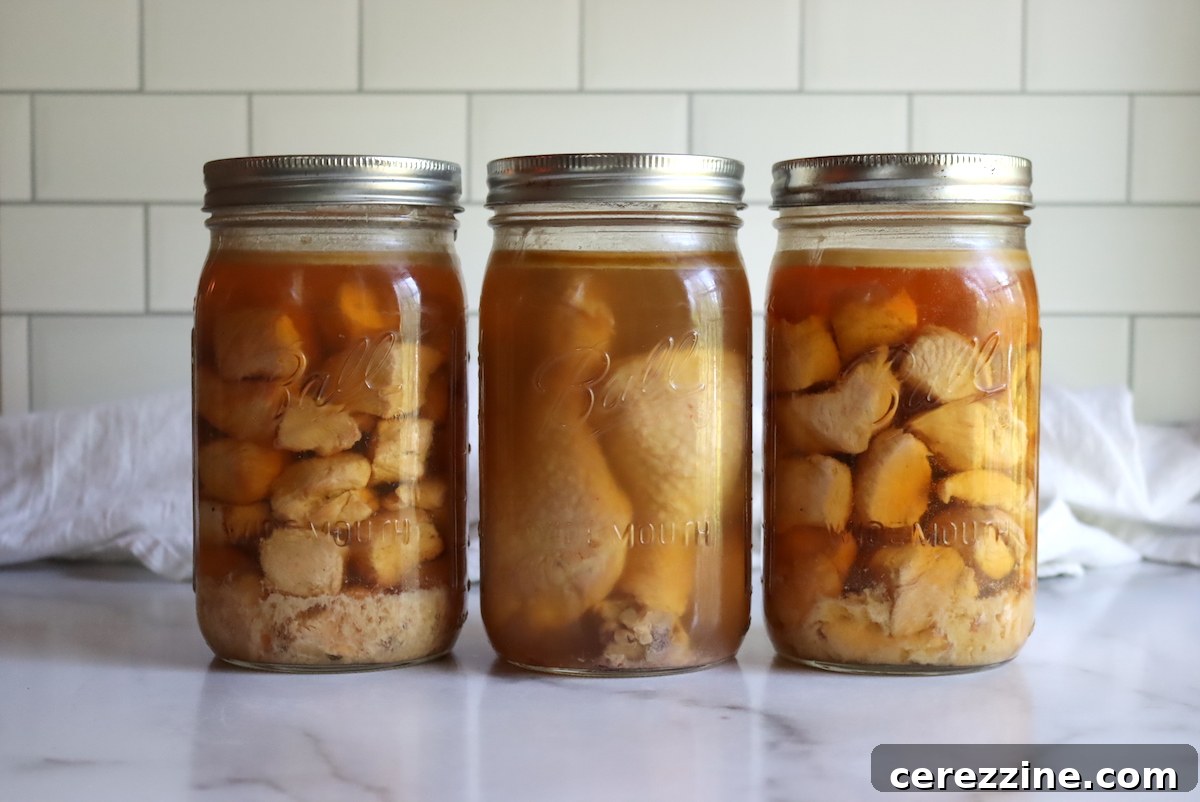
Canning chicken is a game-changer for busy weeknights and meal planning. With home-canned chicken, you bypass thawing and extensive cooking, significantly reducing meal preparation time. A quick pop of a lid and you have high-quality protein ready for stir-fries, tacos, salads, or a comforting casserole. Beyond convenience, canning provides invaluable food security. Your carefully preserved chicken is safe from power outages or freezer malfunctions, offering a reliable food source stored efficiently without any energy consumption.
Before you begin the exciting journey of preserving chicken, you’ll need to make a few key decisions that will influence your process and the final product. These choices include:
- Size and Cut: Will you opt for large, substantial pieces or smaller, bite-sized cubes?
- Packing Method: Are you using the ‘Raw Pack’ or ‘Hot Pack’ technique?
- Bone Presence: Do you prefer bone-in or boneless chicken for your jars?
Each method offers distinct advantages and considerations, which we will explore in detail to help you select the best approach for your needs.
(It might seem counterintuitive to can bone-in chicken, potentially sacrificing jar space. However, there are excellent reasons to consider it! Bone-in chicken yields incredibly tender results, and with the skin left on, it can even brown beautifully months later, adding richness and flavor to your dishes.)

Essential Chicken Preparation for Pressure Canning
The journey to perfectly canned chicken begins with proper preparation and cutting. While it’s technically possible to can a whole, small chicken (typically a 2-pound bird) in a quart jar as a novelty, it’s generally not the most practical or efficient method for home canning. Most people opt for canning chicken pieces, which allows for better packing and more versatile usage later on. Whether you start with whole chickens from a local farm, pre-quartered birds, or specific cuts like breasts, legs, or thighs, the principles remain similar.
Many home canners primarily focus on boneless chicken breasts or thighs for convenience. However, this guide will cover the preparation of all chicken parts, both bone-in and boneless, to maximize your canning potential and utilize your poultry efficiently. To break down a whole chicken effectively for canning, start by separating it into primary sections: leg and thigh pieces, wings, and boneless breasts. The remaining carcass and neck (if included) can be reserved for making rich chicken broth, an essential component for flavorful canning.
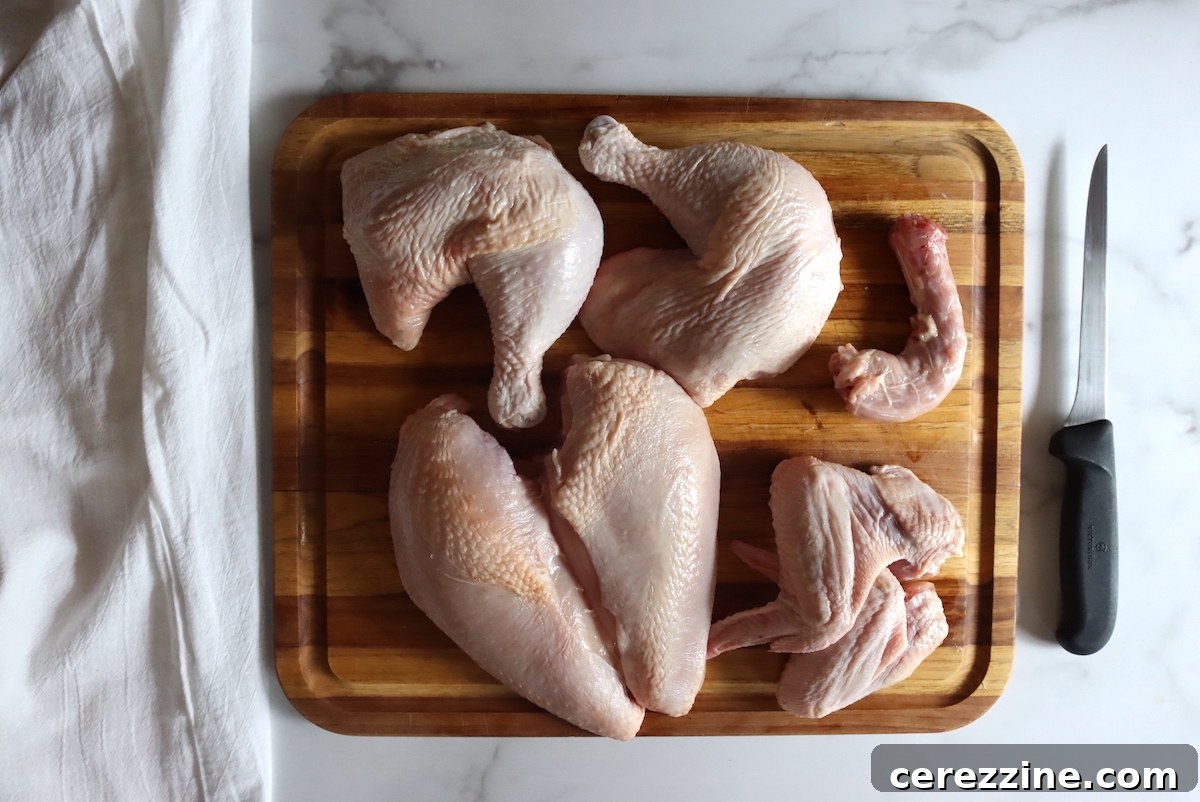
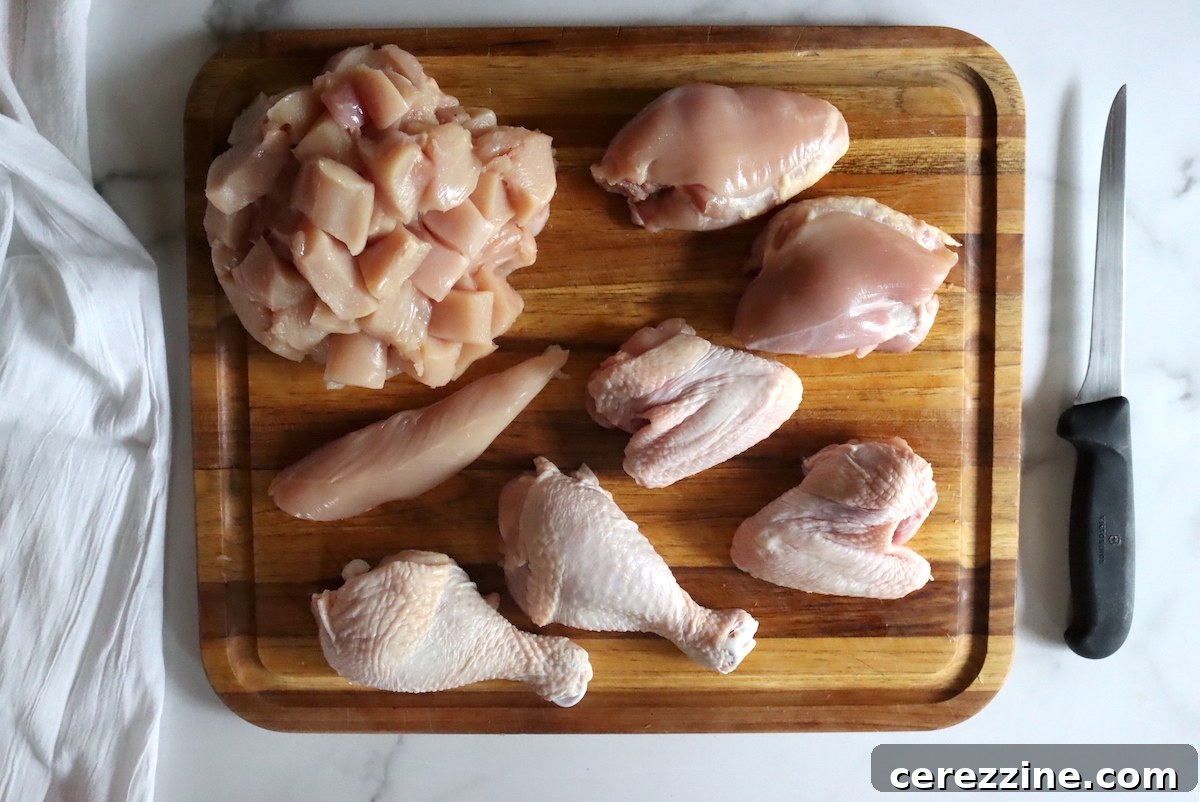
While larger chicken pieces like whole breasts or leg-thigh quarters can be canned as is (bone-in and skin-on is perfectly acceptable), they are less space-efficient in jars. You might fit only two whole chicken breasts or two leg/thigh pieces per quart jar with some effort. For optimal jar utilization and meal versatility, it’s often better to break the chicken down further. This also aligns with how you’ll likely use the chicken in your everyday cooking.
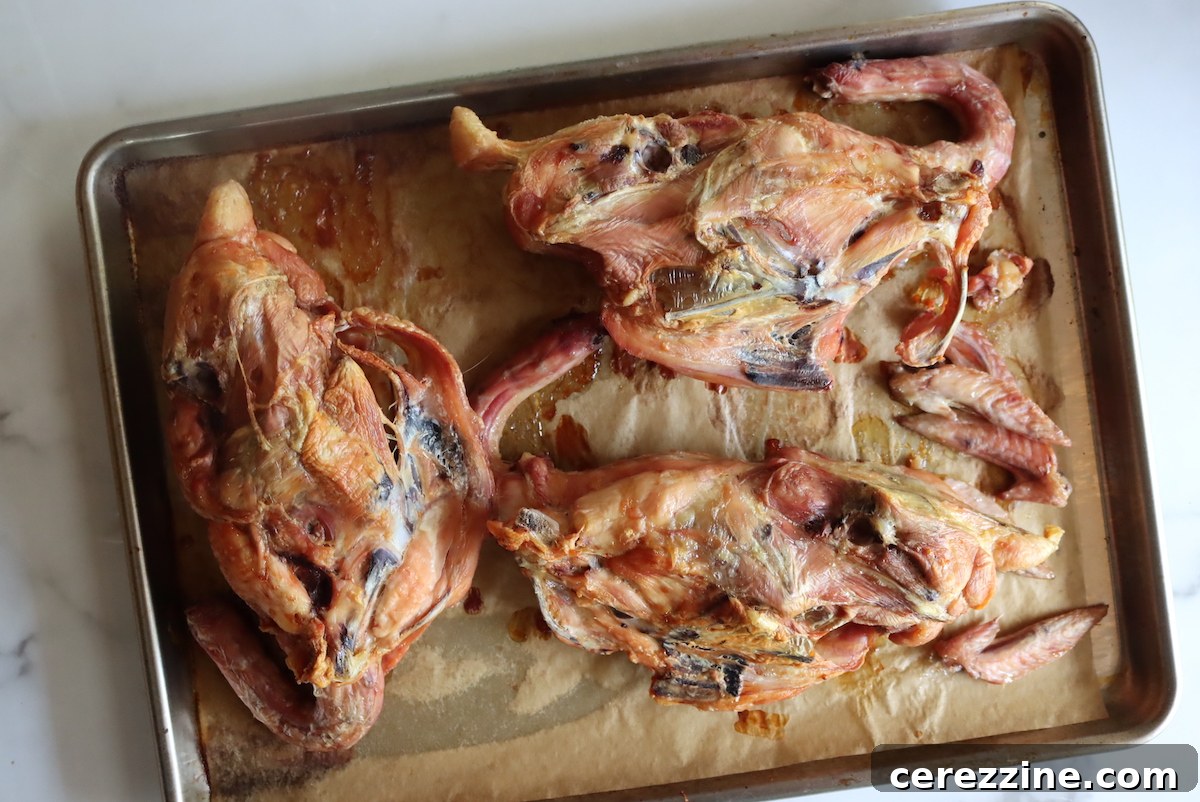
My preferred method involves reducing quartered chicken into more manageable sizes: approximately 2-inch chunks of breast meat, whole chicken tenders (found beneath the breast), boneless/skinless thighs, and wings (with wing tips removed). All the remaining parts—including the neck, excess skin, wing tips, and the carcass—are then roasted. Roasting these components before simmering them for broth significantly enhances the flavor of the resulting stock. Canning chicken in this homemade, flavorful chicken stock offers a superior taste profile compared to using plain water or no added liquid at all. This approach, though requiring an extra step of making stock, is highly recommended for the best canned chicken.
Choosing Your Method: Raw Pack vs. Hot Pack for Canning Chicken
Once your chicken is prepped, the next crucial decision is whether to use the raw pack or hot pack method for canning.
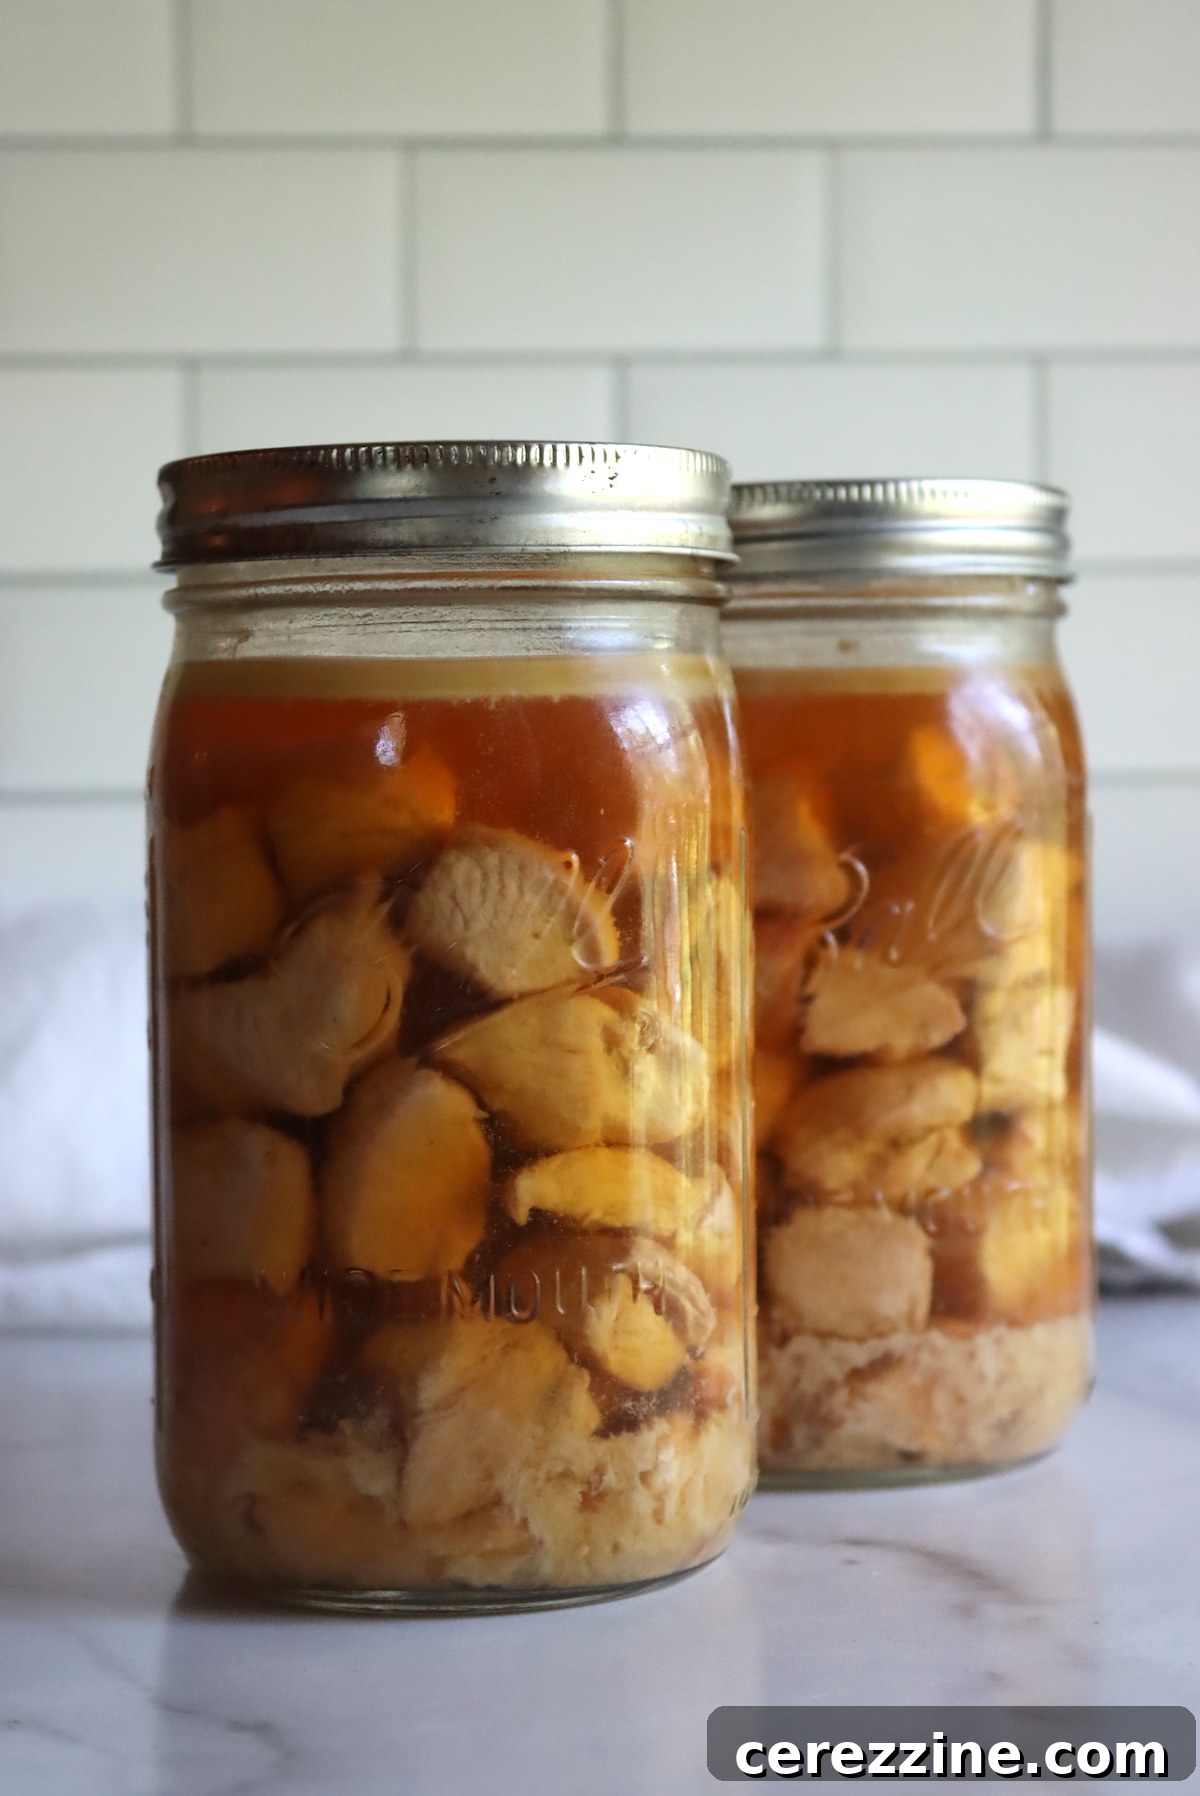
Raw Pack: This method involves placing raw chicken directly into your canning jars without any prior cooking or added liquid. The jars are then sealed and pressure canned. During the canning process, the chicken cooks thoroughly and releases its own juices. While incredibly simple and fast, especially useful in an emergency situation like a freezer failure, modern lean chicken often doesn’t release enough liquid to completely submerge the meat. Over time, chicken above the liquid line can discolor and dry out, affecting long-term quality, although it remains safe to eat for several months. Flavor is also generally less developed than with the hot pack method, as the meat isn’t pre-browned.
Hot Pack: The hot pack method requires the chicken to be browned or partially cooked before being packed into jars. Browning the meat, through what’s known as the Maillard reaction, creates a rich depth of flavor and helps seal in moisture, significantly improving both the taste and texture of the final product. For boneless breasts and thighs, I recommend browning them lightly in a small amount of oil before packing. This step adds an incredible layer of savory flavor that raw packed chicken simply cannot achieve.
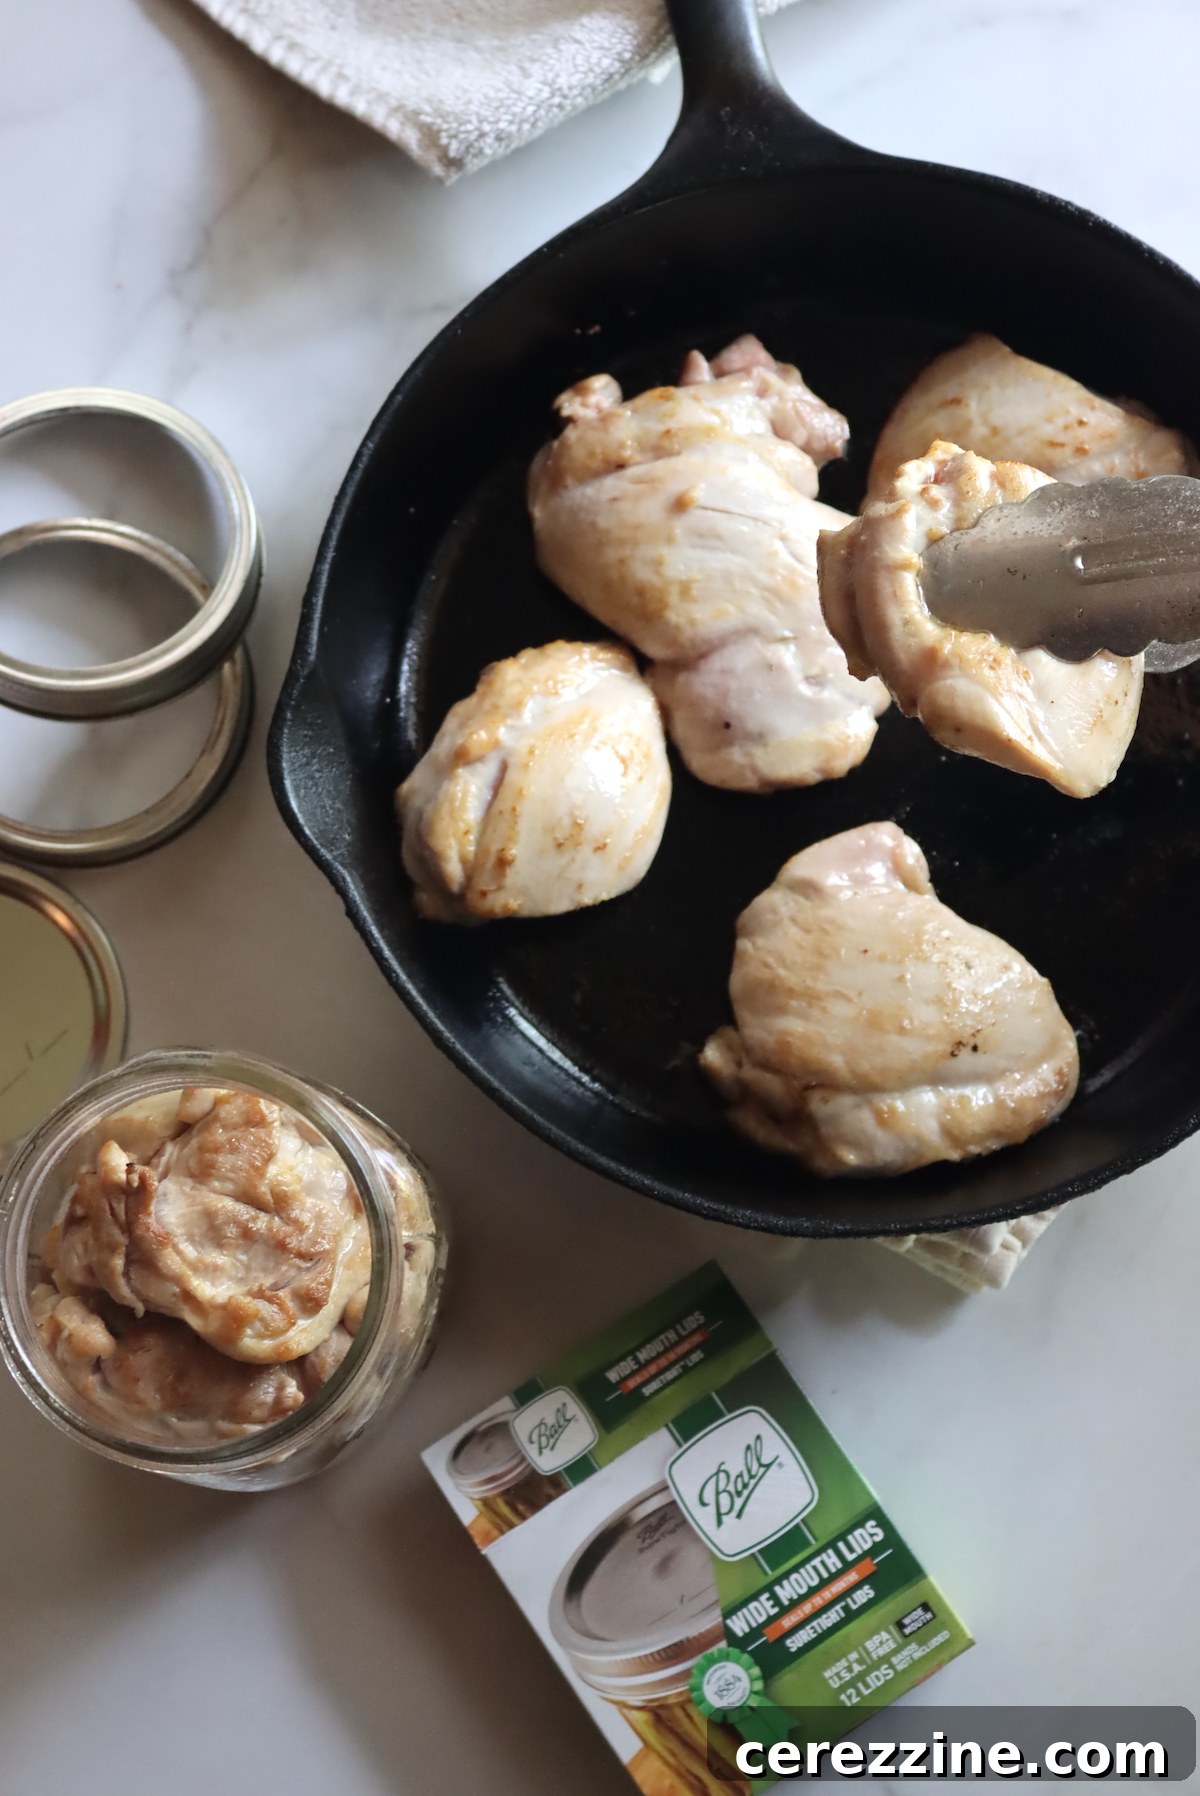
Alternatively, you can partially or fully cook chicken by roasting it in the oven. This approach is particularly effective if you plan to shred the chicken off the bone for canning, or if you’re canning leftover roasted chicken or leftover turkey (which follows similar canning guidelines). A common guideline is to cook the chicken until it’s about two-thirds done, just enough to easily remove the meat from the bones, though fully cooked chicken is also perfectly acceptable. For bone-in wings and thighs, roasting until the skin is beautifully browned imparts a truly rich and robust flavor to the canned product, making it taste like a gourmet treat directly from the jar.
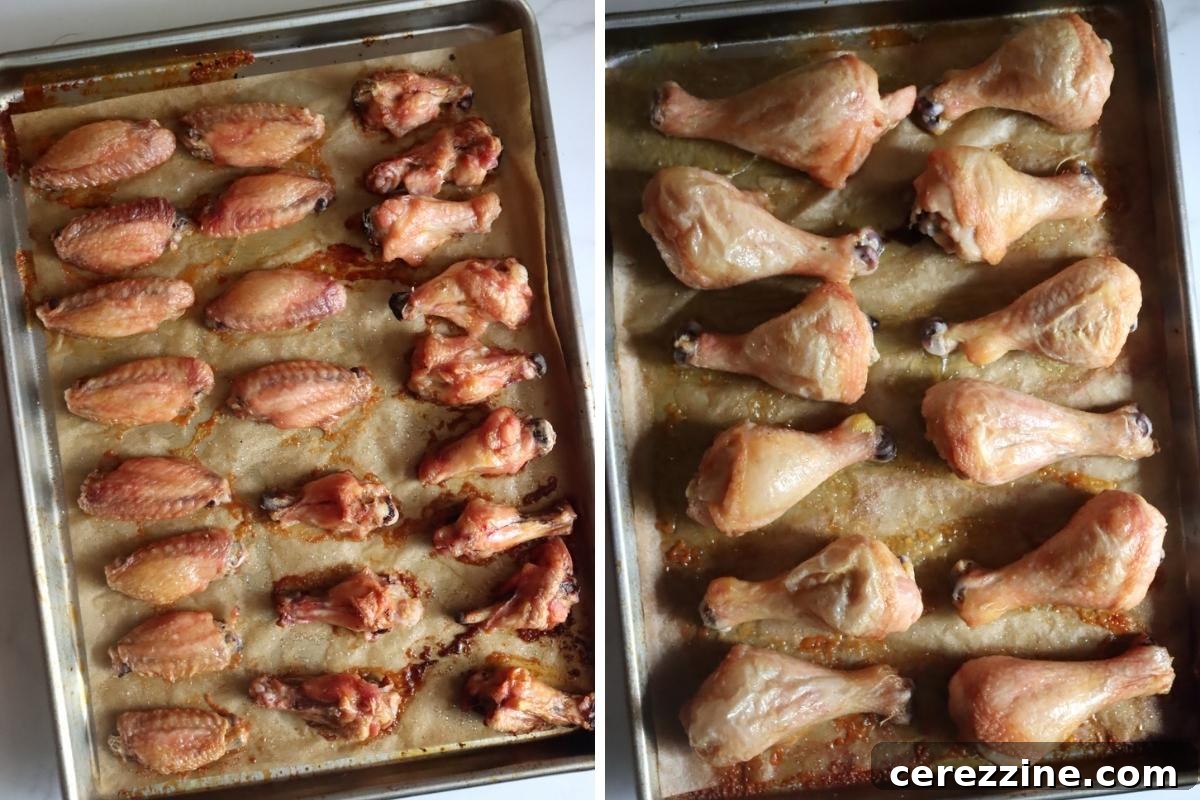
After cooking, pack the warm chicken snugly into clean canning jars, ensuring you leave a generous 1 1/4 inch headspace at the top. While you can certainly mix different chicken types in one jar, I find it simpler and more organized to separate them – for instance, dedicating individual jars to whole boneless thighs, legs, wings, or breast chunks.
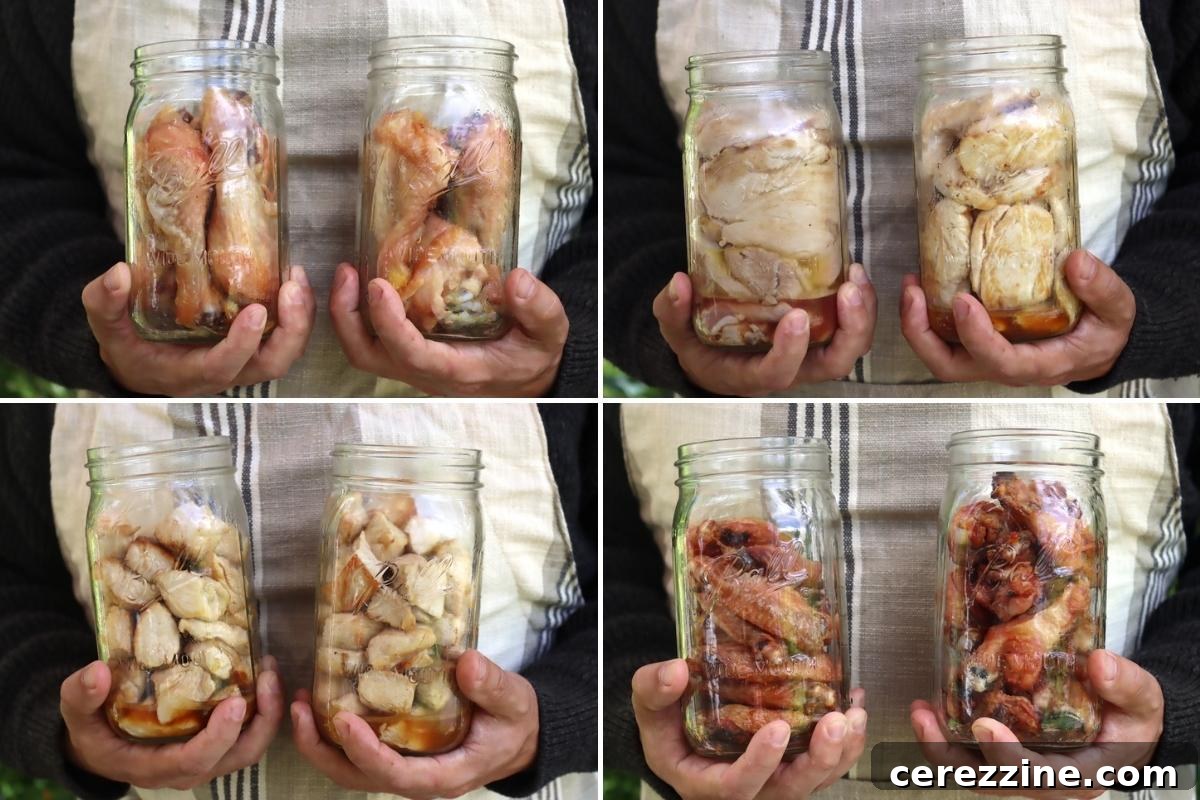
Crucially, once chicken has been partially cooked (hot packed), it must be covered with liquid before canning, as it will have lost moisture during the browning or roasting process. This is where homemade chicken broth truly shines. It infuses the chicken with even more flavor, making it vastly superior to using plain water. My preferred method often spans two days: on the first day, I butcher whole chickens, separating the meat and refrigerating it. The bones, skin, and wing tips are roasted until golden brown, then slow-simmered for 12+ hours to create a deeply flavored, rich chicken stock. Roasting the bones first is key to a robust, clear broth, unlike stock made from raw bones which tends to be cloudy and less intense.
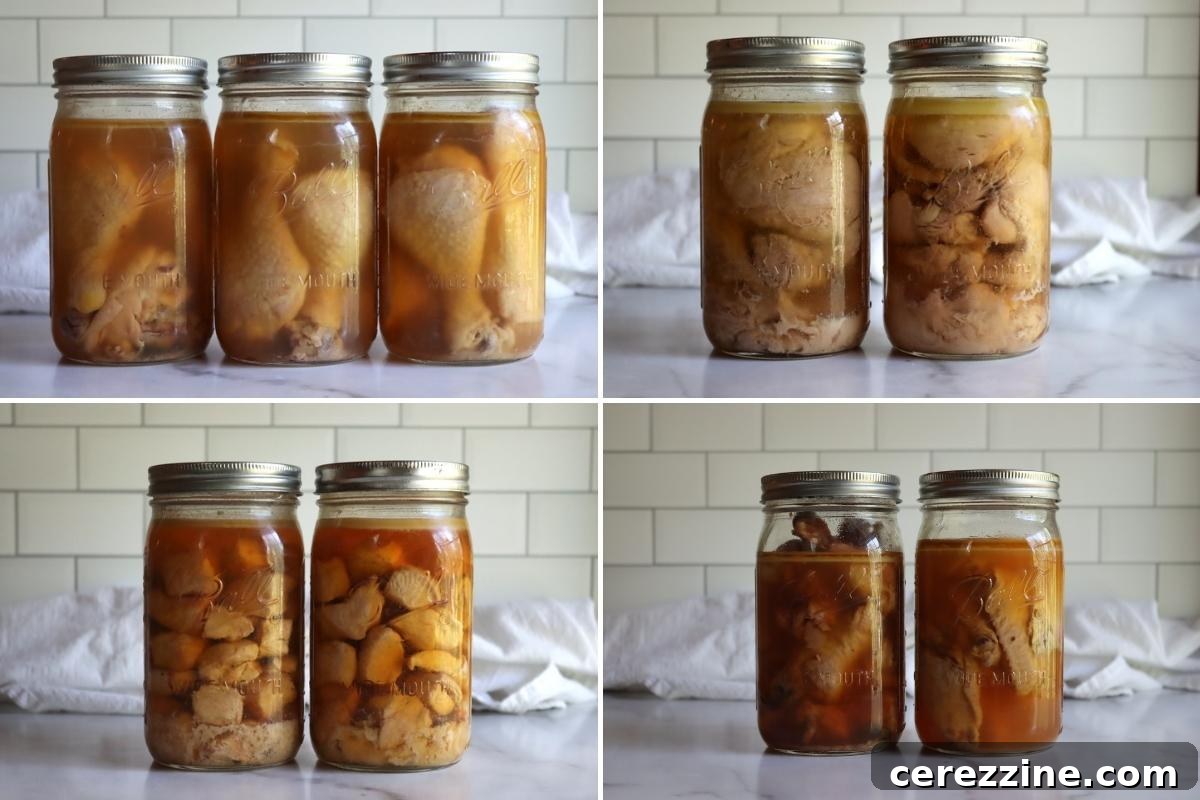
On the second day, the refrigerated chicken meat is browned, packed into jars, and then generously covered with the freshly made, simmering chicken stock, ensuring that 1 1/4 inch headspace is maintained. Once your jars are filled with chicken and covered with broth, you are finally ready for the critical step: pressure canning.
Mastering the Art of Pressure Canning Chicken
As you meticulously pack your chicken into jars, simultaneously prepare your pressure canner. Refer to your specific canner’s instructions, but generally, this involves adding 2 to 3 inches of water to the bottom, placing the canner rack inside, and bringing the water to a gentle simmer. If you are new to pressure canning, I highly recommend consulting a reliable beginner’s guide to pressure canning before proceeding to ensure safety and success.
Carefully pack your browned or pre-cooked chicken into clean canning jars (either pint or quart sizes), maintaining precisely 1 1/4 inch of headspace. If you wish to add salt for flavor and improved texture, the recommended amount is 1 teaspoon per quart jar and 1/2 teaspoon per pint jar. Salt is entirely optional and not essential for the preservation process itself. You can always adjust salt levels at the time of serving or omit it altogether. Next, pour boiling chicken broth (or water) over the meat, again ensuring you leave 1 1/4 inch headspace. Use a de-bubbler tool to remove any trapped air pockets and gently adjust the meat so it remains submerged beneath the liquid line. Add more hot broth if needed to correct the headspace.
Wipe the rims of your jars thoroughly with a clean, damp cloth to remove any grease or food particles, which could prevent a proper seal. Then, center a 2-part canning lid onto each jar and tighten the bands to “fingertip tight” – meaning secure but not overly tightened. Load the prepared jars into your simmering pressure canner using a jar lifter, arranging them according to the manufacturer’s guidelines to allow for proper heat circulation. Securely close the canner lid, but do not seal the vent or vent pipe just yet. Turn the heat to high and bring the canner to a vigorous boil. Allow a steady stream of steam to escape from the vent for a full 10 minutes. This crucial venting step purges all air from the canner, creating a pure steam environment necessary for accurate pressure processing. After 10 minutes, seal the canner (e.g., by placing the weighted gauge) and continue heating until the desired pressure is reached.
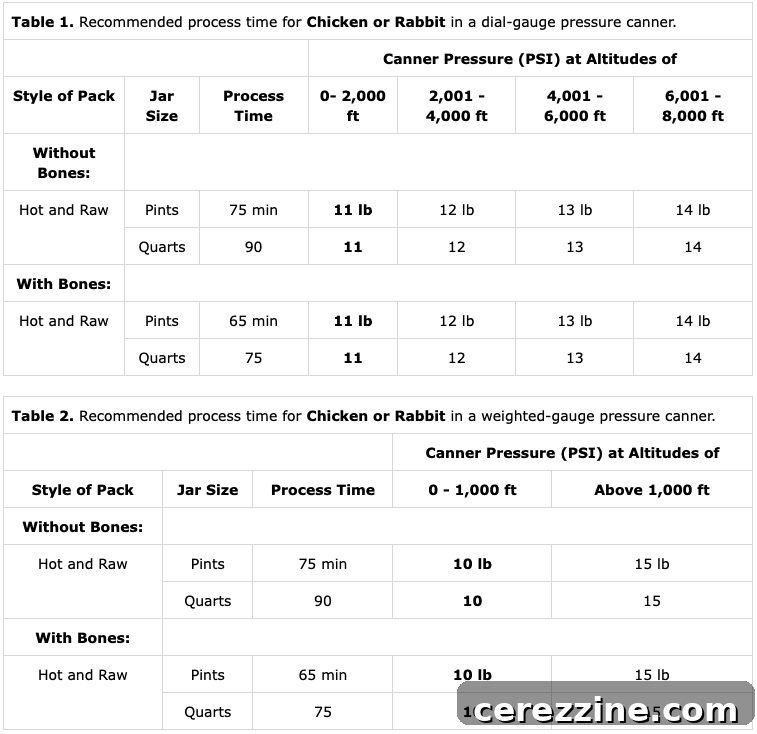
The precise pressure required will depend on your specific altitude and the type of pressure canner you are using (dial gauge vs. weighted gauge). Always consult a trusted canning chart or your canner’s manual for specific recommendations based on your elevation. This ensures safe processing temperatures are achieved.
Optimal Pressure Canning Times for Chicken
Once your pressure canner reaches the specified pressure, start your timer. It’s important to note that canning times remain consistent regardless of altitude; only the required pressure setting changes. For chicken, processing times vary based on jar size and whether the meat contains bones. Chicken bones are excellent heat conductors, which means bone-in chicken actually requires less processing time than boneless chicken.
Here are the recommended pressure canning times for chicken:
- For Boneless Chicken (raw or hot pack): Process pint jars for 75 minutes. Process quart jars for 90 minutes.
- For Bone-in Chicken (raw or hot pack): Process pint jars for 65 minutes. Process quart jars for 75 minutes.
If you are canning a mixed batch that includes both bone-in and boneless chicken in the same canner, you must always adhere to the longer processing times for boneless chicken to ensure all jars are safely processed. Once the designated canning time is complete, turn off the heat completely and allow the pressure canner to cool naturally and depressurize. Do not attempt to force-cool the canner or open it prematurely, as this can lead to siphoning (liquid loss from jars) or seal failures. Once the pressure gauge reads zero and the lid can be opened safely, carefully remove the hot jars using a jar lifter and place them on a towel or cooling rack, ensuring they are not touching each other, to cool undisturbed for 12 to 24 hours. During this cooling period, the jar lids should seal with an audible “pop” and become concave. After cooling, check all seals; any unsealed jars should be refrigerated and consumed promptly. Properly sealed jars of pressure-canned chicken are now ready for your pantry shelf, offering a convenient and versatile protein source for months to come.
Your Comprehensive Chicken Canning FAQ
Having covered the detailed process of preserving chicken at home, from preparation to pressure canning, you might still have a few lingering questions. Here are answers to common inquiries to ensure your canning endeavors are successful and enjoyable.
What is the Typical Yield When Canning Chicken?
The yield can vary based on the size of your chickens and how you butcher them. As a general guide, if you’re using a large 30-quart pressure canner (which holds about 14 quart jars), starting with approximately six whole chickens (each weighing 5 to 6 lbs) typically yields around 14 quarts of home-canned chicken. This might break down into roughly 7 quarts of breast cubes and tenders, 3 quarts of legs, 2 quarts of boneless thighs, and 2 quarts of wings. Additionally, you’ll often have an extra 7 quarts of flavorful chicken broth to can separately after the chicken is processed.
For a standard 7-quart capacity canner, plan on using about three whole chickens (5 to 6 lbs each). This equates to roughly 2 to 2.5 pounds of whole bone-in chicken per quart jar, not including the carcass which is used for broth. If you’re working with pre-parted chicken, estimate 1.5 to 2 pounds of raw chicken per quart jar. For pint jars, a good approximation is about 3/4 pound of chicken per jar, keeping in mind that the 1 1/4 inch headspace takes up a proportionally larger amount of space in smaller jars.
How Long Does Home-Canned Chicken Remain Fresh?
Properly sealed jars of pressure-canned chicken, particularly those prepared using the hot pack method, will maintain peak quality on your pantry shelf for 12 to 18 months. Raw pack chicken tends to show a decline in quality around 6 to 8 months. It’s crucial to understand that while quality may gradually degrade over time (e.g., discoloration or slight drying out above the liquid line), the contents will remain safe to eat indefinitely as long as the jars were correctly processed and remain hermetically sealed. Most canning authorities recommend consuming home-canned meats within one year for the best possible quality, though they remain safe beyond this point if the seal is intact. Always remove the metal bands for long-term storage, and refrigerate any opened jars.
Is It Necessary to Remove the Skin When Canning Chicken?
Removing the skin is an optional step when canning chicken, and leaving it on is perfectly fine, especially for bone-in pieces like legs and wings. The skin can contribute to a richer flavor and appealing texture, particularly if you pre-roast these pieces until the skin browns. For chicken breasts, I often remove the skin because whole breasts are large and less ideal for packing into jars. If you’re canning smaller breast pieces or half breasts, you might consider leaving the skin on and browning it after removing it from the jar for serving. For thighs, leaving the skin on works well as they pack easily. However, if you plan to use canned thighs for shredded applications like burritos, skinless might be preferred. Ultimately, the choice depends on your desired end use and personal preference.
What is the Flavor Profile of Pressure-Canned Chicken?
One of the remarkable benefits of pressure cooking and canning is the consistent tenderness it imparts to the meat. Whether you’re canning a young broiler or an older rooster, the chicken will emerge incredibly tender and flavorful. For the absolute best taste, brown the meat thoroughly before canning, use the recommended amount of salt (which also aids in texture retention), and most importantly, can it in a well-made, rich chicken broth. When prepared this way, home-canned chicken often tastes remarkably similar to a perfectly cooked rotisserie chicken – moist, savory, and ready to use.
For skin-on legs and wings, you can achieve a delightful crispness by simply draining them well after opening the jar and quickly browning them in a hot skillet with a little oil. The skin will crisp beautifully, offering a tender version of roasted chicken legs that’s incredibly satisfying.
Can I Incorporate Seasoning When Canning Chicken?
Yes, adding reasonable amounts of dry spices and herbs is generally safe and encouraged when canning chicken to enhance its flavor. The quantities you would typically use for everyday cooking are usually safe for canning. However, it’s wise to start with a lighter hand than usual, as flavors tend to intensify both during the pressure canning process and during storage. You can always add more seasoning when you open the jar for serving, but you can’t take it away!
The main cautionary note when seasoning is to avoid creating dense spice pastes or excessively thick dry rubs (like those often used in Indian, Thai, or American BBQ styles). Excessive seasoning can potentially thicken the liquid in the jar, which may hinder proper heat penetration during processing and compromise the safety of your canned product. Ensure the liquid remains sufficiently thin to allow for efficient heat transfer. Also, be aware that some spices, such as cumin and cinnamon, can develop a bitter taste after pressure canning. Experiment with small batches first to discover what your family enjoys. Personally, I find a simple sprinkle of garlic powder, onion powder, and a touch of smoked paprika adds wonderful flavor without any issues.
Creative Ways to Use Pressure-Canned Chicken
Pressure-canned chicken is incredibly versatile and can be used in almost any recipe calling for cooked chicken. For most applications, I recommend draining the broth from the jar and reserving it for future use in soups, gravies, or other dishes. The drained breast meat works wonderfully in quick stir-fries, creamy casseroles, shredded for chicken salad sandwiches, or as a protein boost in pasta dishes. Canned thighs are excellent when quickly re-fried whole or shredded into flavorful burrito or taco meat.
Bone-in legs and wings, once removed from the jar, can be browned in hot oil in a pan and served as a standalone meal. Believe it or not, they even make surprisingly good buffalo wings – simply crisp the skin in hot oil and then toss them in your favorite buffalo wing sauce before serving. A note of caution: chicken bones become quite soft after pressure canning and can break easily. Exercise care when eating bone-in canned chicken, and it’s generally not recommended to serve it to young children due to the risk of small bone fragments.
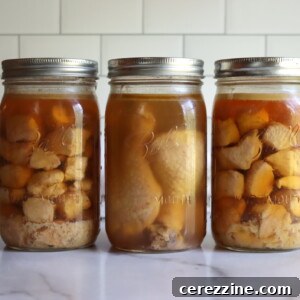
Average Rating: 5 stars from 3 votes
Servings: Yield Varies (see notes)
Canning Chicken
By Ashley Adamant
Home-canned chicken allows you to preserve chicken right on the pantry shelf and makes for quick meals later on.
Prep Time: 1 hour
Cook Time: 1 hour
Canning Time: 1 hour 30 minutes
Total Time: 3 hours 30 minutes
Equipment
- Pressure Canner
- Wide Mouth Quart Mason Jars
- Jar Lifter
- Canning Funnel
- Wide Mouth Canning Lids
Ingredients
- Chicken
- Chicken Broth
- Salt (optional)
Instructions
- Start by preparing the chicken. If starting with whole birds, part the birds into whatever pieces you desire and save the carcasses for making broth. Roast the carcasses and make a chicken broth for canning, or start with prepared chicken broth and pre-cut chicken pieces. Chicken may be canned boneless or bone-in, with or without skin, and in large pieces or small chunks, based on your preference.
- Preheat your pressure canner and prepare your jars, lids, and rings.
- Brown the chicken in a bit of oil on all sides and then pack into prepared canning jars, leaving 1 1/4 inch headspace.
- Add salt, if desired. The recommended amount is 1 tsp per quart or 1/2 tsp per pint. Adjust to your tastes, or omit.
- Cover the chicken in boiling chicken broth (or water), still maintaining 1 1/4 inch headspace. Adjust pieces to be below the liquid line and de-bubble jars. Adjust headspace if necessary.
- Wipe jar rims to remove any oil and seal jars to fingertip tight with 2-part canning lids.
- Load the canning jars into the pressure canner, packing it according to the manufacturer’s directions.
- Close the lid on the pressure canner, but don’t start bringing it up to pressure yet. Turn up the heat and allow the canner to vent steam for a full 10 minutes to ensure that the chamber is completely full of steam before sealing the canner completely and bringing it up to pressure.
- Canning pressure depends on altitude and the type of canner used. See notes below for specifics.
- Once at the specified pressure, start the timer. Canning times are as follows: For Boneless chicken (raw or hot pack), process jars at pressure for 75 minutes for pints and 90 minutes for quarts. For bone-in chicken (raw or hot pack), process jars for 65 minutes for pints and 75 minutes for quarts.
- Once the canning time is complete, turn off the heat and allow the canner to cool completely before removing the jars.
- Check seals, and store any unsealed jars in the refrigerator for immediate use.
- Properly canned and sealed jars will maintain peak quality on the pantry shelf for 12 to 18 months after canning. Remove bands for storage. Refrigerate after opening.
Notes
Whole roasted chicken or leftover chicken – Instead of browning individual chicken pieces, you can also roast the chicken whole in an oven until it’s done enough to pick from the bones. Pick the chicken and pack it into jars and then proceed as you otherwise would.
Salt – The salt is optional, and not required for preservation. It improves flavor and texture when canning chicken.
Water or Broth – Water or chicken broth are both acceptable canning liquids, but I’d recommend chicken broth for the best flavor.
Raw Pack v. Hot Pack – I’ve given instructions for hot pack because it results in much higher quality canned chicken, and it stores better. If you’d like to do raw pack, simply pack the chicken into jars without liquid leaving 1 1/4 inch headspace. Seal jars and process as you would hot pack chicken. No liquid is added to the raw pack since the chicken will release its own juices during canning.
Canning Pressures – The proper canning pressure to use varies based on your elevation and the type of canner you’re using:
For Dial Gauge Pressure Canners (Presto brand, etc):
- For 0 to 2,000 feet in elevation, use 11 pounds of pressure
- For 2,001 to 4,000 feet in elevation, use 12 pounds of pressure
- For 4,001 to 6,000 feet in elevation, use 13 pounds of pressure
- For 6,001 to 8,000 feet in elevation, use 14 pounds of pressure
- Above 8,000 feet in elevation, use 15 pounds of pressure
For Weighted Gauge Pressure Canners (All American Brand, etc):
- For 0 to 1,000 feet in elevation, use 10 pounds of pressure
- Above 1,000 feet in elevation, use 15 pounds of pressure
Nutrition
Serving: 1 cup, Calories: 232kcal, Carbohydrates: 7g, Protein: 41g, Fat: 4g, Saturated Fat: 1g, Polyunsaturated Fat: 1g, Monounsaturated Fat: 2g, Trans Fat: 0.03g, Cholesterol: 121mg, Sodium: 2437mg, Potassium: 852mg, Sugar: 2g, Vitamin A: 21IU, Calcium: 26mg, Iron: 1mg
Nutrition information is automatically calculated, so should only be used as an approximation.
Beyond Basic: Delicious Chicken Canning Recipes
While plain canned chicken offers incredible versatility for quick meals, you can also elevate your canning game with meal-in-a-jar recipes. These recipes combine chicken with other ingredients to create complete, ready-to-heat-and-eat meals, perfect for when you need a hearty dinner with minimal effort. Explore these exciting chicken canning recipes:
- Chicken and Gravy Dinner in a Jar
- Chicken Pot Pie Filling
- White Bean Chicken Chili
- Chicken Chili Verde
Expand Your Skills: More Meat Canning Recipes
If you’re eager to further your home preservation journey, there’s a world of meat canning recipes waiting to be explored. Build a diverse and resilient pantry with these additional guides:
- Canning Beef
- Canning Hamburger (Ground Beef)
- Canning Beef Broth
- Canning Beef Stew