
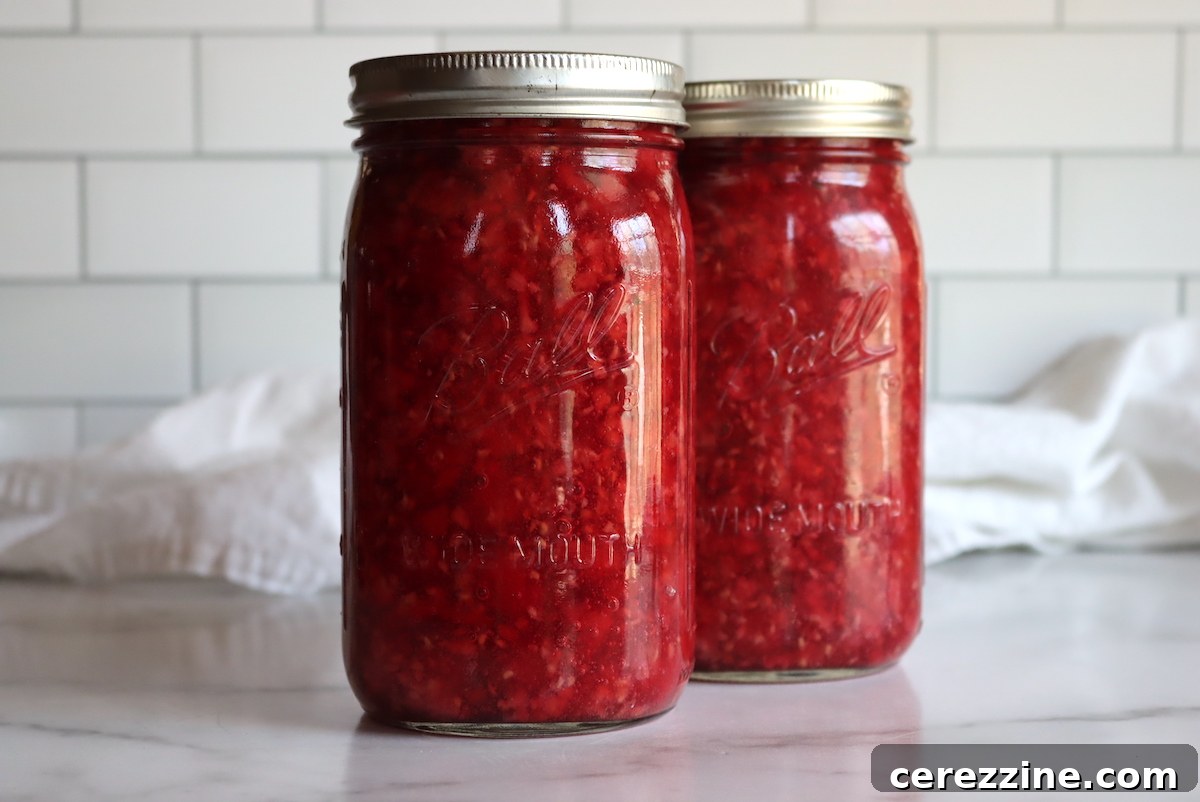
Transforming fresh or frozen raspberries into a luscious pie filling and preserving it through canning is a truly rewarding endeavor. Imagine the convenience of having a ready-to-use, vibrant raspberry pie filling on your pantry shelf, making it effortless to whip up a delicious homemade dessert at a moment’s notice, regardless of the season. This comprehensive guide will walk you through the process of creating a safe, delectable, and versatile raspberry pie filling that you can enjoy year-round.
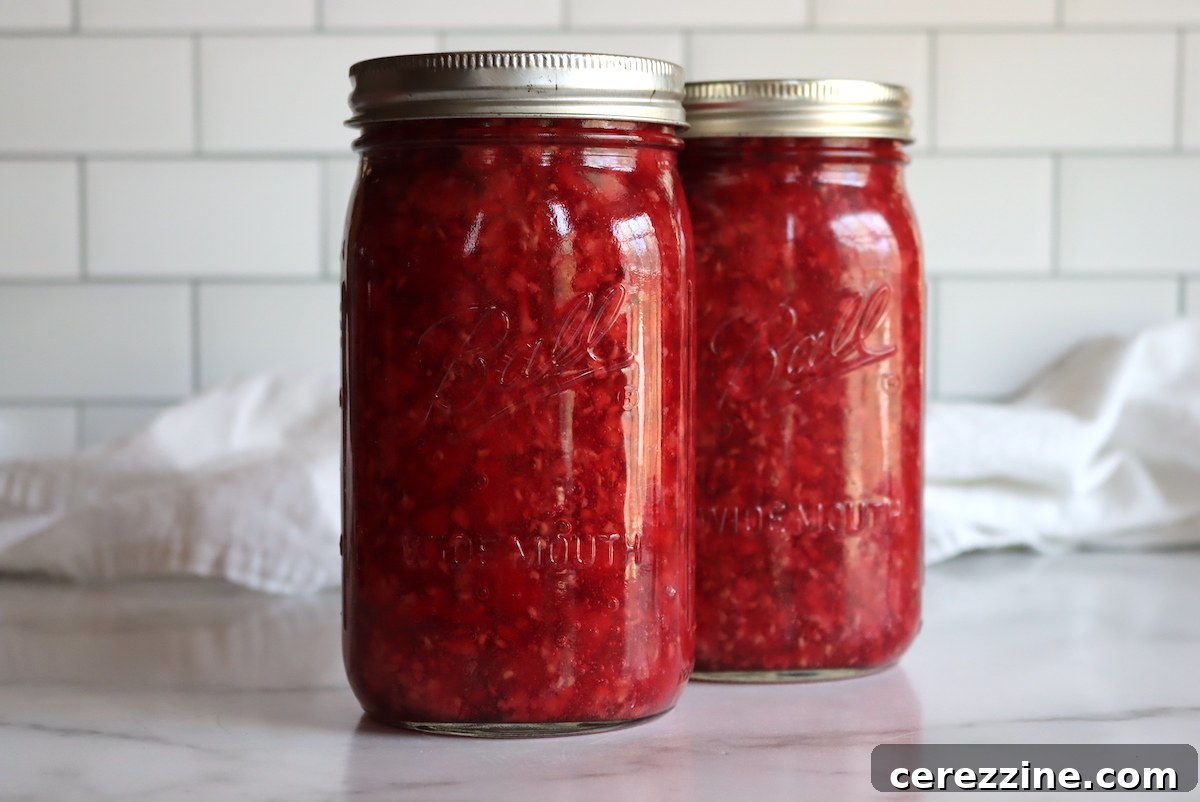
Canned raspberry pie filling is far more than just a component for pies. It’s a versatile pantry staple that can elevate a myriad of dishes. Picture it spooned generously over fluffy pancakes or crepes for a delightful breakfast, drizzled over soft cakes for an instant dessert, or even as a vibrant topping for yogurt or ice cream. The sweet-tart flavor of raspberries, captured perfectly in a jar, brings a burst of summer sunshine to your table even in the depths of winter.
While canning pie filling is an excellent way to preserve the bounty of raspberries, it’s certainly not the only option. The adaptability of this bright red fruit allows for a wide array of preservation methods. Enthusiasts often explore creating unique beverages like homemade raspberry wine or even a batch of refreshing raspberry mead. For those who prefer classic spreads, raspberry jam offers a delightful way to savor the fruit, perfect for spreading on toast or incorporating into baked goods like thumbprint cookies and traditional Danish raspberry slices. Additionally, you can preserve whole raspberries using canning methods, offering another dimension of flavor and texture for your culinary creations. If you’re feeling generous, jars of your homemade raspberry pie filling make thoughtful and impressive gifts, promising a taste of handcrafted goodness to friends and family.
Essential Ingredients for Canning Raspberry Pie Filling
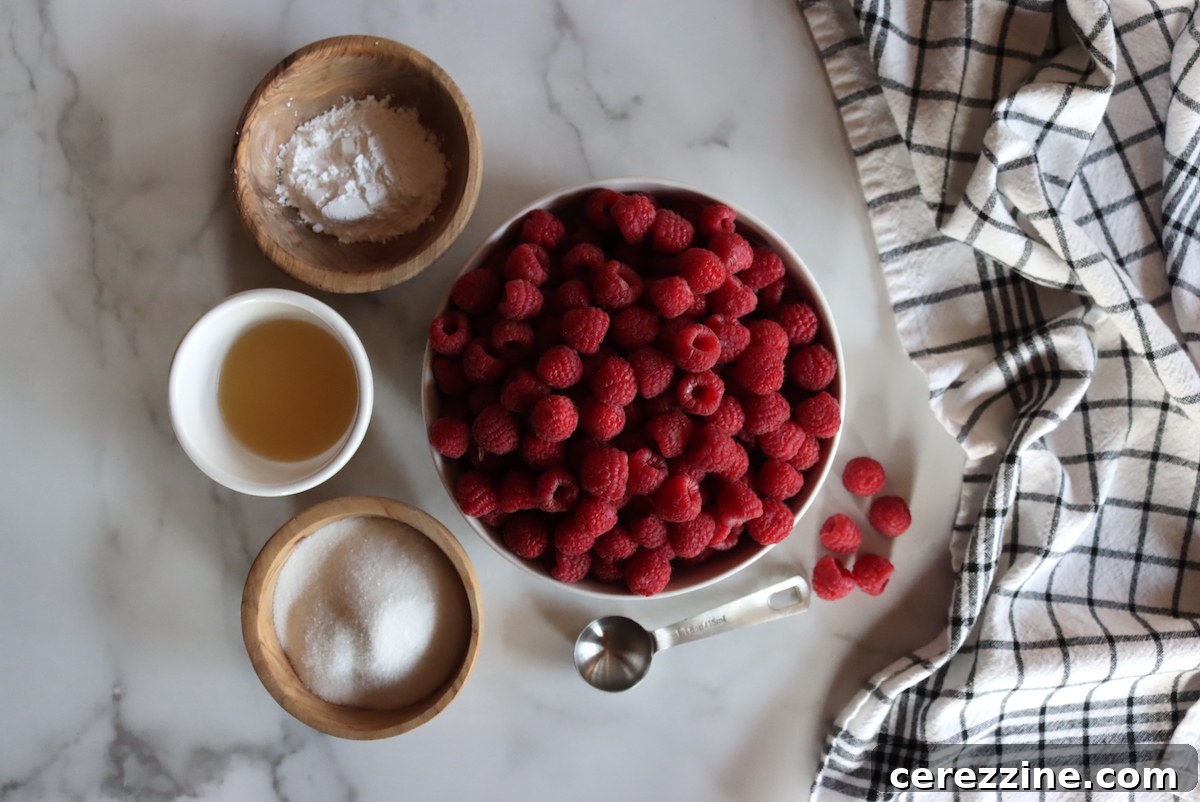
Crafting the perfect raspberry pie filling begins with selecting the right ingredients. This recipe is highly adaptable, allowing you to use either fresh or frozen raspberries. If opting for frozen berries, it is best to choose unsweetened varieties. Should only sweetened frozen raspberries be available, a quick rinse with water before thawing can help mitigate the added sugar. The precise measurements provided ensure a safe and delicious final product, optimized for home canning. Note that while this recipe offers flexibility for batch sizes, certain elements are crucial for safety and must not be altered.
For a Single Quart Jar of Raspberry Pie Filling:
- 3 ½ cups fresh raspberries (or unsweetened frozen berries), approximately 2 lbs
- ¾ cup plus 2 tablespoons granulated sugar
- ¼ cup plus 1 tablespoon Clear Jel (essential for safe canning)
- 1 cup cold water (or a mix of water and raspberry juice)
- 3 ½ teaspoons bottled lemon juice (non-negotiable for safety)
These seemingly precise measurements are carefully derived from a larger 7-quart batch recipe, scaled down for convenience. This allows you to easily multiply the recipe to produce anywhere from one to seven quarts of filling. If you’re new to this recipe, starting with a single-quart batch is an excellent way to experiment with sugar and spice levels, as well as the balance of juice or water, ensuring the taste perfectly matches your preference before committing to a larger production. Remember, while flavor adjustments are possible, the amount of lemon juice is critical for food safety and must be maintained. You may, however, slightly decrease the Clear Jel for a less dense filling, but do not exceed the recommended amount.
For a Full 7-Quart Canner Batch:
- 6 quarts fresh raspberries (or unsweetened frozen berries), approximately 14-15 lbs
- 6 cups granulated sugar
- 2 ¼ cups Clear Jel
- 7 cups cold water (or a mix of water and raspberry juice)
- ½ cup bottled lemon juice
Important Note on Lemon Juice: It’s vital to use the correct amount of bottled lemon juice for safe canning. You may encounter older or copied canning instructions that list different quantities, such as 3 tablespoons per quart or ½ cup for 7 quarts, which have been identified as inaccurate due to a long-standing typo in a University of Washington publication. The National Center for Home Food Preservation (NCHFP) has confirmed the correct, tested ratio: 3½ teaspoons of bottled lemon juice per quart of filling. This exact ratio is used in this recipe, ensuring consistent and safe acidity whether you’re making a single quart or a full 7-quart batch.
Safely Altering Your Raspberry Pie Filling Recipe
When it comes to home canning, understanding which elements of a recipe can be adjusted and which cannot is paramount for safety. As affirmed by experts, including the Washington State University Extension service, the sugar content and choice of spices in this raspberry pie filling recipe can be customized to suit your personal taste preferences. However, the amount of bottled lemon juice is non-negotiable. It plays a critical role in establishing the necessary acidity (pH level) to prevent the growth of harmful bacteria, thus ensuring the safety and long-term stability of your canned pie filling. Therefore, you must never decrease the specified amount of lemon juice, though you may increase it slightly if you desire a more tart flavor profile.
Similarly, the quantity of Clear Jel, the recommended thickener, offers some flexibility. If you prefer a looser pie filling, you can reduce the amount of Clear Jel to 3 to 4 tablespoons per quart jar. It is important, however, not to increase Clear Jel beyond the measurements given in the recipe, as too much can result in an overly stiff filling. A crucial safety warning: do not substitute other thickeners like cornstarch or tapioca starch for Clear Jel. These alternative starches break down under the high heat of canning, leading to a runny consistency that can compromise the safety and quality of your preserved product. Clear Jel is the only food starch approved and recommended by the USDA for home-canned fruit pie fillings due to its stability under canning conditions.
Furthermore, it is strongly advised to use bottled lemon juice rather than fresh lemon juice for home canning. The acidity of fresh lemons can vary significantly, making it unreliable for ensuring the precise pH required for safe preservation. Bottled lemon juice, on the other hand, is standardized to a consistent acidity level, providing the necessary assurance for canning safety.
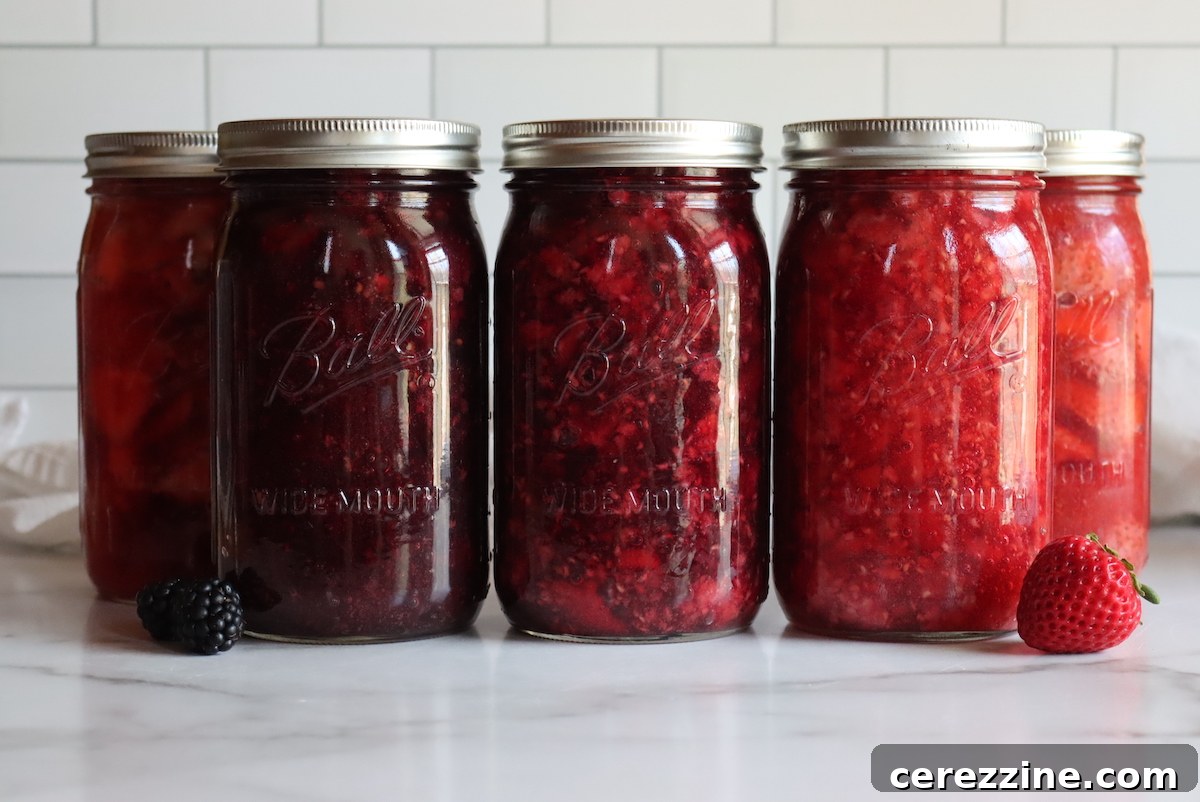
An exciting aspect of this tested recipe is its versatility beyond just raspberries. This identical method and ingredient ratio can be safely applied to other berry pie fillings, including Blackberry, Blueberry, Currant, Gooseberry, Huckleberry, Loganberry, and Strawberry. This means you have the freedom to combine any of these fruits to create a delicious and safe home-canned mixed berry pie filling, allowing for endless flavor combinations for your pantry.
Step-by-Step Guide: How to Can Raspberry Pie Filling
Water bath canning is a simple and effective method for preserving high-acid foods like fruit pie fillings. If you are new to this technique, we recommend reviewing a beginner’s guide to water bath canning to familiarize yourself with the equipment and basic steps before starting this recipe. Proper preparation ensures both safety and quality.
- **Prepare Your Equipment:** Begin by sterilizing your canning jars and their lids (two-piece lids are recommended). Ensure your water bath canner is clean and ready, with enough water to cover your jars by at least an inch once they are loaded.
- **Prepare Raspberries:** If using fresh raspberries, gently wash them under cool water and discard any bruised or damaged fruit. For frozen raspberries, place them in a colander set over a bowl to thaw. Collect the liquid that accumulates as they thaw; this flavorful juice can be used later to partially replace the cold water in the recipe.
- **Blanch the Berries:** In a large pot, bring several quarts of water to a rolling boil. Carefully add the prepared raspberries and blanch them for exactly one minute. This quick blanching helps prevent the berries from floating in the finished filling. After one minute, drain the berries or remove them with a slotted spoon. Transfer the blanched raspberries to a covered pot or dish to keep them warm while you prepare the thickening mixture. Set aside.
- **Combine Dry Ingredients:** In a separate, large, heavy-bottomed pot, thoroughly combine the granulated sugar and Clear Jel. Whisk them together until no lumps remain. This step is crucial to prevent clumping when liquid is added.
- **Add Liquid and Dissolve Thickener:** Gradually add the cold water (or your cold water and collected raspberry juice mixture) to the sugar and Clear Jel mixture. Stir continuously until the Clear Jel is completely dissolved. It is essential that the mixture is entirely smooth before proceeding to the heating step; otherwise, you may end up with undesirable clumps.
- **Thicken the Mixture:** Place the pot over medium-high heat. Continuously whisk the mixture as it heats and begins to thicken. It will become noticeably viscous.
- **Boil and Add Lemon Juice:** Once the mixture reaches a rolling boil, add the bottled lemon juice. Continue to boil, stirring constantly, for one full minute. The lemon juice ensures the necessary acidity for safe canning.
- **Combine with Raspberries and Fill Jars:** Remove the pot from the heat. Gently fold in the warm, blanched raspberries. Ladle the hot pie filling into your prepared canning jars, leaving 1 inch of headspace (the space between the top of the food and the rim of the jar). Because the filling is thick, it’s vital to “de-bubble” the mixture by sliding a non-metallic spatula or chopstick around the inside of the jar. This releases any trapped air bubbles, which could otherwise lead to excessive headspace and potentially compromise the seal.
- **Prepare for Processing:** Wipe the rims of the jars clean with a damp cloth to remove any residue that could interfere with the seal. Center a clean, warm two-part canning lid on each jar, and screw on the band until it is finger-tight (snug but not overly tight).
- **Process in Water Bath Canner:** Immediately transfer the filled and sealed jars to the preheated water bath canner. Ensure the jars are fully submerged under at least 1 inch of boiling water. Bring the canner back to a vigorous boil and process the jars for 30 minutes. Adjust this processing time as needed for your specific altitude (refer to the altitude adjustment chart below).
- **Cooling and Sealing:** Once the processing time is complete, turn off the heat and carefully remove the canner lid. Allow the jars to rest in the hot water for an additional 10 minutes. This helps reduce the chances of siphoning (liquid loss from the jars) as they begin to cool. After 10 minutes, use a jar lifter to carefully remove the hot jars from the canner. Place them upright on a towel-covered countertop, ensuring there is space between each jar for air circulation. The towel helps prevent thermal shock, which could cause the jars to crack or shatter.
- **Check Seals and Store:** Allow the jars to cool undisturbed for 12 to 24 hours. After this time, check the seals. A properly sealed lid will be concave (curved inward) and will not flex when pressed. Any unsealed jars should be refrigerated immediately and consumed promptly. Properly sealed and stored jars will maintain their peak quality for up to 12 months in a cool, dark place. Once opened, refrigerate the pie filling.
Altitude Adjustments for Canning Raspberry Pie Filling
The boiling point of water decreases at higher altitudes, which means food processing times must be increased to ensure proper sterilization and safety. Adjust your water bath canning time for raspberry pie filling according to your elevation:
- 0 to 1,000 Feet in Elevation: 30 minutes
- 1,001 to 3,000 Feet in Elevation: 35 minutes
- 3,001 to 6,000 Feet in Elevation: 40 minutes
- Above 6,000 Feet in Elevation: 45 minutes
Enhancing Flavor: Juice or Water for Canning Liquid?
While water provides a neutral base, substituting a portion of the cold water with raspberry juice can intensify the fruit’s natural flavor in your pie filling, resulting in an even more delicious product. If you’re using frozen raspberries, remember the liquid collected during thawing can be utilized. Simply measure this flavorful juice and add enough water to meet the total liquid requirement for the recipe.
For those working with fresh raspberries, you can easily extract your own juice. A common method involves mashing fresh raspberries with a small amount of water (a couple of tablespoons per cup of berries) in a saucepan, then bringing the mixture to a boil for a few minutes. After simmering, strain the mixture through a cheesecloth or a jelly bag to separate the juice from the pulp. This process is best done in advance, as it requires some time for draining. Alternatively, a countertop juicer can efficiently extract juice from fresh raspberries. Regardless of the method, ensure your freshly extracted juice is chilled before incorporating it into the pie filling mixture to maintain the correct temperature for dissolving the Clear Jel.
You can also experiment with other fruit juices, such as apple juice or juice from other berries, to add a different dimension to your raspberry pie filling. However, be aware that this will alter the flavor profile significantly, so it’s always a good idea to conduct a small test batch first to ensure the taste is to your liking. For optimal results and balanced flavor, aim to substitute between ¼ to ½ of the total water required in the recipe with your chosen fruit juice.
Creative Uses for Your Home-Canned Raspberry Pie Filling
While its name suggests one primary use, your homemade raspberry pie filling is incredibly versatile and can be enjoyed in countless ways beyond traditional pies, cobblers, and tarts. Having jars of this delightful filling on hand opens up a world of culinary possibilities for quick and satisfying desserts or breakfast treats.
For breakfast or brunch, spoon the vibrant filling over warm waffles, fluffy pancakes, or elegant crepes. It also makes a fantastic topping for oatmeal or a delightful swirl in overnight oats. Beyond the breakfast table, elevate simple desserts by drizzling it over creamy cheesecake, rich panna cotta, or a scoop of vanilla ice cream for an instant gourmet touch.
Looking for more baked inspiration? Incorporate raspberry pie filling directly into your baking projects. Swirl it into cupcake batter before baking for stunning and delicious raspberry swirl cupcakes. Combine it with a buttery oat crumble and bake for crunchy raspberry crumb bars, perfect for snacking or dessert. It can also be generously layered into a streusel or coffee cake for a moist and flavorful treat.
Raspberry’s bright, tangy notes pair exceptionally well with other flavors. Layer your pie filling with decadent chocolate elements in cakes or trifles, or combine it with refreshing lemon curd for a delightful contrast. The versatility extends to mixed fruit desserts as well; create cozy mixed berry tarts by combining raspberry with blackberries or blueberries, craft a comforting peach and raspberry cobbler, or bake a classic rhubarb-raspberry crumble for a perfect balance of sweet and tart.
More Raspberry Canning Recipes
If you’ve enjoyed canning raspberry pie filling and are eager to explore more ways to preserve this delightful berry, we have additional raspberry canning recipes for your pantry:
- Classic Raspberry Jam
- Canning Whole Raspberries
Canning Raspberry Pie Filling
By canning homemade raspberry pie filling, you can ensure a supply of tasty pies and baked cobblers throughout the year. Think you won’t use it all? Don’t forget about all the other delights it can top, from French toast to bread puddings and creamy desserts.
Author: Ashley Adamant
Prep Time: 20 mins
Cook Time: 10 mins
Canning Time: 30 mins
Total Time: 1 hr
Yields: 1 quart or 7 quarts (see notes)
Equipment
- Water Bath Canner
- Clear Jel (Canning Safe Thickener)
- Large Pot
- Slotted Spoon
- Whisk
- Canning Jars, Lids & Bands
- Jar Lifter
- Non-metallic spatula or chopstick (for de-bubbling)
Ingredients
For A Single Quart:
- 3 1/2 cups Raspberries, about 2 lbs (fresh or frozen unsweetened)
- 3/4 cup + 2 Tbsp. Granulated Sugar
- 1/4 cup + 1 Tbsp. Clear Jel
- 1 cup Water, or juice (cold)
- 3 1/2 tsp Bottled Lemon Juice (see notes)
For a 7 Quart Canner Batch:
- 6 Quart Raspberries, about 14 to 15 lbs (fresh or frozen unsweetened)
- 6 cups Granulated Sugar
- 2 1/4 cups Clear Jel
- 7 cups Water, or juice (cold)
- 1/2 cup Bottled Lemon Juice
Instructions
- Begin by sterilizing jars and lids. Prepare a water bath canner by filling it with water and bringing it to a simmer.
- Wash raspberries thoroughly. If using frozen, thaw them in a colander with a bowl underneath to collect the juice, which can be substituted for a portion of the water later in the recipe.
- Fill a pot with a few quarts of water and bring to a boil. Blanch the berries in the boiling water for one minute. Drain or remove with a slotted spoon, then place them in a covered dish or pot to keep warm.
- In a large pot, combine the granulated sugar and Clear Jel. Add the cold water (or cold water and juice mixture) and whisk continuously until the Clear Jel has completely dissolved and the mixture is smooth.
- Once the Clear Jel is fully dissolved, place the pot over medium-high heat. Continuously stir or whisk the mixture as it heats and thickens to a noticeable consistency.
- Once the mixture is bubbling, add the bottled lemon juice. Continue to boil, stirring, for one minute more.
- Remove the pot from the heat and gently fold in the blanched raspberries. Ladle the hot filling into prepared canning jars, leaving 1 inch of headspace. Since the mixture is thick, ensure you de-bubble thoroughly with a non-metallic tool to prevent excess air pockets. Clean the rims of any residue and apply two-part canning lids until finger-tight.
- Immediately process the jars in a preheated water bath canner for 30 minutes, adjusting the processing time as necessary for your altitude.
- After the processing time is complete, turn off the water bath canner and let the jars sit in the hot water for an additional 10 minutes. This step helps to reduce the chance of siphoning.
- Carefully remove the jars from the canner using a jar lifter and place them upright on a towel-covered countertop to cool completely, allowing sufficient space between jars. This prevents thermal shock.
- Check the seals after 12 to 24 hours. Properly sealed lids will be concave and will not flex when pressed. Any unsealed jars should be refrigerated and consumed promptly. Properly sealed and stored jars will maintain their peak quality for 12 months in a cool, dark place. Refrigerate after opening.
Notes
If you wish to add spices to your pie filling (e.g., a pinch of cinnamon or nutmeg), fold them in when you combine the blanched raspberries with the thickened mixture.
The ingredient measurements are provided for both a single-quart yield and a full 7-quart canning batch. The single-quart yield can be easily multiplied to make any amount between 1 to 7 quarts.
Altitude Adjustments for Processing Times:
- 0 to 1,000 Feet in Elevation: 30 minutes
- 1,001 to 3,000 Feet in Elevation: 35 minutes
- 3,001 to 6,000 Feet in Elevation: 40 minutes
- Above 6,000 Feet in Elevation: 45 minutes
To further reduce the risk of siphoning (liquid loss from jars), it is advisable to turn off your water bath canner after the full processing time and let the jars rest in the hot water for an additional 10 minutes before removing them. Always use a jar lifter and place hot jars on a towel-covered surface to prevent thermal shock.
Clarification on Lemon Juice Amounts:
You may encounter varying lemon juice amounts for berry pie fillings in older or duplicated canning handouts. A long-standing typographical error in a University of Washington publication incorrectly listed 3 tablespoons per quart and ½ cup for 7 quarts. The National Center for Home Food Preservation (NCHFP) has verified the correct and tested ratio: 3½ teaspoons of bottled lemon juice per quart of filling. This calculates to ½ cup for a 7-quart batch. These corrected and safe amounts are precisely what is used in this recipe, ensuring a consistent and safe level of acidity per quart, whether you are preparing a small or large batch.
Nutrition
Serving: 1 cup, Calories: 167kcal, Carbohydrates: 41g, Protein: 2g, Fat: 1g, Saturated Fat: 0.03g, Polyunsaturated Fat: 0.5g, Monounsaturated Fat: 0.1g, Sodium: 14mg, Potassium: 197mg, Fiber: 8g, Sugar: 26g, Vitamin A: 41IU, Vitamin C: 37mg, Calcium: 38mg, Iron: 1mg
Nutrition information is automatically calculated and should be used as an approximation only.
Explore More Home-Canned Pie Fillings
If you’ve enjoyed the process of making your own raspberry pie filling, you might be interested in expanding your repertoire of home-canned fruit fillings. These recipes offer the same convenience and delicious taste, allowing you to stock your pantry with a variety of options for all your baking needs:
- Canning Apple Pie Filling
- Canning Blackberry Pie Filling
- Canning Peach Pie Filling
- Canning Cherry Pie Filling
Beyond Fillings: Essential Fruit Canning Recipes
Raspberries are just one of many fruits that truly shine when preserved for year-round enjoyment. Don’t let seasonal availability limit your culinary adventures! Discover even more fruit canning recipes to keep your pantry shelves abundantly stocked through all four seasons, ensuring you always have fresh flavors at your fingertips:
- Canning Peaches
- Canning Blackberries
- Canning Plums
- Canning Blueberries
- Canning Cherries
