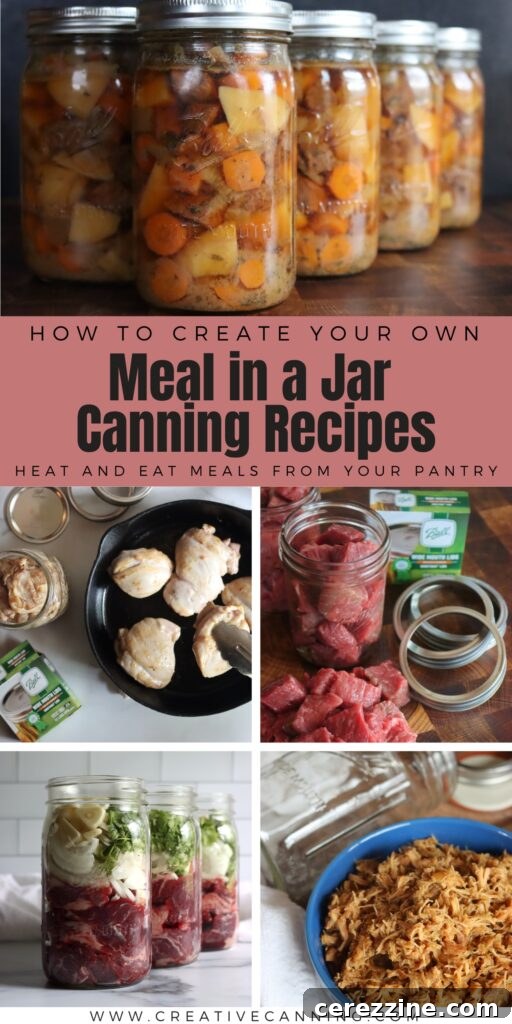
Unlock unparalleled convenience and savory satisfaction by crafting your own meal-in-a-jar canning recipes. This comprehensive guide will walk you through the essential pressure canning guidelines, empowering you to fill your pantry with safe, nutritious, and incredibly flavorful homemade meals ready for any occasion. Imagine having hearty stews, comforting soups, or delectable main courses at your fingertips, requiring only a quick reheat. This ancient art, revitalized with modern safety standards, transforms meal preparation, offering both emergency preparedness and everyday ease.
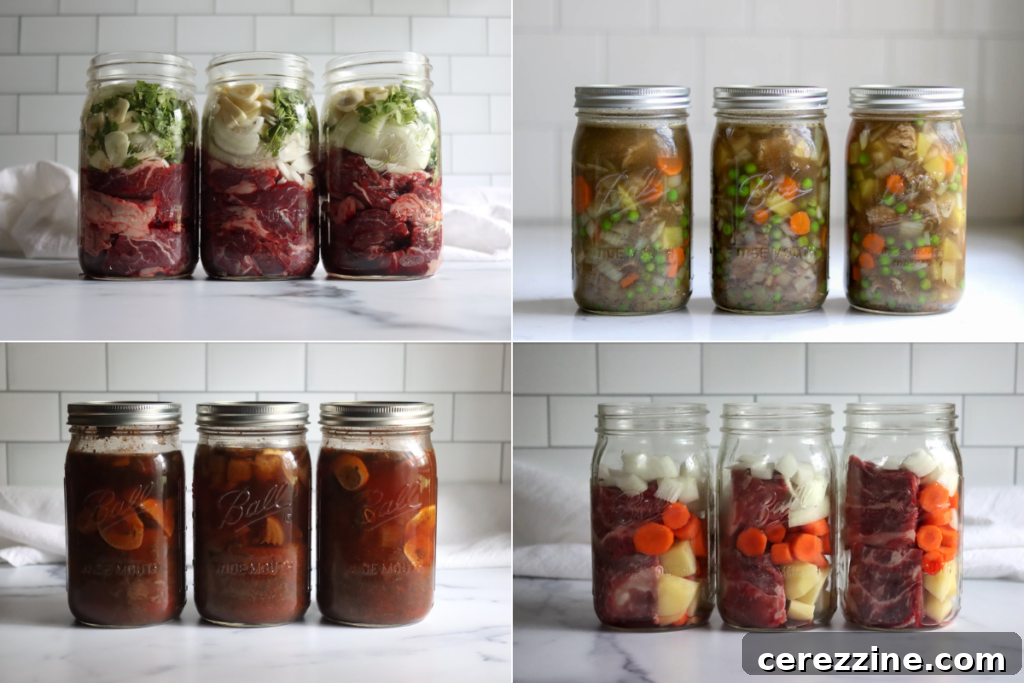
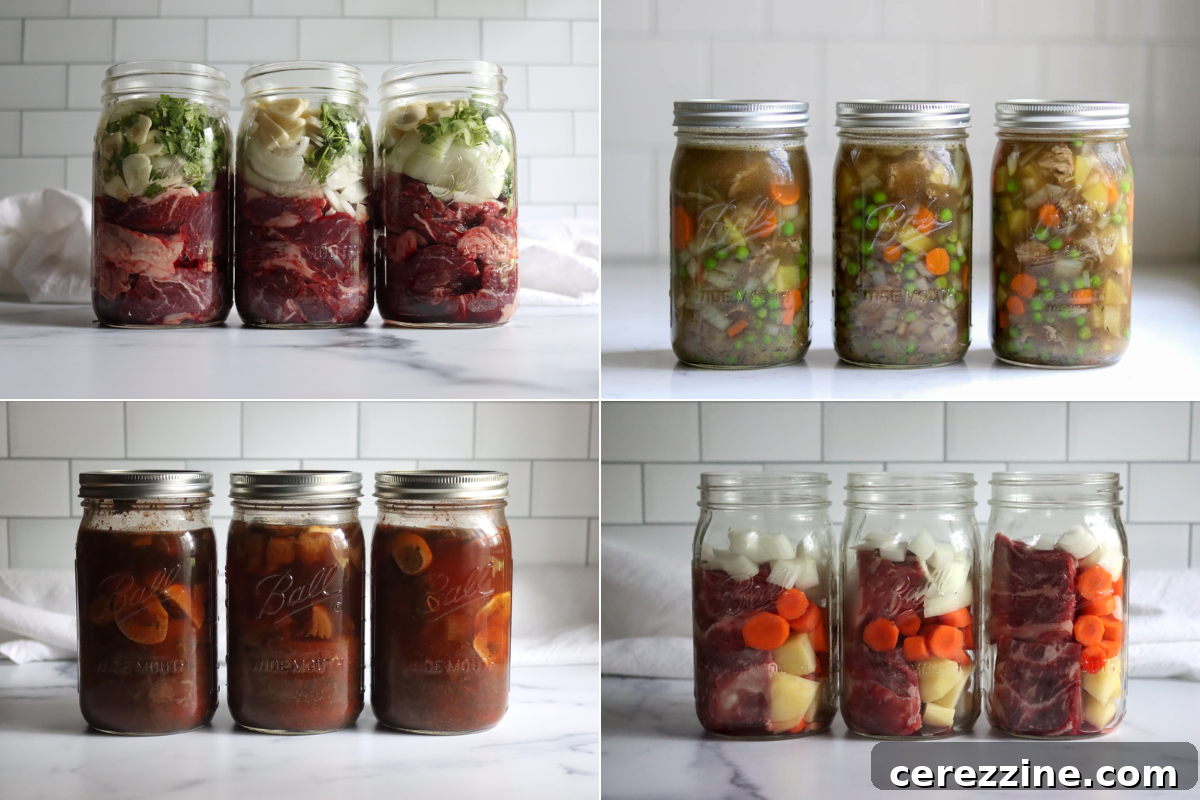
The ability to create personalized meal-in-a-jar canning recipes is a game-changer for home cooks and preppers alike. Guided by the rigorous research of institutions like the National Center for Home Food Preservation (NCHFP) and the University of Alaska Extension, you can confidently develop and preserve a diverse array of pressure-canned meals right in your kitchen. This article will demystify the process, providing clear instructions and critical safety insights to ensure your shelf-stable culinary creations are both delicious and perfectly safe for long-term storage.
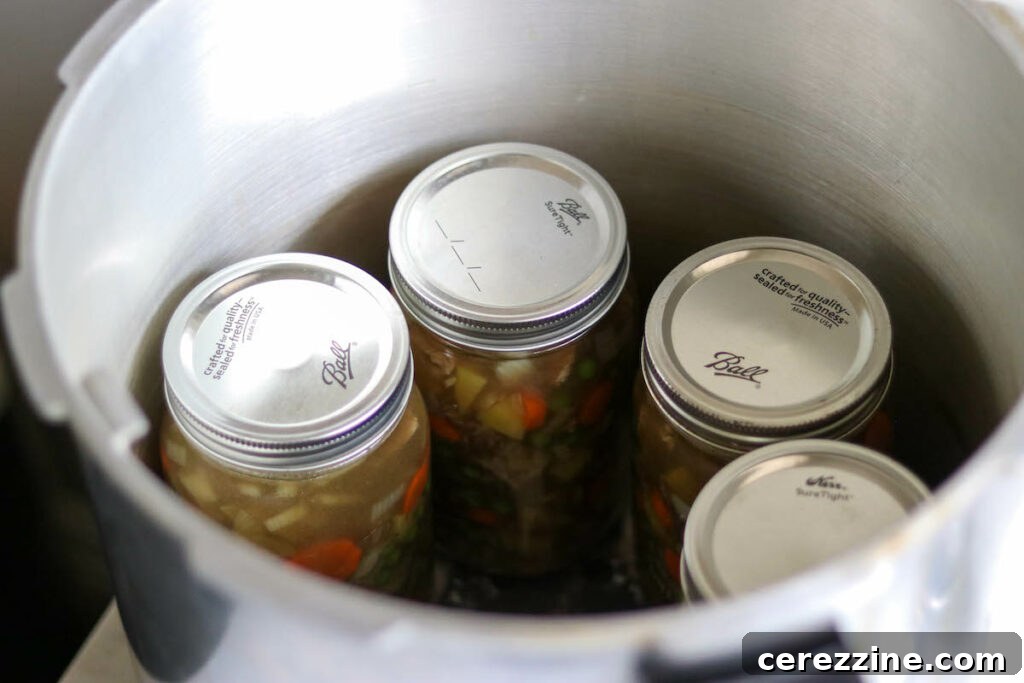
Understanding the Fundamentals of Meal-in-a-Jar Canning
When embarking on your meal-in-a-jar canning journey, it’s helpful to understand the two primary categories into which most recipes fall. These classifications dictate processing times and the types of ingredients you can safely include, primarily based on the ratio of solids to liquids within each jar.
Brothy Meals: A Lighter Approach to Preservation
Brothy meals, as the name suggests, are characterized by a higher liquid content. Dishes such as chicken and vegetable soup fit this description perfectly. In these recipes, jars are intentionally filled only halfway with solid ingredients, with the remaining volume topped off with broth or liquid. This greater proportion of liquid allows for more efficient heat penetration during the pressure canning process, often resulting in shorter processing times and a broader spectrum of permissible ingredients.
Hearty Meals: Substantial and Satisfying Staples
In contrast, hearty meals are designed to be packed full of ingredients, with minimal broth or liquid. Think robust dishes like beef stew or a rich fish chowder base. Because these jars contain a dense mixture of solids, they require longer processing times to ensure thorough heat penetration and microbial safety. While more restrictive in terms of certain ingredients, hearty meal guidelines allow you to create incredibly satisfying, ready-to-eat classics like pot roast, beef stroganoff, flavorful curries, chili, pot pie fillings, and even sloppy joe filling. These versatile guidelines extend beyond traditional “soups” to encompass a wide range of main dishes.
Essential Ingredients for Your Canned Meals
The foundation of any safe and delicious meal-in-a-jar canning recipe lies in selecting appropriate ingredients. Adhering to scientifically tested guidelines ensures both the safety and quality of your preserved foods. Below is a list of commonly approved vegetables and other components, along with specific considerations for their inclusion.
Approved Vegetables for Safe Canning
When developing your recipes, prioritize vegetables known to be safe for home pressure canning. These ingredients maintain their quality and allow for effective heat penetration during processing:
- Tomatoes (prepared according to specific canning guidelines, e.g., with added acid for water bath, but generally safe in pressure canned meals without extra acid)
- Carrots (diced or sliced)
- Green beans (cut into 1-inch pieces)
- Peas
- Corn (kernels, not creamed style)
- Beets (peeled and diced or sliced)
- Peppers (sweet bell peppers or hot peppers, diced)
- Asparagus (cut into 1-inch pieces)
- Potatoes (peeled and diced, pre-cooked slightly)
- Pumpkin (cubed, *never pureed*, as purees can prevent even heat distribution)
- Spinach and other cooking greens, including Swiss chard, kale, and collards (not lettuce, and with specific considerations for hearty vs. brothy meals)
- Onions (diced)
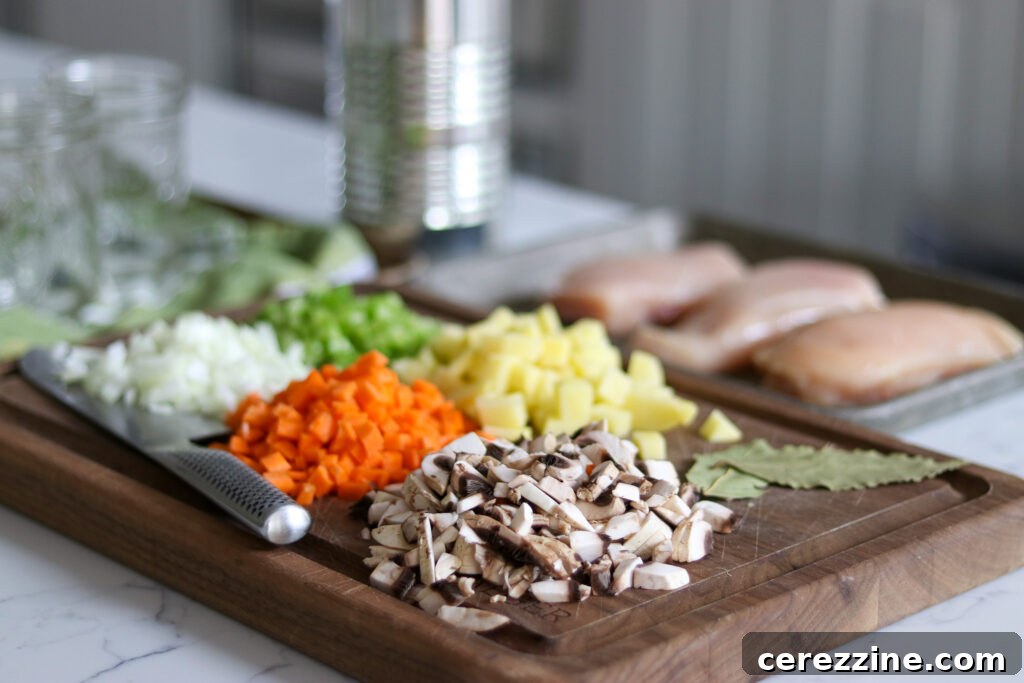
Additionally, while they don’t have standalone canning recipes, food preservation extension offices confirm that **garlic** and **leeks** can be safely added to meal-in-a-jar recipes in reasonable amounts. Plain **cabbage** is generally not recommended for home canning due to texture issues and lack of tested recipes, but **sauerkraut** is permitted because it has an established canning recipe. **Dry beans** are a fantastic addition, but they must be properly pre-soaked and cooked until tender before canning. For **meat and seafood**, always follow specific canning instructions for that particular type of protein. For example, ground meat must be thoroughly browned before canning, whether in crumbles for taco meat or formed into patties or meatballs as you would for canning hamburger.
Critical Safety Guidelines for Pressure Canning
Safety is paramount in home canning, especially when preserving low-acid foods like most meal-in-a-jar recipes. The most crucial rule to remember is that all meal-in-a-jar recipes, due to their low acidity (pH above 4.6), **must be processed in a pressure canner**. Water bath canning is only suitable for high-acid foods such as fruits, pickles, and jams. Meats, most vegetables, and beans—the primary components of savory meals—require temperatures far exceeding the boiling point of water to eliminate the risk of botulism, a serious foodborne illness caused by the bacterium *Clostridium botulinum*. **Never attempt to process these recipes in a water bath canner.**
Beyond the processing method, certain ingredients are universally prohibited in all pressure-canned meals because they can compromise safety or significantly degrade food quality during the canning process:
Ingredients NEVER Allowed in Pressure Canning
- **Thickening agents:** Flour, cornstarch, arrowroot, or other thickeners can prevent proper heat penetration to the center of the jar, creating cold spots where dangerous bacteria could survive. Thickeners should always be added at the time of serving.
- **Dairy products:** Milk, cream, cheese, and other dairy items can change the pH of the food, interfere with heat transfer, and often separate or curdle during canning, leading to an unappetizing product and potential safety issues. Add dairy when reheating.
- **Pasta, rice, or other grains:** These ingredients absorb liquid unevenly and can become very dense and mushy during the canning process, again hindering proper heat circulation. Cook and add these just before serving for best texture and safety.
- **Bread products:** Breadcrumbs, dumplings, or any similar items also become overly dense and can block heat transfer, making them unsafe for canning.
These exclusions apply without exception to both brothy and hearty meal-in-a-jar recipes. The general rule of thumb is that every ingredient included in your custom recipe must have its own established, tested canning guidelines from a reputable source.
Ingredients Not Recommended for Meal-in-a-Jar Canning
Several other common ingredients lack specific canning instructions, primarily due to concerns about safety, texture degradation, or unknown processing parameters:
- Cabbage (and related vegetables like broccoli and cauliflower): These can soften excessively and produce strong odors, potentially becoming too dense for safe heat penetration.
- Eggplant: Becomes extremely mushy and can prevent even heating.
- Summer Squash & Zucchini: Similar to eggplant, these have a high water content and delicate texture that breaks down significantly, hindering heat transfer.
- Celery: While often used in small amounts for flavor, large quantities can affect density and texture negatively.
- Lettuce and other salad greens: These become very limp and unappetizing when canned and can also become too dense. (Hardier cooking greens like kale and collards, however, are permissible in specific brothy meal scenarios).
- Avocados: Their texture and oil content make them unsuitable for safe home canning.
- Cucumbers: Best for pickling, their texture does not hold up well to pressure canning.
- Melons: High water content and low acidity make them problematic for quality and safety.
- Bananas: Their texture and low acidity are not suitable for pressure canning.
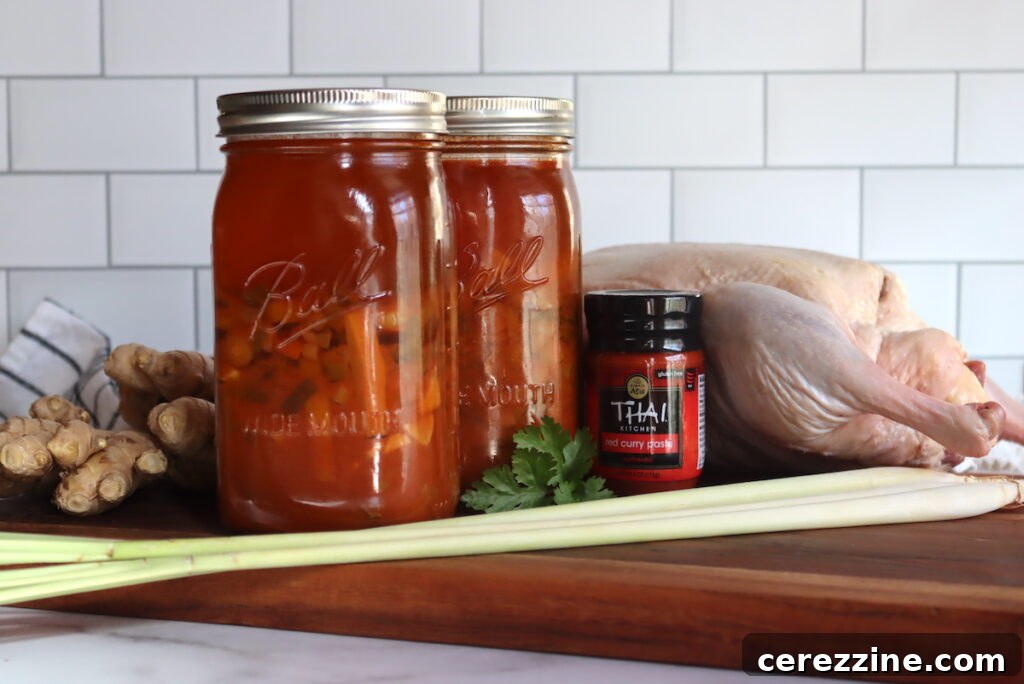
- Coconut (or Coconut Milk): No tested canning guidelines exist for coconut products, making their safety unknown for home preservation. If a recipe calls for coconut milk, add it fresh when reheating the meal for serving. This also ensures better flavor and texture.
Understanding these prohibitions is vital for safely creating your own custom meal-in-a-jar recipes. Always prioritize tested guidelines and when in doubt, consult official food preservation resources.
Crafting Hearty Meal-in-a-Jar Recipes
For those seeking substantial, filling meals straight from the jar, hearty meal recipes are the ideal choice. These guidelines are designed for recipes where the jar is packed almost completely with solid ingredients, allowing you to pressure can many of your family’s favorite, comforting dishes.
Permitted Ingredients for Hearty Meals
When developing hearty meal-in-a-jar recipes, you may safely include:
- Canning-safe vegetables: (e.g., carrots, potatoes, corn, peppers, onions, beets, green beans, tomatoes, asparagus, cubed pumpkin). Ensure they are properly prepared (washed, peeled, chopped, pre-cooked if dense).
- Meat, poultry, or seafood: (e.g., beef, chicken, pork, venison, fish). All meats should be cut into bite-sized pieces and thoroughly pre-cooked. Ground meats must be browned.
- Broth, stock, or water: Used to cover solids and fill headspace.
- Herbs and spices: Fresh or dried herbs and spices can be added to taste. Note that flavors can intensify during canning, so start with conservative amounts.
Prohibited Ingredients for Hearty Meals
In addition to the universally prohibited ingredients mentioned earlier (thickening agents, dairy products, noodles, pasta, rice, grains, pureed vegetables, ham, bacon, or cured meats, and any ingredient without specific canning guidelines), hearty meals have further restrictions due to their high solid content and the need for optimal heat penetration:
- Dry beans or legumes: These expand significantly during canning, increasing density and potentially hindering heat distribution. They are generally reserved for brothy meals.
- Leafy greens: (e.g., kale, spinach, collards). While some cooking greens are allowed in brothy meals, their density in a full jar can prevent proper heat penetration.
- Cream-style corn: The creamy texture makes it too dense for safe processing in hearty meals. (Regular corn kernels are fine).
- Winter squash (other than cubed pumpkin): Varieties like butternut or acorn squash can become too dense or mushy.
- Sweet potatoes: Similar to winter squash, sweet potatoes become too dense for reliable heat penetration in a fully packed jar.
If your desired meal includes any of these hearty-prohibited ingredients, consider adapting it to the “brothy meal” guidelines, where solids only fill half the jar, allowing for more ingredient flexibility.
Step-by-Step: Preparing Hearty Meals for Canning
Careful preparation is key to successful and safe home canning. Follow these steps for hearty meal-in-a-jar recipes:
- Choose Your Ingredients: Select only ingredients that have verified canning recommendations from reliable sources like the NCHFP or university extensions.
- Prepare Your Ingredients: Ensure all components are ready for canning according to their specific guidelines:
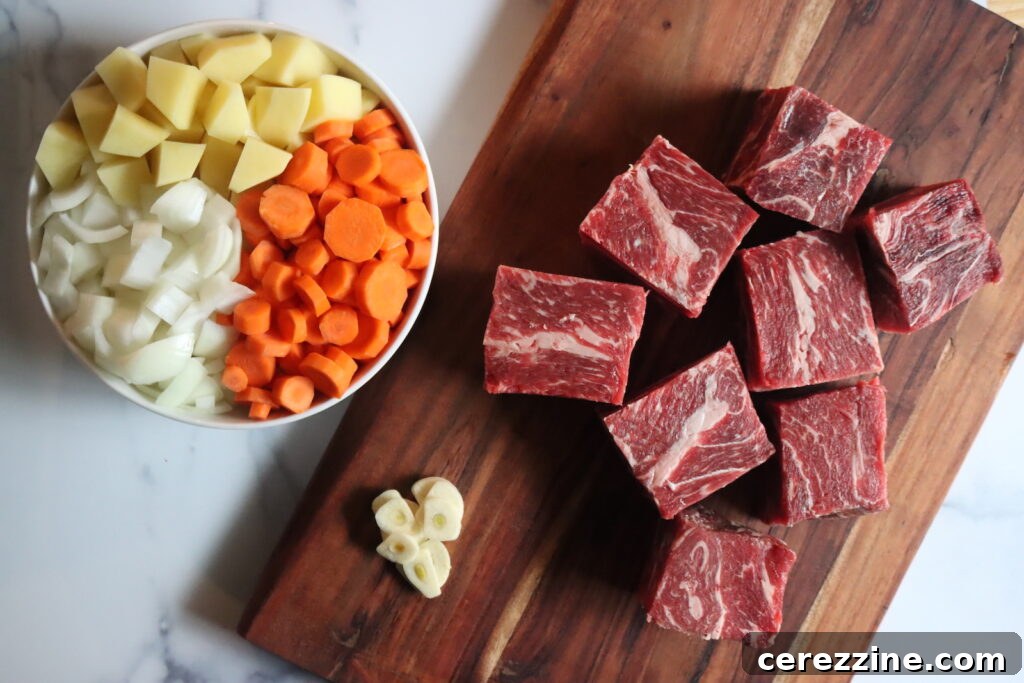
- Vegetables: Wash, peel (if necessary), and chop into uniform, bite-sized pieces (typically 1-inch cubes or slices). Dense vegetables like carrots and potatoes should be blanched or pre-cooked until tender-crisp.
- Meat or Poultry: Cook thoroughly until tender. Remove all bones and excess fat. Cut the cooked meat into uniform, bite-sized pieces. Ground meat must be browned completely and drained of fat.
- Seafood: Cut into bite-sized pieces. Small bones may remain in fish if desired, but larger bones should be removed. Cook seafood lightly if desired, though often it’s packed raw for canning.
- Dried Beans: (Not for hearty meals, but generally for canning: must be fully rehydrated by soaking overnight and then pre-cooked until tender. This step is crucial for safety and texture).
- Combine Ingredients: In a large pot, combine all your prepared solid ingredients. Add enough hot liquid (broth, stock, or water) to just cover the solids. Bring the mixture to a boil and simmer gently for at least 5 minutes. This “hot pack” method helps remove air from the food and promotes a better seal.
- Fill Jars: Using a canning funnel, carefully pack the hot solid ingredients into clean, hot canning jars, leaving approximately 1 inch of headspace from the top of the jar. Then, pour the hot liquid from your pot over the solids, maintaining that critical 1-inch headspace. Remove any air bubbles with a non-metallic utensil, wipe jar rims clean with a damp cloth, and center new, pre-warmed lids. Apply screw bands finger-tight.
- Process: Place the filled jars into your prepared pressure canner. Process according to the recommended times and pressure levels below, making sure to adjust for your altitude.
Pressure Canning Times for Hearty Meals
These are the minimum processing times for hearty meal-in-a-jar recipes. Always use a pressure canner and ensure proper pressure is maintained throughout the entire processing time:
- Pints: 75 minutes
- Quarts: 90 minutes
- Seafood (pints only): 100 minutes
For hearty meal-in-a-jar recipes containing seafood, processing is only approved for pint-sized jars due to density considerations. All other hearty meals can be safely processed in both pint and quart jars. Remember to adjust the canning pressure according to your altitude; refer to the altitude adjustment table provided later in this article, as these adjustments apply to all pressure canning recipes.
Designing Brothy Meal-in-a-Jar Recipes
If you prefer a more liquid-rich meal or wish to include ingredients that are restricted in hearty meals, brothy meal guidelines offer greater flexibility. The key distinction is that jars are only filled halfway with solids, leaving ample room for liquid. At the time of serving, you can either simmer the meal to reduce the liquid to your desired consistency or simply strain the dish.
When incorporating pre-soaked and cooked beans into brothy recipes, be aware that beans will absorb a significant amount of water during canning. This often results in a jar that is two-thirds to three-quarters full of solids, providing a substantial meal despite the initial half-fill guideline. Most other ingredients will not expand, so expect a generous amount of liquid in the final product.
Allowed Ingredients for Brothy Meals
Brothy meal recipes offer a wider range of ingredient choices, including those restricted in hearty meals:
- Fresh vegetables: (e.g., carrots, celery, bell peppers, onions, tomatoes, corn, peas, spinach, kale, collards, potatoes).
- Meat or poultry: (cut into pieces, cooked).
- Fish: (in small pieces, cooked or raw packed).
- Pre-soaked dry beans: (they must be fully rehydrated and cooked until tender before adding to the jar).
- Liquid: Water, broth, stock, wine, or juice can all be used as the canning liquid.
- Fresh or dried herbs and spices: To taste.
Ingredients to Avoid in Brothy Meals
Even with the increased flexibility of brothy meals, the universal prohibitions for pressure canning still apply. Do not add the following to any brothy meal-in-a-jar recipe:
- Thickening agents (e.g., flour, cornstarch)
- Dairy products (e.g., milk, cream, cheese)
- Noodles, pasta, rice, or other grains
- Pureed vegetables (e.g., mashed potatoes, pumpkin puree)
- Ham, bacon, or cured meats (due to their unique preservation methods)
- Any ingredients lacking specific, tested canning guidelines (e.g., cabbage, eggplant, summer squash in large quantities)
Preparing Brothy Meals for Canning
The preparation process for brothy meals is similar to hearty meals, with a key difference in how the jars are filled:
- Choose Your Ingredients: Ensure all ingredients selected have established canning recommendations from trusted sources.
- Prepare Your Ingredients:
- Vegetables: Wash, peel (if required), and chop according to specific canning guidelines. Pre-cook dense vegetables to tenderness.
- Meat or Poultry: Cook until tender, remove bones and excess fat, then cut into uniform, bite-sized pieces. Ground meat should be browned.
- Seafood: Cut into bite-sized pieces; small bones may remain. Cook lightly or pack raw, depending on specific guidelines for the type of fish/seafood.
- Dried Beans: Fully rehydrate by soaking overnight and then pre-cook until tender before adding to the mix.
- Combine Ingredients: Mix all prepared solid ingredients in a large pot. Cover them with your chosen hot liquid (water, broth, etc.), ensuring there’s enough liquid to adequately fill the jars later. Bring the mixture to a boil and simmer for 5 minutes. This ensures the ingredients are hot when packed.
- Fill Jars: Use a slotted spoon to fill clean, hot canning jars approximately **halfway** with the hot solid ingredients. Then, pour the hot liquid from the pot over the solids, ensuring you leave 1 inch of headspace from the top of the jar. Remove air bubbles with a non-metallic tool, wipe jar rims clean, and center new, pre-warmed lids. Apply screw bands finger-tight.
- Process: Place the filled jars into your pressure canner. Process them according to the recommended times and pressure levels for brothy meals, adjusting for your specific altitude.
Processing Times for Brothy Meals
For brothy meal-in-a-jar recipes, these are the standard minimum processing times:
- Pints: 60 minutes
- Quarts: 75 minutes
- Seafood (pints and quarts): 100 minutes
Essential Altitude Adjustments for Pressure Canning
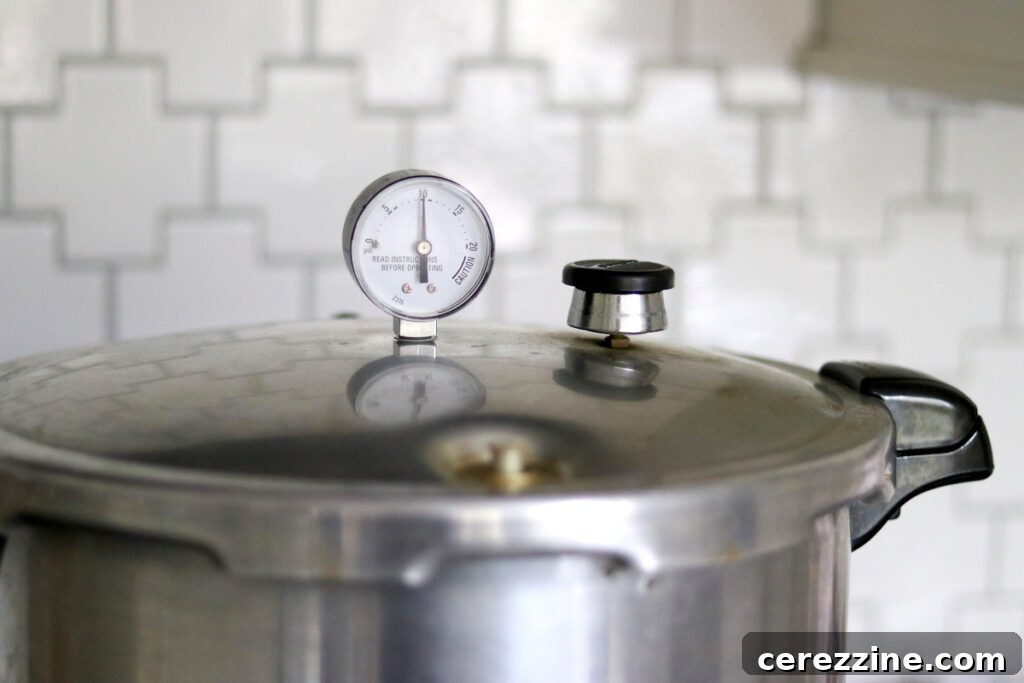
Maintaining the correct pressure throughout the canning process is critical for safety. Since water boils at lower temperatures at higher altitudes, you must increase the pressure in your canner to reach the necessary sterilization temperature. These adjustments are universal for all pressure canning recipes.
For Dial Gauge Pressure Canners:
The pressure setting for dial gauge canners must be adjusted based on your elevation:
- 0 to 2,000 feet: 11 lbs pressure
- 2,001 to 4,000 feet: 12 lbs pressure
- 4,001 to 6,000 feet: 13 lbs pressure
- 6,001 to 8,000 feet: 14 lbs pressure
For Weighted Gauge Pressure Canners:
Weighted gauge canners use specific weights that automatically maintain the correct pressure once the canner is at temperature. The adjustments are simpler:
- 0 to 1,000 feet: 10 lbs pressure
- Above 1,000 feet: 15 lbs pressure
Always verify your altitude before canning to ensure you’re using the correct pressure setting. Incorrect pressure can lead to unsafe food.
Sealing, Storage, and Shelf Life
After the pressure canning process is complete, the final crucial steps involve checking for proper seals and storing your jars correctly to ensure long-term safety and quality.
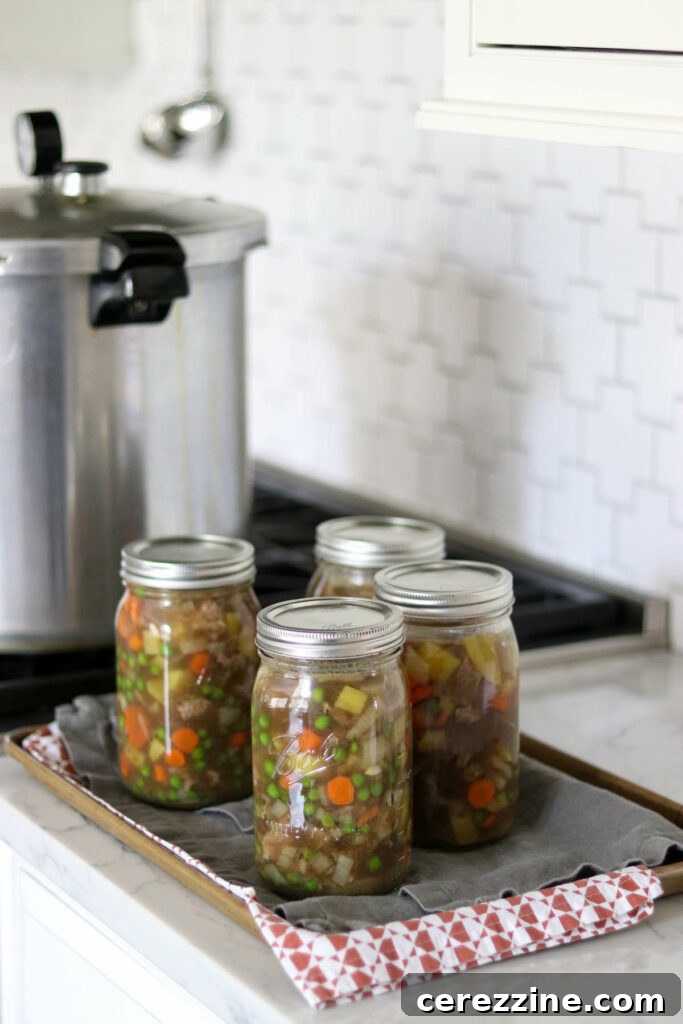
Once you remove the hot jars from the canner, allow them to cool undisturbed on a towel-lined surface for 12 to 24 hours. Avoid tightening screw bands or disturbing the lids during this time, as this can interfere with the sealing process. As the jars cool, you should hear satisfying “pings” as the lids create a vacuum seal. After they have completely cooled, it’s essential to check each jar’s seal before storing.
To check for a proper seal, press down on the center of the lid. A successfully sealed lid will be concave and should not flex or pop when pressed. You can also visually inspect the lid; it should be slightly indented. If any jars have not sealed properly, do not attempt to re-process them. Instead, refrigerate these jars immediately and consume their contents within a few days.
For all successfully sealed jars, remove the screw bands. Storing jars without bands prevents false seals (where the band holds the lid in place even if the vacuum failed) and allows for easier monitoring for spoilage. Wash and dry the jars thoroughly to remove any residue from the canning process. Label each jar clearly with its contents and the date it was canned. Store your sealed jars in a cool, dark, and dry place, ideally between 50-70°F (10-21°C). While properly canned and sealed meals are considered shelf-stable indefinitely, for optimal flavor and texture quality, it is best to consume them within 12-18 months. Always inspect jars for signs of spoilage (e.g., bulging lids, leaks, off-odors) before opening and consuming.
Reheating Your Home-Canned Meals
Enjoying your home-canned meals is the best part of the process. Properly sealed and stored jars will maintain their safety for an extended period, generally retaining peak quality for 12-18 months. When you’re ready to enjoy a meal-in-a-jar, reheating is quick and straightforward:
- **Stovetop:** Empty the contents of the jar into a saucepan. Bring to a simmer over medium heat and cook for approximately 10 minutes, or until thoroughly heated through. You can reduce the liquid for a thicker consistency if desired.
- **Microwave:** For individual servings, remove the metal lid and ring. Transfer the contents to a microwave-safe bowl or heat directly in the jar (without metal parts). Heat on high, stirring occasionally, until hot.
Always ensure the food is heated to a safe internal temperature (typically 165°F / 74°C) before serving.
Popular Meal-in-a-Jar Recipe Inspiration
The possibilities for meal-in-a-jar canning are vast, allowing you to preserve a wide range of comforting and convenient dishes. If you’re looking for more specific ideas, explore our dedicated article featuring over a hundred Meal in a Jar Canning Recipes. In the meantime, here are a few popular and highly satisfying options to get you started:
- Pot Roast in a Jar: Tender beef and vegetables in a rich gravy, perfect for a quick, hearty dinner.
- Beef Stroganoff: Savory beef with mushrooms and onions, ready to be served over fresh noodles or rice.
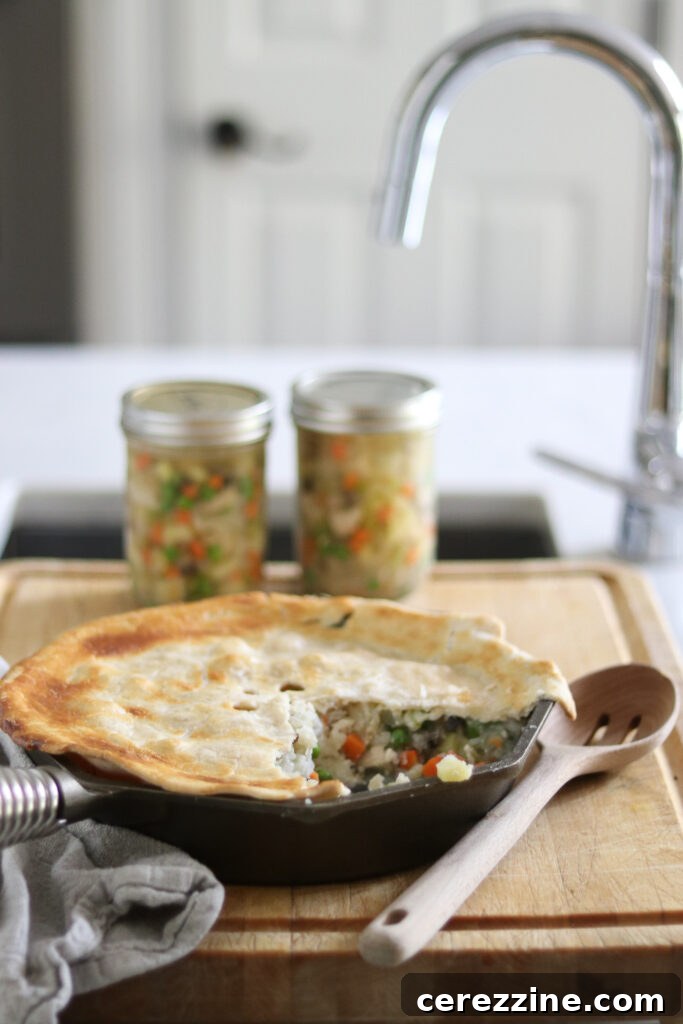
- Beef Pot Pie Filling: A delicious mix of beef and vegetables, ideal for topping with a fresh crust for an instant pot pie.
Customizable Meal-in-a-Jar Canning Recipe Guidelines
These comprehensive guidelines allow you to safely create your own unique meal-in-a-jar canning recipes, drawing upon the robust research and recommendations from the National Center for Home Food Preservation and the University of Alaska Cooperative Extension.
Equipment Needed
To safely engage in meal-in-a-jar pressure canning, you will need the following essential equipment:
- Pressure Canner: Essential for reaching temperatures required for low-acid foods.
- Wide Mouth Quart Mason Jars: Or pint jars, depending on your recipe and processing size.
- Wide Mouth Canning Lids: New lids are essential for each canning batch to ensure a proper seal.
- Canning Funnel: Aids in cleanly filling jars without spilling.
- Jar Lifter: For safely placing and removing hot jars from the canner.
Core Ingredients (Flexible Choices)
When customizing your meal-in-a-jar, select from these approved categories:
- Fresh vegetables: Choose a variety such as carrots, onions, green beans, corn, peas, potatoes, or peppers.
- Meat: Beef, chicken, or pork, cut into uniform cubes or bite-sized pieces. Ground meat must be browned.
- Fish or seafood: Cut into bite-sized pieces.
- Pre-soaked and fully cooked beans: *Only for Brothy Meals*, as they expand significantly.
- Liquid: Broth, stock, water, or wine to cover ingredients and fill headspace.
- Herbs and spices: Fresh or dried, to taste, keeping in mind flavors intensify with canning.
Detailed Instructions for Brothy Meals (Jars Half-Filled with Solids)
- **Ingredient Selection & Safety:** Choose only ingredients explicitly approved for canning. Crucially, avoid flour, dairy, cheese, bread products, or any thickeners.
- **Prepare Ingredients Thoroughly:** Prepare each component as you would for individual canning.
- **Vegetables:** Wash, peel if required, and chop into uniform pieces. Pre-cook denser vegetables like carrots or potatoes until tender-crisp.
- **Meat:** Cook all meat until tender. Remove excess fat and bones, then cut into bite-sized pieces. Brown any ground meats completely and drain fat.
- **Fish/Seafood:** Cut into small chunks. Fish bones can remain if desired.
- **Beans:** Fully rehydrate by soaking overnight, then cook thoroughly until tender before adding.
- **Combine & Simmer:** Mix all prepared solid ingredients in a large pot. Add enough liquid (broth/water/wine) to cover the solids, plus an additional 2-3 inches, anticipating liquid absorption and filling jars. Bring the mixture to a boil and simmer for 5 minutes. Incorporate herbs and spices to taste during this step.
- **Fill Jars Precisely:** Using a slotted spoon, fill clean, hot jars **halfway** with the hot solid ingredients. Then, pour the remaining hot liquid over the solids, leaving 1 inch of headspace from the top of the jar. Ensure there is 1 inch of clear space between the liquid level and the jar rim. Remove air bubbles with a non-metallic utensil, wipe jar rims clean, and secure with new, pre-warmed lids and screw bands finger-tight.
- **Pressure Process:** Place jars in your prepared pressure canner. Process pint jars for 60 minutes and quart jars for 75 minutes. For seafood-based recipes, process both pint and quart jars for 100 minutes. Adjust the pressure according to your altitude (refer to the altitude adjustment section).
- **Cool & Store Safely:** Once processing is complete, allow jars to cool completely undisturbed for 12-24 hours. Check seals thoroughly before removing bands, washing, labeling, and storing sealed jars in a cool, dark place.
Detailed Instructions for Hearty Meals (Jars Fully Packed with Solids)
- **Ingredient Selection & Safety:** Select only canning-approved ingredients. Absolutely no flour, dairy, cheese, bread products, or thickeners. For hearty meals, avoid dry beans, leafy greens, winter squash, sweet potatoes, or creamed corn, as these are suitable only for brothy meals with half-filled jars due to density concerns.
- **Prepare Ingredients:** Prepare all ingredients as outlined for brothy meals above, ensuring uniform sizing and pre-cooking where necessary.
- **Combine & Simmer:** Add all prepared hot solid ingredients to a large pot. Cover them with hot broth or liquid, ensuring just enough to cover the solids. Bring to a boil and simmer for 5 minutes.
- **Fill Jars Precisely:** Pack clean, hot jars tightly with the hot solid ingredients, leaving 1 inch of headspace. Pour additional hot broth or liquid over the solids, maintaining that crucial 1-inch headspace. Remove air bubbles, wipe jar rims clean, and secure with new, pre-warmed lids and screw bands finger-tight.
- **Pressure Process:** Place jars in your prepared pressure canner. Process pint jars for 75 minutes and quart jars for 90 minutes. For seafood recipes in hearty meals, process *pints only* for 100 minutes. Adjust pressure for your altitude (see notes).
- **Cool & Store Safely:** Allow jars to cool completely undisturbed. Check seals before removing bands, washing, labeling, and storing in a cool, dark place.
Important Notes for Customizing Your Recipes
- Brothy Meals: Jars should be half-filled with solids, then filled with liquid to 1-inch headspace. Beans will expand during canning and should only be used in brothy meals.
- Hearty Meals: Jars are mostly filled with solids to 1-inch headspace. Do not include dry beans, leafy greens, winter squash, sweet potatoes, or creamed corn in hearty meals.
- Never Add: Dairy products, thickening agents (flour, cornstarch), pasta, rice, grains, or any ingredient without specific, tested canning guidelines. These are universal prohibitions.
- Prepare all ingredients meticulously according to individual canning recommendations to ensure safety and quality.
- Seafood in hearty meals can only be canned in pint jars; do not attempt to process quarts.
- Minimum batch size: A minimum of 2 quarts or 4 pints is generally recommended to ensure the canner reaches and holds temperature effectively. The maximum batch size depends on your specific canner’s capacity.
- Shelf life: Properly sealed and stored home-canned meals can last indefinitely, but for best quality, aim to consume them within 12-18 months. Always check seals and inspect for any signs of spoilage before use.
Raw Pack vs. Hot Pack Discussion
This customizable recipe primarily utilizes the **hot pack** method, aligning with the guidance developed by the NCHFP. The main reason for this preference is quality, as hot packing tends to yield better results with a wider variety of ingredients, maintaining texture and color more effectively. While Ball Canning has recently shifted towards recommending raw pack for many of their pressure canning meal-in-a-jar recipes due to its perceived convenience of simply placing raw ingredients into a jar and topping with hot broth, the NCHFP has not yet officially adopted this guidance. Therefore, this guide adheres to the established hot pack method for its proven reliability and quality benefits.
Altitude Adjustment Summary
Canning *times* remain constant regardless of altitude, but *pressure* must be adjusted. Ensure you know your elevation.
- Dial Gauge Canner:
- 0-2,000 ft: 11 lbs pressure
- 2,001-4,000 ft: 12 lbs pressure
- 4,001-6,000 ft: 13 lbs pressure
- 6,001-8,000 ft: 14 lbs pressure
- Weighted Gauge Canner:
- 0-1,000 ft: 10 lbs pressure
- Above 1,000 ft: 15 lbs pressure
Reheating Tips
- Stovetop: Simmer in a saucepan for 10 minutes until heated through.
- Microwave: Heat directly in the jar (after removing metal lid and ring) or transfer to a microwave-safe bowl.
Nutrition
Nutrition information is automatically calculated based on typical ingredients and should only be used as an approximation. Actual values will vary based on your specific ingredient choices and preparation.
Enjoy the rewarding experience of creating your own personalized, shelf-stable meals. If you found this guide helpful, consider leaving a comment or sharing your canning success stories!
Explore More Customizable Canning Recipes
Looking for additional customizable canning recipes to further expand your home food preservation skills and get creative in the kitchen?
- How to Create Your Own Soup Canning Recipe