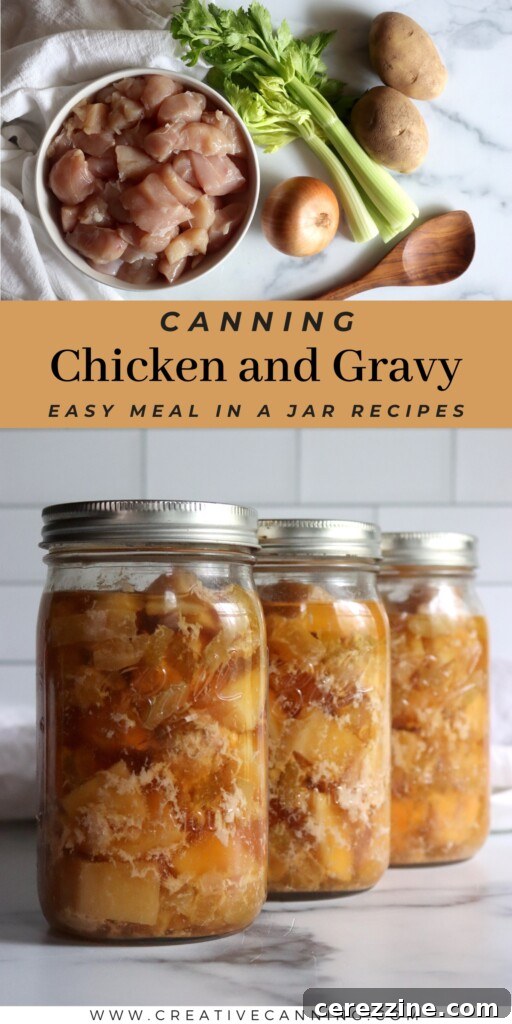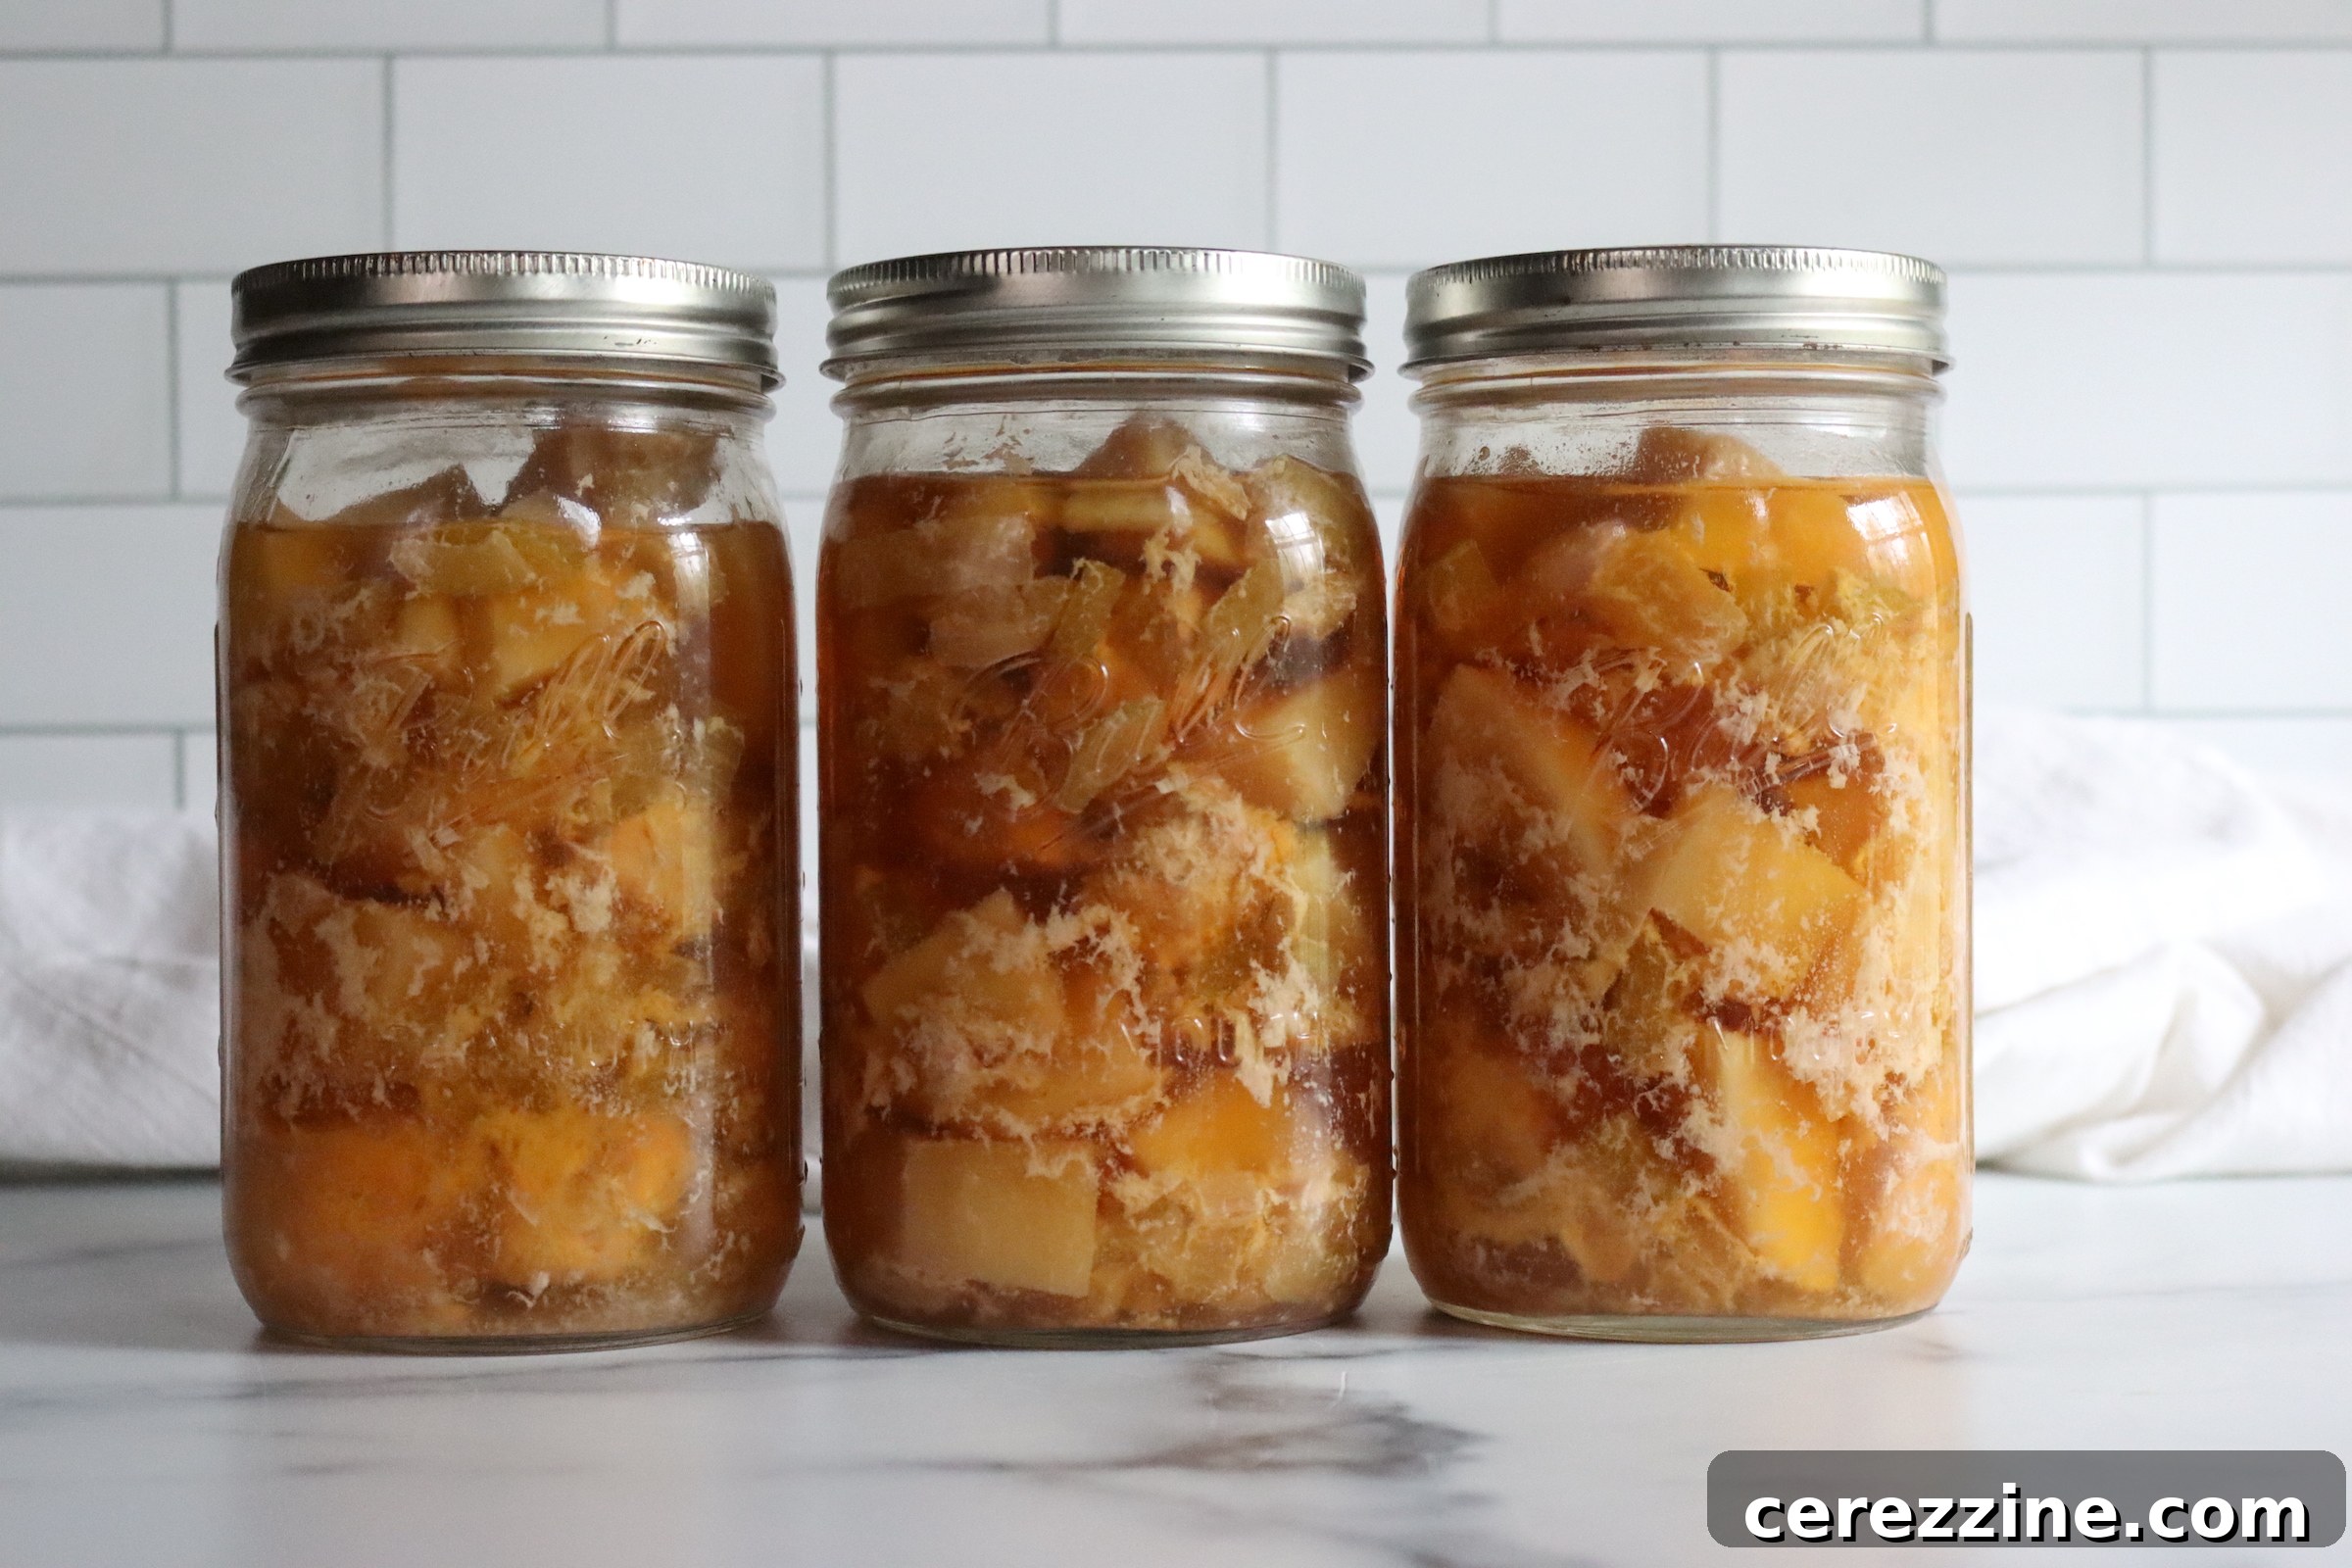
Unlock the secret to effortless weeknight dinners and robust emergency preparedness with pressure canned chicken and gravy in a jar. This incredible method transforms humble ingredients into a shelf-stable, ready-to-heat meal that’s packed with flavor and convenience. Imagine coming home after a long day and having a hearty, homemade supper on the table in minutes – no extensive cooking required. Just open a jar, warm, thicken, and serve over your favorite comfort food staples like creamy mashed potatoes, fluffy rice, or tender biscuits. This comprehensive guide will walk you through the process, ensuring a safe, delicious, and deeply satisfying result every time.
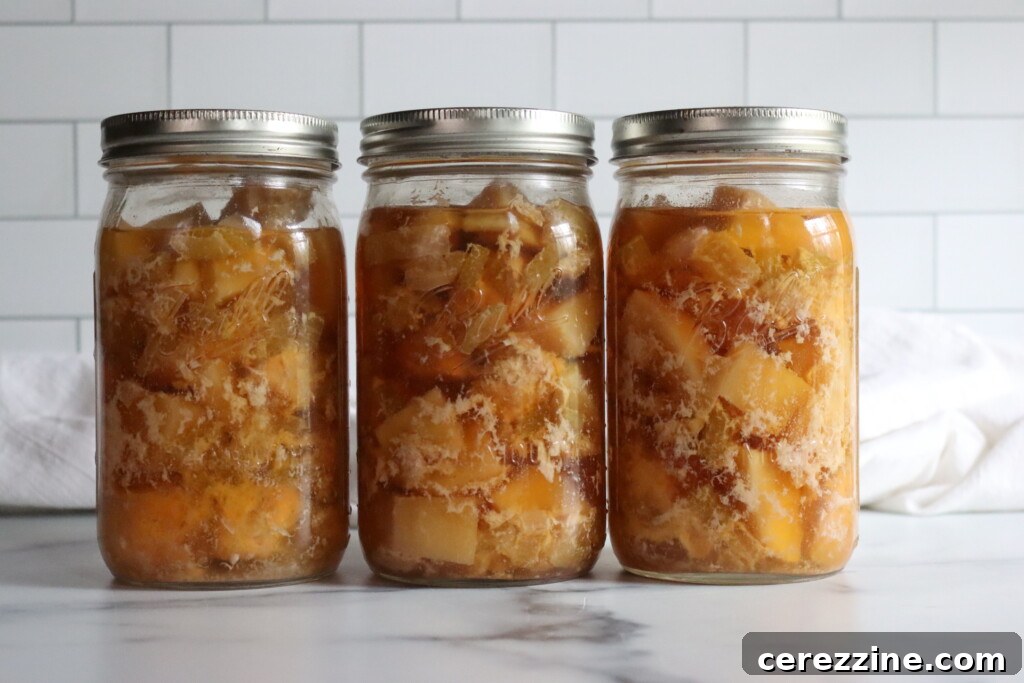
Chicken and gravy in a jar isn’t just a meal; it’s a game-changer for anyone seeking to streamline their kitchen routine without sacrificing the warmth and taste of home-cooked food. This pressure canned version goes beyond simple meal prep by creating an entirely shelf-stable product, meaning no refrigeration is needed until opened. The result is a savory, tender chicken and vegetable medley bathed in its own rich juices, waiting to be transformed into a delectable gravy. It’s the ultimate convenience food for busy families, campers, or anyone looking to build a reliable pantry of delicious, ready-made meals.
The beauty of this recipe lies in its simplicity and the deep flavor it develops during the pressure canning process. The chicken pieces remain incredibly tender, while the diced vegetables — onions, celery, and potatoes — soften perfectly, melding their flavors with the poultry and seasonings. Everything is pre-seasoned and ready to go, eliminating last-minute fuss. From jar to table, you can enjoy a comforting, homemade dinner in about 15 minutes, making it an invaluable addition to your collection of canning recipes.
One of the most appealing aspects of this specific recipe is its raw pack method. This means you simply chop your ingredients, combine them in jars, top with hot broth, and then process them in your pressure canner. This minimal-fuss approach saves a significant amount of time and effort on canning day, making it accessible even for those new to pressure canning meals in a jar. It’s a tested and approved recipe, ensuring both safety and quality, derived from reputable canning resources.
The Advantages of Pressure Canning Chicken and Gravy
Beyond the immediate satisfaction of a quick dinner, pressure canning chicken and gravy offers a multitude of benefits:
- Unmatched Convenience: Say goodbye to takeout and complex meal planning. With a jar of chicken and gravy on your shelf, a delicious meal is always within reach, simplifying hectic evenings.
- Long-Term Shelf Stability: Properly pressure canned, these jars can last for a year or more, providing a dependable food source without refrigeration. This is ideal for pantry stocking, emergency preparedness, or even for cottage or RV living.
- Economical Meal Solution: Canning allows you to buy chicken and vegetables in bulk when they are on sale, processing them for later use. This significantly reduces your grocery bill and minimizes food waste.
- Control Over Ingredients: When you can your own food, you control exactly what goes into it. You can avoid artificial preservatives, excessive sodium, and other additives often found in store-bought convenience meals, tailoring the flavors to your family’s preferences.
- Enhanced Flavor Profile: The slow, high-pressure cooking during canning tenderizes the chicken and allows the flavors of the vegetables and seasonings to meld beautifully, creating a depth of taste that’s often superior to fresh-cooked quick meals.
Ingredients for a Perfect Chicken and Gravy Meal in a Jar
This simple yet robust recipe for pressure canned chicken and gravy is a classic, widely trusted and developed by experts in home preservation, such as those found in Ball Canning’s comprehensive guides. It’s typically presented as a small batch recipe, perfect for getting started, but easily scalable to fill your canner to its maximum safe capacity. Remember, for pressure canning, a minimum batch size of two quarts (or four pints) is generally recommended to ensure proper heat distribution and safety during processing. Feel free to multiply these quantities to suit your needs and canner size.
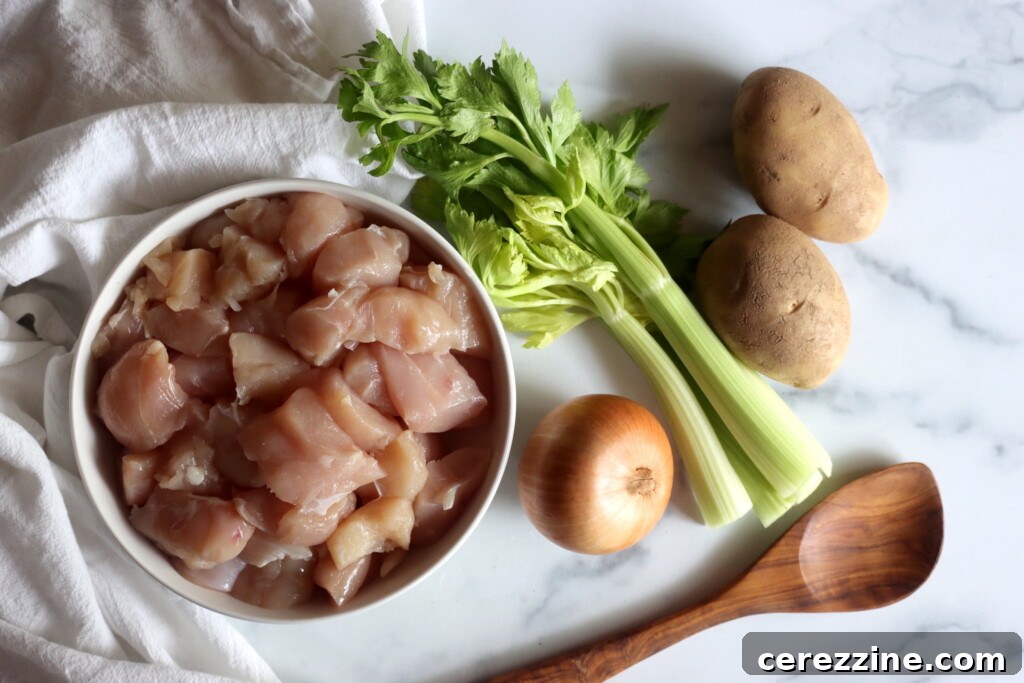
For a foundational 2-quart batch (or 4 pint equivalent), you will need:
- Chicken: The cornerstone of this meal. Boneless chicken, whether white meat (breast) or dark meat (thighs), works wonderfully. White meat tends to hold its shape better, resulting in distinct chunks, while dark meat becomes incredibly tender and almost falls apart, perfect for a pulled chicken texture. Cut the chicken into uniform 2-inch chunks to ensure even cooking throughout the canning process and prevent it from becoming stringy.
- Onions, Celery, and Potatoes: These essential aromatic vegetables not only add bulk and texture but also contribute significantly to the savory depth of the final gravy. It’s crucial to dice them into small, bite-sized pieces so they cook thoroughly and evenly within the jar. This also allows for efficient packing around the chicken, maximizing jar space and flavor integration.
- Salt, Poultry Seasoning, and Black Pepper: A simple yet effective seasoning trio that brings out the best in the chicken and vegetables. Standard canning salt is recommended, but if you use a salt substitute, ensure it’s suitable for canning and won’t develop off-flavors or cloud the liquid. Poultry seasoning adds a warm, herbaceous note; if you don’t have it on hand, you can omit it and adjust seasonings to taste when serving. Freshly ground black pepper offers a superior flavor.
- Dry White Wine: A small amount of dry white wine adds a layer of complexity and a touch of acidity, balancing the richness of the chicken and vegetables. For those who prefer to avoid alcohol, suitable substitutes include a splash of lemon juice or apple cider vinegar, which will provide a similar bright, acidic lift, topped with additional broth to maintain liquid volume.
- Chicken Stock or Water: This hot liquid is vital for filling the jars and ensuring proper heat transfer during processing. High-quality homemade chicken stock, perhaps even your own pressure canned broth, will yield the richest flavor. However, good-quality store-bought broth or even bouillon-based broth is perfectly acceptable. In a pinch, plain hot water can be used, though it will result in a less flavorful final product that might taste a bit “washed out.” Always ensure your liquid is hot when adding it to the jars to prevent thermal shock and facilitate proper headspace maintenance.
The dry white wine’s role is purely for flavor enhancement, contributing a subtle acidity and depth that elevates the dish. If you choose to omit it, simply replace the volume with additional hot broth. A teaspoon or two of lemon juice or a tablespoon of cider vinegar can mimic the acidic balance if desired, making up the difference with more broth.
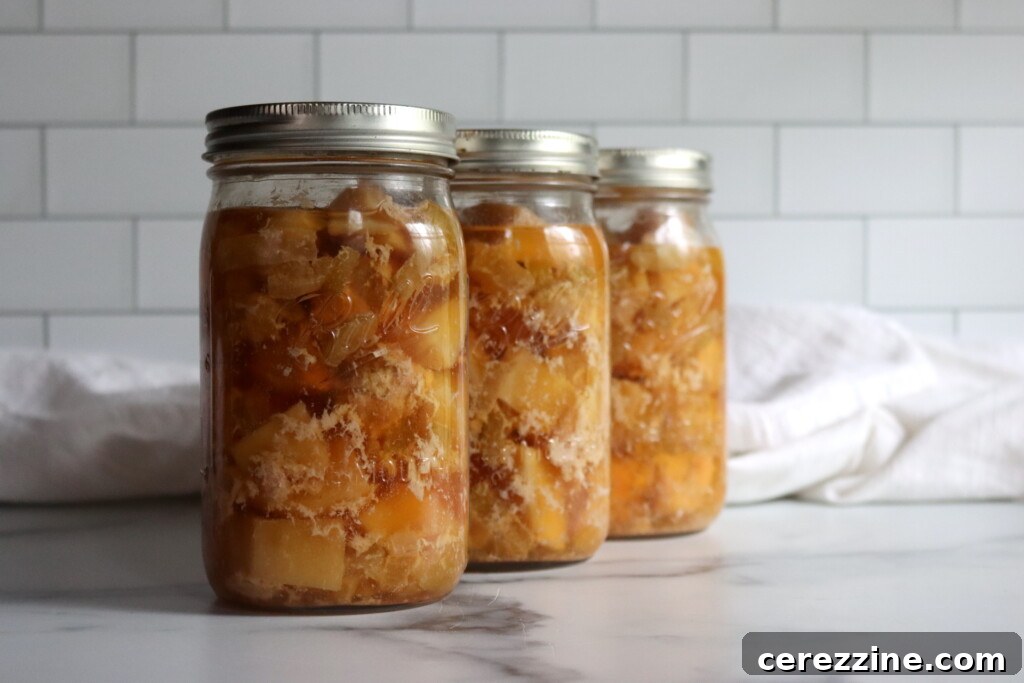
How to Make Chicken & Gravy in a Jar: Pressure Canning Steps
The process of canning chicken and gravy as a raw pack meal is remarkably straightforward. Careful preparation and adherence to safety guidelines are paramount for a successful and shelf-stable product.
Step 1: Prepare Your Ingredients
Begin by meticulously prepping all your solid ingredients. Peel and chop the onions, dice the celery, and peel and cube the potatoes into consistent, bite-sized pieces. These should be roughly the same size to ensure they cook evenly. For the chicken, cut your boneless pieces into approximately 2-inch chunks. This size is large enough to maintain a good texture after canning but small enough to cook through completely and fit well within the jar.
Step 2: Combine and Season
Place all the prepped chicken, onions, celery, and potatoes into a large mixing bowl. Add the salt, poultry seasoning, and black pepper, along with the dry white wine (if using). Using clean hands or a sturdy spoon, mix all the ingredients thoroughly. This ensures that the seasonings are evenly distributed throughout the mixture, leading to consistent flavor in every jar.
Step 3: Prepare Your Canning Setup
While the seasoned mixture rests briefly, prepare your pressure canner and jars. Ensure your jars are clean and hot, either by running them through a dishwasher cycle or heating them in hot water. Lids should be new and simmered in hot water (not boiling) to soften the sealing compound. Rings should be clean and readily accessible. Begin heating your chicken broth or water; it should be hot, but not necessarily boiling, when you add it to the jars.
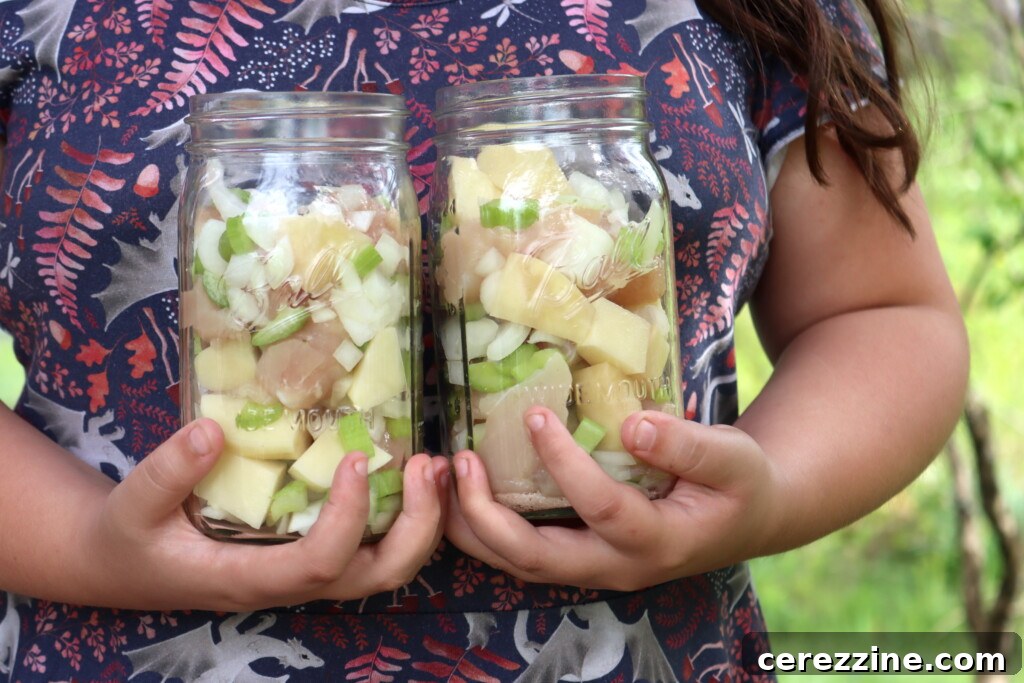
Canning Chicken and Gravy Meal in a Jar: The Processing Phase
This is where the magic of preservation happens, transforming your raw ingredients into a shelf-stable meal.
Step 4: Pack the Jars
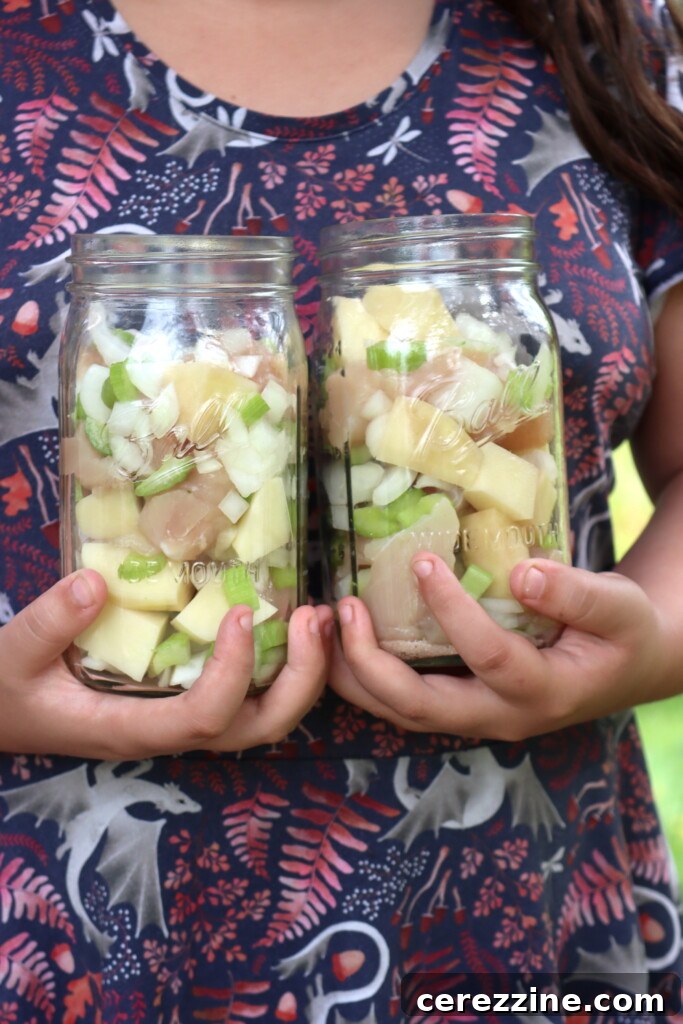
Carefully pack the seasoned chicken and vegetable mixture into your hot jars. Pack firmly but avoid crushing the ingredients, leaving a precise 1-inch (3 cm) headspace from the top of the jar to the food. This headspace is crucial for proper sealing and to prevent food from siphoning out during processing. Next, ladle the hot broth or water over the packed ingredients, again maintaining that critical 1-inch headspace. The hot liquid helps to prevent thermal shock to the jars and ensures even heating.
Step 5: Debubble, Wipe Rims, and Seal
Insert a clean, non-metallic utensil (like a plastic spatula or chopstick) into each jar, gently moving it around to release any trapped air bubbles. Adjust the liquid level as needed to maintain the 1-inch headspace. This step is vital because trapped air can lead to false seals or improper processing. Wipe the rims of each jar thoroughly with a clean, damp cloth dipped in white vinegar to remove any food particles or grease that could interfere with the seal. Center a hot lid on each jar and apply rings fingertip-tight – meaning snug, but not overly tightened, allowing air to vent during processing.
Step 6: Pressure Canning
Place the prepared jars onto the rack in your pressure canner, ensuring they don’t touch each other. Add the recommended amount of water to the canner base (usually 2-3 inches, check your canner’s manual). Secure the canner lid. Turn the heat to high and allow steam to vent steadily from the vent pipe for a full 10 minutes. This critical step ensures that all air is expelled from the canner, creating a true pressure environment. After venting, apply the weighted gauge or close the petcock (for dial gauge canners) and allow the pressure to rise.
Process the jars at the appropriate pressure for your altitude and canner type. For pints, process for 75 minutes; for quarts, process for 90 minutes. Use 10 pounds pressure with a weighted gauge or 11 pounds with a dial gauge, adjusting for altitude as necessary (refer to the altitude adjustments section below). Maintain a consistent pressure throughout the entire processing time, adjusting heat as needed.
Step 7: Cool Down and Store
Once the processing time is complete, turn off the heat and allow the pressure canner to cool down naturally and completely depressurize. Do NOT force cool the canner, as this can lead to liquid loss from jars and unsafe seals. This can take anywhere from 30 minutes to over an hour. Once the pressure gauge reads zero (or no steam escapes when the vent is opened for a weighted gauge canner), carefully remove the lid. Remove the hot jars using a jar lifter and place them on a towel-covered counter, ensuring they are not touching, to cool undisturbed for 12 to 24 hours. During this time, you should hear the satisfying “ping” of lids sealing.
After the cooling period, check all seals. Press the center of each lid; if it doesn’t flex, the jar is sealed. Remove the rings, wipe down the jars, label them with the contents and date, and store them in a cool, dark, dry place. Properly canned, your chicken and gravy will be shelf-stable and ready for a quick, comforting meal whenever you need it.
Altitude Adjustments for Safe Pressure Canning
Understanding and applying altitude adjustments is crucial for safe pressure canning. While processing times remain constant regardless of elevation, the required pressure changes to achieve the necessary temperature for killing harmful bacteria. Always refer to these guidelines based on your elevation:
For dial gauge pressure canners:
- 0 to 2,000 feet in elevation – 11 lbs pressure
- 2,001 to 4,000 feet in elevation – 12 lbs pressure
- 4,001 to 6,000 feet in elevation – 13 lbs pressure
- 6,001 to 8,000 feet in elevation – 14 lbs pressure
For weighted gauge pressure canners:
- 0 to 1,000 feet in elevation – 10 lbs pressure
- Above 1,000 feet – 15 lbs pressure
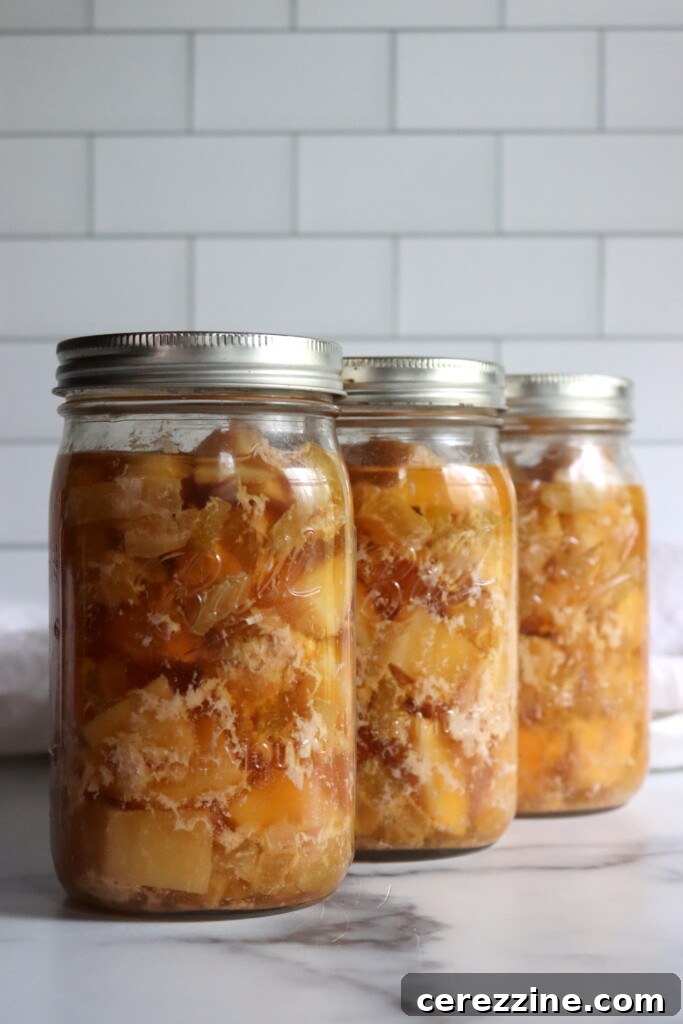
How to Serve Your Pressure Canned Chicken & Gravy
The beauty of this meal-in-a-jar is its incredible versatility and ease of preparation. When hunger strikes, simply:
Pour the entire contents of a jar into a saucepan. Gently heat it over medium heat until it’s simmering and thoroughly warmed through. The liquid in the jar will be thin at this stage, so it’s time to create your perfect gravy. In a small bowl, whisk together a tablespoon or two of flour or cornstarch with an equal amount of cold water to create a smooth slurry. Slowly whisk this slurry into the simmering chicken and gravy mixture. Continue to stir gently until the gravy thickens to your desired consistency. This simple step transforms the cooking liquid into a rich, flavorful gravy.
Once thickened, ladle the hearty chicken and gravy over classic accompaniments such as fluffy mashed potatoes, perfectly cooked rice, homemade biscuits, or wide egg noodles. For a balanced meal, consider pairing it with a simple side salad or some steamed green beans. Dinner is served!
Beyond the classic serving, your pressure canned chicken and gravy is a versatile base for many other dishes:
- Hearty Stew: Add more broth and a handful of frozen peas or carrots during reheating for an instant stew.
- Pot Pie or Cottage Pie Filling: Thicken the gravy as usual, then pour the mixture into a pie dish, top with a pie crust or mashed potatoes, and bake until golden brown.
- Savory Sandwiches: Shred the chicken and use it as a filling for hot open-faced sandwiches.
- Soup Base: Combine with additional chicken broth and your favorite pasta or rice for a comforting soup.
Remember, any additions like fresh herbs, a swirl of cream, or a pat of butter should be made at the time of serving to maintain food safety and quality.
Meal Prep and Batch Canning Bonus
Each quart jar of this chicken and gravy provides approximately two generous servings, making it perfect for individual meals or for couples. This recipe is designed to be easily scaled up for larger canning batches. Feel free to prepare as much as your pressure canner can safely hold, allowing you to maximize your efforts on canning day. However, it’s crucial to never scale this recipe down below the equivalent of two quart jars (or four pint jars), as this is the minimum safe batch size for pressure canning to ensure proper heat penetration and consistent processing.
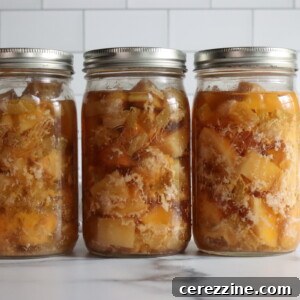
Chicken and Gravy Meal in a Jar
Rate
Equipment
-
Pressure Canner
Ingredients
- 1 cup onion, chopped
- 1 cup celery, finely chopped
- 1 cup potato, peeled & diced
- 2 lbs chicken, white or dark meat, boneless, cut into 2 inch chunks
- 2 tsp salt, or a safe substitute
- 2 tsp poultry seasoning
- 1 tsp ground black pepper
- 4 tbsp dry white wine
- Hot chicken stock or water, to fill jars
Instructions
-
Prepare a pressure canner and jars before beginning.
-
Peel and chop onions, celery, and potatoes.
-
Cut chicken into 2-inch pieces.
-
Place all ingredients except broth into a large bowl. Mix thoroughly.
-
Heat chicken broth or water until hot.
-
Pack the mixture into hot jars, leaving 1-inch headspace.
-
Top off with hot broth, maintaining 1-inch headspace.
-
Debubble, adjust liquid as needed, and wipe rims.
-
Apply lids and rings.
-
Pressure can at 10 lbs (weighted gauge) or 11 lbs (dial gauge), adjusting for altitude (see notes). Process pints for 75 minutes and quarts for 90 minutes.
-
Allow the canner to cool completely to room temperature before opening and removing jars.
-
Let jars cool undisturbed for 12–24 hours. Check seals before storing.
Notes
Canning Safety Note
This is a tested canning recipe developed by Ball Canning for raw pack. All meal in a jar recipes containing meat and low acid vegetables must be pressure canned—never use a water bath. Because it contains low-acid foods like meat and vegetables, only a pressure canner can safely process. Stick to tested processing times, maintain proper headspace, and adjust pressure for your altitude.
Do not thicken the gravy before canning, that has to be done at serving. Likewise, don’t add butter, cream or dairy to this recipe before canning. If using those ingredients, they must be added at serving.
Altitude Adjustments for Pressure Canning
While the processing time doesn’t change at higher elevations, the pressure does. Use the correct pressure setting for your altitude:
Dial Gauge Canners
- 0–2,000 ft: 11 lbs
- 2,001–4,000 ft: 12 lbs
- 4,001–6,000 ft: 13 lbs
- 6,001–8,000 ft: 14 lbs
Weighted Gauge Canners
- 0–1,000 ft: 10 lbs
- Above 1,000 ft: 15 lbs
Serving Suggestions
To serve, empty the jar into a saucepan and heat until it simmers. Thicken the juices with flour or a cornstarch slurry to make a rich gravy, then spoon it over mashed potatoes, rice, or biscuits. It’s a full meal with just a quick reheat.
For something different, use the mixture as a stew with extra broth, or bake it into a pot pie or cottage pie for a cozy dinner twist.
Nutrition
Nutrition information is automatically calculated, so should only be used as an approximation.
Like this? Leave a comment below!
Expand Your Canning Repertoire: More Chicken Canning Recipes
Once you’ve mastered the art of pressure canning chicken and gravy, you’ll likely be inspired to explore other delicious ways to preserve this versatile protein. Adding a variety of chicken canning recipes to your pantry ensures you always have a diverse range of quick and wholesome meals at your fingertips.
If you love the idea of using chicken and gravy as a pot pie filling but desire a more comprehensive vegetable mix, consider trying a dedicated canning recipe for chicken pot pie filling. These recipes often include additional vegetables like carrots and peas, creating a more traditional and visually appealing pot pie base, ready for a quick crust and bake.
For a zesty and flavorful option, chicken chili verde is an excellent choice. This Ball Canning recipe combines tender chicken, hearty white beans, and vibrant salsa verde to create a delicious, slightly spicy chili. It’s a complete meal in a jar that can be enjoyed on its own, or elevated with toppings like fresh cilantro, sour cream, and served alongside warm cornbread or crispy tortilla chips.
Nothing beats the comfort of homemade chicken soup, especially when you’re feeling under the weather. Canning chicken soup is a fantastic way to ensure you always have a nourishing, flavorful broth with tender chicken and vegetables ready to go. You can easily add rice, pasta, or fresh herbs when serving to customize it to your liking, making it a timeless staple in any well-stocked pantry.
And for those seeking a culinary adventure, don’t shy away from something a little more exotic like Thai Red Curry Chicken. This innovative canning recipe uses aromatic red curry paste and classic Thai flavors to create a deeply satisfying and unique meal. It’s a testament to the versatility of pressure canning, proving that homemade, international flavors can also be made shelf-stable for a truly special dinner experience.
Embracing pressure canning allows you to fill your pantry with nutritious, flavorful, and convenient meals, transforming your kitchen into a hub of preparedness and delicious possibilities. Whether it’s a classic chicken and gravy or an adventurous curry, these jarred meals bring comfort and ease to your everyday life.