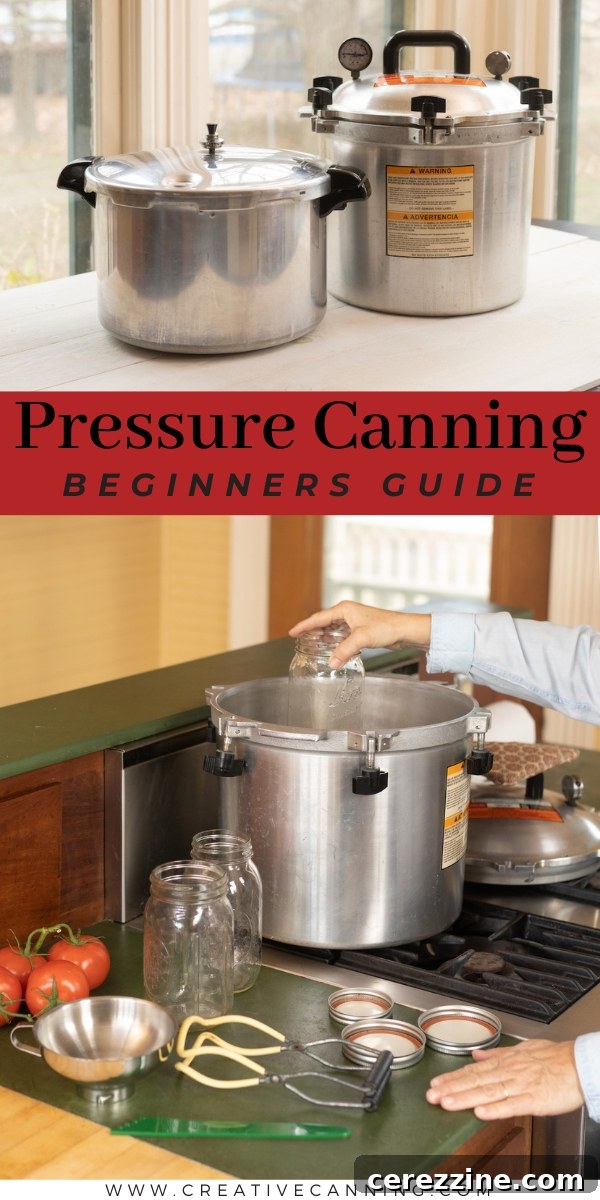
Pressure canning food is an invaluable method for preserving a wide array of vegetables, meats, soups, and ready-to-eat meals directly in jars, stored conveniently on your pantry shelf. Unlike water bath canning, which is typically restricted to high-acid foods like jams and pickles, pressure canning unlocks a much broader spectrum of culinary possibilities, allowing you to safely store low-acid foods for long-term enjoyment.
Home food preservation, particularly canning, has always been a cornerstone practice for gardeners and homesteaders. However, its popularity has witnessed a significant surge, especially since the global uncertainties of 2020. There’s an undeniable sense of satisfaction and self-sufficiency that comes from preserving your own harvest and seeing neat rows of home-canned provisions lining your pantry shelves, ready for any season.
Many beginners typically start their canning journey with water bath canning. This method is ideal for acidic foods, such as fruit preserves, jellies, and various types of pickles. While delicious, these items often serve as toppings, condiments, or side dishes rather than complete, nutritious meals.
This is where pressure canning emerges as a game-changer. By operating at significantly higher temperatures than boiling water, a pressure canner creates an environment that safely processes low-acid foods. This includes essentials like meats, most vegetables, hearty soups, chilis, and convenient “meal-in-a-jar” recipes. The elevated temperatures achieved under pressure are crucial for destroying harmful bacteria, particularly Clostridium botulinum spores, which can thrive in low-acid, anaerobic environments and cause botulism, a severe foodborne illness.
While the initial concept of pressure canning might seem daunting or intimidating to newcomers, mastering this skill is profoundly rewarding. It not only expands your home canning repertoire exponentially but also empowers you to preserve substantial quantities of wholesome, home-cooked food. This ensures your family has access to nutritious meals year-round, promotes food security, and can even help reduce your grocery bills by utilizing seasonal produce and bulk purchases.
What Foods Require Pressure Canning for Safe Preservation?
Understanding which foods *must* be pressure canned is fundamental to safe home preservation. Pressure canning is specifically designed for low-acid foods, which have a pH level higher than 4.6. These foods do not contain enough natural acid to prevent the growth of harmful bacteria, such as Clostridium botulinum, when processed only in a water bath. The intense heat generated by pressure canning (reaching temperatures of 240°F / 116°C or higher) is necessary to eliminate these potential threats and ensure the food is shelf-stable and safe to consume.
While naturally acidic fruits typically fare well with water bath canning (assuming their pH is below 4.6), any food product falling above this pH threshold unequivocally requires the higher temperatures provided by a pressure canner for safe, long-term storage.
Excellent examples of low-acid foods that are ideal for and *must* be pressure-canned include:
- Meats: All types of meat, including chicken, beef, pork, venison, and fish, both raw and cooked. Canning meat provides a convenient source of protein for quick meals.
- Legumes: Beans (such as green beans, kidney beans, black beans), split peas, and lentils. These are excellent sources of plant-based protein and fiber, and pressure canning makes them ready to use in recipes without prior soaking.
- Broth and Stock: Homemade chicken, beef, or vegetable broths and stocks can be pressure canned for flavorful bases for soups, stews, and sauces, eliminating the need for store-bought versions.
- Soups and Stews: Hearty, low-acid soups and stews, often containing meat and vegetables, are perfectly suited for pressure canning, providing ready-to-heat meals.
- Meal-in-a-Jar Recipes: Complete meals like chili, curries, and various casseroles can be prepared and pressure canned, offering ultimate convenience for busy days.
- Most Vegetables: Carrots, potatoes, corn, green beans, peas, and many other common vegetables. Preserving them this way locks in their freshness and nutrients.
- Some Tomato Products: While many tomato recipes are acidic enough for water bathing, certain combinations, especially those with added low-acid vegetables or meats (like pasta sauce with ground beef), may require acidification or pressure canning to ensure safety. Always follow a tested recipe for tomato products.
What Foods Are Unsuitable for Home Pressure Canning?
Despite its versatility, pressure canning isn’t a universal solution for all food preservation. Certain foods, due to their composition or density, are simply not approved for safe home canning, regardless of the processing method used. Attempting to can these items can lead to spoiled food, seal failures, or, more importantly, create an unsafe product that could cause serious health issues.
Foods that should *not* be home canned under any circumstances include:
- Milk, Cream, Butter, and Other Dairy Products: Dairy products are extremely difficult to can safely at home due to their high fat content, density, and susceptibility to spoilage. Home canning methods cannot achieve the necessary temperatures and conditions to ensure safety for these items.
- Coconut Milk: Similar to dairy, coconut milk has a high fat content and density that makes it unsafe for standard home pressure canning methods.
- Flour, Corn Starch, and Most Thickeners: These ingredients increase the density of food and interfere with heat penetration during canning. This means the center of the jar may not reach a safe temperature, risking bacterial survival. The only exception is specifically formulated “Canning Clear Jel,” which is approved for thickening certain pie fillings before canning.
- Rice, Pasta, and Other Starchy Foods: High-starch foods become very dense when cooked and packed in jars. This density prevents adequate heat transfer, making it impossible to guarantee that the entire contents of the jar reach a safe processing temperature. Such items are best added to your meals after opening the jar.
- Eggs, Including Pickled Eggs: Eggs are highly perishable and cannot be safely canned at home. Even pickled eggs carry significant risks if not prepared and stored correctly, and are not recommended for long-term shelf storage through home canning.
- Puréed Pumpkin or Winter Squash: While cubes of pumpkin or winter squash can be safely pressure canned, puréed versions are too dense for adequate heat penetration, making them unsafe for home canning.
Essential Supplies for Home Pressure Canning
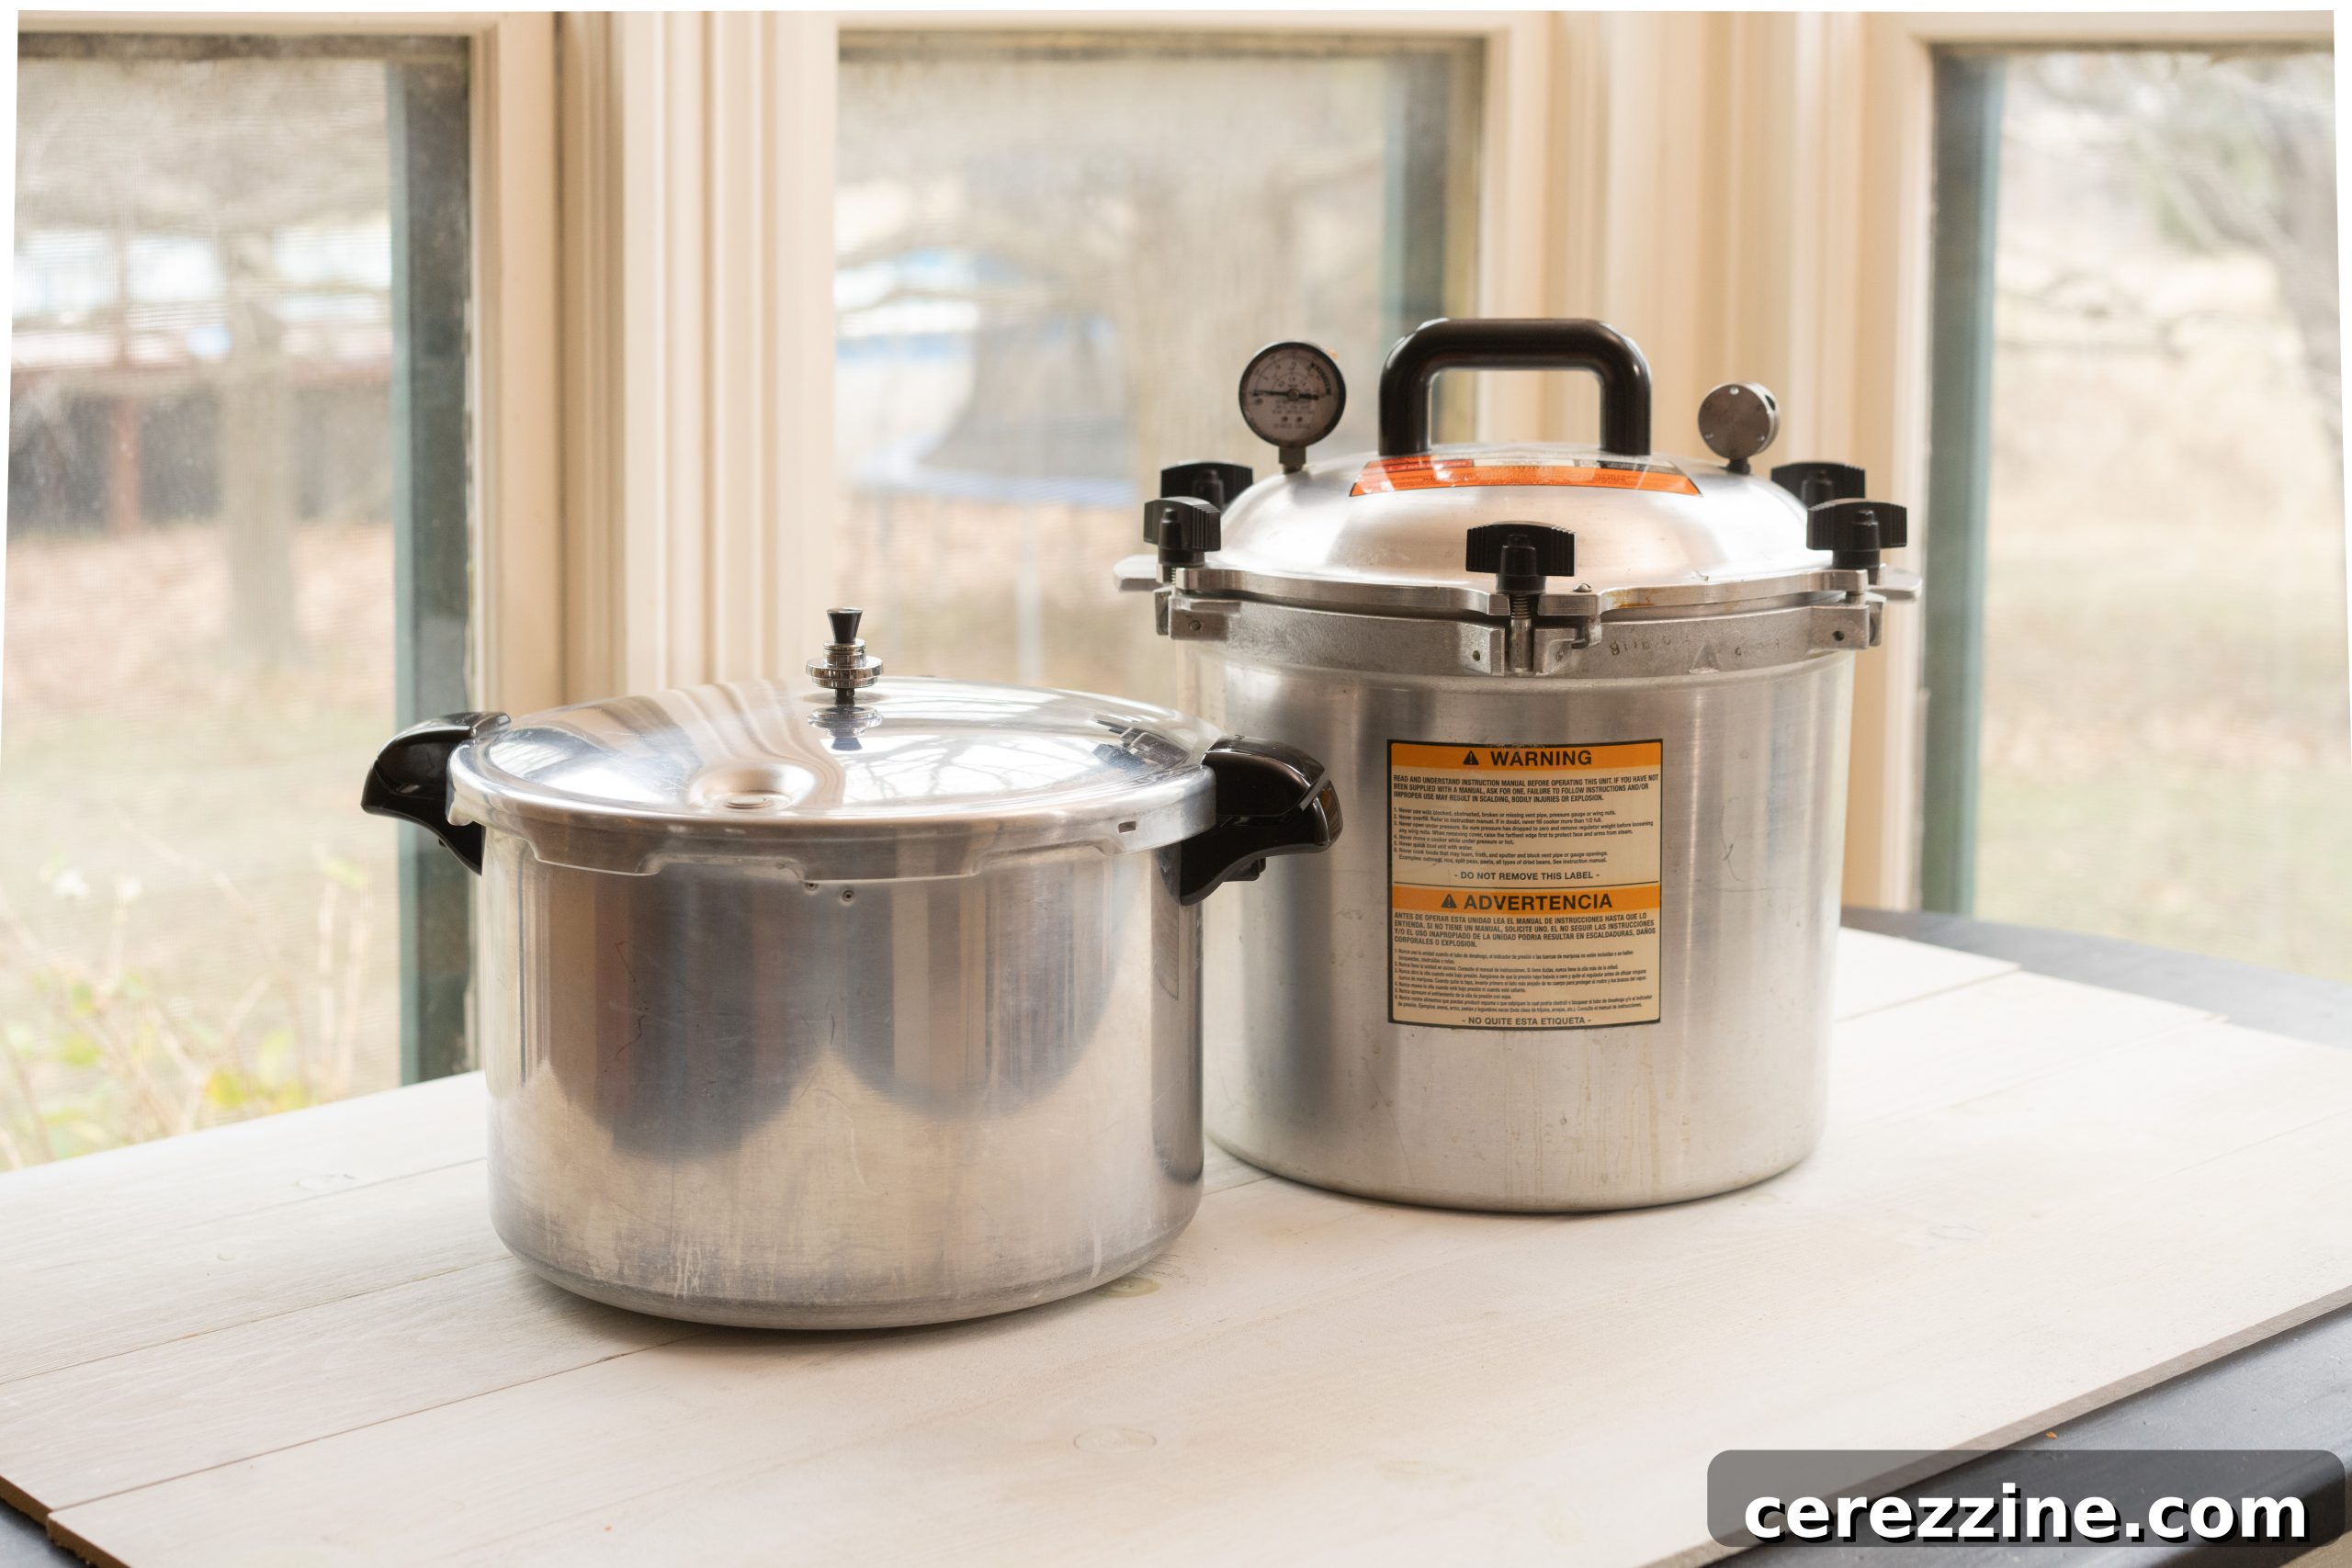
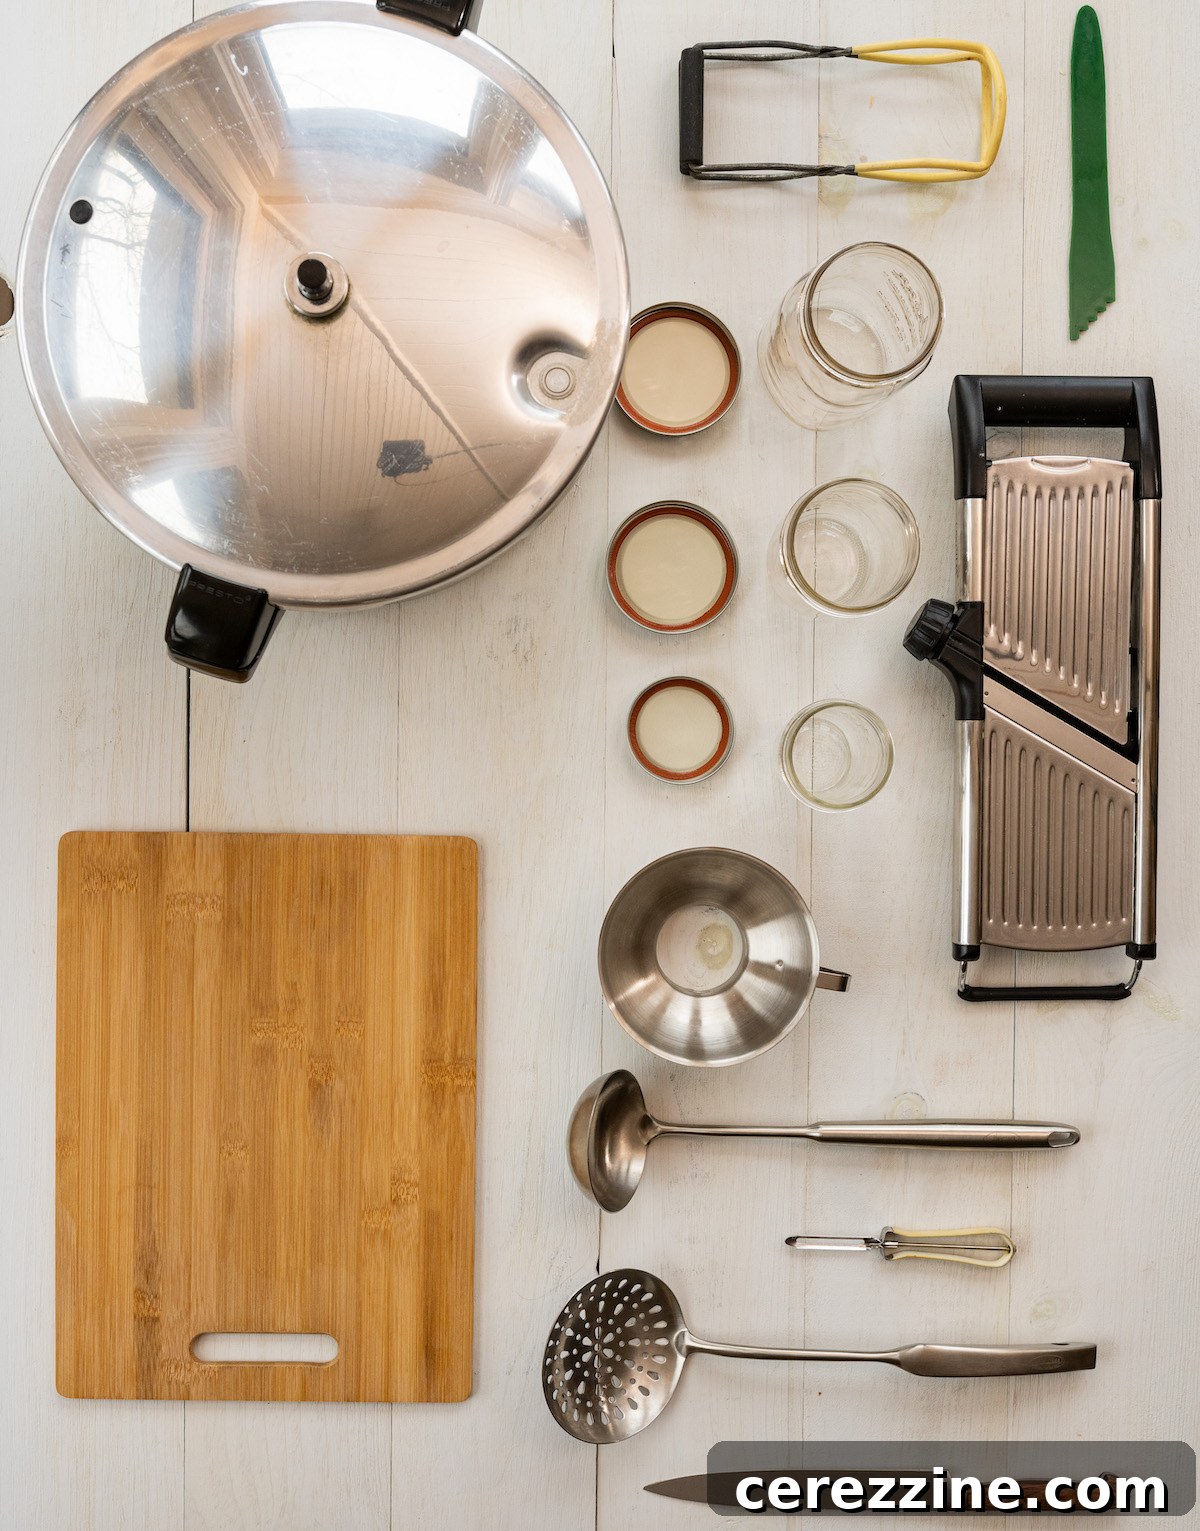
Embarking on your pressure canning journey requires a few key pieces of equipment. Fortunately, many of the basic supplies you’ll need are identical to those used in water bath canning. The primary new item to add to your collection will be the pressure canner itself. Investing in quality tools not only ensures safety but also makes the process more efficient and enjoyable.
Fundamental canning supplies include:
- Canning Jars: Specifically designed for canning, these heat-tempered glass jars come in various sizes (half-pint, pint, quart, half-gallon) and mouth widths (regular and wide). Always inspect jars for chips, cracks, or nicks before use, as imperfections can lead to seal failure or breakage.
- Canning Lids and Rings: Lids are typically single-use, flat metal discs with a sealing compound that creates a vacuum seal. Rings (or bands) are reusable and screw onto the jar to hold the lid in place during processing.
- Jar Lifter: An indispensable tool with rubberized grips designed to safely lift hot jars in and out of the canner, preventing burns and spills.
- Canning Funnel: A wide-mouthed funnel that fits perfectly into jar openings, making it easy to fill jars without spilling food on the rims, which can interfere with sealing.
- Headspace Measure/Bubble Remover Tool: A multi-purpose tool used to measure the precise headspace (empty space at the top of the jar) and to remove trapped air bubbles from food-filled jars before sealing.
- General Kitchen Utensils: Various ladles for filling, slotted spoons for solids, knives for preparation, and clean cloths for wiping jar rims will also be necessary.
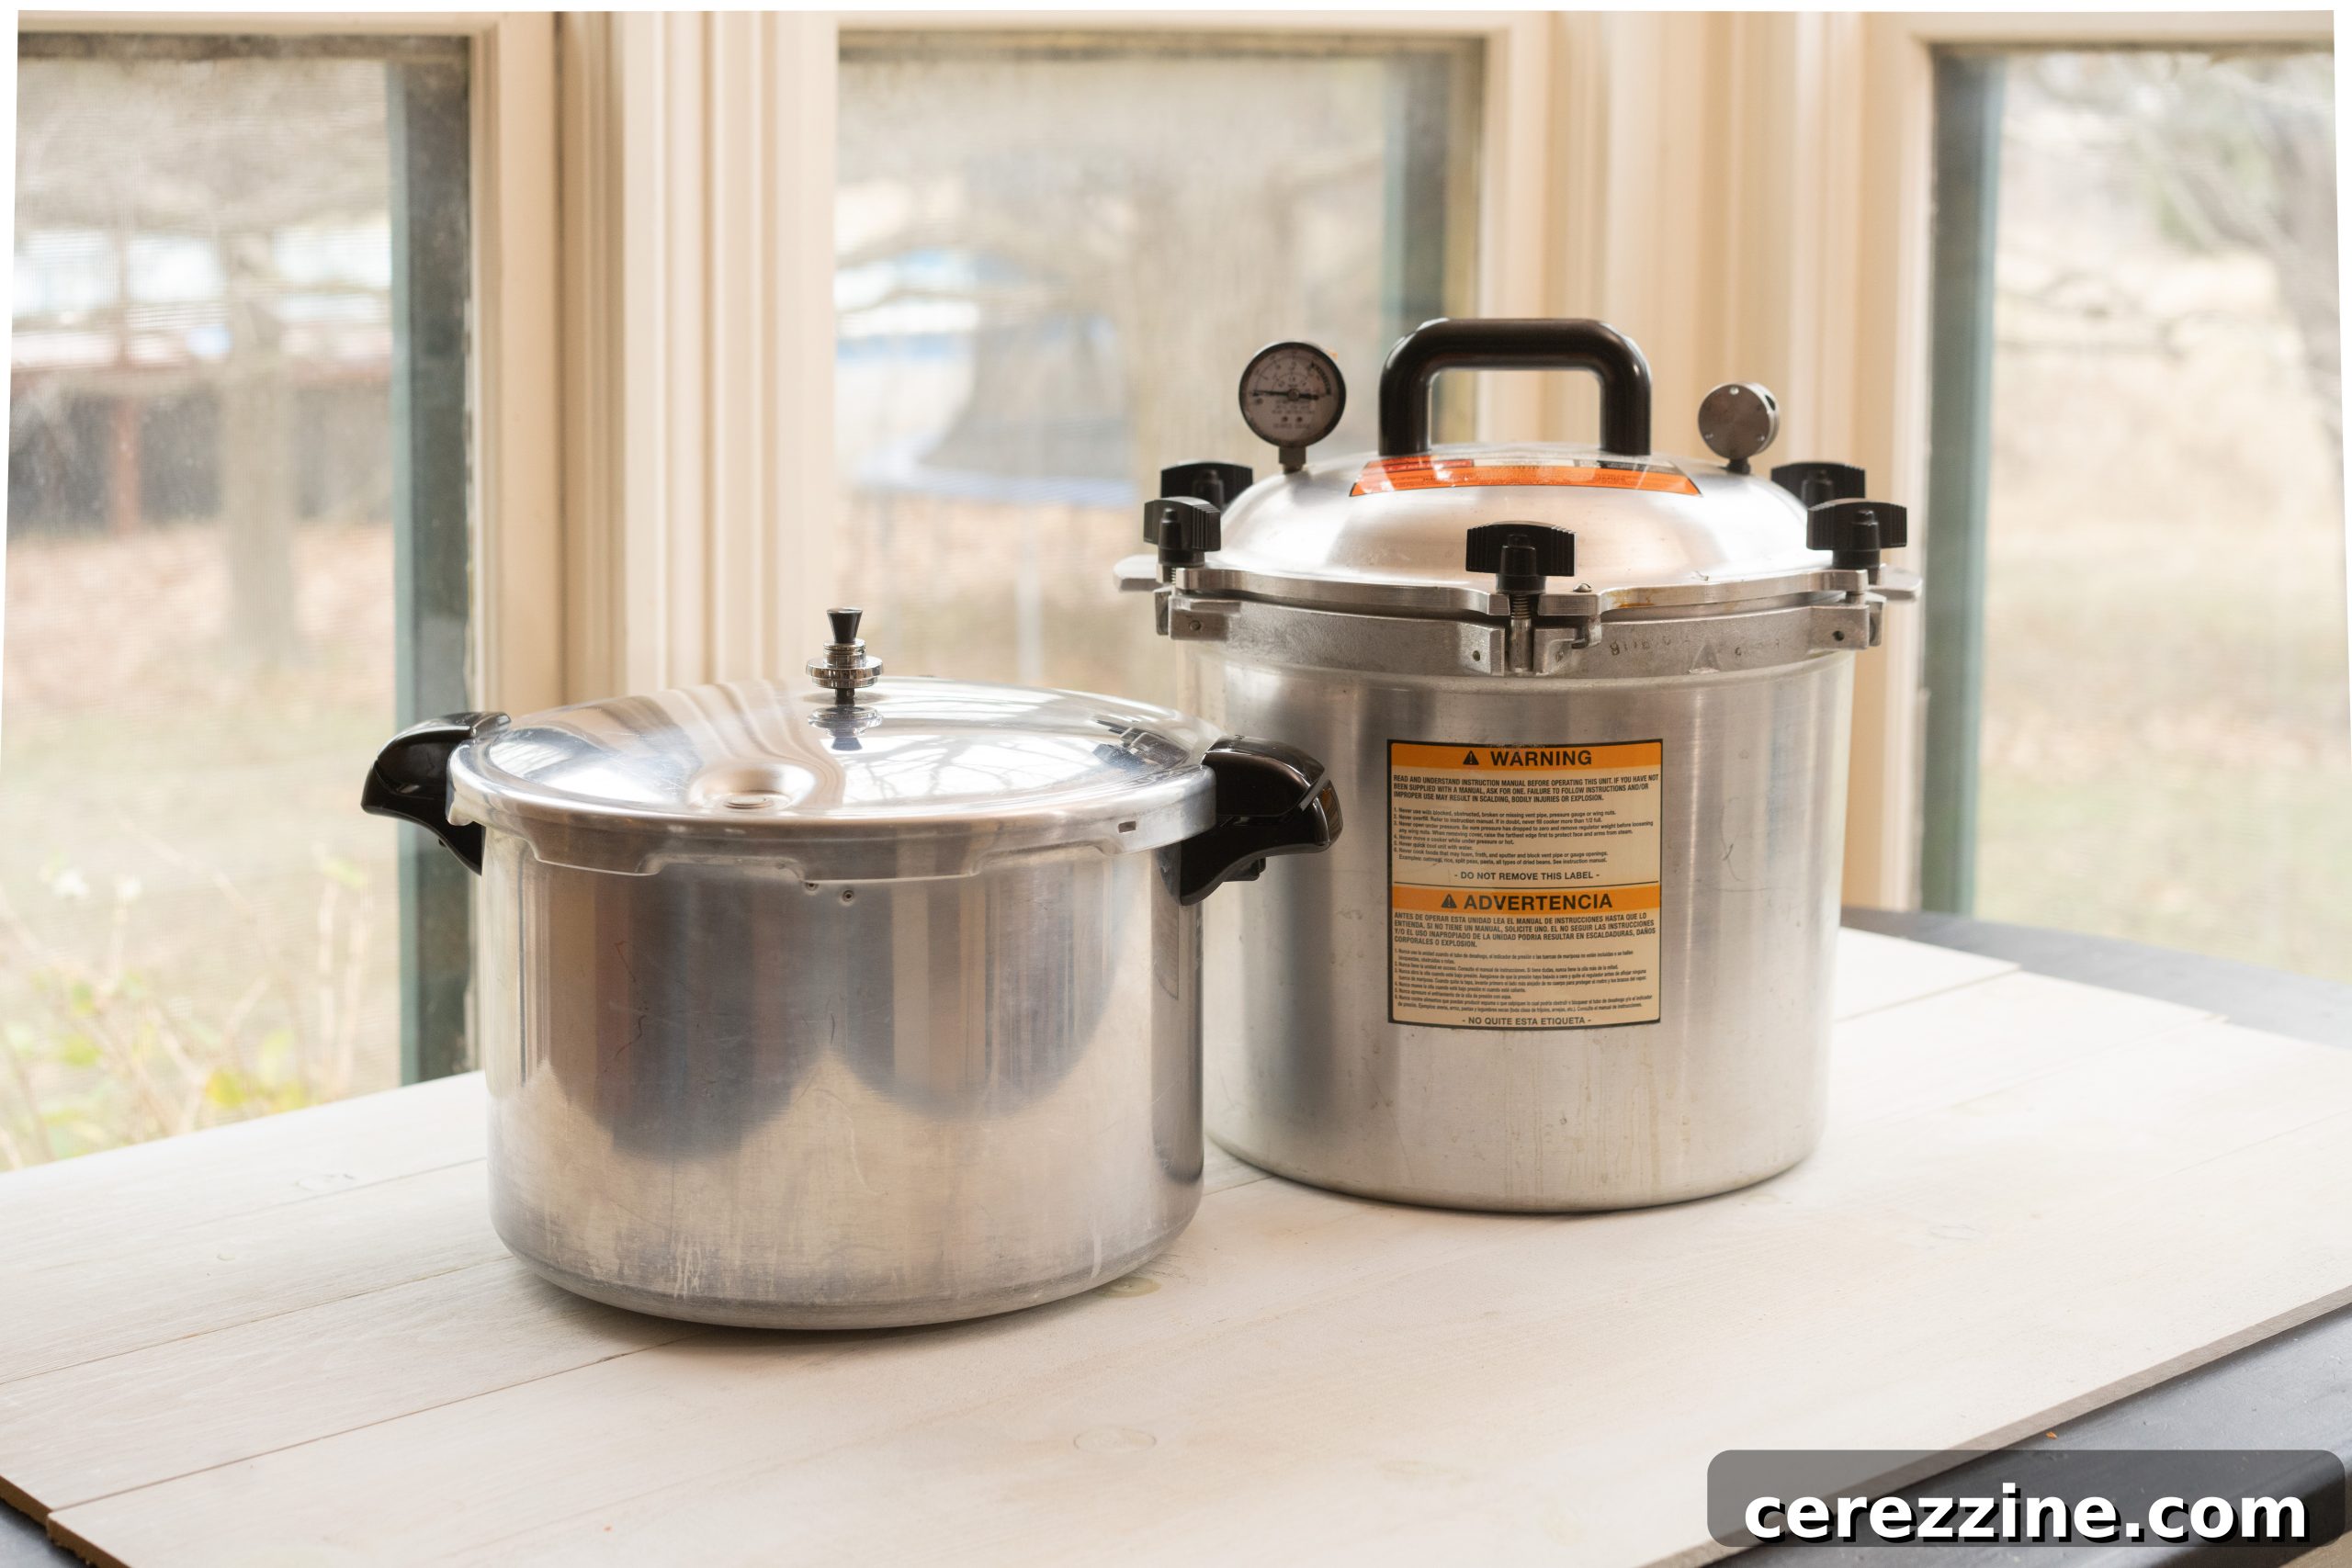
When selecting your pressure canner, you’ll primarily encounter two main types of pressure canners, each with distinct advantages:
- Dial Gauge Pressure Canners: These canners feature a dial on the lid that displays the exact internal pressure. They offer precise control, allowing you to adjust pressure down to a single pound per square inch (psi). However, this precision requires constant monitoring and minor adjustments to your stove’s heat to maintain the desired pressure throughout the processing time. Dial gauge canners are generally more affordable, with popular options like Presto pressure canners ranging from approximately $100 to $200, depending on size and features. Regular maintenance includes inspecting and potentially replacing the lid gasket annually or as needed to ensure a tight seal.
- Weighted Gauge Pressure Canners: These canners utilize a weighted valve that jiggles or rocks to release steam, automatically maintaining a specific pressure level (typically 5, 10, or 15 pounds of pressure). While they offer less granular control over pressure settings, they are significantly more convenient to operate, requiring less hands-on monitoring once they’ve reached pressure. Weighted gauge canners tend to be a larger initial investment, often costing between $250 and $500. A premium example is the All-American Brand Pressure Canners, renowned for their robust construction and a metal-to-metal seal that eliminates the need for lid gaskets, reducing long-term maintenance.
At this point, you have a solid understanding of which foods are suitable (and unsuitable) for home pressure canning, and you’re familiar with the essential equipment required. The actual process of pressure canning, while it involves multiple steps, is quite straightforward once you’ve practiced it a few times. It quickly becomes a simple, almost routine, task.
In our home, we incorporate pressure canning into our routine at least once a week, and sometimes even daily, particularly during the winter months. This dedicated time allows us to stock our pantry with convenient “meal-in-a-jar” recipes, ensuring we have quick, nutritious, heat-and-eat options ready for the bustling summer gardening season and beyond.
However, I vividly recall the trepidation and anticipation of my very first batch. Sitting nervously, intently listening to the canner, constantly questioning its safety. It’s a common experience for beginners.
To guide you through this process with confidence, we’re privileged to feature insights from a true pressure canning expert. The following detailed pressure canning tutorial is provided by Angi Schneider, the esteemed author of Pressure Canning for Beginners and Beyond, which stands as my personal favorite pressure canning cookbook for its clarity and comprehensive approach.
This tutorial is an excerpt directly from her invaluable book, used with kind permission, adapted slightly for online readability and length.
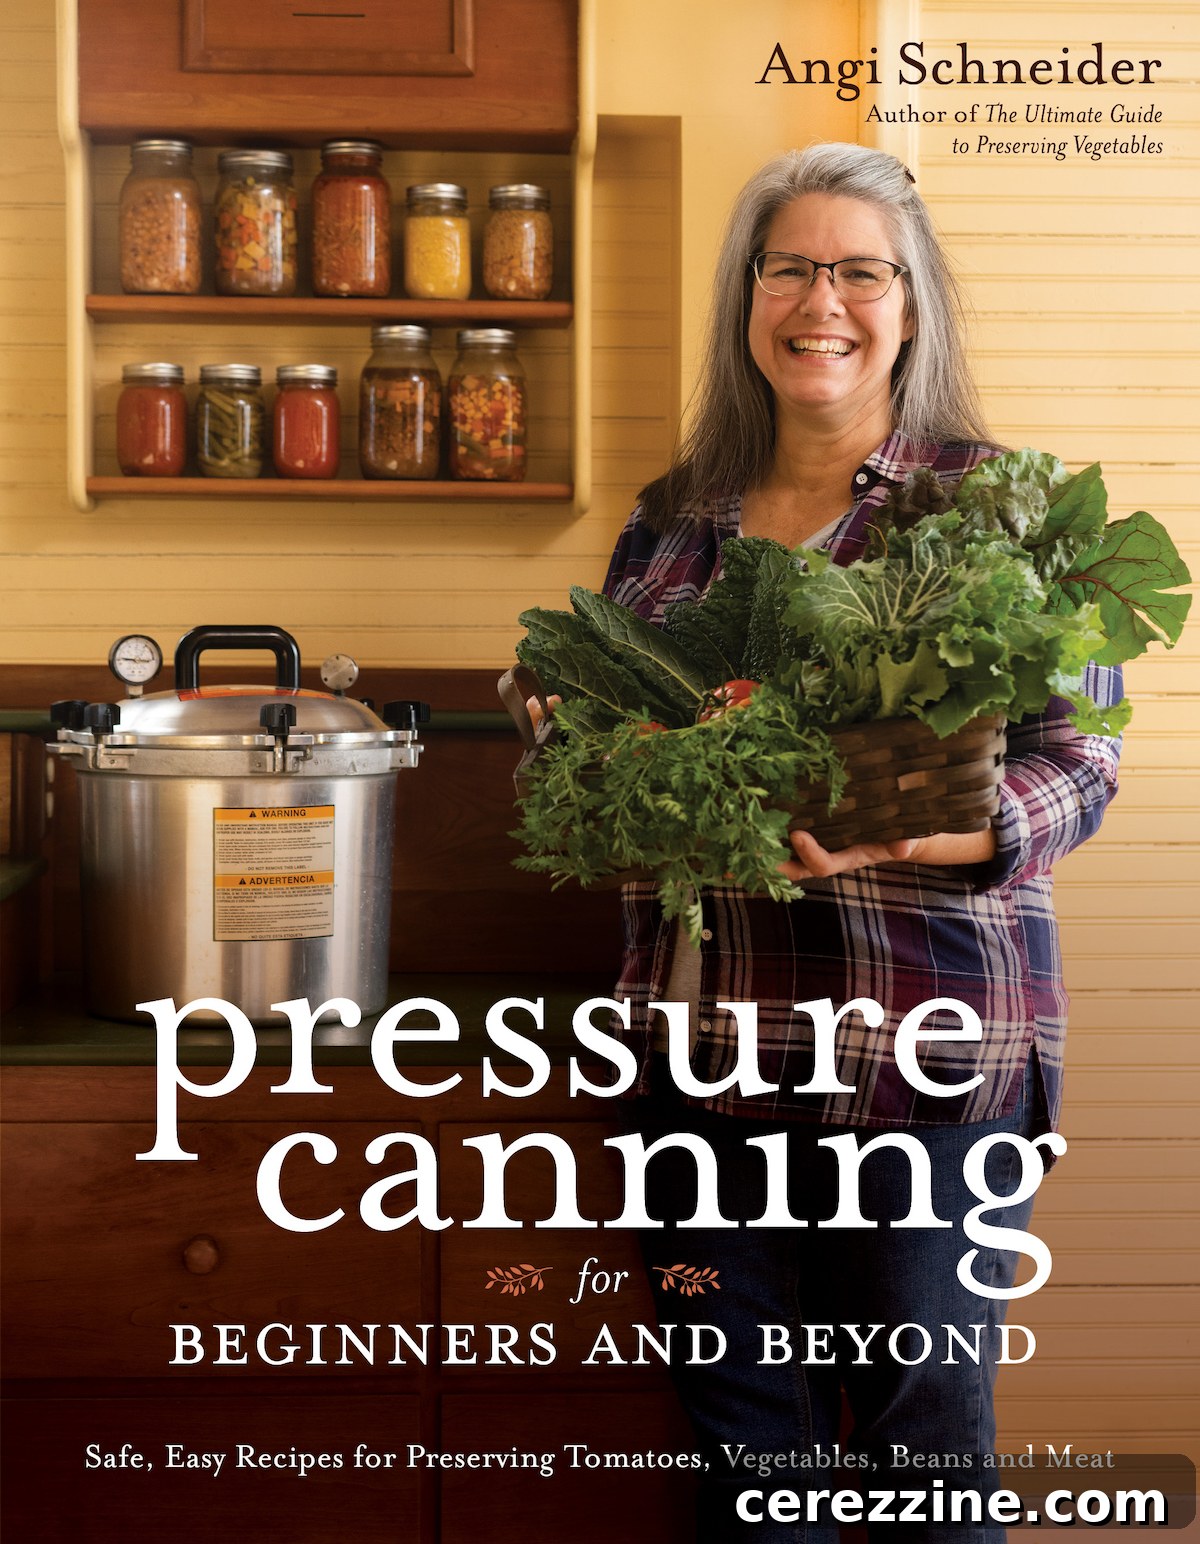
Reprinted with permission from Pressure Canning for Beginners and Beyondby Angi Schneider. Page Street Publishing Co. 2021. Photo credit: Dennis Burnett. It has been edited slightly for format and length to fit the web.
A Comprehensive Step-by-Step Guide: How to Pressure Can Safely
Now that you’re well-acquainted with the types of foods suitable for pressure canning and have gathered your essential supplies, let’s walk through the pressure canning process step-by-step. Each stage is crucial for ensuring both the quality and safety of your home-preserved foods. Following these instructions diligently will lead to successful canning experiences. The fundamental steps are:
- Read the Recipe Thoroughly
- Wash the Canner, Jars, and Lids
- Add the Correct Amount of Water to the Canner
- Pre-Heat the Water in the Canner
- Prepare the Food According to Recipe
- Pack the Jars (Choosing Hot or Raw Pack Method)
- Ensure the Correct Headspace
- Remove Any Trapped Air Bubbles
- Recheck the Headspace Level
- Wipe the Jar Rims Clean
- Add the Lids and Screw Bands
- Carefully Place the Jars Into the Canner
- Securely Close and Lock the Canner Lid
- Begin Heating the Canner
- Vent the Canner to Release Air
- Process Jars for the Correct Duration and Pressure
- Allow the Canner to Cool Naturally
- Safely Remove the Canner Lid
- Remove the Jars and Let Them Cool Undisturbed
- Check the Seals for Integrity
- Label and Store Your Preserves
Let’s delve into each of these steps in detail to ensure a thorough understanding.
1. Read the Recipe Thoroughly Before You Begin
Before you even think about gathering ingredients or preparing your canner, it’s paramount to read your chosen pressure canning recipe from start to finish. This initial read-through allows you to anticipate all necessary steps and allocate sufficient time. You’ll want to confirm if any ingredients require pre-treatment, such as soaking legumes overnight, meticulously trimming fat from meats, or washing and peeling vegetables. Some preparatory tasks, like soaking beans, need to be completed well in advance of the actual canning process.
Every reputable canning recipe is meticulously written with a specific order of operations in mind, designed for both quality and safety. For instance, hot-packed recipes should not be allowed to cool before jars are filled to maintain product temperature. While some minor sequence adjustments might be possible (e.g., washing and cutting all green beans before setting up the canner), always prioritize the recipe’s core instructions. Over time, you’ll naturally develop an efficient workflow that suits your style.
2. Wash the Canner, Jars, and Lids Meticulously
Begin by thoroughly washing your pressure canner and its internal rack in hot, soapy water. Simultaneously, clean all your canning jars and their corresponding lids and bands in hot, soapy water. This ensures cleanliness and removes any dust or residue.
During the jar washing process, meticulously inspect each jar for any signs of nicks, cracks, or chips, especially around the rim. Even minute imperfections can prevent a proper seal or cause the jar to break under pressure. Discard any compromised jars.
The jars must remain hot while you prepare your food for canning, but sterilization is not typically required for foods processed in a pressure canner for 10 minutes or more, as the intense processing heat will sterilize them. A common practice is to place the clean jars into the canner with water (which will be heated anyway) or use a dishwasher’s sanitizing cycle. Some individuals utilize ice chests filled with hot water to maintain jar temperature. However, placing jars in a dry oven to heat them is generally not recommended. The dry heat can make the glass brittle, significantly increasing the risk of thermal shock and shattering when hot liquids are added.
For lids, inspect them for any scratches, dents, or deformities that could compromise the seal. While some manufacturers, like Ball® and Kerr®, now recommend simply washing their lids and using them at room temperature, others, such as Bernardin®, suggest keeping their lids in a pot of hot (but not boiling) water until ready for use. Always refer to the specific instructions provided on the lid packaging, as manufacturer recommendations can evolve.
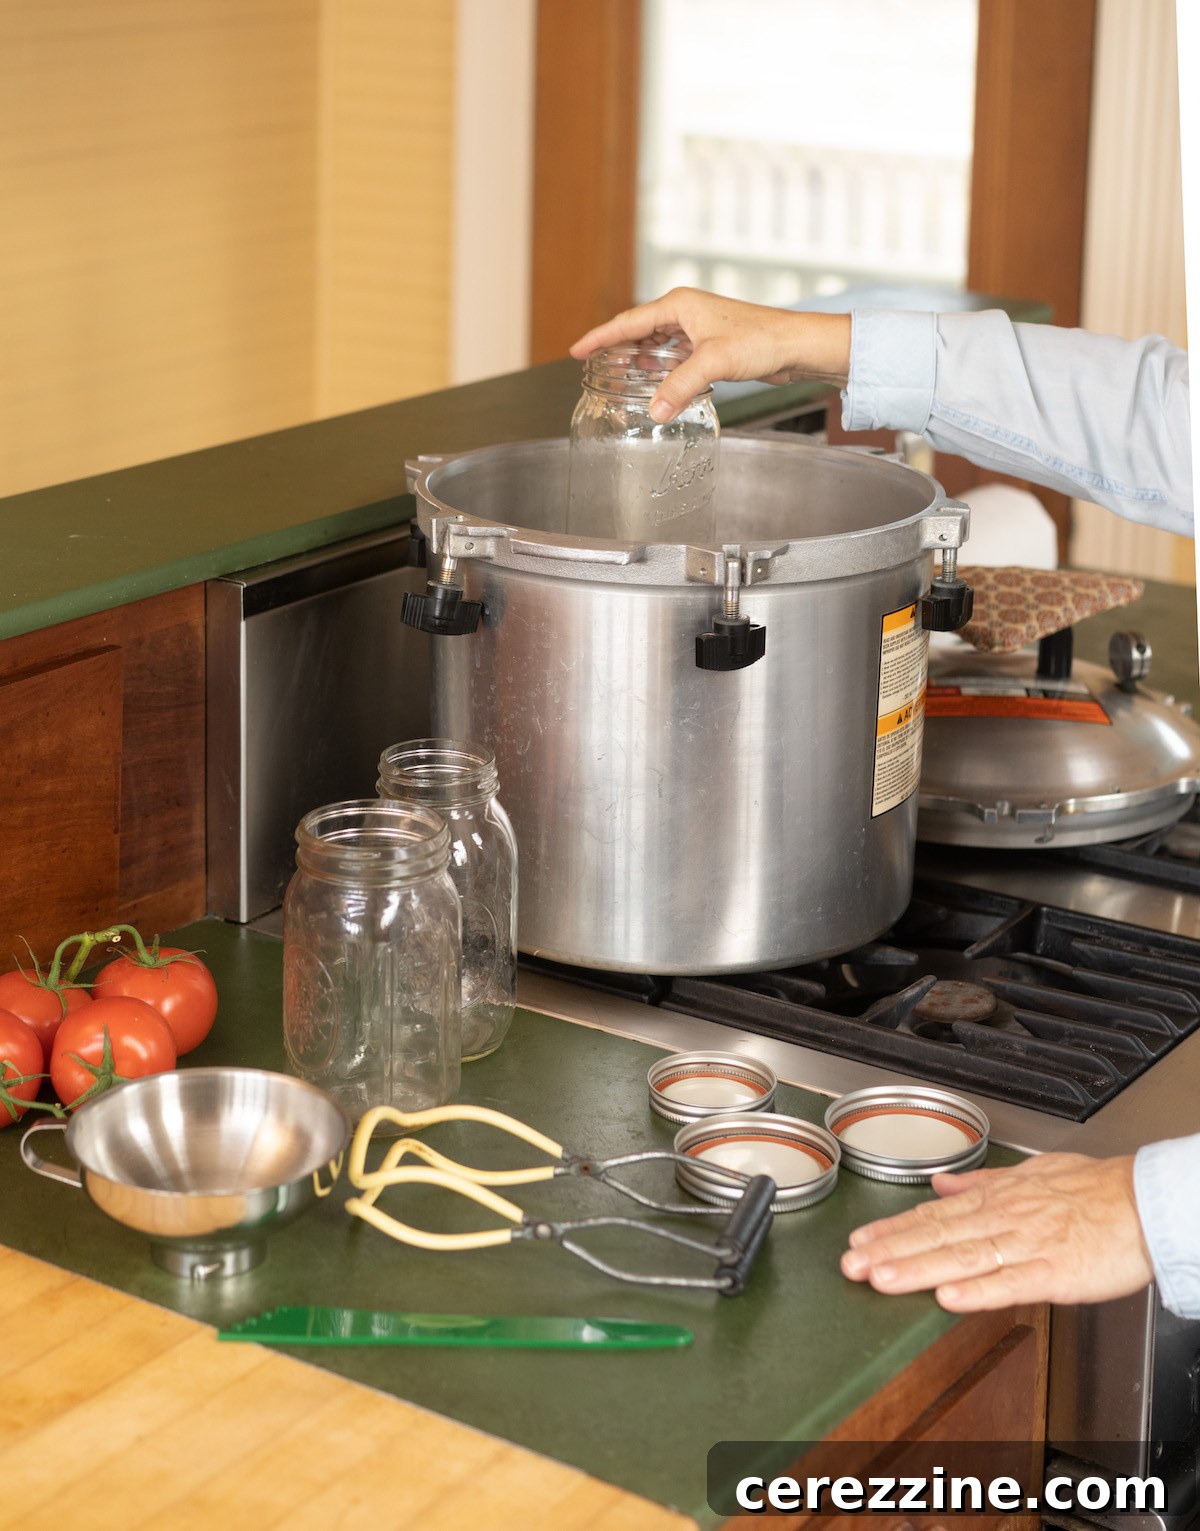
3. Add the Correct Amount of Water to the Canner
Refer to the user manual that accompanied your specific pressure canner to ascertain the precise amount of water required. If your manual is unavailable, a widely accepted guideline from the USDA recommends filling the canner with 2 to 3 inches (5 to 7.5 cm) of water. This water creates the steam necessary for pressurization.
Regular tap water is perfectly suitable for this purpose. If you live in an area with hard water, adding a small amount of white vinegar – approximately 2 tablespoons (30 ml) – can help mitigate calcium deposits on your jars, keeping them clear and clean. There’s no need for exact measurement here; a splash will suffice.
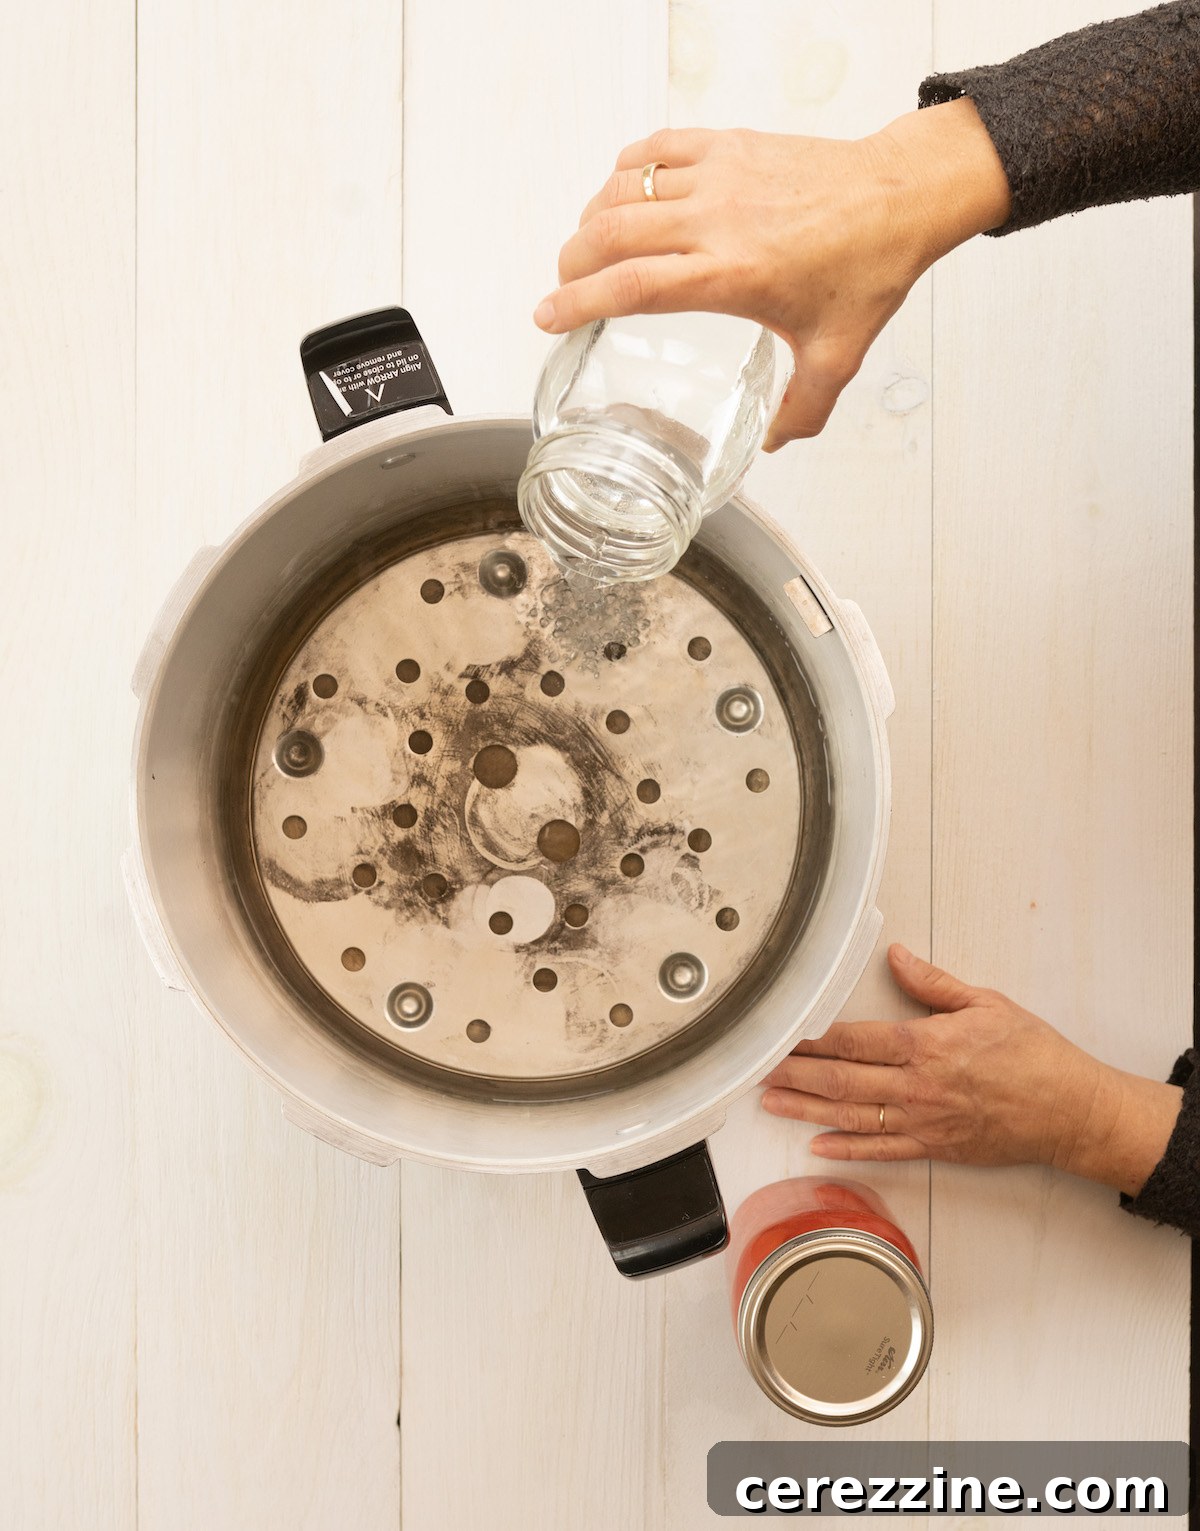
4. Pre-Heat the Water in the Canner
Before placing the filled jars inside, you need to pre-heat the water in your canner. All pressure canners are compatible with standard electric coil stovetops and indoor gas stovetops with a BTU rating of up to 12,000 BTUs. However, compatibility with flat-top stoves (glass or induction) and outdoor burners varies, so always consult your canner’s user manual.
Outdoor turkey fryers or high-BTU burners are generally not recommended for pressure canning due to their uncontrolled high heat, which can exceed safe operating temperatures for canners. Always ensure your heat source allows for precise temperature adjustment.
Once the clean canner, rack, and appropriate amount of water are in place on your stove, turn the heat to medium. The target water temperature depends on your packing method: for raw-packed foods, the water should be around 140°F (60°C); for hot-packed foods, aim for approximately 180°F (82°C). The water should be hot but not yet boiling when you load the jars.
5. Prepare the Food According to Recipe Guidelines
Food preparation is a critical step, influencing both the safety and quality of your canned goods. Each recipe provides specific instructions for preparing ingredients, which are not merely for taste but for safety. It is imperative to follow these guidelines, especially regarding blanching, peeling, chopping size, and cooking times before packing.
As part of my preparation, I also like to fill a teakettle with water and heat it. This ensures I have readily available hot water if I need to top off any jars to achieve correct headspace after packing.
Simultaneously, prepare your workspace. Lay a clean kitchen towel on your counter. Carefully remove your pre-heated jars from the canner or dishwasher and place them on the towel; do not dry them. Arrange your clean lids, canning funnel, and bubble remover tool within easy reach. Keep a clean, damp washcloth nearby for wiping jar rims.
6. Pack the Jars: Hot Pack or Raw Pack Method
There are two primary methods for packing food into jars for pressure canning:
Hot Packing the Jars
The hot pack method involves heating the food ingredients to a boil and then simmering them for a specified duration before filling the jars. This pre-cooking helps to remove air from the food, resulting in less floating, better color, and improved flavor in the finished product. Most recipes, especially for denser items, will recommend hot packing. I find it effective to use a slotted spoon to distribute the solid ingredients evenly among the jars first, ensuring each jar receives a consistent amount. Then, I ladle the hot liquid over the solids, making sure the food is adequately covered.
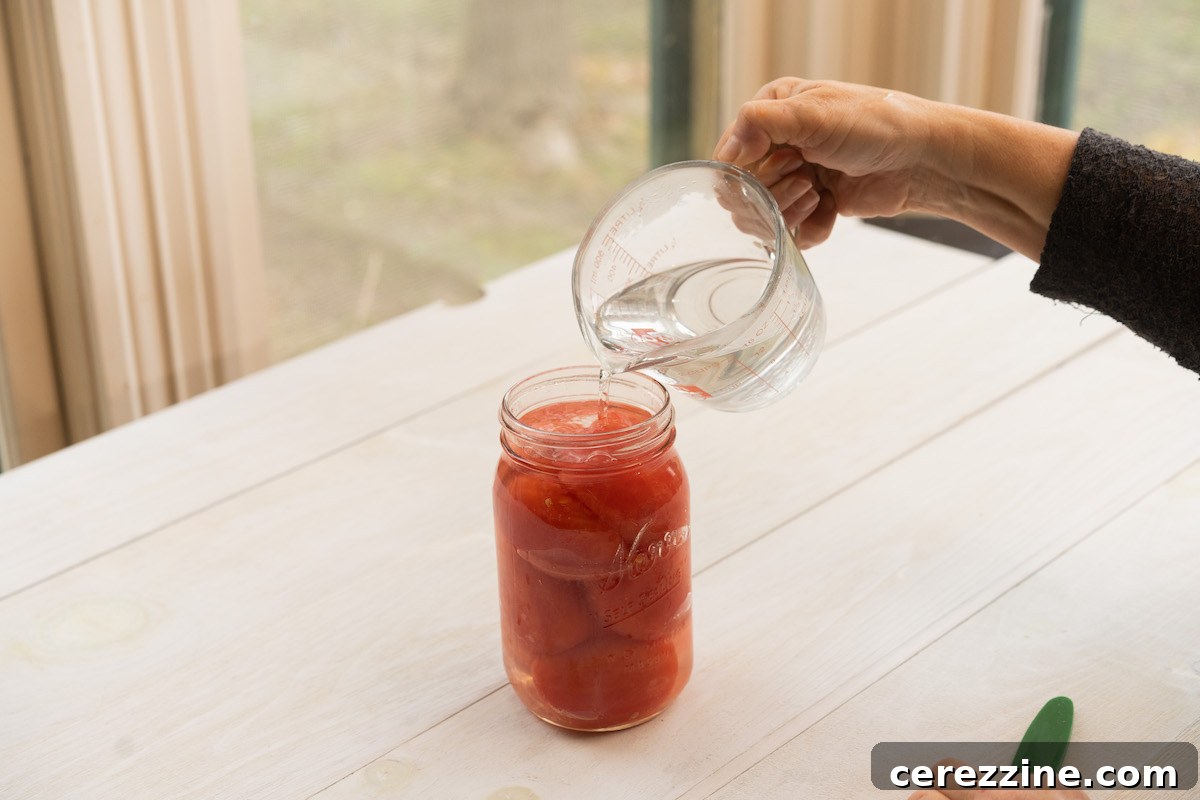
Raw Packing the Jars
With the raw pack method, raw, unheated vegetables or meats are placed directly into the prepared jars. Afterward, hot water or broth is poured over the raw ingredients. While simpler in initial preparation, raw packing often results in more air bubbles being trapped within the food, requiring more thorough debubbling. Foods packed raw are also more prone to “floating” within the jar during processing, where the food rises above the liquid. While perfectly safe, this can sometimes affect the visual appeal. Ensure you take extra time to remove air bubbles effectively with this method.
7. Leave the Correct Headspace – A Critical Safety Measure
Headspace refers to the empty space between the highest level of the food or liquid and the rim of the canning jar. This space is absolutely critical for successful and safe canning. Each recipe will specify the precise amount of headspace required, typically ¼ inch, ½ inch, or 1 inch. Adhering to this measurement is non-negotiable.
Leaving insufficient headspace can be problematic: as the food heats and expands during processing, it can seep out of the jar, potentially leading to seal failures, siphoning (liquid loss), and food residue on the sealing surface. Conversely, too much headspace means there isn’t enough air to be driven out during processing, which can prevent a strong vacuum seal from forming. It can also mean the recommended processing time is insufficient to fully heat the entire contents of the jar, compromising safety. Always use a headspace measuring tool for accuracy.
8. Remove Any Trapped Air Bubbles
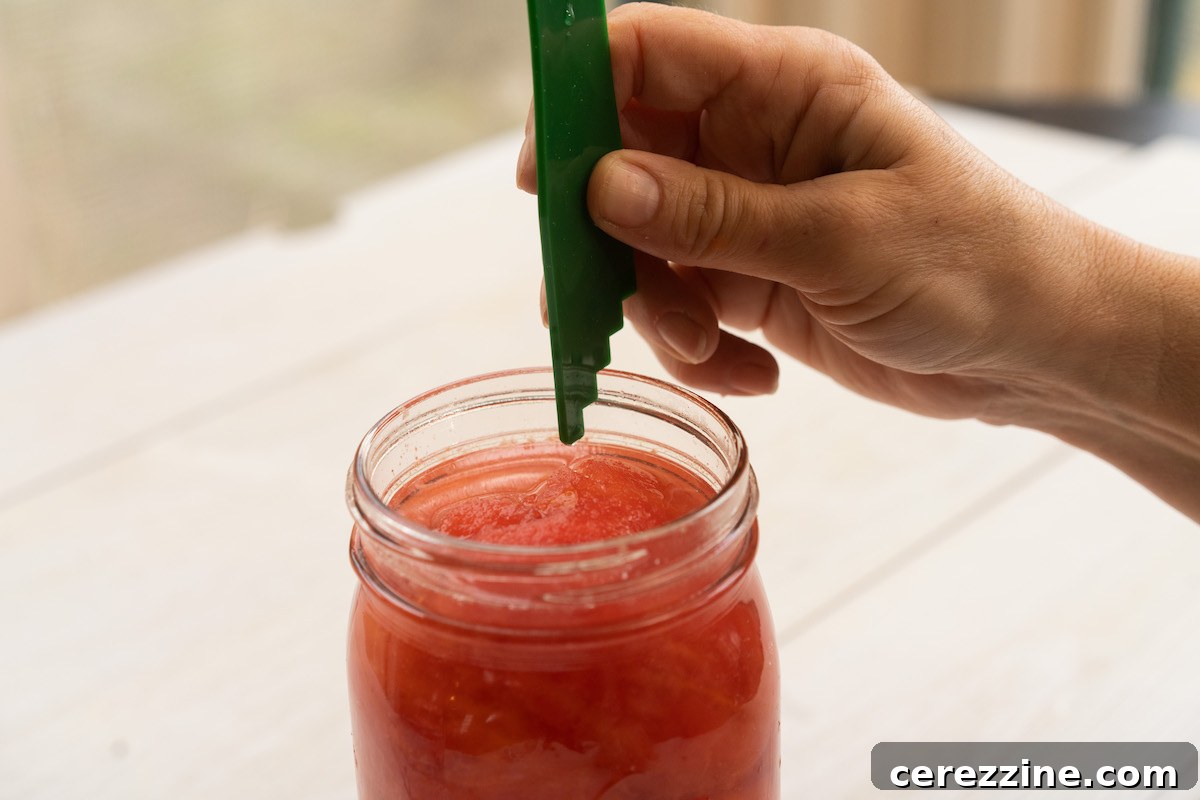
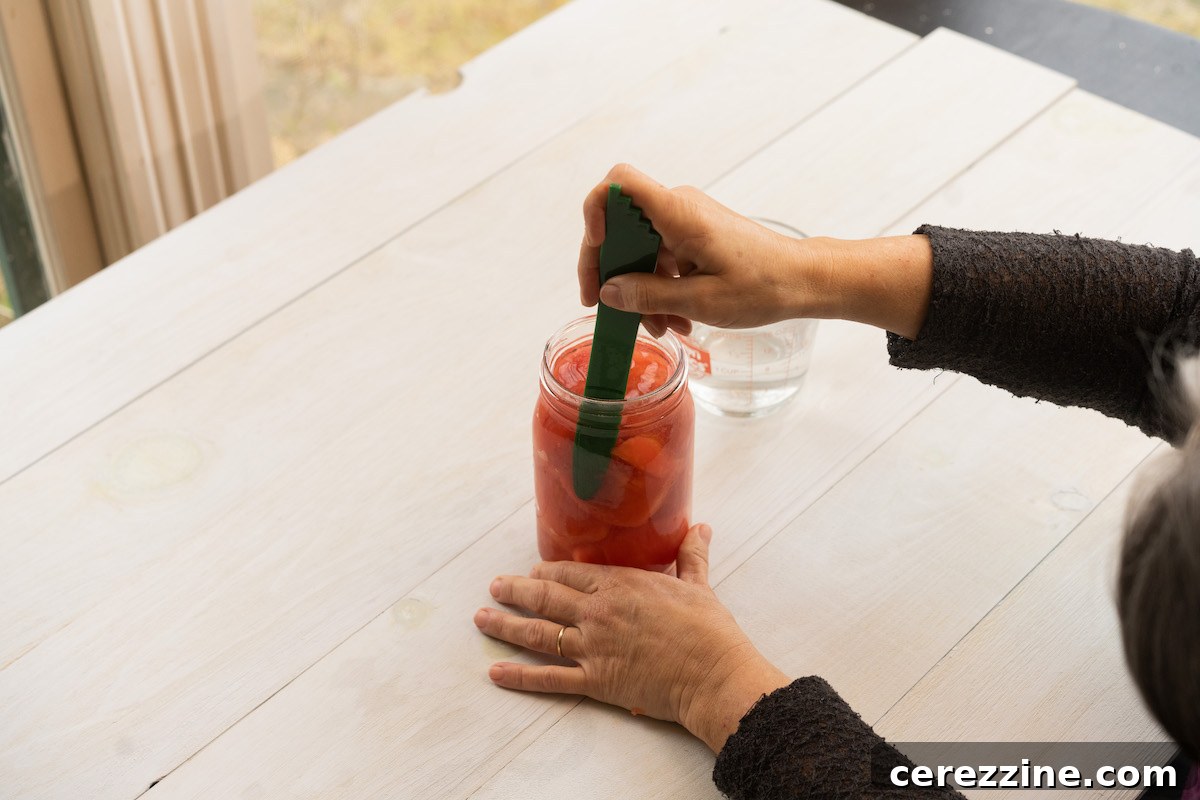
After filling your jars and measuring headspace, it’s essential to remove any trapped air bubbles. These bubbles, if left in the jar, can cause food to darken, contribute to seal failure, and lead to siphoning as they escape during processing. To debubble, gently slide a plastic or silicone bubble removal tool (or a chopstick) between the food and the inside of the jar. Work your way around the entire circumference of the jar, gently pressing the food inward towards the center. You’ll observe bubbles rising to the surface.
Continue this process until no more bubbles escape. Avoid using metal utensils, as they can scratch the glass and potentially weaken the jar, leading to breakage during processing. The goal is to eliminate as much trapped air as possible without compromising the food structure.
9. Recheck the Headspace Level
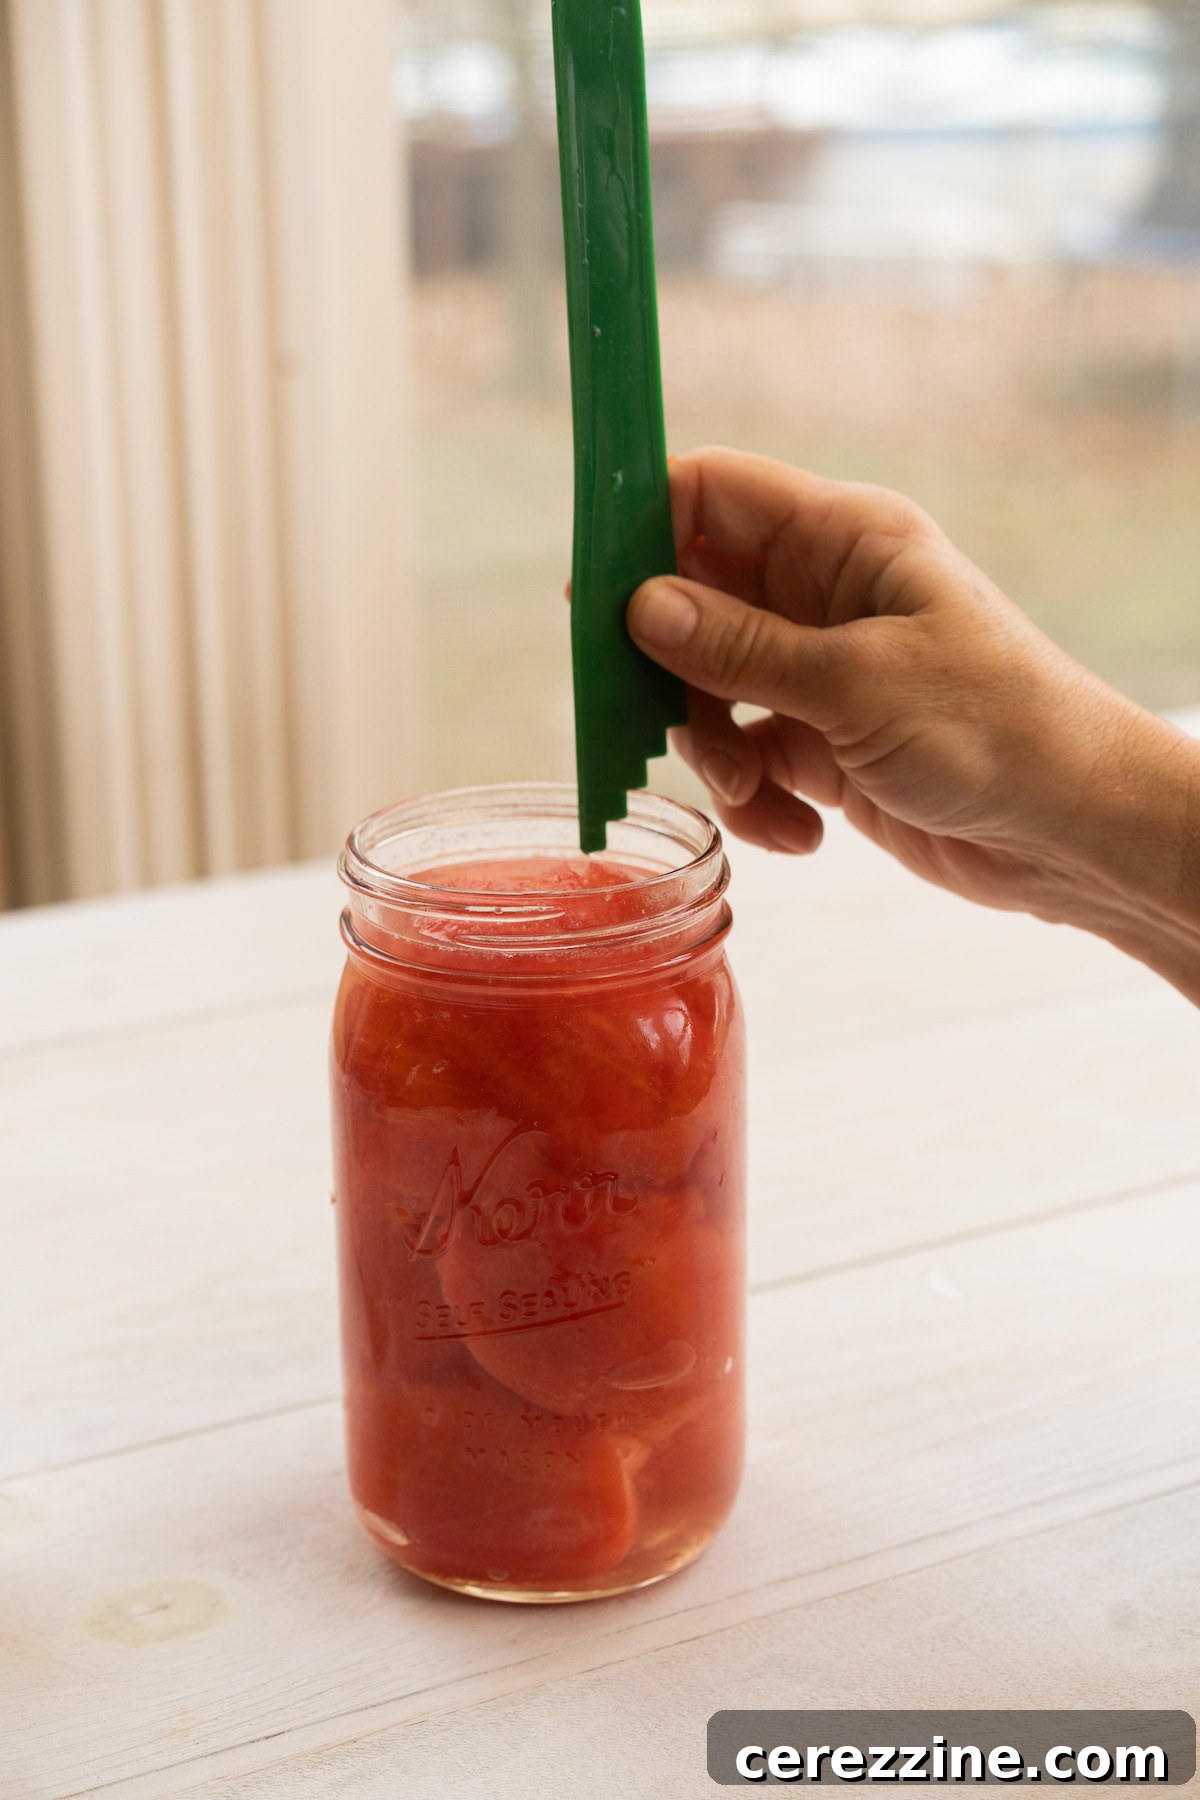
Once you’ve removed all the air bubbles, it’s crucial to recheck the headspace. Often, removing trapped air will cause the liquid level to drop, increasing the headspace beyond what is recommended. If this occurs, simply add a bit more hot liquid (water, broth, or the recipe’s liquid) to the jar to bring the headspace back to the correct level. This step is vital for ensuring a proper seal and preventing food spoilage.
10. Wipe the Jar Rims Clean
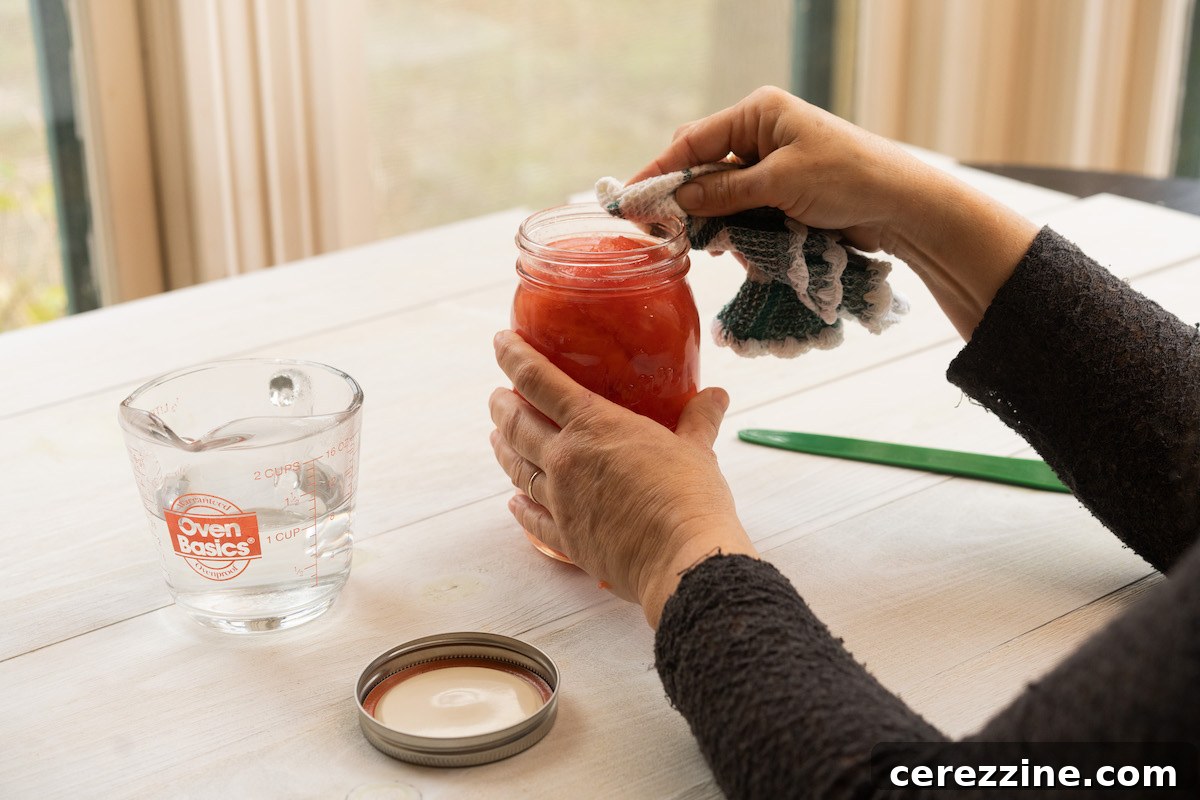
A pristine jar rim is essential for a reliable seal. Using a clean, damp cloth, carefully wipe the entire rim of each jar to remove any food particles, grease, or residue. Even a tiny speck of food can prevent the lid’s sealing compound from adhering properly to the glass, resulting in a failed seal. If canning greasy foods, a cloth dampened with a little white vinegar can be particularly effective in cutting through any oil and ensuring a perfectly clean surface.
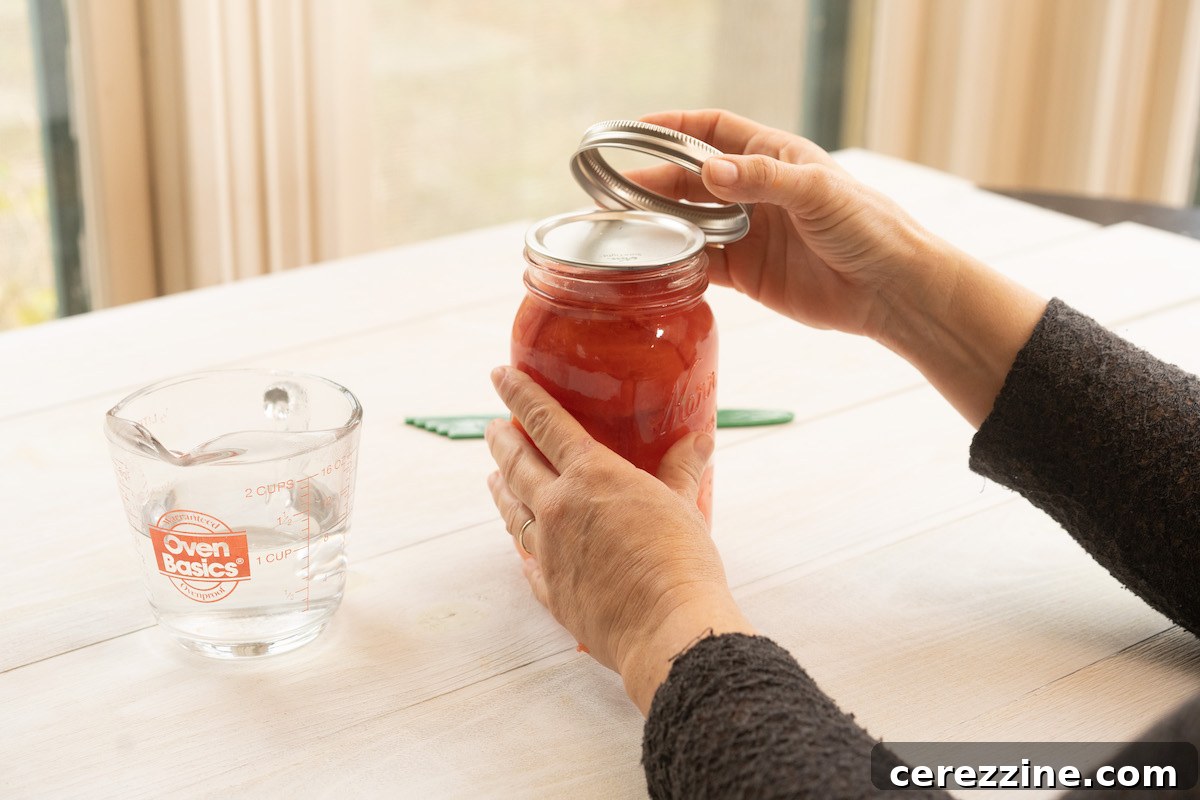
11. Add the Lids and Screw Bands “Finger-Tight”
Place a clean canning lid squarely on top of each jar. Then, screw a clean band (ring) onto the jar until it is “finger-tight.” This means tightening it just enough so that it feels secure, similar to how you would tighten the lid on a mayonnaise jar, without excessive force. The goal is to hold the lid in place, allowing air to vent during processing.
If the band is overtightened, air cannot escape, which can lead to the lid buckling or the jar failing to seal properly. Conversely, if the band is too loose, excessive siphoning (liquid loss from the jar) may occur, also compromising the seal. While it sounds precise, there’s a forgiving range for “finger-tight,” so don’t overthink it. Aim for a snug but not overly forceful fit, and your jars will likely seal perfectly.
12. Carefully Place the Jars Into the Canner
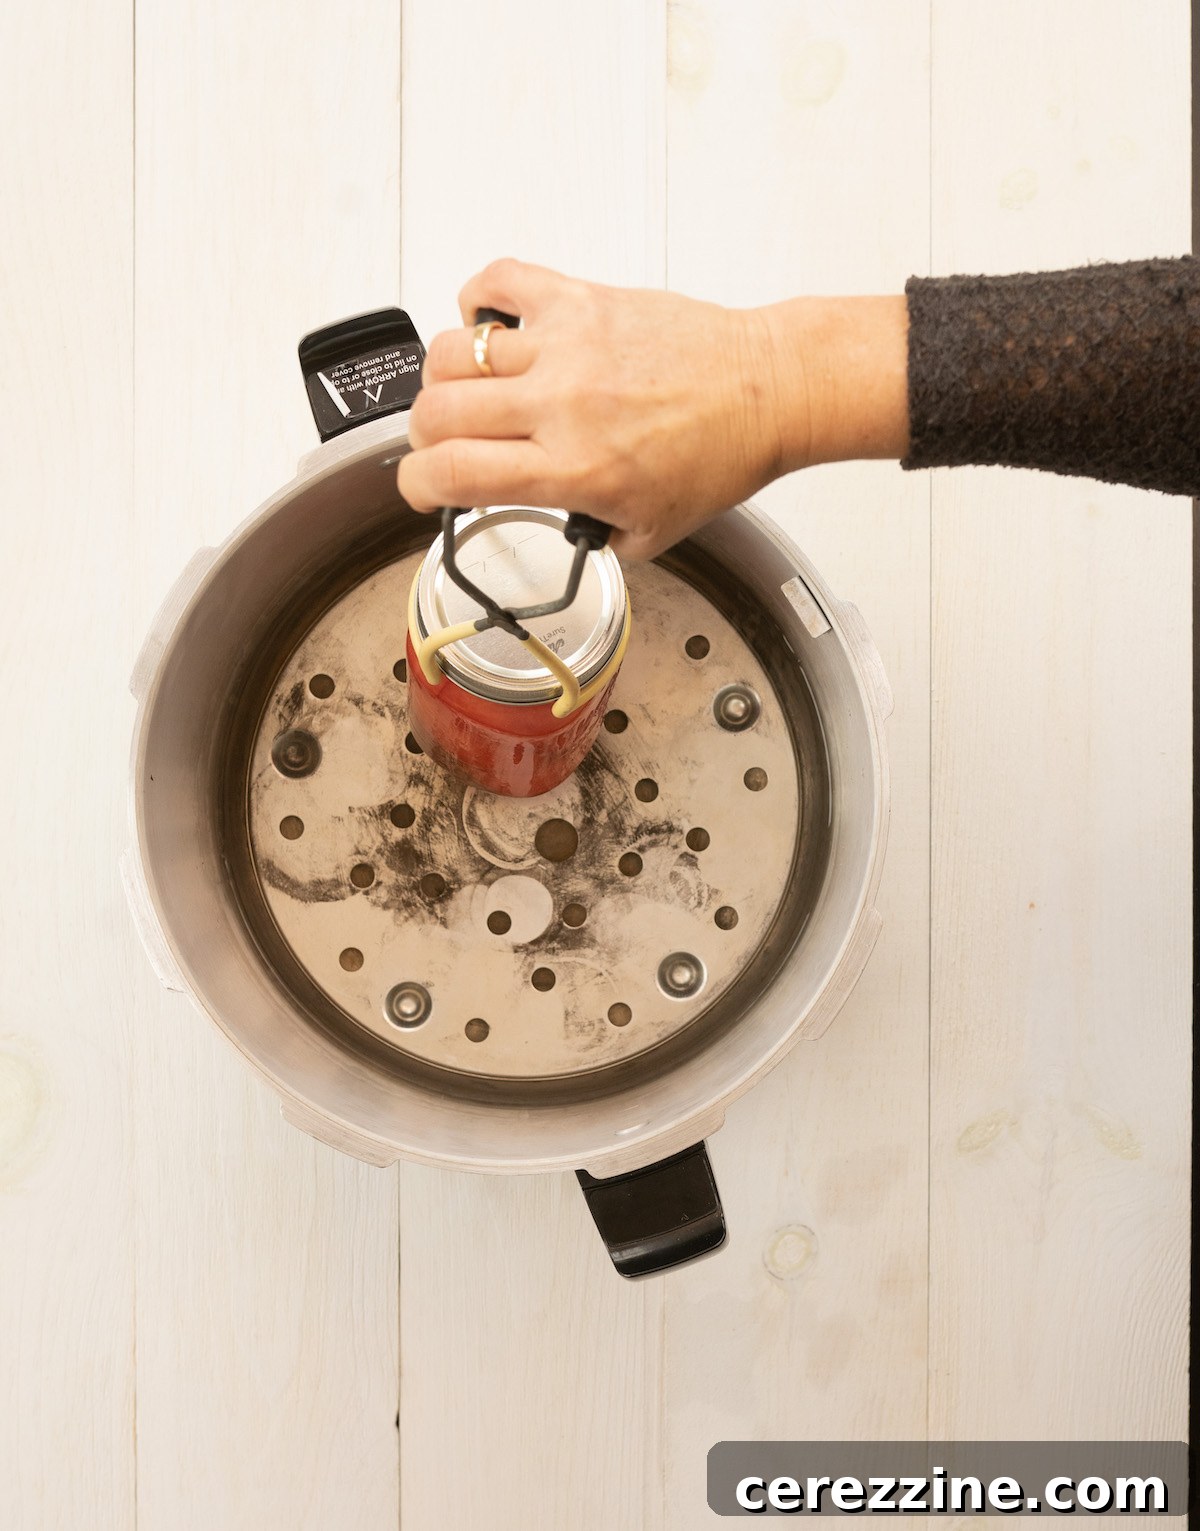
With jars prepared, they are now ready for the pressure canner. Double-check that the canning rack is securely positioned at the bottom of the canner. Using a jar lifter, gently and carefully place the hot, filled jars onto the rack. Most standard pressure canners can accommodate a single layer of nine 1-pint (500-ml) jars or seven 1-quart (1-L) jars. Some taller models are designed to process two layers of jars at once, in which case you will use an additional rack to separate the layers.
For proper pressurization, a minimum load equivalent to two properly filled 1-quart (1-L) jars is required. If you’re canning smaller jars, this translates to four 1-pint (500-ml) jars or eight half-pint (250-ml) jars. If your recipe yields fewer jars than the minimum, you can use “dummy jars” filled with hot water (with correct headspace and a lid) to make up the difference. You can either store this bottled water or simply reuse an old lid for dummy jars to avoid wasting new ones.
13. Securely Close and Lock the Canner Lid
Place the pressure canner lid onto the base, aligning it according to your canner’s instructions, and securely lock it into place. Always refer to your user manual for specific locking mechanisms and procedures.
For canners like the Presto® brand, which typically use a rubber gasket to create a seal, regular inspection is vital. Gaskets can dry out and crack over time and must be replaced to ensure a tight seal and safe operation. It’s wise to keep a spare gasket on hand. All-American® canners, on the other hand, feature a metal-to-metal seal and do not use a gasket. For these models, a light lubrication with olive oil or petroleum jelly along the sealing edges is recommended before each use to ensure a proper seal.
14. Begin Heating the Canner to Build Steam
Once the canner is loaded and securely closed, turn your stove’s heat setting to high. This intense heat will rapidly bring the water inside the canner to a boil, initiating the buildup of steam. This steam is essential for both venting (purging air) and ultimately building the necessary pressure for safe processing.
15. Vent the Canner to Release All Air – The Crucial First Step to Pressure
As steam begins to accumulate inside the pressure canner, it will start to escape steadily from the vent pipe (or petcock). This process is known as “venting” or “exhausting” the canner. This is a crucial safety step: it ensures that all ordinary air is expelled from the canner and replaced entirely with pure steam. Trapped air can lead to an inaccurate pressure reading and insufficient processing temperatures, compromising food safety.
As a general rule, allow the pressure canner to vent vigorously for a full 10 minutes before you place the weighted gauge or counterweight onto the vent pipe. Always consult your specific canner’s user manual, as some models may recommend a slightly different venting time. Adhering to the correct venting period is non-negotiable for safe pressure canning.
16. Process Jars for the Correct Duration and Pressure
The official processing time for your jars does not begin until the canner has reached and maintained the full, correct pressure. After venting for 10 minutes, apply the weighted gauge or counterweight to the vent pipe. This action will seal the canner, allowing pressure to build rapidly.
For Dial Gauge Canners: Monitor the dial closely. The canner is fully pressurized when the needle reaches the precise pounds per square inch (psi) specified for your altitude and recipe (e.g., 10 or 11 psi).
For Weighted Gauge Canners: The canner is fully pressurized when the weighted gauge begins to jiggle steadily at the recommended rate (e.g., 1-4 jiggles per minute for a 10lb weight, or a continuous, gentle rock for some models). Refer to your canner’s manual for the correct jiggling or rocking pattern.
Once the correct pressure is achieved, gradually reduce the heat to a medium-high or medium setting. This step requires a bit of finesse and trial-and-error during your first few canning sessions. Adjust the heat just enough to maintain the pressure consistently without causing excessive steam loss or allowing the pressure to drop. If the pressure drops below the recommended level at any point, you must bring the canner back to the correct pressure and restart the entire processing time from zero. This is critically important for food safety.
Set a timer only after the canner has stabilized at the correct pressure. Do not rely on memory. While the canner is designed to release excess pressure safely, maintaining excessively high heat can lead to rapid water evaporation, which is especially problematic for longer processing times (90 minutes or more). Note down your stove’s heat setting once you find the sweet spot for maintaining consistent pressure, as this will save you time in future canning sessions.
17. Allow the Canner to Cool Naturally and Depressurize
When the processing timer signals completion, turn off the heat. If you’re using an electric stove, if feasible, carefully move the hot canner off the burner to prevent residual heat from prolonging the cooling process. (Be mindful that a full canner is very heavy; if you cannot move it safely, simply leave it on the turned-off burner.)
The canner must now cool down and depressurize naturally. This typically takes 30 to 60 minutes, depending on the canner’s size and contents, until it reaches 0 psi. It is absolutely vital to resist the temptation to speed up this cooling process. Forcing the canner to cool faster—by applying cold wet towels, placing it outdoors, or running cold water over it—can be dangerous. Rapid temperature changes can cause thermal shock, potentially damaging the canner, causing jars to break, leading to severe liquid loss (siphoning) from the jars, and ultimately compromising the seals and safety of your food. Patience is paramount here; truly, it’s not worth the risk.
For Dial Gauge Canners: The dial will slowly return to 0. If your canner has a vent-lock piston, it will visibly drop to its normal, unlocked position.
For Weighted Gauge Canners: After the recommended resting time (check your manual), gently nudge the weighted gauge. If no hiss of steam escapes, the canner is fully depressurized. Once fully depressurized, remove the weight from the vent pipe or open the petcock and allow the canner to sit undisturbed for an additional 10 minutes. This crucial waiting period helps equalize temperatures, preventing a sudden surge of liquid within the jars that could disrupt seals.
18. Safely Remove the Canner Lid
When it’s time to open the canner, exercise caution. Remove the canner’s lid by lifting it away from your face, allowing any residual steam to escape safely without burning you. After the lid is removed, let the jars remain in the hot canner for another 5 minutes. This brief resting period helps them acclimate further to the ambient temperature, reducing the risk of thermal shock when they are removed.
19. Remove the Jars and Let Them Cool Undisturbed
Using your jar lifter, carefully remove each jar from the canner and place it on a clean kitchen towel or a wire rack on the counter to cool. It’s critical to place them on a towel or rack, not directly on a cold countertop, to prevent thermal shock that could cause the jars to crack or break. Ensure there is at least 1 inch (2.5 cm) of space between each jar to allow for even air circulation. Allow the jars to cool completely and undisturbed for 12 to 24 hours. During this time, you may hear satisfying “ping” sounds as the lids seal, creating a vacuum.
20. Check the Seals for Integrity and Safety
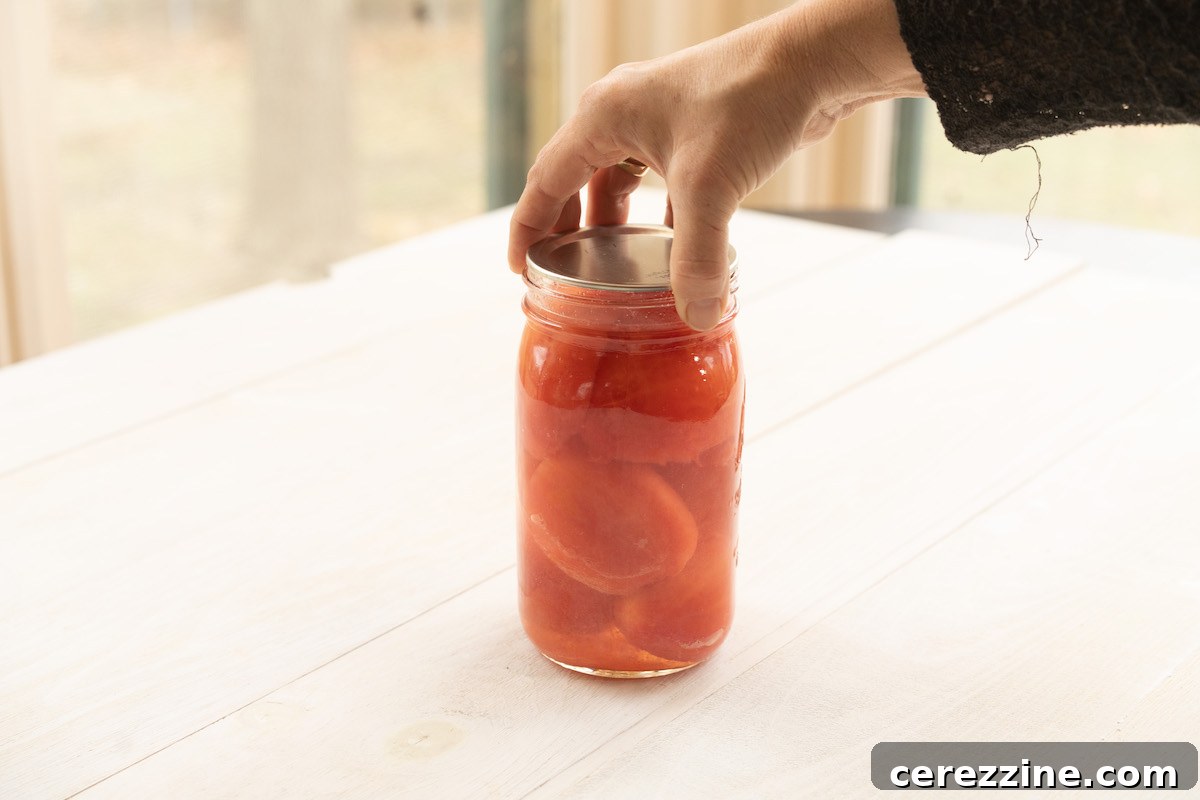
After the jars have fully cooled, it’s time for the final, crucial step: checking the seals. First, remove the screw bands (rings) from all the jars. Then, gently press down on the center of each lid. A properly sealed lid will be concave (curved inward) and will show no movement or give when pressed. Next, try to gently lift the lid with your fingertips. If the lid remains firmly attached, you have a good seal. If a lid pops up, moves, or feels loose, the jar has failed to seal. Any unsealed jars should be refrigerated immediately and consumed within a week, or reprocessed with a new lid within 24 hours if the food quality is still good.
21. Label and Store Your Home-Canned Preserves
Congratulations! Your sealed jars are now ready for long-term storage. Before storing, carefully wipe each jar with a clean, damp cloth to remove any residue. Wash and thoroughly dry the screw bands; many canners prefer to store jars without bands to prevent corrosion and to free up bands for future canning projects. If you choose to store jars with bands on, ensure the bands are completely dry to avoid rusting onto the jar.
Every jar must be clearly labeled with its contents and the date of canning. You can use a permanent marker directly on the metal lid, apply decorative sticker labels, or simply use masking tape for quick identification. For jars with reusable lids (like Tattler or Weck), masking tape is a practical choice. Store your labeled jars in a cool, dry, dark place, away from direct sunlight and temperature extremes. The USDA recommends consuming home-canned food within one year for optimal quality, though it often remains safe beyond this period if properly sealed and stored.
Guidelines for Safely Modifying Pressure Canning Recipes
Discussions about altering canning recipes can often ignite passionate debates among home canners. On one side, there are those who vehemently argue against any deviation from tested recipes, citing grave safety concerns. On the other, some embrace a more flexible approach, confident in their grandmother’s canning wisdom. Neither extreme is entirely helpful; fear can paralyze, while overconfidence can lead to unsafe practices.
The prudent approach is to always begin with tested, reputable recipes and processes. Within these established guidelines, however, there are certain safety parameters that allow for minor, thoughtful recipe tweaks to better suit your family’s preferences without compromising safety. The following guidelines for modifying pressure-canned recipes are based on various USDA publications and best practices:
Understanding Acid in Pressure Canning
Bottled Lemon and Lime Juice: When a recipe calls for lemon or lime juice to acidify a food (e.g., tomatoes), it is crucial to use *bottled* juice. Bottled juices have a consistent, standardized acidity level, unlike fresh juices which can vary significantly. If lemon or lime juice is used solely for flavoring, such as in a lemongrass chicken soup, fresh juice is acceptable as it’s not relied upon for safety.
Vinegar: Any vinegar with 5 percent acidity can be safely substituted for white vinegar in canning recipes. If the vinegar acts purely as a seasoning rather than an acidifier for safety (as in many meat or vegetable recipes), then any type of vinegar can be used for flavor. For recipes where wine is used for flavor, vinegar can be a safe substitute. Use a 1:1 vinegar to water ratio to account for the wine. For example, 1 cup (240 ml) of red wine can be replaced with ½ cup (120 ml) red wine vinegar and ½ cup (120 ml) water.
Adding More Acid: It is always safe to *increase* the amount of acid in any recipe. For instance, if you prefer a more tart flavor, adding extra citric acid to Italian-style tomatoes is safe, as it only increases the acidity. However, citric acid (or other specified acidifiers) cannot be *omitted* from recipes that rely on them for safety, such as tomato and vegetable juice recipes, as this would reduce the acidity below safe levels.
Salt’s Role in Canning
In home canning, salt primarily serves to enhance flavor and help preserve the color and texture of the food; it is generally *not* a preservative that affects safety in pressure canning (unlike pickling). Therefore, you can safely adjust the amount of salt to your taste, using more or less than the recipe specifies. Remember, you can always add more salt when serving, but you cannot remove it once canned. Err on the side of less salt.
When using salt for canning, you are not limited solely to “canning salt.” Any pure salt is suitable; simply check the ingredients list. If it lists only “salt,” it’s fine. Avoid salts that contain iodine or anti-caking agents, as these can cause discoloration or cloudiness in your canned goods.
Sugar in Preserved Foods
Similar to salt, sugar’s role in pressure-canned recipes is typically for flavor and to help maintain the food’s color and structure, rather than for preservation. Consequently, you have the flexibility to adjust the sugar content to your preference, using more or less than indicated. For added flavor variety, sugar can also be safely substituted with alternatives like maple syrup, honey, or brown sugar in appropriate pressure-canned recipes.
Herbs and Seasonings: Flavor Enhancers
Dried herbs and spices can generally be added to any pressure canning recipe safely. If a recipe calls for fresh herbs, dried herbs can be substituted (usually at a ratio of 1/3 the amount of fresh). However, the reverse is not true: fresh herbs cannot be substituted for dried herbs if the recipe specifies dried, as fresh herbs introduce additional moisture and density that could affect safety. Sage is sometimes discouraged in canning due to its potential to become bitter during processing.
You can safely add up to one clove of garlic per jar for flavor. As with salt, it’s often best to be conservative with seasonings, as you can always add more when serving the food, but you cannot remove them.
Peppers & Onions: Safe Swaps
For peppers, canned chilies can be used in place of fresh chilies, ensuring equivalent quantities. You can also substitute one variety of peppers for another (e.g., sweet bell peppers for hot jalapeños) as long as the total quantity remains consistent with the original recipe. Similarly, red, yellow, or white bulb onions can be freely interchanged.
While most of these safe modifications apply to ingredients used in smaller quantities, some main ingredients can also be swapped within specific categories. Reputable canning cookbooks often include recommended substitutions for particular food groups, such as different types of beans or meats.
About the Author: Angi Schneider
Angi Schneider is a celebrated expert in home food preservation, widely recognized as the author of the comprehensive guide, Pressure Canning for Beginners and Beyond. She also shares her extensive knowledge and practical homesteading tips on her popular blog, Schneider Peeps. With over 25 years of experience in gardening and food preservation, Angi brings a wealth of hands-on expertise to her readers. She currently resides with her family on a thriving 1.5-acre homestead nestled on the picturesque Gulf Coast of Texas, embodying a self-sufficient lifestyle.
Ready to Get Started? Explore These Pressure Canning Recipes!
Now that you’ve gained a fundamental understanding of how to operate a pressure canner safely and effectively, it’s time to put your newfound knowledge into practice. These tested pressure canning recipes are perfect for beginners and seasoned canners alike, offering delicious and nutritious options for stocking your pantry. Dive in and start preserving your favorite meals!
- Canning Hearty Chicken Soup for Your Pantry
- Canning Delicious Split Pea Soup – A Wholesome Meal
- Canning Exquisite Thai Red Curry (Duck or Chicken Variation)
- Mastering the Art of Canning Homemade Beef Broth
- Step-by-Step Guide to Canning Fresh Chicken