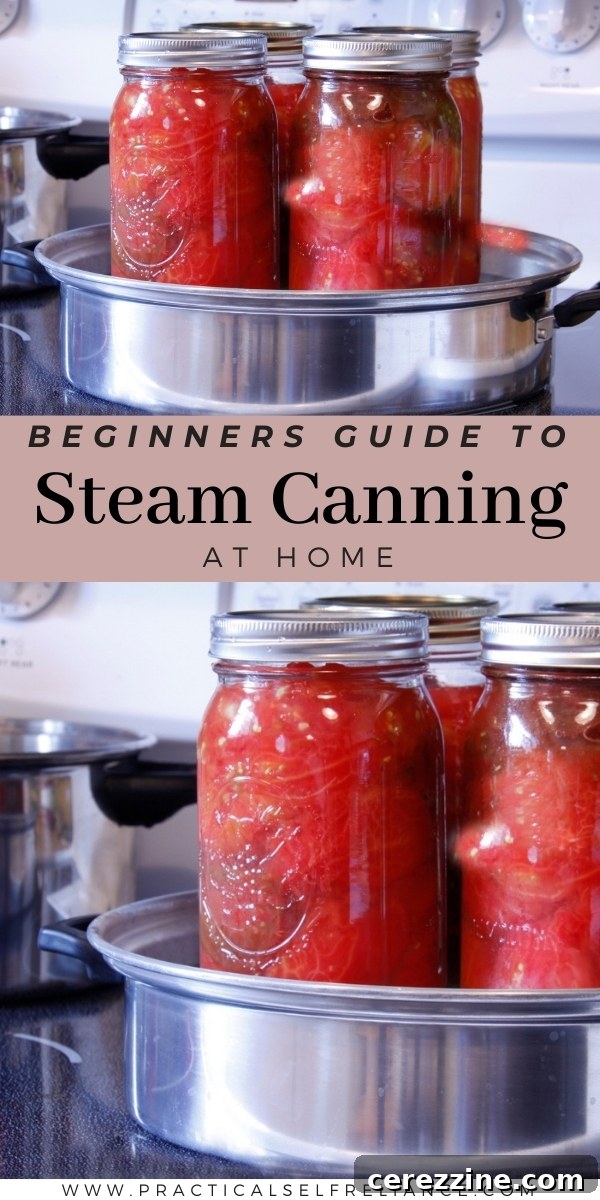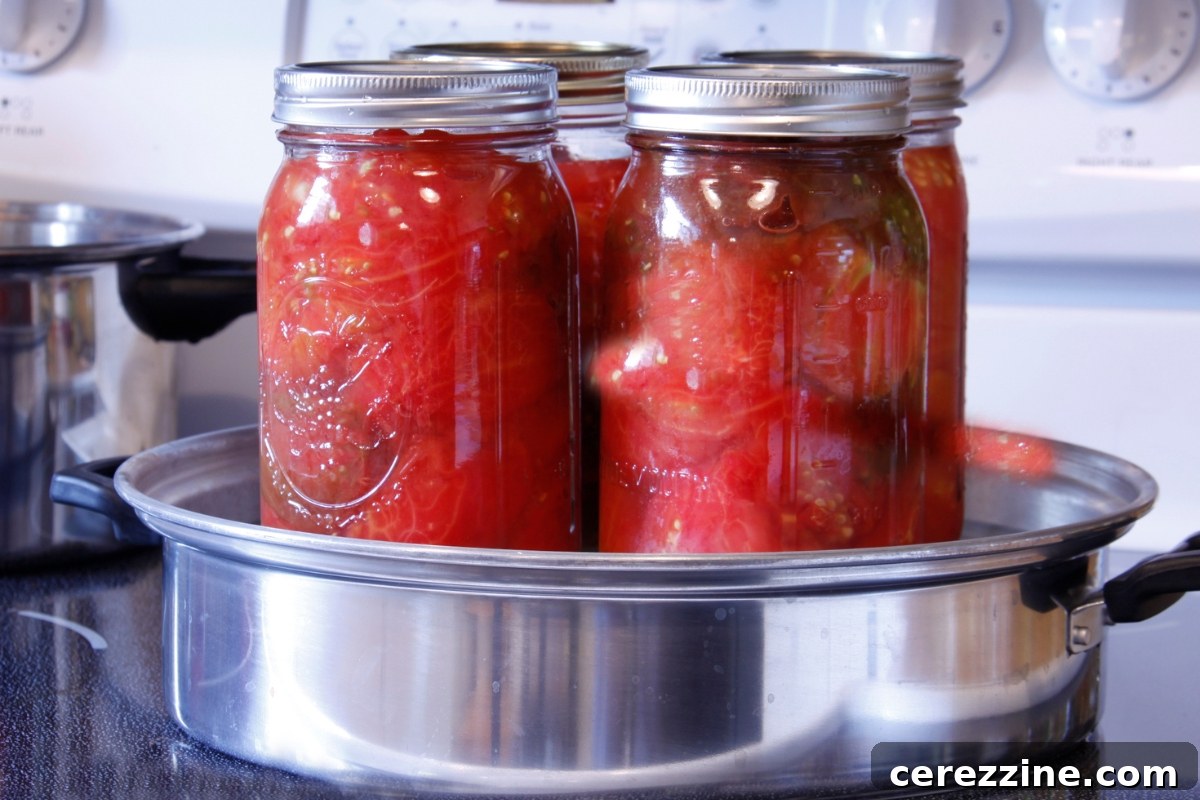
Steam canning offers a modern, efficient, and increasingly popular method for preserving fresh food at home. Compared to traditional water bath canning, it stands out as a quicker and more energy-efficient alternative. A steam canner requires less time to reach the required temperature, consumes significantly less energy to maintain heat, and contributes less warmth to your home environment, making it a comfortable choice, especially during warmer months. This method is perfectly suited for a variety of high-acid foods, allowing you to enjoy homemade jams, jellies, pickles, and salsas year-round.
This article is written by Morgan Hyde, a former reference librarian from Arizona. Working for the library refined her passion for learning and deep research—a passion that began in her rural AZ upbringing and continues in her work as a writer and editor. If it’s something she can do on her own, it’s something wants know about.
Whether you’re new to home food preservation or looking to optimize your canning process, understanding the nuances of steam canning is essential. This comprehensive guide will walk you through its history, safe practices, necessary equipment, and common pitfalls to help you confidently preserve your harvest.
The Evolution of Steam Canning: From Discontinued to Recommended
Home canning has been a staple in kitchens for nearly 150 years, offering a reliable way to store seasonal produce. While water bath canning boasts a long, uninterrupted history, steam canning has a more complex past. The original atmospheric steam canner emerged in the 1920s as an innovative solution for preserving food. However, its use was largely discontinued by the 1970s, primarily due to prevailing safety concerns. At the time, research capabilities and understanding of food microbiology were not advanced enough to definitively confirm steam canning as a universally safe method, leading to a conservative approach from food safety experts. With an alarming rise in botulism cases, often linked to improper canning practices, many turned to methods considered more thoroughly tested and safer.
It wasn’t until 2011 that extensive research into atmospheric steam canning was reignited by food scientists. After four years of rigorous testing and analysis, the method received the official “green light” for safe at-home use in 2015, backed by robust scientific data and updated guidelines. Despite this clear endorsement, echoes of the 1970s concerns sometimes persist online. Fears of “cold spots” inside the canner’s dome, the potential to confuse cool water vapor with active steam, or the risk of steam burns are still occasionally parroted. However, modern steam canners and established, tested recipes address these issues directly. By following these updated guidelines, exercising patience, adhering strictly to approved recipes, and preparing your equipment beforehand, you can safely enjoy the bounty of steam-canned foods, confident in their preservation.
What is Steam Canning? Understanding the Process
Steam canning is a highly effective method for creating shelf-stable foods that can be stored at room temperature for extended periods. While theoretically indefinite, most home canners aim to consume their preserved goods within a year to maximize nutritional benefits and ensure optimal taste. The core principle behind steam canning involves filling glass jars with your chosen food, securing them with a two-part canning lid, and then placing these jars within an enclosed steam canner. Here, the intense heat of the steam pasteurizes the food, eliminating harmful microorganisms. As the jars gradually cool after processing, the two-part lid forms a strong vacuum seal, effectively preserving the food inside.
This process bears a striking resemblance to water bath canning, and for good reason—both methods operate on the same fundamental principles and are specifically approved for high-acidity foods. The key distinction lies in efficiency: steam canning is significantly faster. Because the canner only needs a shallow amount of water to generate steam, it comes to temperature much quicker than a large pot filled for water bath canning. This translates directly into substantial savings in both water and energy consumption, making steam canning a more economical and environmentally friendly choice in the long run. If you’re new to canning, we highly recommend familiarizing yourself with water bath canning basics, as it provides an excellent foundational understanding that complements steam canning practices.
When deciding between steam and water bath canning, processing time is your primary consideration. Recipes that require more than 45 minutes of processing time are generally better suited for water bath canners. This is because a steam canner, with its limited water reservoir, may run dry before longer processing times are complete, potentially compromising the safety and seal of your preserved food.
Which Foods are Safe for Steam Canning? The High-Acid Rule
Just like water bath canning, steam canning is exclusively approved for preserving high-acidity foods—those with a pH level below 4.6. This critical pH level inhibits the growth of harmful bacteria, including Clostridium botulinum, which produces the deadly botulism toxin. It’s crucial to remember that what *seems* acidic might not be acidic enough for safe canning. For example, many modern tomato varieties no longer possess the natural acidity required for steam or water bath canning and must either be pressure canned or have additional acid (like lemon juice or citric acid) added to them to ensure safety.
The complexity increases when dealing with recipes that combine high and low-acid ingredients. To guarantee safety, always select recipes that have been thoroughly tested by reputable sources, such as university extension offices or the National Center for Home Food Preservation (NCHFP), and follow them meticulously. Deviating from these tested guidelines can put your health at risk.
Foods ideally suited for steam canning include:
- Fruits: Apples, peaches, pears, berries, cherries, plums
- Jams & Jellies: Fruit jams, fruit jellies, fruit butters, fruit preserves
- Pickles: Cucumber pickles, pickled vegetables (beans, asparagus, beets)
- Sauces: Fruit sauces, some tomato sauces with added acid
- Vinaigrette Dressings
- Juices: Fruit juices
- Pie Fillings: Fruit-based pie fillings
- Clear Jel: A modified food starch specifically designed for canning, acting as a safe thickening agent.
Foods Not Approved for Steam Canning: Understanding the Risks
It’s equally important to understand which foods are unsuitable for steam canning. Certain items inherently lack sufficient acidity or possess characteristics that impede safe heat penetration, making them dangerous to preserve using this method. You might encounter “workarounds” or unverified recipes online claiming to safely preserve these foods, but it is never advisable to experiment, especially for beginners. Always rely on authoritative resources like the National Center for Home Food Preservation (NCHFP) or state university extension services for tested and approved methods.
Many items on this list require pressure canning to achieve safe preservation, while others, like starches and thickeners, can physically obstruct proper heat transfer within the jar. This means the food may not reach the high internal temperatures necessary for pasteurization, creating a breeding ground for dangerous bacteria. Some foods are generally not recommended for home preservation at all due to their inherent risks.
Foods you should NOT steam can:
- Low-Acid Vegetables: Most non-pickled vegetables (carrots, green beans, corn, potatoes, squash)
- Meats: Beef, pork, poultry, wild game
- Seafood: Fish, shellfish
- Dairy Products: Milk, cheese, butter
- Eggs
- Fats & Oils
- Starches: Noodles, rice, pasta, dried beans, thick gravies (these impede heat penetration)
- Specific Fruits: Melons, bananas, avocados, Asian pears, white peaches (these have pH levels that are too high or inconsistent)
The potential for botulism, a severe and often fatal foodborne illness, underscores the paramount importance of following tested and approved canning guidelines. When in doubt, always err on the side of caution.
Essential Equipment for Safe and Successful Steam Canning
Before embarking on your steam canning journey, gathering the right tools is paramount. While the steam canner itself is obvious, several other pieces of equipment are crucial for ensuring safety, efficiency, and successful seals.
- Canning Jars: These are not just any glass jars. You’ll need specialized canning jars designed to withstand high temperatures and rapid changes. Look for jars explicitly labeled for canning, usually with a two-part lid system. They come in various sizes (pint, quart, half-gallon) to suit different needs. Sadly, commercial glass jars from pickles or mayonnaise are typically not thick enough or designed to handle canning temperatures and cannot be safely reused.
- Canning Lids: The two-part lid system is fundamental to home canning. It consists of a flat, metal lid with a sealing compound (gasket) on the underside, and a metal screw band (ring) that holds the lid in place during processing. Lids are single-use; the sealing compound can only create a reliable vacuum seal once. Always discard used lids and replace them with new ones for each canning session. The screw bands, however, are reusable.
- A Steam Canner: This is the heart of your operation. Modern steam canners come in two main styles. The classic design features a shallow base and a tall, domed lid, primarily useful for steam canning. Another popular style offers versatility, doubling as a water bath canner. Whichever design you choose, prioritize a canner with a built-in temperature gauge on its lid. This gauge is vital for monitoring the internal temperature and ensuring your jars are processed at the correct heat for your specific elevation.
- Jar Lifter: While steam canners use less water and jars aren’t fully submerged, you’ll still be handling hot jars that have been exposed to boiling steam. A jar lifter, with its rubberized grips, provides a secure and safe way to move hot jars in and out of the canner, preventing burns and accidental drops.
- Canning Funnel: Any kitchen funnel can technically work, but a canning funnel is specifically designed with a wide mouth that fits snugly over your canning jar openings. This prevents spills and keeps the jar rims clean while filling, which is crucial for achieving a proper seal. Some canning funnels even feature integrated headspace measurements, making the filling process even more precise.
Optional Equipment for Steam Canning: Nice-to-Haves, Not Must-Haves
Many canning kits include an array of tools, some of which are genuinely useful, while others are more convenience items you can often do without, especially when starting out.
- Canning Rack: Most steam canners come with a flat rack to keep jars from touching the canner bottom, ensuring even heat distribution and preventing breakage. If your canner doesn’t have one, don’t fret. A thick-bottomed pot (at least 1/2 inch thick bonded metal) might not strictly require one. For thinner-bottomed pots, you can easily improvise a rack using metal canning rings tied together or a clean cotton towel placed at the bottom.
- Headspace Measure: These thin, small plastic or metal tools are designed to measure the exact headspace (empty space at the top of the jar). While useful, they are easily misplaced or broken. Many canning funnels now have integrated headspace markers, or you can simply use a ruler for precision.
- Bubble Remover: Often combined with a headspace measure, a bubble remover is a thin, non-metallic utensil used to dislodge air bubbles from food packed in jars. A clean plastic knife or a small, non-metallic spatula works just as effectively to release trapped air.
- Magnetic Lid Lifter: While not strictly necessary, some canners prefer to simmer their flat lids in warm water before use to soften the sealing compound. A magnetic lid lifter makes it easy and sanitary to retrieve lids from hot water without touching them directly.
- Jar Wrench: Once your jars are processed and cooled, you’ll remove the screw bands for storage. These bands should only be finger-tightened initially, making removal easy. However, if you accidentally overtighten or need extra grip, a jar wrench can assist. It’s not essential for the sealing process itself.
- Bottle Brushes: For cleaning jars, you likely already have appropriate brushes in your kitchen. There’s no unique “canning kit” bottle brush that outperforms a standard dish brush or sponge for cleaning jars thoroughly.
Step-by-Step Guide: Mastering the Steam Canning Process
Follow these essential steps carefully to ensure safe and successful steam canning:
- Prepare Your Jars: Begin by inspecting your canning jars thoroughly. Check for any cracks, chips, or rough edges, especially around the rim, as these can prevent a proper seal or lead to breakage. Ensure they are free from dried-on food residue. Even if visually clean, give them a final wash in hot, soapy water and rinse well. While not always necessary to sterilize, heating them gently will prevent thermal shock.
- Set Up the Steam Canner: Place your steam canner on a sturdy stove burner. Fill the bottom with the amount of water specified in your canner’s manual, typically around 3 quarts, or enough to generate a strong head of steam without touching the jars. Adding a splash of white vinegar to the water can help prevent mineral deposits (scaling) on your canner and jars, especially if you have hard water.
- Insert Rack and Warm Jars: If using a canning rack or improvised trivet, place it in the bottom of the canner. Then, carefully place your clean, empty jars into the canner. Begin heating the water gradually.
- Achieve Correct Jar Temperature: The temperature to which you heat the water and jars depends on your packing method. For hot packing (when food has been pre-cooked or heated), bring the water up to 180⁰F (82⁰C). For cold packing (raw food), aim for 140⁰F (60⁰C). These controlled temperatures are crucial. Introducing cold jars to boiling water or hot jars to cold water too quickly can cause thermal shock, leading to the glass jars cracking or shattering.
- Fill Jars with Food: While the jars are warming, use your canning funnel to fill them with your prepared food. Pay very close attention to the headspace—the empty space between the food surface and the rim of the jar. Your recipe will specify this, typically ranging from 1/4 inch to 1 inch. Correct headspace is vital for creating a strong vacuum seal and preventing food from bubbling out during processing.
- Remove Air Bubbles and Clean Rims: After filling, gently slide a non-metallic utensil (like a plastic knife or a bubble remover) around the inside of each jar to release any trapped air bubbles. Air pockets can lead to an improper seal. Crucially, wipe the jar rims thoroughly with a clean, damp cloth (and then a dry one) to remove any food particles or moisture. Even a tiny speck can compromise the seal.
- Apply Lids and Rings: Center a new, flat canning lid onto each jar. Then, screw on the metal band (ring) until it is “finger-tight”—meaning just snug enough that you can still turn it with gentle pressure. Do not overtighten, as this can prevent air from escaping and compromise the seal.
- Load the Canner: Using your jar lifter, carefully lower each filled jar into the pre-warmed steam canner, keeping them as upright as possible. Arrange them so they do not touch each other, allowing for even steam circulation.
- Process the Jars: Cover your steam canner with its domed lid. Increase the heat to bring the water to a rolling boil, generating a full head of steam. Once the temperature gauge on your lid indicates the correct processing temperature for your elevation (212⁰F / 100⁰C at sea level, adjusting higher for increased altitude), start your timer according to the recipe’s specified processing time. Consult your canner’s manual and cross-reference it with the recipe for precise elevation adjustments. Avoid cranking the heat to maximum; a steady, moderate boil is sufficient to maintain steam and conserve water.
- Maintain Steam: Do not open the canner lid during processing, as this will cause you to lose steam and heat, interrupting the processing time. If you lose steam, you must bring the canner back up to temperature and restart the entire processing time.
- Cool Down (Initial): Once the processing time is complete, turn off the heat and carefully move the steam canner off the burner (if safe to do so). Let the canner sit, undisturbed with the lid on, for 5 minutes. This gentle cool-down period helps prevent thermal shock to the jars and allows some of the intense steam to dissipate.
- Remove Jars: Wearing oven mitts, carefully remove the canner lid, angling it away from your face and arms to avoid contact with the rush of hot steam and dripping hot water. Place the lid somewhere safe. Using your jar lifter, carefully lift each hot jar out of the canner, keeping it upright.
- Final Cooling and Sealing: Place the hot jars on a clean, dry towel or wire rack in a draft-free location. Leave at least 1 inch of space between each jar to allow for adequate airflow and even cooling. Do not touch or tilt the jars while they cool; the seals are still forming. Allow the jars to cool completely for 12-24 hours until they reach room temperature. Resist the urge to press on the lids or tighten the rings during this time, as this can create a false seal.
- Test the Seals: After the jars are completely cool, remove the screw bands. Test the seal by pressing firmly on the center of each lid. A properly sealed lid will be concave (curved inward) and will not flex or “pop” up and down. If a lid moves, it is not sealed and the food is not shelf-stable.
- Handle Unsealed Jars: Don’t panic if some jars don’t seal! Place them in the refrigerator and consume their contents like any other fresh food within a few days. Alternatively, you can replace the lid and ring and reprocess the jar within 24 hours, ensuring you follow all steps carefully again.
- Label and Store Sealed Jars: For successfully sealed jars, use a marker to label the lid with the contents and the date of processing. Remove the screw bands; they are only needed during processing and can rust onto the jars or harbor mold if left on. Store your sealed jars in a cool, dry, dark place, such as a pantry or basement. Enjoy your homemade preserves throughout the year!
Adapting Water Bath Canning Recipes for Steam Canning
One common observation for those new to steam canning is the relative scarcity of recipes specifically labeled “steam canning recipes.” This is partly due to the method’s complex history and its relatively recent re-approval by food safety authorities. However, the primary reason is that dedicated steam canning recipes are largely unnecessary.
The excellent news is that you can confidently use any tested water bath canning recipe for your steam canner. The underlying principles of heat transfer and preservation for high-acid foods are identical for both methods. Therefore, you do not need to alter any of the critical parameters when converting a water bath recipe: the recommended headspace, the processing time, and the acidity requirements all remain exactly the same.
The only adjustment you’ll need to make is to replace the concept of bringing a large pot of water to a rolling boil with bringing your steam canner to the specified steaming temperature for your elevation. This straightforward adaptation makes a vast library of tried-and-true water bath recipes readily available for steam canning, significantly expanding your options for home preservation.
Common Beginner Mistakes in Steam Canning and How to Avoid Them
While steam canning is a safe and efficient method, beginners can sometimes encounter issues. Most problems stem from insufficient preparation or a lack of understanding of critical steps. By being aware of these common pitfalls, you can ensure a successful canning experience.
Not Calibrating Your Steam Gauge
Not all steam canners require calibration, but if your manual specifies this step, it is absolutely essential to follow the instructions precisely. Your canner’s steam gauge is the primary indicator of whether your food is reaching the necessary temperature for safe pasteurization. An uncalibrated or inaccurate gauge can lead to under-processing, leaving harmful bacteria in your food.
Breaking or Misaligning Your Steam Gauge
Steam gauges are delicate instruments. They can easily be damaged or knocked out of alignment by a bump, a fall, or improper handling (e.g., attempting to manually adjust a gauge not designed for calibration). A broken or misaligned gauge might fail to register temperature, or it might display incorrect readings, indicating “full steam” when it’s not, or vice versa. If you suspect your gauge is faulty, contact the manufacturer’s support line—most manuals provide this information. Do not proceed with canning if your gauge is not functioning correctly.
Using the Wrong Canning Method for Specific Foods
Steam and water bath canning are excellent and safe for high-acid foods. However, they are entirely unsuitable for low-acid foods (like most vegetables, meats, and dairy). Attempting to steam can low-acid items creates a prime environment for the growth of Clostridium botulinum, which produces a deadly toxin. Conversely, while pressure canning is required for low-acid foods, it is generally not appropriate for jams, pickles, and chutneys. These high-acid foods would be subjected to excessive heat and pressure, resulting in an unappetizing, mushy texture and potentially compromising their quality without adding any safety benefit.
Overfilling and Underfilling Jars (Incorrect Headspace)
Headspace is one of the most critical factors for successful canning. Too little headspace (overfilling) can cause food to boil out of the jars during processing, creating siphoning, which prevents a proper seal. It can also lead to air bubbles becoming trapped, compromising the vacuum. Too much headspace (underfilling) can result in an inadequate vacuum and a weak seal, as there isn’t enough internal pressure buildup to push the lid down firmly. Always follow your recipe’s exact headspace recommendations.
Not Accounting for Elevation
Water boils at lower temperatures at higher altitudes. This means that at elevated locations, the steam temperature inside your canner will be lower than at sea level. If you don’t adjust your processing time or pressure (for pressure canning) according to your elevation, your food may not be heated sufficiently to kill all harmful microorganisms. Always consult reputable canning guides (like the NCHFP) or your local extension office for specific elevation adjustments for processing times.
Amending Tested Recipes Without Understanding Chemistry
Tested canning recipes are developed by food scientists and are considered safe because their ingredient ratios and processing times have been scientifically validated. Unless you possess a deep understanding of food chemistry and have the means to accurately test the pH of your modified recipe, never add or remove ingredients from trusted canning recipes. Adding starches (other than Clear Jel, which is specifically designed for canning) can inhibit heat transfer. Removing acidic ingredients or adding non-acidic ones can raise the pH above the safe threshold of 4.6, inviting bacterial growth. Deviating from tested recipes puts your health at severe risk.
Attempting Oven Canning
Once a seemingly convenient method, oven canning has been widely discredited for over 75 years due to significant safety hazards. There are no safe, tested guidelines for oven canning. Canning jars are not designed to withstand the dry, intense, and often fluctuating heat of an oven, making them prone to shattering or exploding. Furthermore, ovens provide uneven heat distribution, meaning the internal temperature of your jars may not reach the required level for safe food preservation, leading to potential spoilage and botulism risk.
Using Excessive Heat and Losing Steam Too Quickly
While it might seem logical to crank the heat to maximum for faster processing, doing so with a steam canner is counterproductive and potentially dangerous. Excessive heat causes water to evaporate too quickly, leading to a rapid loss of steam. If your canner runs out of water before the processing time is complete, the internal temperature will drop, rendering the processing ineffective. You would then need to open the canner (losing all steam), add more hot water, wait for steam to rebuild, and restart the entire processing time, wasting energy and time and potentially overcooking your food.
By understanding and avoiding these common mistakes, you can approach steam canning with confidence and enjoy the rewarding experience of preserving delicious, safe, homemade food for your family.