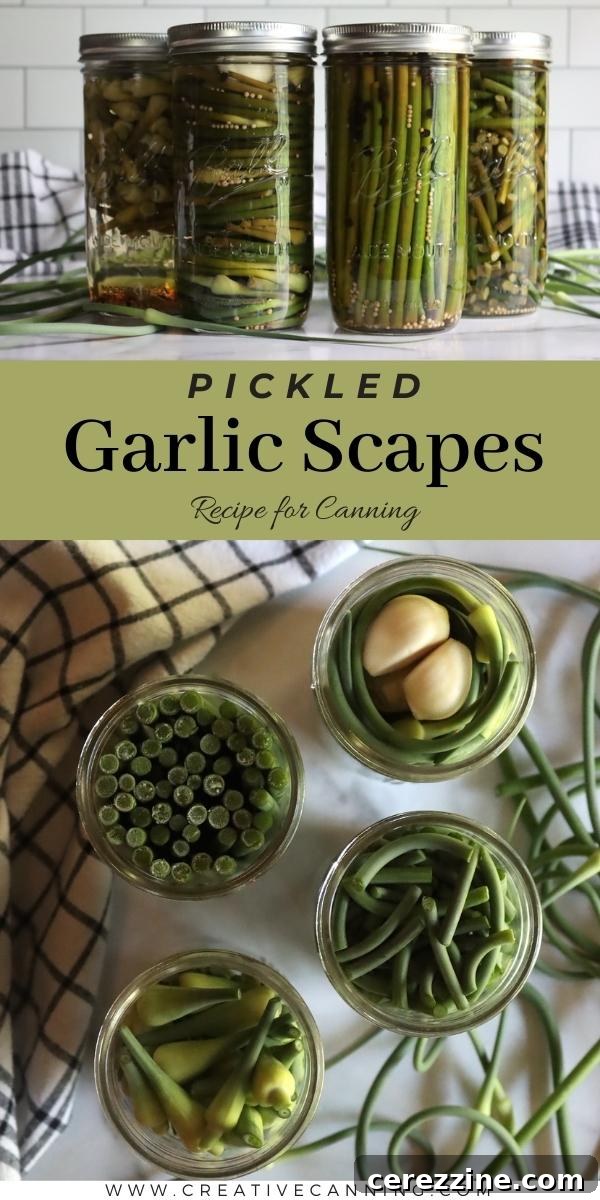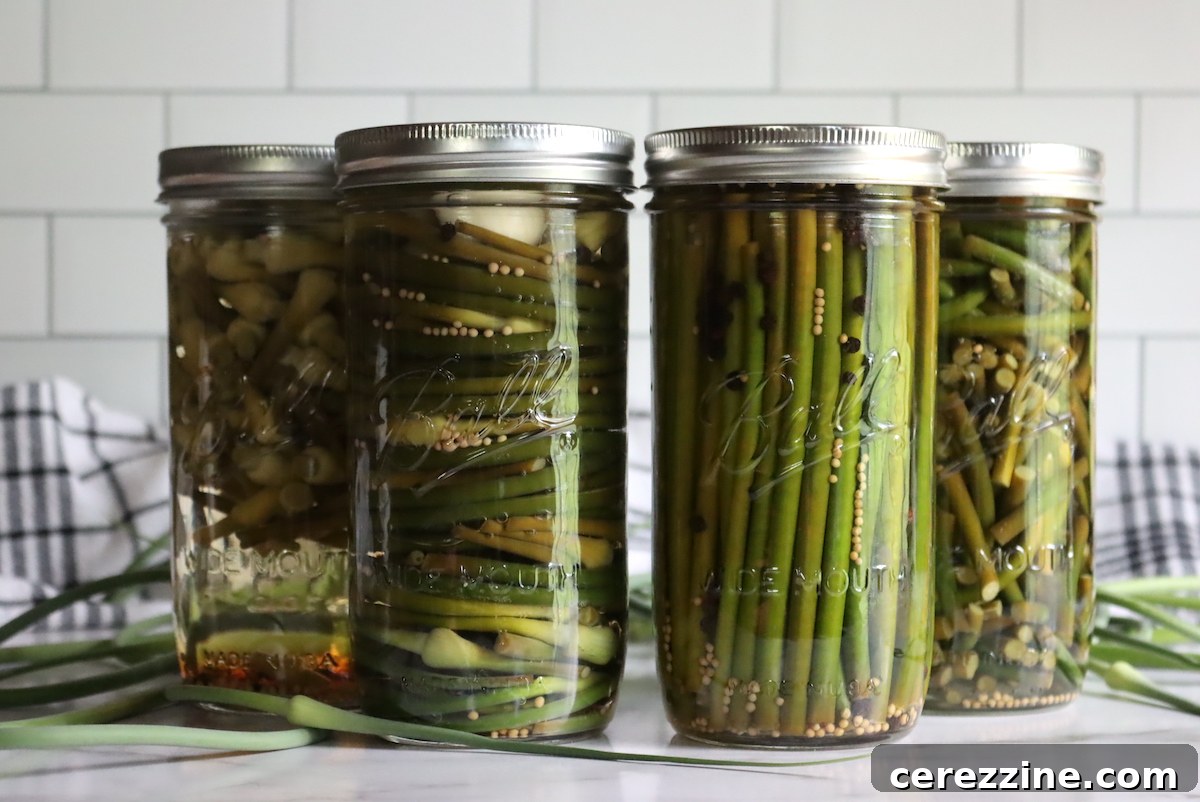
Pickled garlic scapes offer a delightful and creative solution for utilizing this unique spring vegetable, allowing you to savor its distinct flavor throughout the entire year.
Mastering Pickled Garlic Scapes: A Comprehensive Guide to Harvesting, Preparing, and Preserving
Garlic scapes, the tender, curly flower stalks of hardneck garlic, signal the true arrival of spring in the garden. For those of us who cultivate a substantial amount of garlic on our homesteads, a few hundred hardneck garlic bulbs mean a bountiful harvest of these culinary gems each spring. Here in the colder northern climates, hardneck garlic varieties are preferred not only for their superior hardiness but also for their remarkably richer, more rounded flavor compared to most softneck varieties found in grocery stores. An added bonus? The exciting early-season crop of garlic scapes.
Every year, I eagerly explore new ways to incorporate these vibrant green stalks into our meals. While we always experiment with a handful of fresh garlic scape recipes, pickled garlic scapes consistently earn a permanent spot in our preservation routine. These effortlessly prepared pickles are an ideal method for preserving the intense, fresh garlic flavor and satisfying crunch of scapes. They taste wonderfully reminiscent of traditional pickled dilly beans, but with an even crisper bite, and a subtle nod to pickled garlic, albeit less overpowering. Each bite delivers a fantastic blend of savory green goodness, delightful crunch, and robust flavor. Enjoy them as a standalone snack, or elevate your lunch by serving them alongside a hearty sandwich.
Choosing and Harvesting the Perfect Garlic Scapes for Pickling
The secret to exceptional pickled garlic scapes begins with selecting the finest scapes. When harvesting from your own garden, timing is crucial. Aim to pick them early in the season, just as they begin to emerge and form their characteristic curl from the garlic plant. Delaying harvest allows the garlic flowers to open, which unfortunately leads to the scapes becoming tough and fibrous, losing their desirable tender texture. Ideally, scapes should measure no longer than about 12 inches. However, if spring has been cool, you might get away with slightly longer scapes, provided they remain tender and flexible.
If you’re sourcing garlic scapes from a farmers market, look for bright, fresh-looking bunches with a tight, distinct curl. As scapes mature and grow longer, they naturally straighten out, indicating a potentially tougher texture. Even if you acquire scapes that are a bit longer and straighter, they can still make excellent pickles; they just won’t be quite as tender. Regardless of their initial shape or length, you have several creative options for preparing them for pickling.
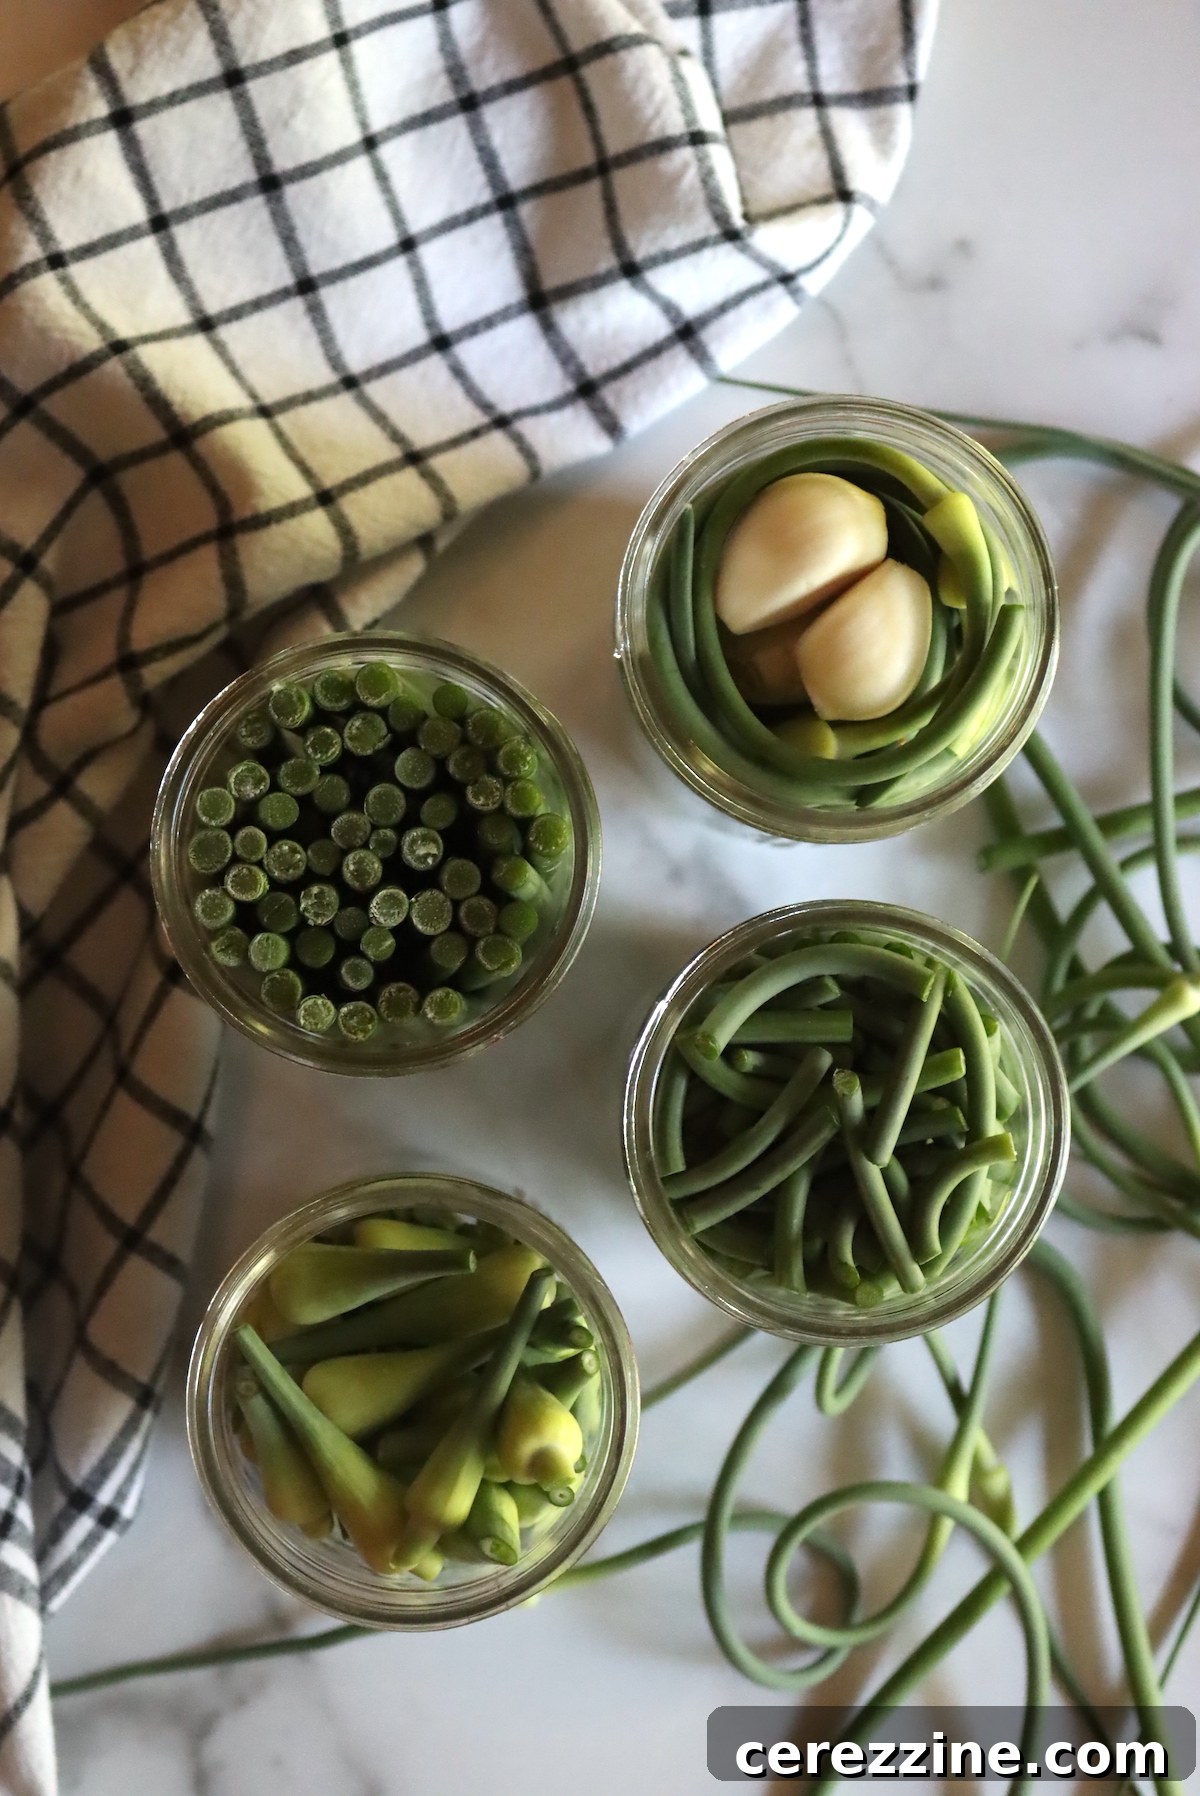
Preparing Garlic Scapes for Pickling: Creative Cuts and Shapes
The way you prepare your garlic scapes before pickling can influence both their presentation and ease of use. Here are a few popular methods:
Small Pieces: The Practical Approach
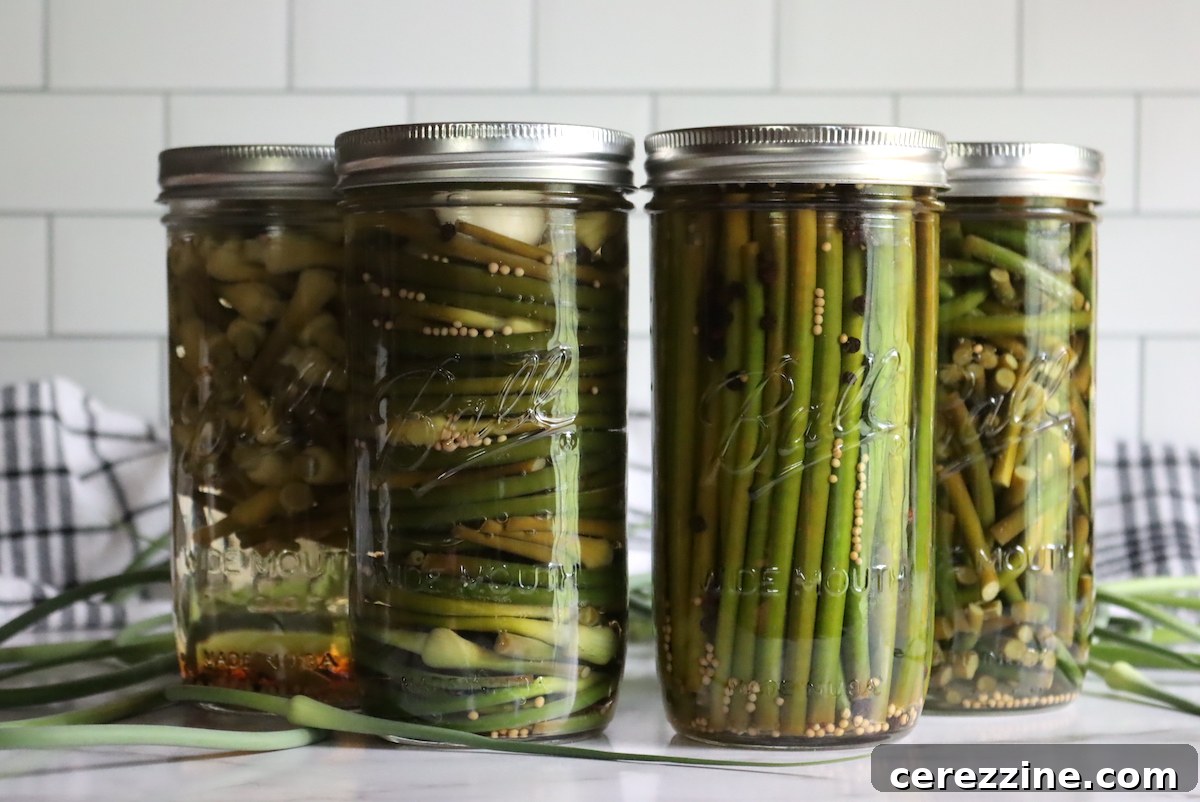
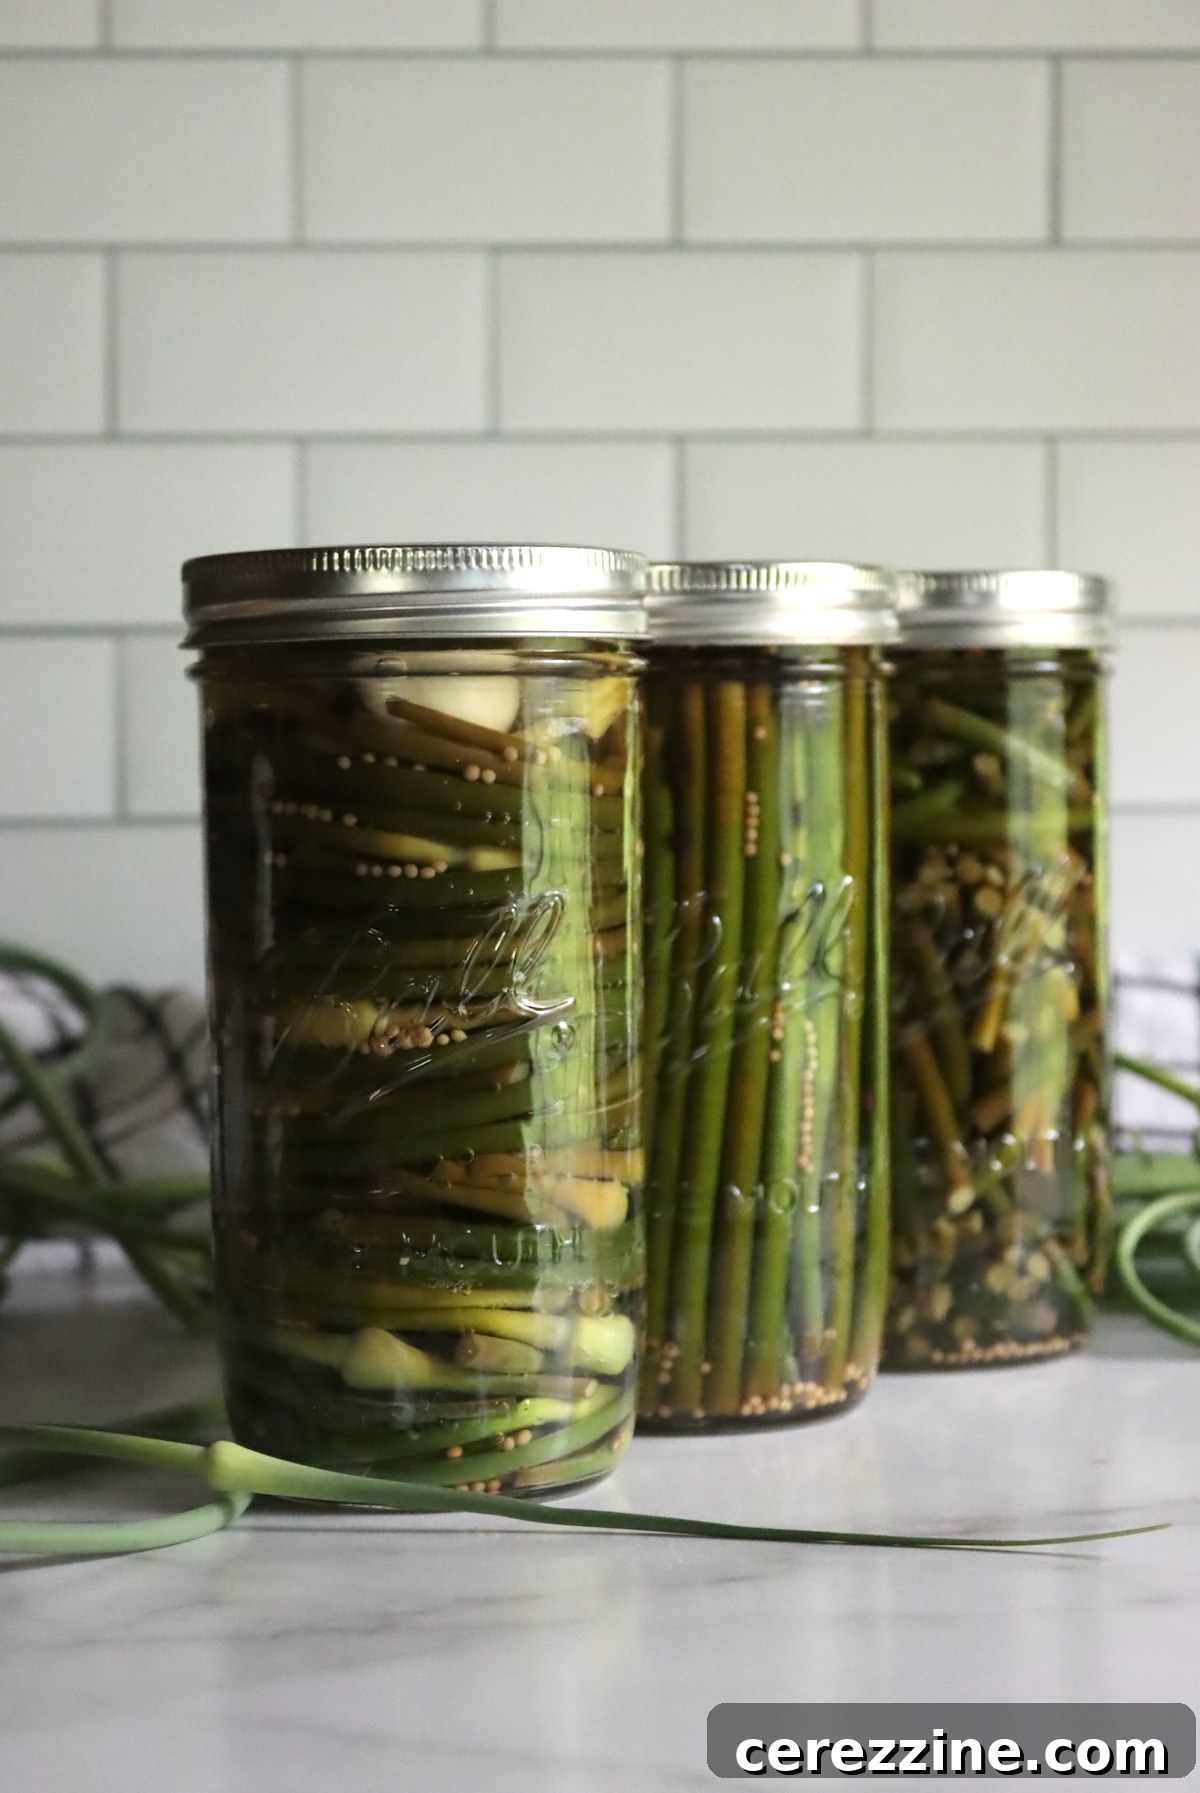
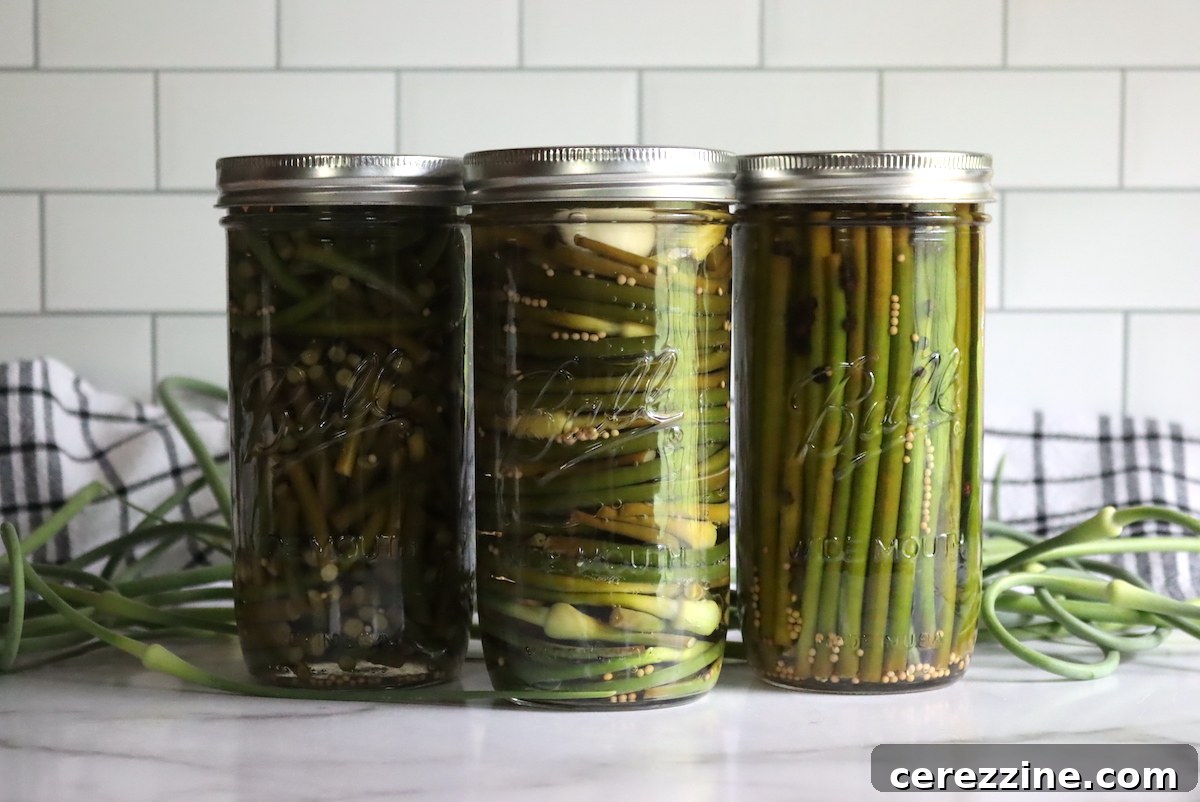
Undoubtedly the simplest and most efficient method is to cut the scapes into short segments, typically ranging from 1 to 3 inches long. The ideal length depends on your intended use for the finished pickles. These shorter pieces pack quickly and efficiently into jars, and their initial curled or straight shape matters very little. They are perfectly sized to accompany a sandwich or add to a salad. While they might not offer the most elaborate visual appeal in the jar, they are incredibly practical and ensure that a bumper crop of garlic scapes can be preserved with minimal effort.
Elegant Curls: For a Touch of Whimsy
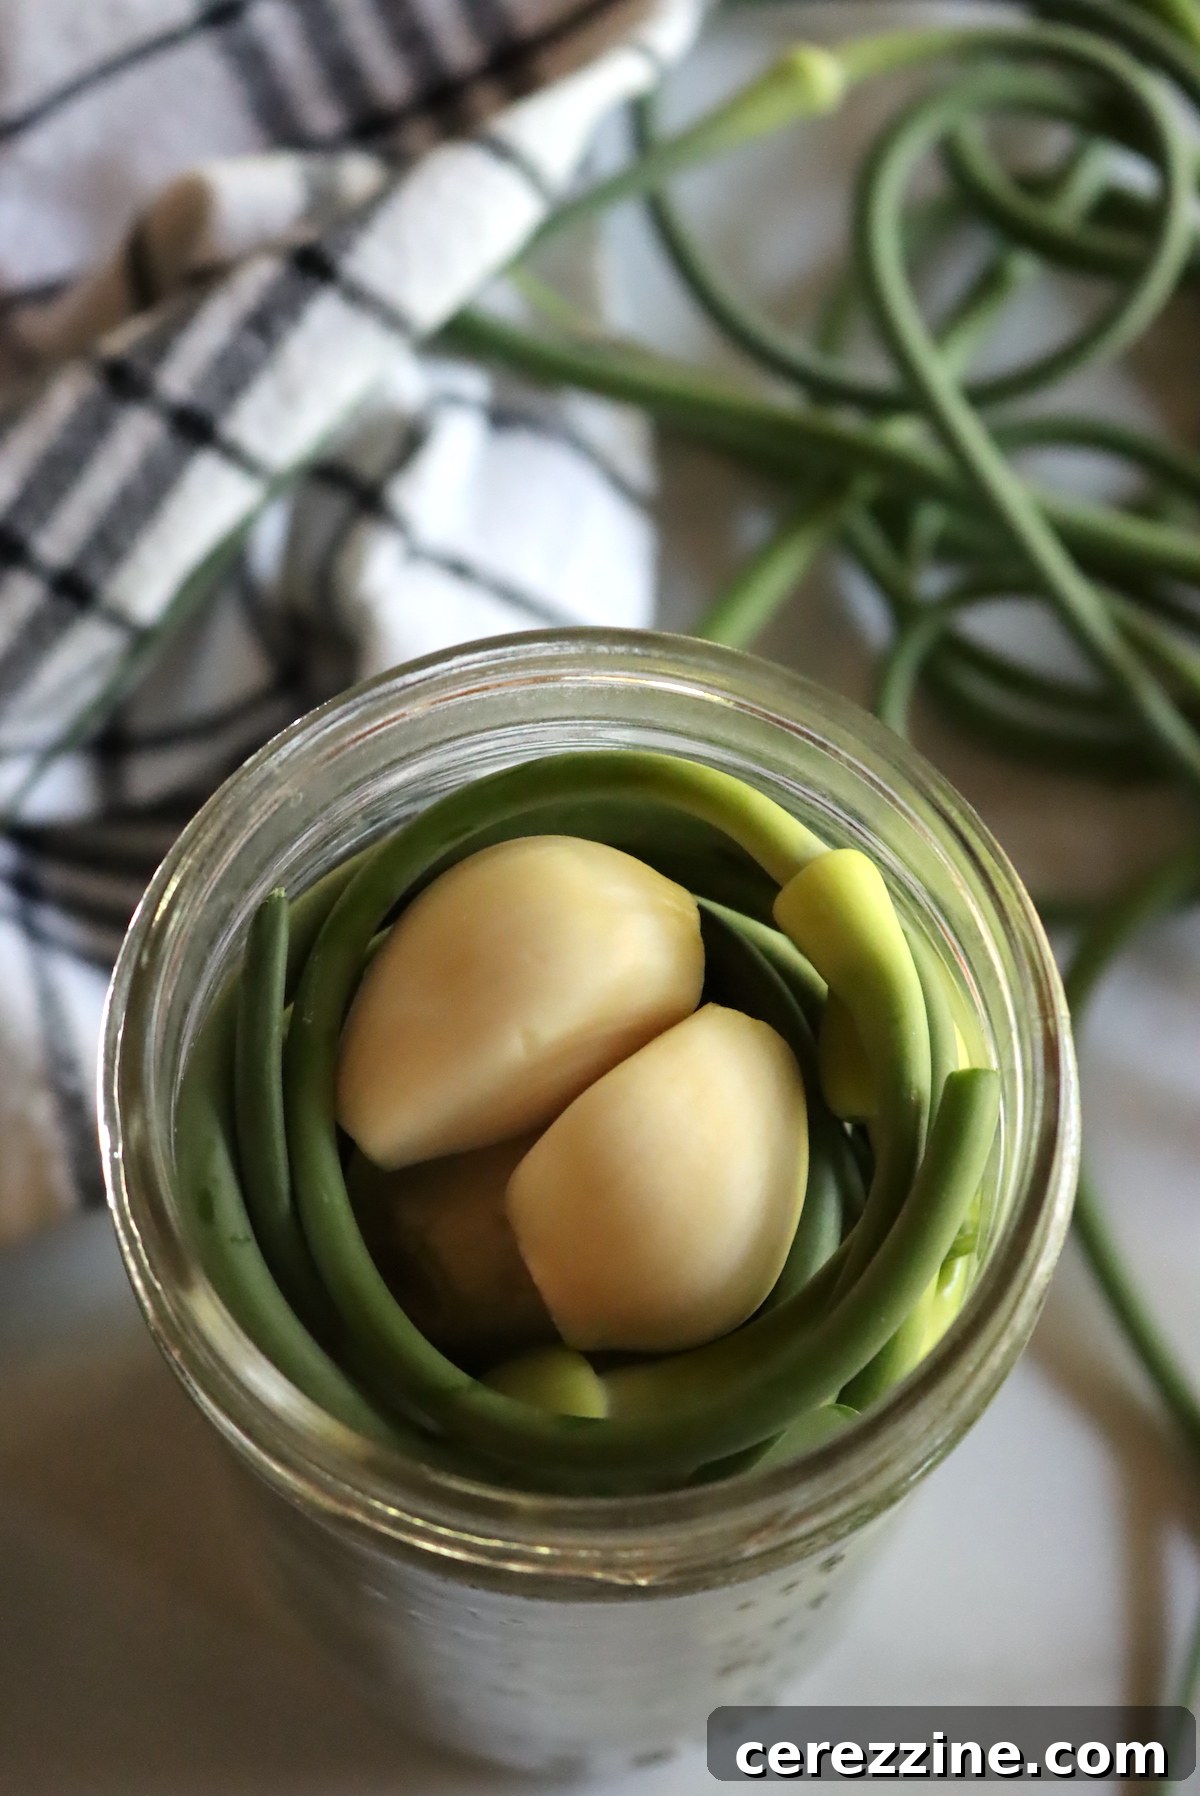
If you’re fortunate enough to have exceptionally curly garlic scapes, consider carefully winding them into attractive spirals within the jars. This method creates a visually striking presentation, both in the jar and when served. These curly-q pickles are particularly fun additions to charcuterie boards, truly showcasing the beauty of your preserved harvest. Filling the center of the jar can be a bit challenging with this method, but I often tuck a few whole garlic cloves into the gaps, which works wonderfully and adds extra flavor.
Straight Sticks: A Sophisticated Presentation
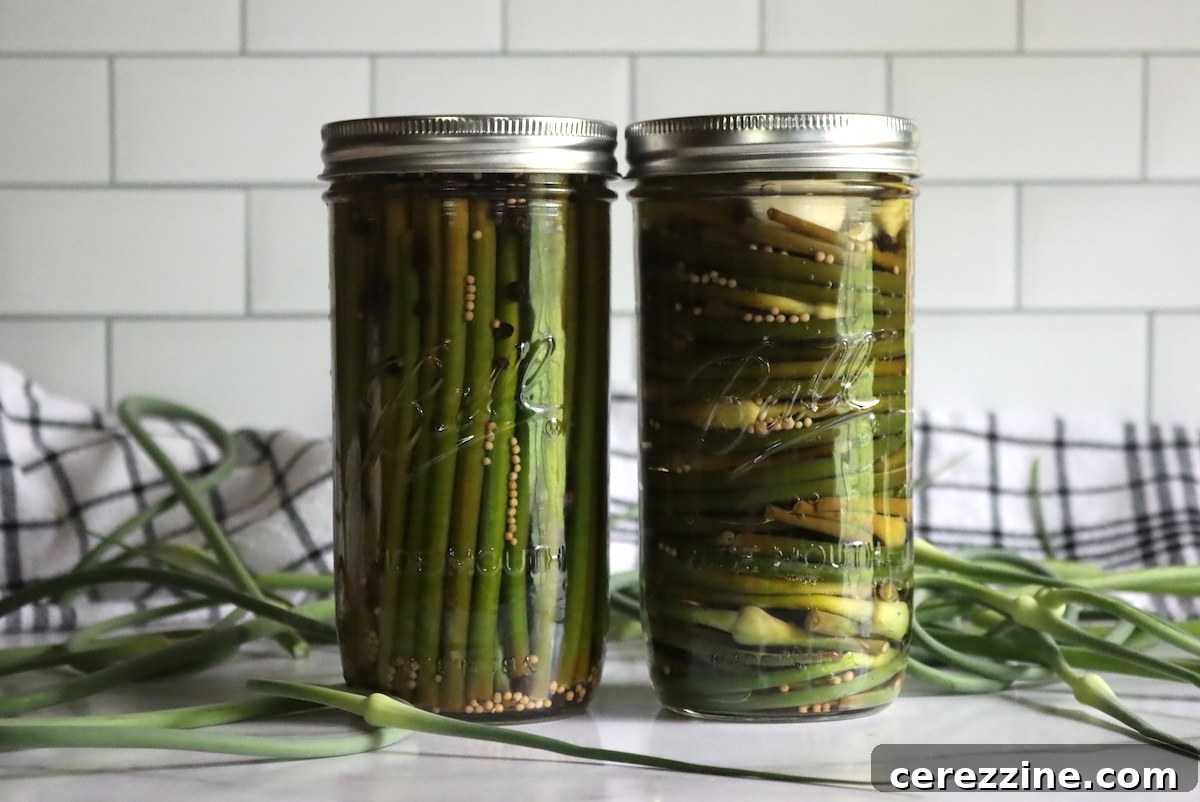
Given our abundant garlic harvest, I often allow some scapes to grow a bit longer and straighter, specifically to achieve longer, more uniform sections for pickling. When packed vertically, these straight sticks resemble pickled asparagus in appearance, but offer a unique, crisp, and robust garlic flavor. They make an impressive visual statement and are excellent for dipping or plating.
Flower Blossoms: A Culinary Delicacy
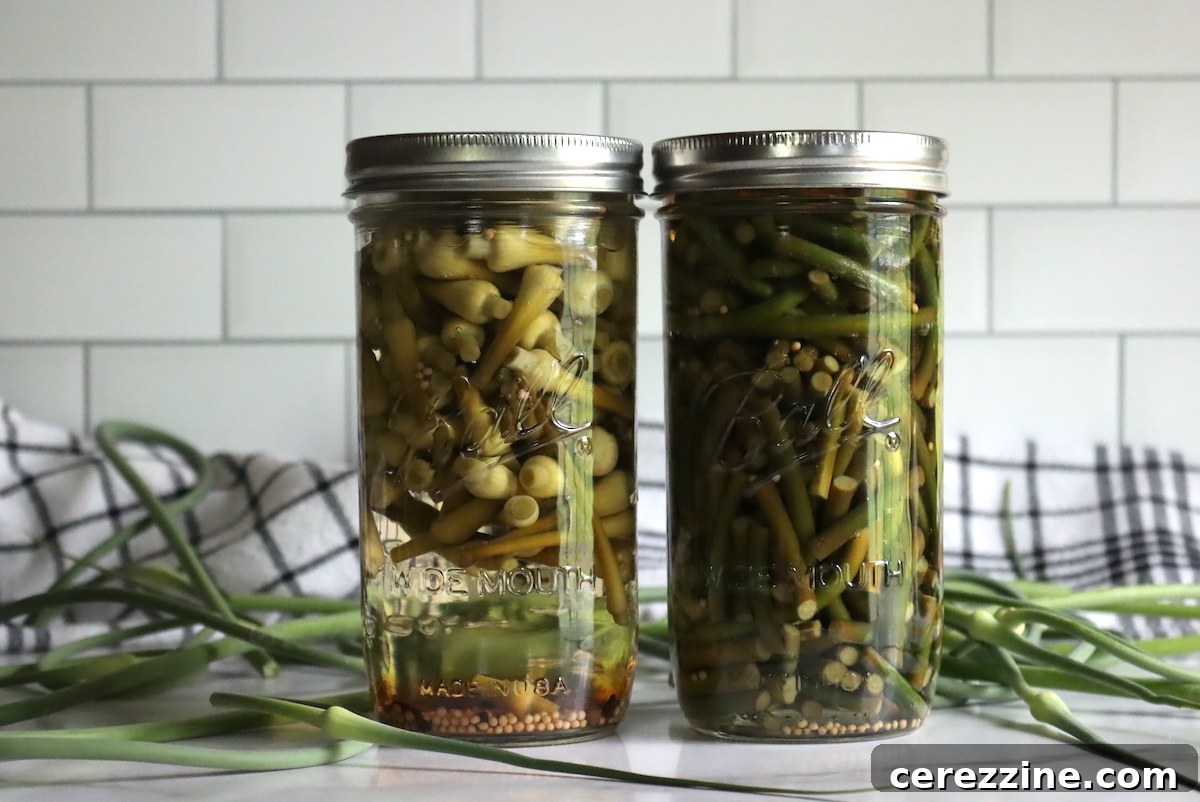
For a truly unique pickle, I sometimes separate the delicate flower blossom ends from the main scape stalks and pickle them in their own dedicated jar. These make, in my opinion, the most interesting and conversation-starting pickles, which I reserve for special occasions and gatherings. Pickled garlic flower buds are sure to intrigue and delight your guests. Of course, separating them is entirely optional; you can also simply leave them attached to the scapes and pickle them together. The choice of presentation is entirely yours. Elaborate spirals and long sticks look stunning in a jar but require more time and effort. Chopping them into simple, manageable chunks is by far the most practical approach for everyday enjoyment.
Even when opting for simplicity, I often separate the larger blossom buds from the stem segments because their textures differ, and I prefer to use them in varying culinary applications. Bear in mind that the flower buds contain more air and will shrink noticeably during the pickling process. No matter how tightly you pack them, there will likely be some empty space at the bottom of the jar, and the blossoms tend to float. However, if convenience is paramount, feel free to pickle them all together – the choice is always yours!
Crafting the Perfect Brine for Pickled Garlic Scapes
Regardless of the shape or cut you choose for your garlic scapes, the fundamental pickling process remains the same: prepare a simple, flavorful brine and pour it over the packed scapes in sterilized jars. I’ve provided four distinct brine variations below, all classic pickle recipes that complement garlic scapes beautifully. These recipes are versatile and can be used for either quick refrigerator pickles or for canning to achieve shelf-stable storage.
For each pint jar of pickled garlic scapes, you’ll generally need approximately 1/4 pound of scapes and a little over 1 cup of brine. Each of the brine recipes listed is scaled to accommodate 1/2 pound of garlic scapes, which typically equates to about 2 to 3 bunches from a farmer’s market, depending on their size. This quantity will yield two pints of delicious pickled garlic scapes. You can easily halve any of these recipes to make a single pint if you have fewer scapes, or scale them up if you have a larger harvest. It’s always a good practice to first pack your jars with the raw, prepared scapes; this way, you’ll have a more accurate estimate of the exact amount of brine you’ll need to prepare.
(Quick tip: If you find yourself slightly short on brine for the final jar, simply add a splash more vinegar to fill it. Do not use plain water, as this will dilute the acidity and compromise safety, especially for canning. Adding more vinegar is perfectly safe and won’t harm the pickles, but more water is not recommended. If your jars are well-packed, you should have ample brine, and perhaps even a little extra.)
Basic Pickled Garlic Scapes Brine
- 1 1/4 cups water
- 1 1/4 cups vinegar (white, apple cider, or any type standardized to 5% acidity)
- 1 1/2 Tbsp canning or pickling salt
- 1 Tbsp granulated sugar
- 2 tsp mustard seeds (approx. 1/2 tsp per pint jar)
- 2 tsp black peppercorns (approx. 1/2 tsp per pint jar)
Dill Pickled Garlic Scapes Brine
- 1 1/4 cups water
- 1 1/4 cups vinegar (white, apple cider, or any type standardized to 5% acidity)
- 2 Tbsp canning or pickling salt
- 2 tsp dill seeds (approx. 1/2 tsp per pint jar)
- 2 tsp black peppercorns (approx. 1/2 tsp per pint jar)
- A few fresh dill fronds (optional, for enhanced dill flavor)
Bread and Butter Pickled Garlic Scapes Brine
- 2 cups white vinegar
- 1 cup granulated sugar
- 1 Tbsp canning or pickling salt
- 2 Tbsp mustard seeds (approx. 1/2 Tbsp per pint jar)
- 1 tsp celery seed (approx. 1/4 tsp per pint jar)
- 1 tsp ground turmeric (approx. 1/4 tsp per pint jar, for color and earthy notes)
Spicy Pickled Garlic Scapes Brine
- 1 1/4 cups water
- 1 1/4 cups vinegar (white, apple cider, or any type standardized to 5% acidity)
- 1 Tbsp canning salt
- 1 Tbsp granulated sugar
- 2 to 4 tsp red pepper flakes (approx. 1-2 tsp added to each pint jar, adjust to your preferred spice level)
- 4 tsp black peppercorns (approx. 1 tsp added to each pint jar)
Each of these brine recipes provides enough liquid to pickle roughly 1/2 pound of garlic scapes, resulting in about two pint jars of pickles. The final yield can vary slightly based on how densely you pack the scapes and the specific cut you’ve chosen, as some shapes allow for tighter packing than others. Should you have a bit of empty space in your jars or fewer scapes than anticipated, feel free to add other vegetables to fill the void. Whole garlic cloves or thinly sliced onion are excellent choices, as they pickle wonderfully alongside garlic scapes. Both are suitable for canning or refrigerator pickles, provided you adhere to the brine acidity (at least 50% vinegar standardized to 5% acidity) specified in these tested recipes.
Begin by meticulously packing your prepared garlic scapes into clean jars. Next, add the dry spices relevant to your chosen brine variation. In a saucepan, combine the liquid brine ingredients (water, vinegar, salt, and sugar) and bring the mixture to a rolling boil on the stovetop. Carefully pour the hot, boiling brine over the packed scapes and spices in each jar. At this point, you can either transfer the jars to the refrigerator for quick pickles or proceed with the detailed canning instructions below for shelf-stable preservation.
Canning Pickled Garlic Scapes for Long-Term Storage
Water bath canning pickled garlic scapes is an optional step. These pickles are perfectly delicious and safe when made as quick refrigerator pickles, which will keep well in your fridge for at least a month without any canning required. However, for those of us who preserve a significant quantity of garlic scapes annually, refrigerator space can quickly become a limiting factor. Canning allows us to enjoy these delightful pickles year-round, stored conveniently at room temperature on our pantry shelves.
The instructions for canning garlic scapes are consistent with the general guidelines for water bath canning any high-acid pickle. If you are new to canning, I strongly recommend consulting a reliable beginner’s guide to water bath canning before you begin to ensure safety and success.
- Prepare Your Canner: Start by preparing your water bath canner. Fill it with enough water to cover your jars by at least 1 inch, place it on the stove, and bring it to a simmer (around 180°F or 82°C). Keep your jars warm in the canner or hot water.
- Pack the Jars: Pack the raw, prepared garlic scapes tightly into clean, hot pint jars, leaving 1/2 inch of headspace from the rim. Distribute your chosen dry spices evenly among the jars.
- Prepare the Brine: In a saucepan, combine the liquid brine ingredients (water, vinegar, sugar, and salt). Bring this mixture to a rolling boil, stirring until the sugar and salt are completely dissolved.
- Fill the Jars: Carefully pour the boiling hot brine over the scapes and spices in each jar, ensuring that the scapes are fully submerged and maintaining 1/2 inch of headspace.
- Seal the Jars: Remove any air bubbles by gently tapping the jars or using a non-metallic utensil. Wipe the jar rims meticulously with a clean, damp cloth to remove any food residue. Center new, clean lids on the jars, and apply screw bands until fingertip tight.
- Process in Canner: Carefully place the filled jars into your preheated water bath canner. Ensure the jars are covered by at least 1 inch of water. Bring the water to a full, rolling boil. Once boiling vigorously, begin your processing time. Process pint jars for 10 minutes. If you reside at an elevation above 6,000 feet, increase the processing time to 15 minutes.
- Cool and Check Seals: After the processing time is complete, turn off the heat and allow the jars to remain in the canner for an additional 5 minutes. Carefully remove the jars from the canner and place them on a towel-lined surface, ensuring they are not touching each other, to cool undisturbed for 12-24 hours. After cooling, check all seals. Lids should be concave and should not flex when pressed. Any jars that have not sealed properly should be refrigerated and consumed within a month. Properly sealed jars can be stored in a cool, dark place for up to 12 months, though quality is best within the first year. Refrigerate all jars after opening.
Pickled Garlic Scapes Recipe
Pickled garlic scapes are a delightful way to preserve the unique flavor and crisp texture of this seasonal spring vegetable. Enjoy them straight from the jar, as a side with sandwiches, or as a vibrant addition to charcuterie boards.
- Prep Time: 15 minutes
- Cook Time: 5 minutes
- Canning Time (Optional): 10-15 minutes
- Yields: 2 pints (approx. 16 servings)
- Author: Ashley Adamant
Equipment
- Water Bath Canner (optional for shelf-stable pickles)
- Pint jars with new lids and bands
- Large saucepan
- Funnel (optional, for pouring brine)
- Jar lifter, headspace tool, and bubble remover (for canning)
Ingredients
For Garlic Scapes:
- 1/2 lb fresh garlic scapes (about 2 to 3 farmer’s market bunches), washed and trimmed
Basic Pickled Garlic Scapes Brine (Yields approx. 2 pints):
- 1 1/4 cups water
- 1 1/4 cups vinegar (white, apple cider, or any 5% acidity)
- 1 1/2 Tbsp canning or pickling salt
- 1 Tbsp granulated sugar
- 2 tsp mustard seeds (1/2 tsp per pint jar)
- 2 tsp black peppercorns (1/2 tsp per pint jar)
Dill Pickled Garlic Scapes Brine (Yields approx. 2 pints):
- 1 1/4 cups water
- 1 1/4 cups vinegar (white, apple cider, or any 5% acidity)
- 2 Tbsp canning or pickling salt
- 2 tsp dill seeds (1/2 tsp per pint jar)
- 2 tsp black peppercorns (1/2 tsp per pint jar)
- A few fresh dill fronds (optional)
Bread and Butter Pickled Garlic Scapes Brine (Yields approx. 2 pints):
- 2 cups white vinegar
- 1 cup granulated sugar
- 1 Tbsp canning or pickling salt
- 2 Tbsp mustard seeds (1/2 Tbsp per pint jar)
- 1 tsp celery seed (1/4 tsp per pint jar)
- 1 tsp ground turmeric (1/4 tsp per pint jar)
Spicy Pickled Garlic Scapes Brine (Yields approx. 2 pints):
- 1 1/4 cups water
- 1 1/4 cups vinegar (white, apple cider, or any 5% acidity)
- 1 Tbsp canning salt
- 1 Tbsp granulated sugar
- 2 to 4 tsp red pepper flakes (1-2 tsp added to each pint jar, adjust to taste)
- 4 tsp black peppercorns (1 tsp added to each pint jar)
Instructions
- First, choose your preferred brine recipe from the list above. Each recipe is designed to yield enough brine for approximately 2 pint jars, which will pickle about 1/2 pound of scapes (roughly 1/4 pound per pint).
- Prepare your garlic scapes by washing them thoroughly and trimming any tough ends. Cut them into your desired shapes: short segments (1-3 inches), curled pieces, long straight sticks, or separate the blossom ends. Pack the prepared scapes tightly into clean, sterilized pint jars, leaving 1/2 inch of headspace at the top of each jar.
- Distribute the dry spices (and fresh dill fronds, if using) evenly among the packed jars.
- If you plan to water bath can these pickles for shelf-stable storage, prepare your water bath canner by filling it with water and bringing it to a simmer (around 180°F / 82°C). Keep your empty jars warm until ready to fill.
- In a large saucepan, combine all the liquid brine ingredients (water, vinegar, salt, and sugar for your chosen variation). Bring the mixture to a rolling boil, stirring occasionally until the salt and sugar are completely dissolved.
- Carefully pour the hot, boiling brine over the garlic scapes and spices in each jar. Ensure that the scapes are fully submerged and maintain 1/2 inch of headspace. Use a bubble remover to remove any trapped air bubbles, then adjust headspace if necessary by adding more brine.
- Wipe the jar rims clean with a damp cloth, center new lids on top, and secure with screw bands until fingertip tight.
- For Refrigerator Pickles: Allow the jars to cool completely to room temperature on your countertop. Once cooled, transfer them to the refrigerator. These pickles need at least 2 days for the flavors to fully develop before enjoying them. They will remain fresh and delicious in the refrigerator for at least one month, or often longer.
- For Water Bath Canned (Shelf-Stable) Pickles: Carefully place the filled, sealed jars into the prepared water bath canner, ensuring they are fully covered by at least 1 inch of water. Bring the water to a full, rolling boil. Once boiling vigorously, process pint jars for 10 minutes. If you are at an elevation above 6,000 feet, increase processing time to 15 minutes. After processing, turn off the heat and let the jars sit in the canner for 5 minutes before carefully removing them. Place the hot jars on a towel-lined surface to cool completely for 12-24 hours. Check for proper seals (lids should be concave and not flex when pressed). Any unsealed jars should be stored in the refrigerator for immediate use. Properly canned and sealed jars of garlic scape pickles will maintain peak quality on the pantry shelf for about 12 months, and will be safe to eat as long as they remain properly sealed. Refrigerate after opening.
Notes
- This guide provides four distinct brine variations. Simply choose the one that appeals most to your taste buds. Each brine recipe yields enough for approximately two pint jars of pickles.
- You can easily adjust the recipe by halving it if you only have enough scapes to pack a single pint jar, or increase the recipe proportionally for larger batches. It’s always a good idea to pack your jars with scapes first to get an accurate estimate of how much brine you’ll need. A well-packed pint jar typically requires a little over 1 cup of brine.
- Don’t hesitate to get creative! If you have extra space in your jars or don’t have quite enough scapes to fill them, consider adding other canning-approved vegetables like whole garlic cloves or thinly sliced onions, as they pickle beautifully with garlic scapes. For refrigerator pickles, you have even more freedom to experiment with various vegetables.
Nutrition Information (Approximate per serving, based on Basic Recipe)
Calories: 121kcal | Carbohydrates: 23g | Protein: 2g | Fat: 1g | Saturated Fat: 0.1g | Polyunsaturated Fat: 0.3g | Monounsaturated Fat: 1g | Sodium: 2066mg | Potassium: 74mg | Fiber: 2g | Sugar: 15g | Vitamin A: 197IU | Vitamin C: 6mg | Calcium: 74mg | Iron: 1mg
Nutrition information is automatically calculated and should only be used as an approximation.
Beyond Pickles: More Delicious Garlic Scape Recipes
Eager to explore more ways to enjoy your abundant garlic scape harvest? These recipes offer fantastic culinary alternatives:
- Garlic Scape Tempura
- Garlic Scape Pesto
- Garlic Scape Hummus
- Garlic Scape Compound Butter
Explore More Pickling Adventures
If you’ve enjoyed the art of pickling garlic scapes, delve into more simple and satisfying pickling recipes to fill your pantry:
- Pickled Corn Salad
- Pickled Three Bean Salad
- Pickled Green Tomatoes
- Pickled Green Beans (Dilly Beans)
- Pickled Jalapenos
- Pickled Fiddleheads