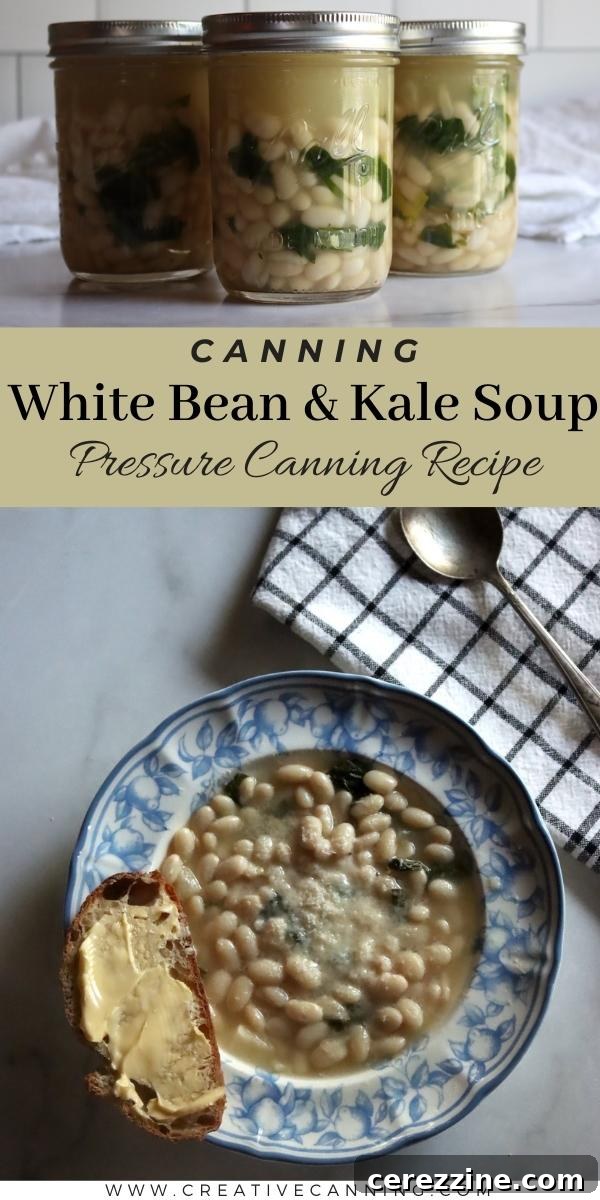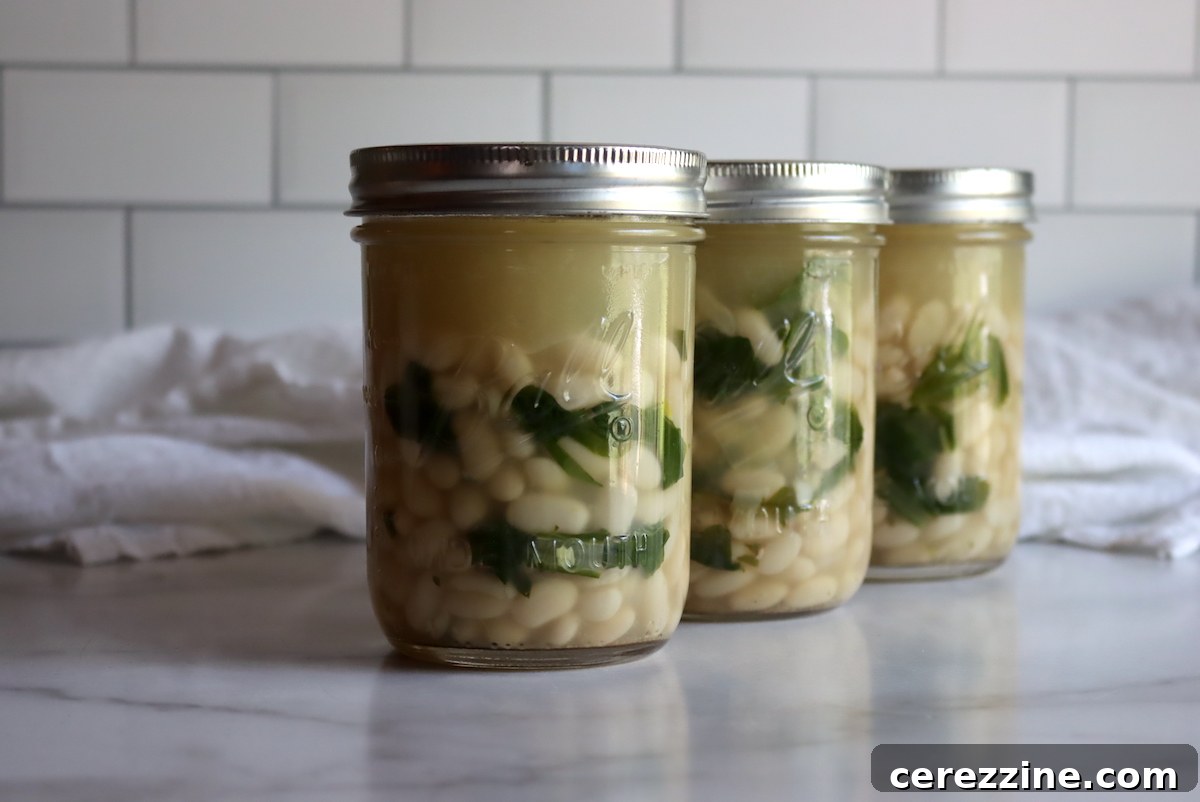
White bean and kale soup is a vegetarian classic, and it’s perfectly suited for home canning, offering a nutritious and incredibly convenient meal solution.
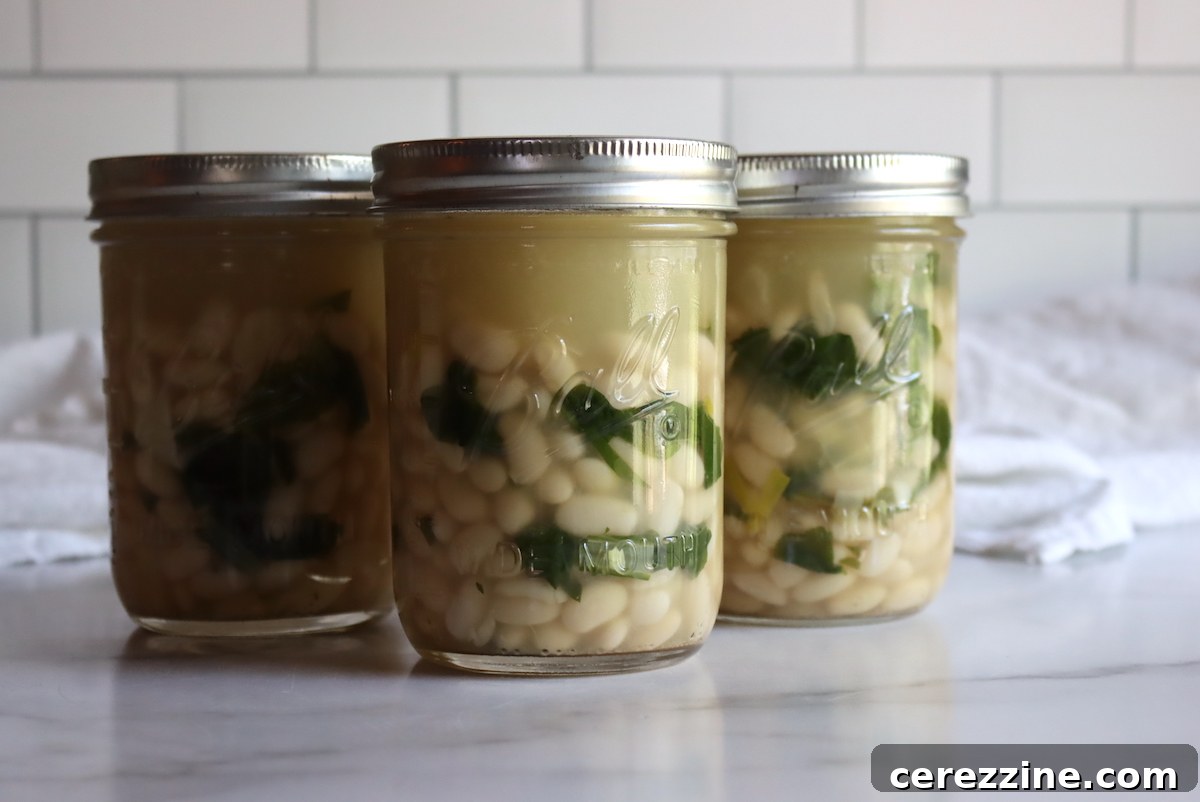
Mastering Home Canning: Delicious White Bean and Kale Soup for Your Pantry
There’s immense satisfaction in enjoying a warm, hearty bowl of homemade soup, especially when the weather turns chilly. However, preparing wholesome meals from scratch, particularly those involving dried beans, can often be a time-consuming affair. This is where the magic of pressure canning transforms your kitchen routine, allowing you to stock your pantry with delicious, ready-to-eat meals.
Imagine the convenience: a busy weeknight arrives, and instead of scrambling for dinner ideas or resorting to unhealthy takeout, you simply reach for a jar of expertly preserved White Bean and Kale Soup. With just a little bit of upfront effort, you can ensure your family has access to nourishing, homemade food whenever hunger strikes. This recipe is specifically designed as a vegetarian soup canning recipe, packed with plant-based goodness. However, its versatile nature means you can easily adapt it by adding sausage, chicken, or other meats if you prefer, transforming it into a hearty meat-lover’s delight.
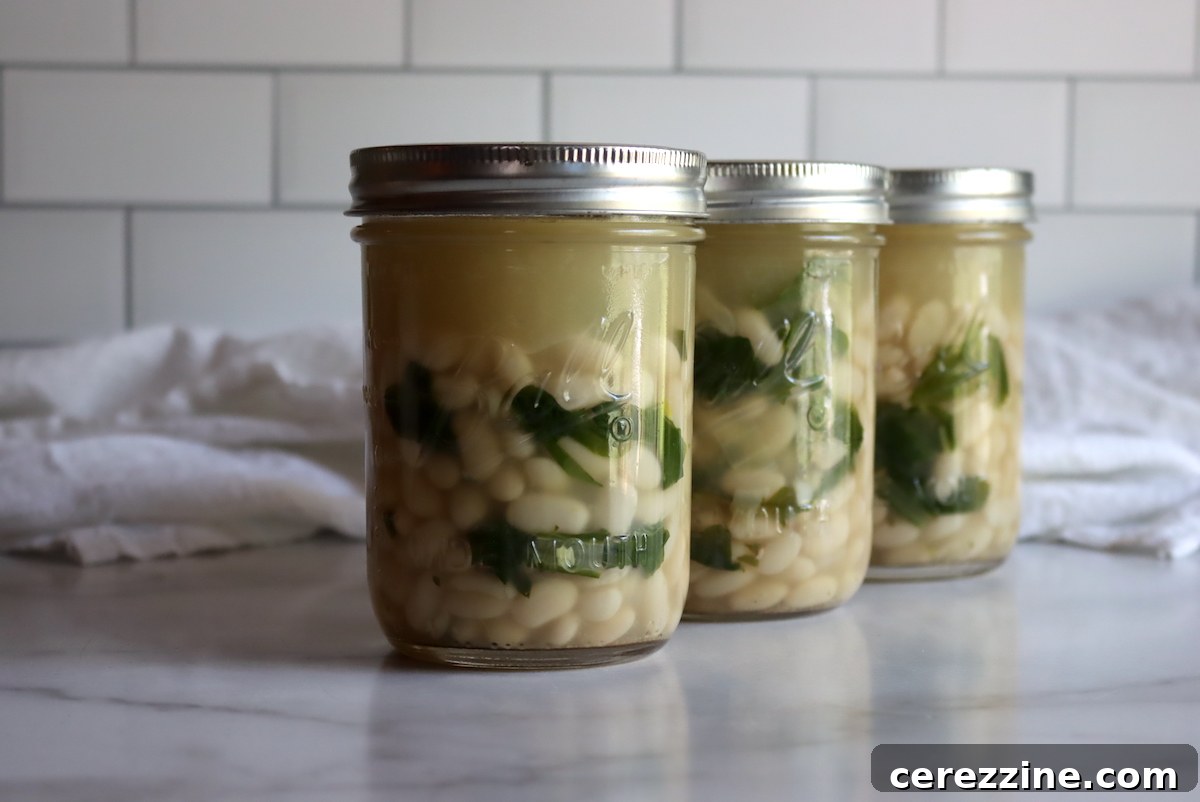
It’s crucial to remember a vital safety guideline: when adding solids like beans, vegetables, or meat, ensure your jars are filled no more than halfway. This recipe, and its associated processing times, are meticulously tested based on the National Center for Home Food Preservation’s (NCHFP) comprehensive guidance for brothy soups. This safety standard mandates a half-solids, half-broth ratio in each jar for safe and effective pressure canning, allowing for proper heat penetration during processing.
Why You’ll Adore This Easy Canned White Bean and Kale Soup Recipe!

This particular White Bean and Kale Soup isn’t just another recipe; it’s a game-changer for your pantry management and a true ally for healthy living. It’s the kind of wholesome, comforting meal you’ll be genuinely thrilled to have on hand during the depths of winter, an unexpected cold snap, or any time you need a quick, satisfying dinner. Its robust flavor and hearty texture make it incredibly fulfilling, yet it remains light enough that you don’t need to plan an elaborate side dish. When a demanding day stretches long, simply grab a jar, gently warm it, and a delicious, nutritious dinner is effortlessly served, saving you precious time and effort.
Beyond its convenience, I adore the incredible flexibility of this homemade canned soup. It embraces whatever fresh greens your garden or local market offers. If vibrant kale is in abundance, it’s perfect. If you have a bounty of chard or other leafy greens like spinach or collards, they integrate beautifully, allowing you to utilize seasonal produce. This is a reliable pressure-canned soup that consistently delivers a deep, simmered-all-afternoon flavor, even when you’re just reheating it on a busy night. For those moments you desire a touch of indulgence, a splash of cream, a generous sprinkle of Parmesan cheese, or a spoonful of vibrant pesto can elevate it further. But truthfully, it’s absolutely fantastic straight from the jar, requiring no embellishments to be a star.
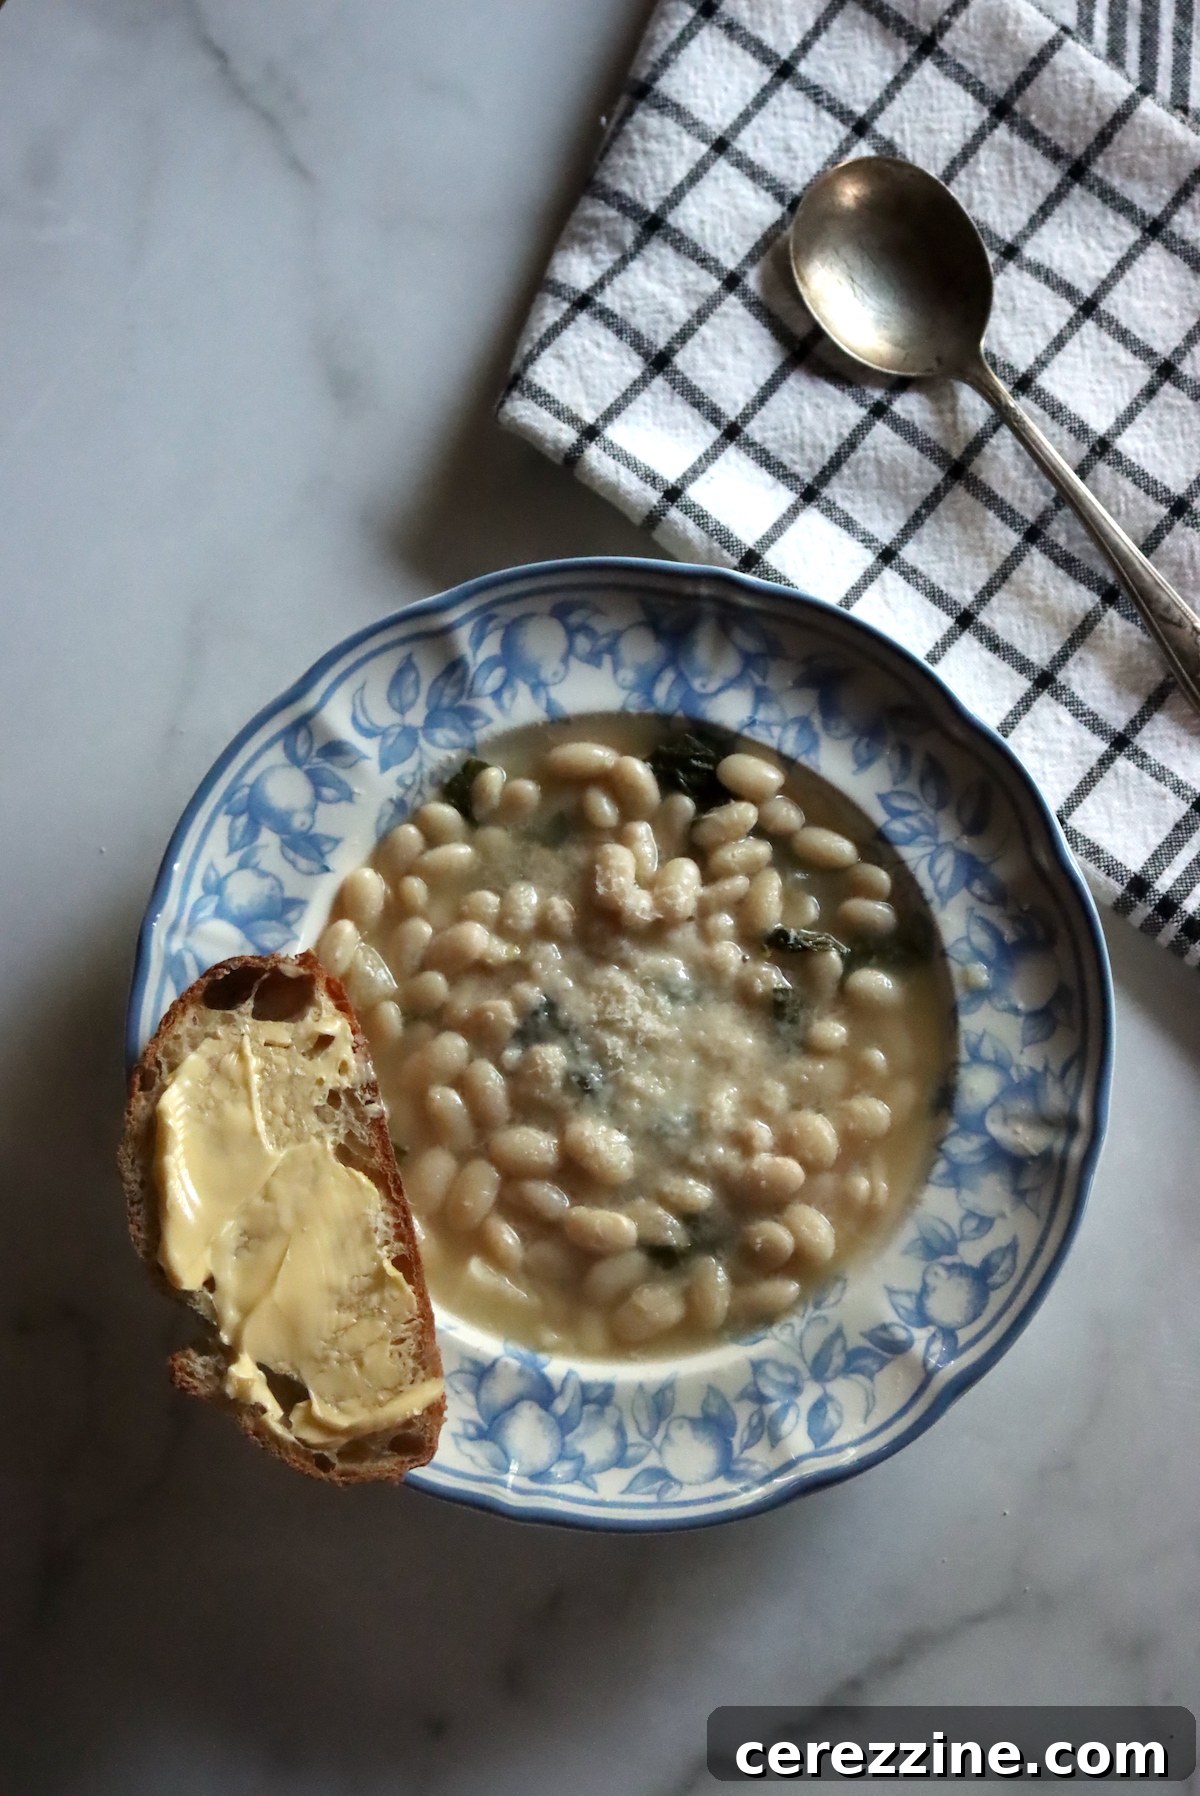
White Bean and Kale Soup: Recipe At a Glance
Before diving into the detailed instructions, here’s a concise overview of what makes this vegetarian canned soup a pantry essential:
- Recipe Name: Hearty White Bean and Kale Soup
- Recipe Type: Soup Canning Recipe, Vegetarian-Friendly
- Canning Method: Pressure Canning
- Preparation Time: Approximately 30 minutes active prep, plus essential bean soaking time (8-12 hours or 1 hour quick soak).
- Canning Processing Time: 60 minutes for Pint Jars, 75 minutes for Quart Jars.
- Yield: Approximately 7 pint jars (or 3-4 quart jars), providing multiple ready-to-eat meals.
- Recommended Jar Sizes: Pint or Quart.
- Headspace Requirement: 1 inch, absolutely critical for safe sealing and preventing siphoning.
- Key Ingredients: Great Northern Beans (or other white beans), Fresh Onions, Nutritious Kale (or other compatible greens), Flavorful Broth (vegetable or chicken), aromatic Garlic, and selected Spices.
- Official Safe Canning Source: This recipe strictly adheres to the NCHFP Brothy Soup Canning Guidelines, ensuring maximum safety and quality for your preserved goods.
- Difficulty Level: Moderate. The most critical steps involve properly rehydrating the beans (by soaking or pre-cooking) and strictly adhering to the “no more than halfway with solids” rule, as processing times are meticulously calibrated for brothy soups. Patience and precision are key!
- Similar Recipes You Might Enjoy: The pressure canning methodology for this soup is highly transferable to other delicious brothy bean soups, allowing for diverse pantry stocking. Consider trying Taco Soup, Butternut Squash and White Bean Soup, Chipotle Black Bean Soup, and Cuban Black Bean Soup.
Essential Ingredients for Your Homemade White Bean and Kale Soup Canning Project
Crafting this flavorful and nourishing canned vegetarian soup starts with simple, wholesome ingredients. This particular recipe for Canning White Bean and Greens Soup draws inspiration from Pressure Canning for Beginners and Beyond by Angi Schneider, which I consider a highly recommended resource for any home canner. I find this recipe to be an absolute favorite, often substituting seasonal chard or other hardy greens for kale when they’re readily available from the garden or farmer’s market, highlighting its impressive adaptability.
To successfully prepare a full canner batch, yielding approximately 7 pint jars (or 3-4 quart jars), gather the following high-quality ingredients:
- 1 lb Great Northern Beans, or your preferred variety of dry white beans (such as cannellini or navy beans). It is crucial that these beans are uncooked but thoroughly pre-soaked to ensure proper rehydration and safe canning.
- 2 cups Onions, finely diced. Onions provide a foundational aromatic depth and a subtle sweetness that is key to a well-rounded soup base.
- 6 cups Vegetable Broth, or chicken broth for a non-vegetarian option. A good quality, low-sodium broth is essential for a rich, flavorful soup.
- ½ lb Kale, Chard, or Other Greens, de-stemmed and roughly chopped. Fresh, vibrant greens are a cornerstone of this healthy soup, offering essential vitamins, minerals, and a delightful texture. Ensure they are well-washed.
- 4 cloves Garlic, freshly minced. Garlic adds a pungent, aromatic kick that complements the earthiness of the beans and greens beautifully.
- 1 Tbsp. White Wine Vinegar, or apple cider vinegar. This is an optional addition used purely for enhancing flavor and brightness, adding a subtle tang; it does not contribute to the preservation process and can be omitted if preferred.
- 1 Tbsp. Canning Salt. This type of salt is specifically recommended for canning as it’s free of anti-caking agents and iodine, which can cloud your canning liquid or affect the taste and color of your preserved food over time.
- ½ tsp. Black Pepper, freshly ground for the best, most aromatic flavor.
A Critical Pre-Step: Thoroughly Soaking Your Beans!
Do not skip this vital preliminary step! Proper bean rehydration is paramount for safe and successful pressure canning. Dry beans can swell significantly and absorb liquid during processing. If not adequately soaked and pre-cooked, they can absorb liquid from your jars, leading to siphoning (liquid loss) and potentially under-processed food. You have two main methods for effective rehydration:
- Overnight Soak (Slow Method): Place the dry beans in a large bowl, cover them with plenty of cold water (at least 3 inches above the bean level), and let them soak for 8-12 hours, or conveniently overnight.
- Quick Soak Method: Place the dry beans in a large stockpot, cover them with water (again, ensuring ample coverage), bring to a rolling boil for 2 minutes, then immediately remove from heat, cover the pot tightly, and let them stand for 1 hour.
Whichever method you choose, ensure the beans are fully plumped and ready before proceeding with the rest of the recipe. For practical measurement, you will typically need about ¾ lb of unprepared onions and ¾ lb of kale or chard before any chopping or de-stemming, as these weights can reduce significantly during preparation.
“How delicious! I added a spoonful of homemade garlic scape pesto when I heated it up and oh my, so good! I’ll definitely make this again!”
– Heather
Step-by-Step Guide to Safely Canning White Bean and Kale Soup
Pressure canning this White Bean and Kale Soup is a straightforward process when you meticulously follow the recommended safety guidelines. Here’s a detailed walkthrough to help you preserve this delicious meal safely and effectively for your family’s pantry:
Phase 1: Preparation of Jars, Canner, and Beans
- Prepare Your Canning Equipment: Begin by thoroughly washing and sterilizing your seven 1-pint (or 3-4 quart) canning jars. Inspect each jar carefully for any chips, cracks, or imperfections, as these can prevent a proper seal. Set aside new canning lids and rings. Fill your pressure canner with the appropriate amount of water, typically 2-3 inches, strictly following your specific canner manufacturer’s instructions. Place the canner on your stovetop over low heat with the jars inside to keep them hot, ensuring the water temperature is around 180°F (82°C). This pre-heating is crucial for a hot-pack recipe like this, preventing thermal shock when hot food enters hot jars.
- Pre-Cook the Soaked Beans: After your beans have been thoroughly soaked (using either the overnight or quick soak method as described above), drain off the soaking water completely. Transfer the pre-soaked beans to a large stockpot and cover them generously with fresh water. Bring these beans to a rolling boil, then immediately remove them from the heat and drain the water once more. This crucial pre-cook step ensures the beans are fully rehydrated and helps prevent them from absorbing too much liquid from the jar during the canning process, minimizing siphoning (liquid loss) and ensuring proper density and safe preservation.
Phase 2: Combining Ingredients and Gentle Boiling
- Assemble the Soup Base: Return the drained, pre-cooked beans to the large stockpot. Add the vegetable (or chicken) broth, freshly minced garlic, finely diced onions, roughly chopped greens (kale or chard), canning salt, and freshly ground black pepper. If you are using it, add the white wine vinegar at this stage for an extra layer of flavor and brightness.
- Bring to a Gentle Boil: Bring the entire soup mixture to a full rolling boil over high heat, then immediately reduce the heat to a gentle boil and continue to cook for precisely five minutes. At this stage, it’s important to note that the beans and vegetables will not be fully cooked or tender. This is entirely intentional! They will continue to cook and tenderize within the jars during the extended pressure canning process. Resist the urge to cook them fully now, as overcooking at this stage can lead to a mushy texture in the final canned product.
Phase 3: Filling Jars and Pressure Processing
- Fill the Canning Jars with Solids: Carefully remove the stockpot from the heat. Using a slotted spoon, evenly distribute the solids (beans, onions, greens, garlic) among your hot, prepared canning jars. Each jar must be filled no more than halfway with solids. This is a critical safety instruction for brothy soup canning recipes and cannot be overstated. The processing times provided are specifically calibrated for soups with a higher liquid-to-solid ratio. Exceeding the halfway mark with solids can compromise heat penetration to the center of the jar, leading to unsafe preservation and potential spoilage.
- Add Broth and Adjust Headspace: Ladle the remaining hot broth over the solids in each jar, ensuring you leave precisely 1 inch of headspace. Headspace is the empty space between the food surface and the rim of the jar. It is essential for proper sealing, allowing for expansion during processing, and preventing siphoning.
- Remove Air Bubbles and Clean Rims: Utilize a bubble removal tool (a plastic knife or spatula works well) to gently release any trapped air bubbles from the jars. Run the tool along the inside perimeter of each jar. After removing bubbles, recheck the headspace; if it has decreased significantly, add more hot broth (or boiling water) to maintain the crucial 1-inch headspace. Carefully wipe the rims of each jar clean with a damp cloth to ensure a perfect seal. Any food residue on the rim can prevent the lid from sealing properly.
- Apply Lids and Rings: Place a clean, warm canning lid onto each jar, centering it. Then, screw on the canning bands (rings) fingertip tight – meaning snug enough to hold the lid in place, but not overtightened, which can hinder proper air venting.
- Load Canner and Process: Carefully load the prepared jars into your pressure canner. Secure the canner lid according to your model’s instructions. Bring the canner up to the required pressure (refer to the altitude adjustment table below) and maintain this pressure steadily for the entire processing duration: 60 minutes for pint jars and 75 minutes for quart jars. It’s vital to monitor the pressure carefully and adjust heat as needed to keep it consistent.
- Cool Down and Store: Once the processing time is complete, turn off the heat and allow the pressure canner to depressurize naturally. Do not attempt to force release the pressure, as this can cause liquid loss from jars and affect seals. Once the pressure gauge reads zero, wait an additional 10 minutes before carefully opening the canner. Remove the hot jars using a jar lifter and place them on a clean towel or cooling rack on your counter, ensuring there is sufficient space between each jar for proper air circulation. Let them cool undisturbed for 12 to 24 hours.
- Check Seals and Store: After the cooling period, check all jar seals. A properly sealed lid will be concave (curved inwards) and will not flex when pressed in the center. Remove the bands (rings) before storing, as leaving them on can trap moisture and promote rust. Label your jars with the contents and date of canning. Properly sealed and stored jars can be enjoyed for up to one year in a cool, dark, dry place away from direct sunlight.
Critical Altitude Adjustments for Pressure Canning Safety
While the actual processing time for canning this White Bean and Kale Soup remains constant regardless of your geographical altitude (60 minutes for pints, 75 minutes for quarts, as per the NCHFP guidance on brothy soups), the pressure required inside your canner must be precisely adjusted. Water boils at lower temperatures at higher elevations, necessitating increased pressure to reach the internal temperatures required for safe food preservation and to eliminate harmful bacteria like Clostridium botulinum.
It is absolutely critical to use the correct pressure for your specific altitude to ensure food safety and prevent spoilage. Please consult the following table to determine the precise processing pressure needed if you reside above 1,000 feet in elevation:
For Dial Gauge Pressure Canners:
- 0 to 2,000 feet in elevation – Maintain 11 lbs pressure
- 2,001 to 4,000 feet in elevation – Maintain 12 lbs pressure
- 4,001 to 6,000 feet in elevation – Maintain 13 lbs pressure
- 6,001 to 8,000 feet in elevation – Maintain 14 lbs pressure
For Weighted Gauge Pressure Canners:
- 0 to 1,000 feet in elevation – Maintain 10 lbs pressure
- Above 1,000 feet – Maintain 15 lbs pressure
Always double-check your canner’s specific instructions and consult reputable, updated sources like the NCHFP for the most accurate and current information regarding pressure canning safety. Never guess when it comes to canning!
Serving Your Homemade White Bean and Kale Soup from the Pantry
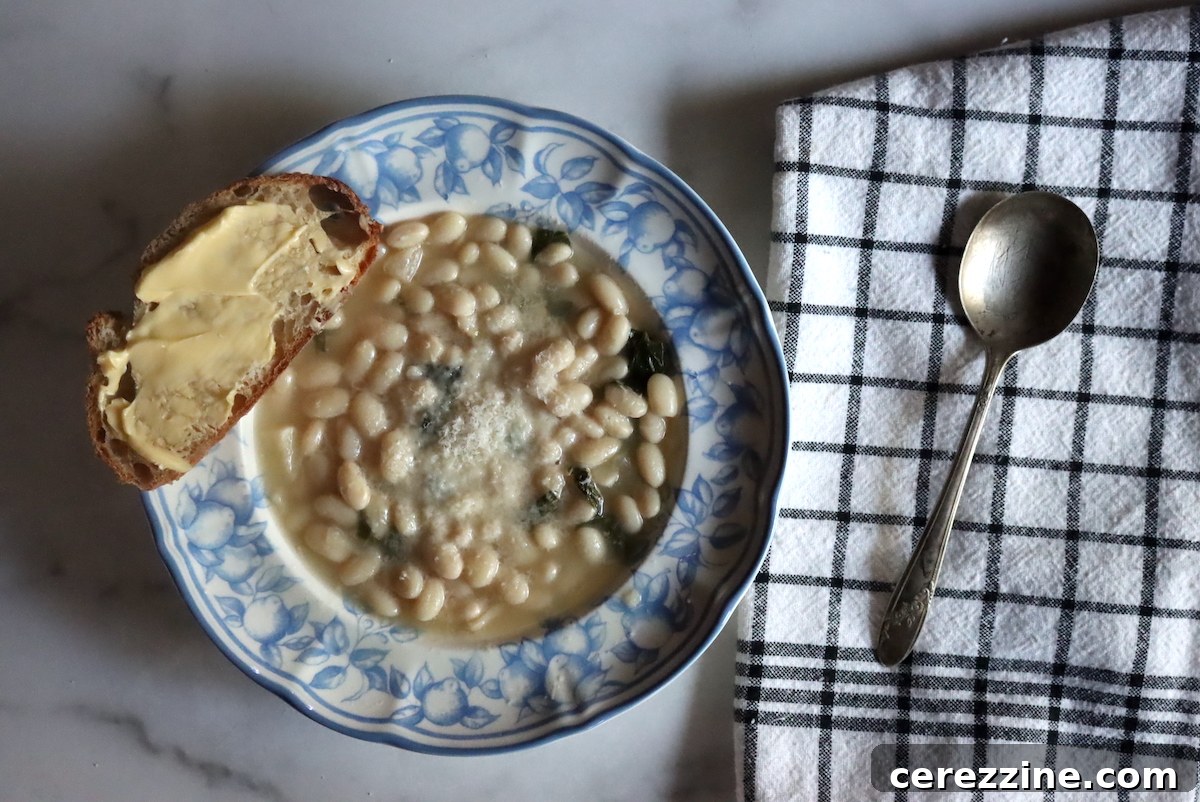
The beauty of having home-canned White Bean and Kale Soup readily available is its incredible convenience. It truly is a “heat and eat” meal, making it an ideal solution for those hectic evenings when cooking from scratch just isn’t feasible. Simply open a jar, pour the contents into a pot, gently heat until bubbling, and savor the comforting flavors of a nutritious homemade meal without the fuss.
However, if you wish to elevate the experience or add a little something extra to your meal, this versatile soup welcomes a variety of delicious additions. It’s a wonderful canvas for culinary creativity:
- Creamy Indulgence: For a richer, more luxurious texture, stir in a quarter cup of fresh heavy cream, half-and-half, or a dairy-free alternative like full-fat coconut milk (for an interesting flavor twist) just before serving. This adds a luscious, velvety mouthfeel.
- Cheesy Topping: A generous sprinkle of freshly grated Parmesan cheese, Pecorino Romano, or a sharp aged cheddar provides a delightful salty, savory finish that complements the soup beautifully. For a vegan option, nutritional yeast can offer a cheesy flavor.
- Herbaceous Freshness: Brighten the flavors with a dollop of vibrant pesto (as one reviewer suggested, garlic scape pesto sounds divine!) or a scattering of fresh chopped parsley, cilantro, or dill right before serving.
- Crunch and Texture: For added crunch and a satisfying contrast, consider topping your soup with homemade or quality store-bought croutons, a slice of toasted crusty bread, or even a handful of toasted pumpkin or sunflower seeds.
- A Touch of Spice: A dash of smoked paprika not only adds a beautiful depth of color but also imparts a subtle smoky flavor that perfectly complements the beans and greens. A pinch of red pepper flakes can add a gentle warmth.
- Complete Your Meal: To make it a truly satisfying and complete meal, serve your White Bean and Kale Soup alongside a simple green salad with a light vinaigrette, or with a slice of warm, artisanal bread for dipping.
Whichever way you choose to enjoy it, this homemade, pressure-canned White Bean and Kale Soup is sure to become a cherished and frequently enjoyed staple in your healthy, ready-to-go pantry.
Explore More Delicious Soup Canning Recipes
Canning Sausage Potato and Kale Soup (Copycat Zuppa Toscana)
Canning Taco Soup
Roasted Tomato Basil Soup
If you tried this White Bean and Greens Soup Canning Recipe, or any other recipe on Creative Canning, we encourage you to leave a ⭐ star rating and share your thoughts in the 📝 comments below!
And make sure you stay connected with us for more canning tips and recipes!
Rating: 5 out of 5 stars (based on 3 votes)
Servings: 7 Pint Servings
White Bean and Kale Soup Recipe Card
By: Ashley Adamant
White bean and kale soup is a hearty vegetarian comfort food classic, now easily preserved as a canning recipe for your pantry shelf, offering convenience and nutrition.
Prep Time: 1 hour 30 mins (includes bean soaking)
Cook Time: 30 mins
Canning Time: 1 hr (Pints) / 1 hr 15 mins (Quarts)
Total Time: Approximately 3 hrs (plus cooling time)
For detailed instructions, please refer to the comprehensive guide above.
Equipment Needed for Canning
- Pressure Canner
- 7 pint (or 3-4 quart) canning jars with new lids and bands (rings)
- Large stockpot
- Slotted spoon
- Jar lifter
- Bubble removal tool (or non-metallic spatula)
- Damp cloth for wiping jar rims
Ingredients for White Bean and Kale Soup
- 1 lb Great Northern Beans (or other dry white beans), pre-soaked (refer to detailed soaking instructions above)
- 2 cups Onions, peeled and diced (approximately ¾ lb unprepared)
- 6 cups Vegetable Broth (or chicken broth)
- ½ lb Kale, chard, or other greens, de-stemmed and chopped (approximately ¾ lb unprepared)
- 4 cloves Garlic, minced
- 1 tbsp White Wine Vinegar (or cider vinegar), optional, for flavor enhancement
- 1 Tbsp. Canning Salt (non-iodized, without anti-caking agents)
- ½ tsp Ground Black Pepper
Canning Instructions
- Pre-Soak Beans: Ensure beans are thoroughly soaked (overnight or quick soak method). This step is crucial for safe and proper rehydration.
- Prepare Equipment: Wash and sterilize 7 pint (or 3-4 quart) jars. Keep them hot in a pressure canner filled with water (as per manufacturer’s instructions) at approximately 180°F (82°C).
- Pre-Cook Beans: Drain soaked beans, cover with fresh water in a stockpot, bring to a boil, then drain again.
- Combine Soup Ingredients: Return pre-cooked beans to the stockpot. Add broth, garlic, onions, greens, salt, pepper, and vinegar (if using). Bring to a full boil, then reduce to a gentle boil and simmer for 5 minutes. Do not fully cook the vegetables.
- Fill Jars with Solids: Remove stockpot from heat. Using a slotted spoon, evenly distribute solids into hot jars, filling each jar no more than halfway.
- Add Broth & Headspace: Ladle hot broth over solids to fill jars, leaving 1 inch of headspace (space between food and rim).
- Remove Bubbles & Clean Rims: Use a bubble removal tool to release air bubbles. Recheck headspace and adjust if necessary. Wipe jar rims clean.
- Seal Jars: Place lids on jars and apply bands fingertip tight.
- Pressure Process: Load jars into the preheated pressure canner. Process pint jars for 60 minutes, or quart jars for 75 minutes. Adjust pressure according to your altitude (refer to the detailed altitude chart in the main article above).
- Cool Down: Once processing is complete, turn off heat and allow canner to depressurize naturally.
- Final Steps: Remove jars, cool undisturbed for 12-24 hours. Check seals (lids should be concave). Remove bands and store sealed, labeled jars in a cool, dark place for up to one year.
Important Notes for Canning
Altitude Adjustments for Canning Soup
Canning time remains constant, but processing pressure increases with elevation.
Use the following tables to determine the correct processing pressure if you’re above 1,000 feet in elevation.
For Dial Gauge Pressure Canners:
- 0 to 2,000 feet in elevation – 11 lbs pressure
- 2,001 to 4,000 feet in elevation – 12 lbs pressure
- 4,001 to 6,000 feet in elevation – 13 lbs pressure
- 6,001 to 8,000 feet in elevation – 14 lbs pressure
For Weighted Gauge Pressure Canners:
- 0 to 1,000 feet in elevation – 10 lbs pressure
- Above 1,000 feet – 15 lbs pressure
Nutrition Information (per serving)
Calories: 119kcal, Carbohydrates: 23g, Protein: 7g, Fat: 1g, Saturated Fat: 0.2g, Polyunsaturated Fat: 0.4g, Monounsaturated Fat: 0.1g, Sodium: 1645mg, Potassium: 443mg, Fiber: 7g, Sugar: 4g, Vitamin A: 3668IU, Vitamin C: 35mg, Calcium: 141mg, Iron: 2mg
Nutrition information is automatically calculated and should be used as an approximation.
Find Your Next Canning Adventure
Looking for another perfect recipe to fill your pantry? Use the search bar below to discover more delicious canning ideas and expand your home food preservation skills!
More Delightful Soup Canning Recipes for Your Pantry
The world of home-canned soups is vast and rewarding! Once you’ve mastered this White Bean and Kale Soup, consider exploring these other fantastic options to keep your pantry well-stocked with convenient, homemade meals:
- Sausage, Potato, and Kale Soup: A hearty and flavorful meal, perfect for colder days or a comforting family dinner.
- Carrot Soup: A naturally sweet and savory option, wonderful on its own or as a light side dish.
- Split Pea Soup: A classic comfort food, rich in protein and fiber, making it a truly satisfying meal.
- Chicken Soup: The ultimate soothing meal, excellent for wellness or just a simple, delicious and familiar dinner.
Bean Canning Recipes: Filling Your Pantry with Healthy Protein
Beans are an incredible source of plant-based protein and fiber, making them a cornerstone of a healthy, economical, and sustainable pantry. If you’re looking for more creative ways to preserve these versatile legumes, these recipes are a must-try for any home canner:
- Canning Dry Beans: Learn the fundamental, versatile process of canning various types of dry beans for use in countless recipes.
- Canning Vegetarian Baked Beans: A delicious, ready-to-eat side dish or light meal, perfect for barbecues, picnics, or quick lunches.
- Canning Butternut Squash and Dry Bean Soup: A wonderfully autumnal and creamy soup that combines the natural sweetness of squash with the heartiness of beans.
Convenient Meal-in-a-Jar Canning Recipes: Dinners Made Easy
The ultimate goal of home canning for many is the creation of complete “meals in a jar” – ready-made dinners that simplify busy lives and provide peace of mind. Here are a few more popular meal-in-a-jar canning recipes to inspire your next canning session and streamline your meal prep:
- Boston Baked Beans: A classic, slow-cooked favorite, perfect for hearty family meals or potlucks.
- Thai Curry Duck (or Chicken): Bring exotic and vibrant flavors to your table with this convenient and flavorful meal.
- White Bean Chicken Chili: A lighter, yet incredibly satisfying chili option, great for a quick and wholesome dinner.
- Cajun Red Beans and Sausage: A spicy and soulful dish that’s a true taste of Louisiana comfort food, ready in minutes.