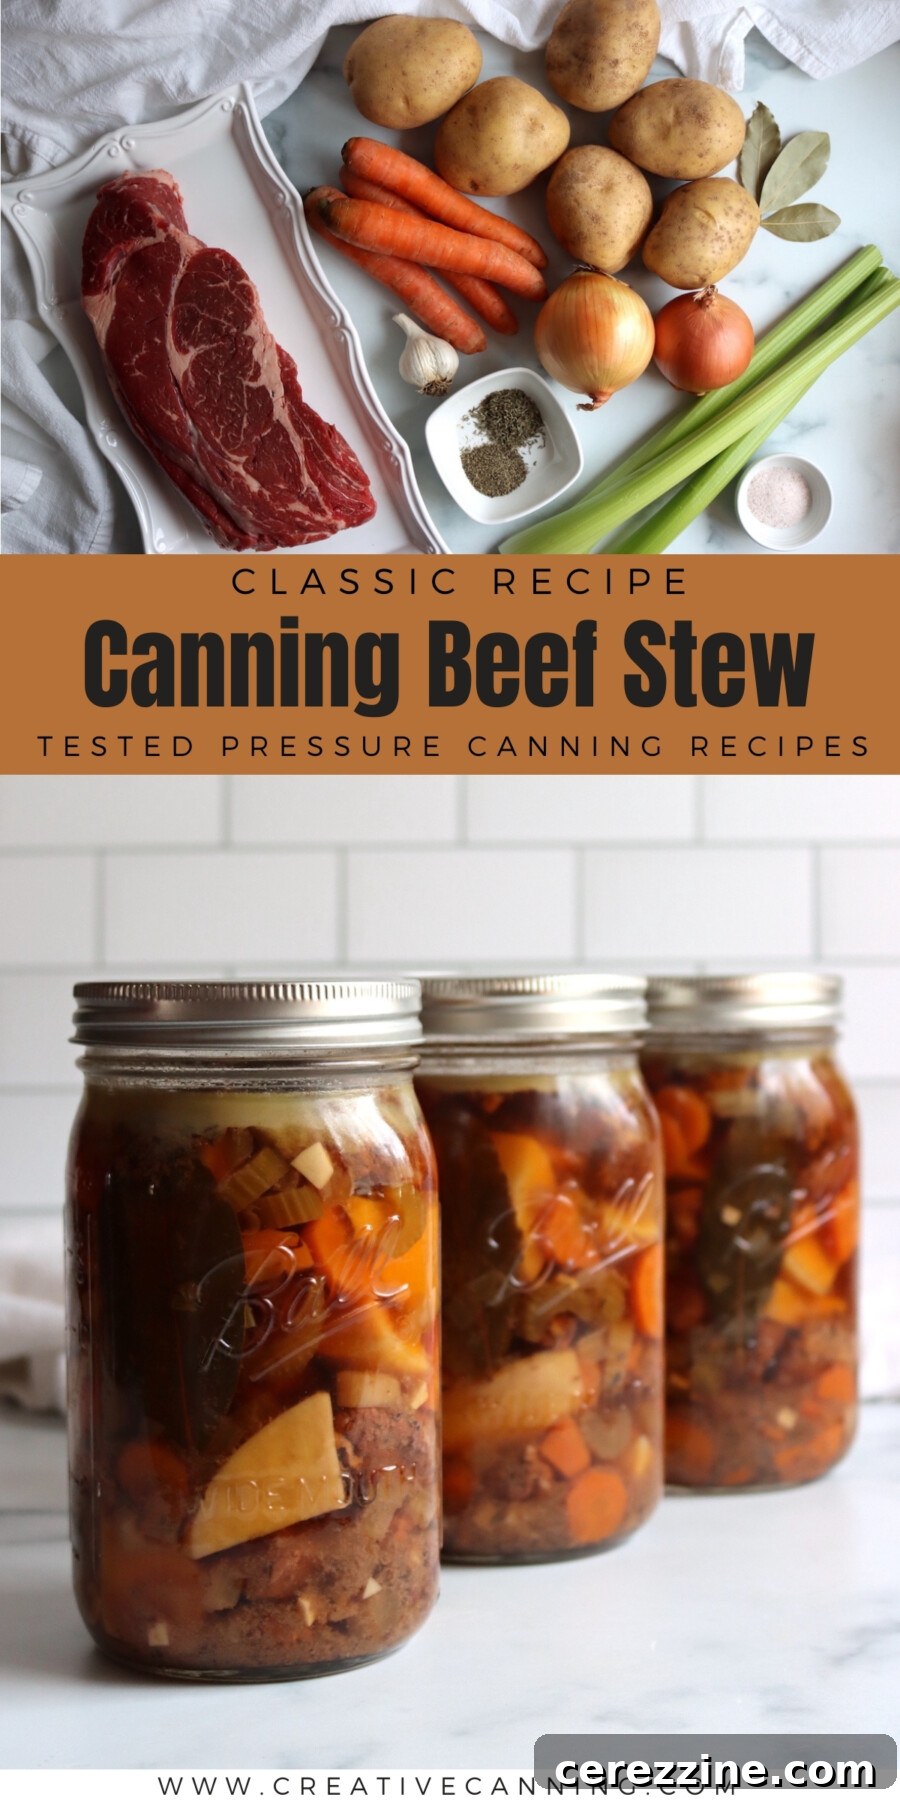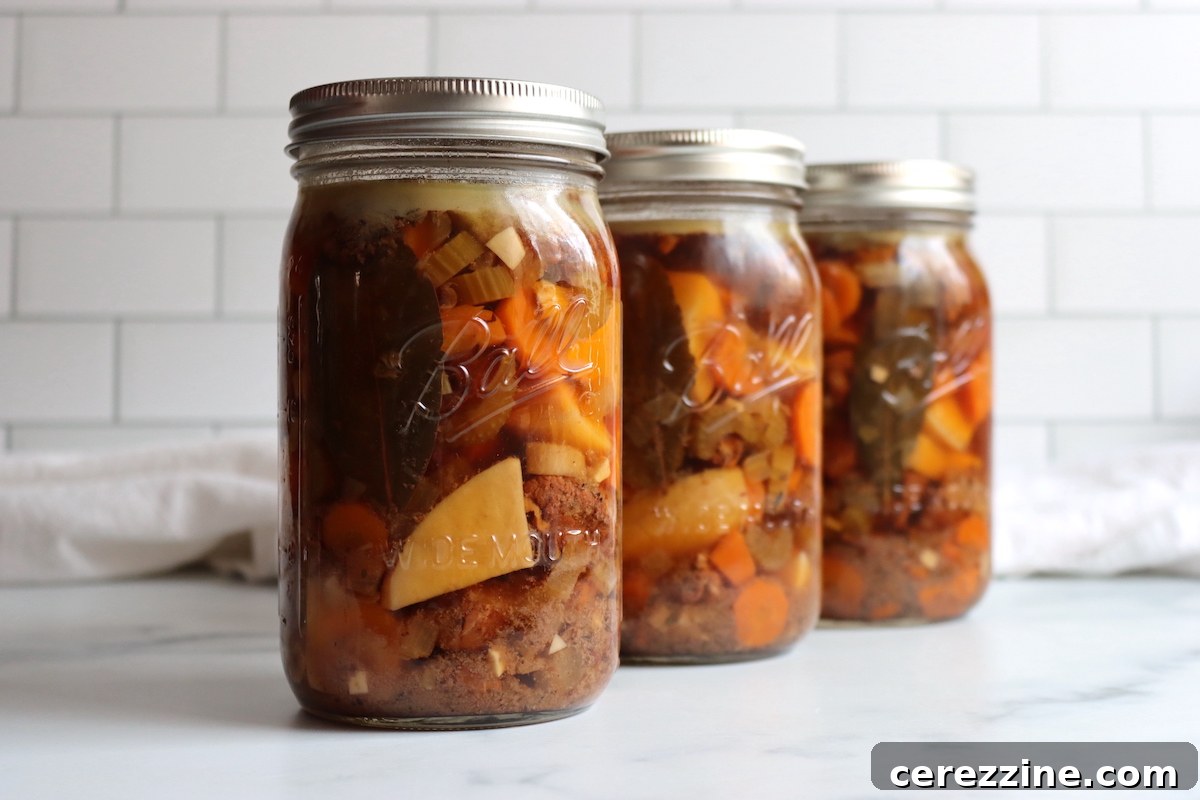
Canning beef stew transforms a beloved, comforting meal into a practical, ready-to-eat pantry staple. This hearty and wholesome dish, packed with simple, nutritious ingredients, becomes an effortless, shelf-stable supper once pressure canned, making it perfect for busy weeknights or unexpected emergencies.
This recipe has been reviewed for safety and accuracy by a Master Food Preserver certified through the University of Cornell Cooperative Extension.
Our recipe for pressure canning beef stew is a carefully adapted version of a classic from the renowned Ball Complete Book of Preserving. While the Ball book offers many excellent meal-in-a-jar recipes, we’ve refined their beef stew instructions to reflect real-world kitchen yields and ensure optimal flavor. The original often states a yield of only 3.5 quarts, but through extensive testing, we’ve found that this recipe consistently produces a more substantial 5 to 6 quarts, depending on how densely you pack your jars. Our goal is to empower you with a reliable recipe that delivers delicious results every time, ensuring no wasted ingredients or effort.
As presented here, this recipe is designed to produce 5 robust quart jars, each filled generously with tender beef, a medley of vegetables, and a rich, savory broth – truly a complete meal, not a thin, watery soup. The original recipe left the amount of broth vague, but our trials confirm that 8 cups (2 quarts) of beef stock is the perfect quantity to fill these 5 jars without any excess. This precise measurement guarantees a hearty, satisfying texture that’s true to a traditional homemade stew.
Should you prefer a slightly lighter, more broth-heavy stew, you can easily extend this recipe to 6 quarts by adding an additional quart of beef stock. Both versions—whether yielding 5 or 6 quarts with 2 or 3 quarts of broth—are perfectly safe and effective for pressure canning when following our detailed instructions. This flexibility allows you to customize the stew to your family’s preferences while maintaining the highest safety standards for home preservation.
The ideal amount of salt in this recipe can vary significantly based on your chosen beef stock. Store-bought, commercially canned broths typically contain a higher sodium content, often having the equivalent of 2 to 3 teaspoons of salt per 8 cups. In contrast, if you use a homemade broth made without salt, you’ll need to adjust the seasoning accordingly to prevent the stew from tasting bland. Our recipe provides guidelines to help you achieve a perfectly balanced flavor, ensuring the stew is well-seasoned without being overly salty.
This meticulously developed recipe strikes the perfect balance of seasoning, delivering a classic beef stew flavor that evokes homemade comfort. Each spoonful offers tender chunks of beef, complemented by wholesome potatoes, sweet carrots, crisp celery, aromatic onion, and fragrant garlic, all bathed in a robust beef broth. The result is a truly authentic taste experience, reminiscent of a slow-cooked meal enjoyed by the fire, but with the convenience of a ready-to-heat jar.
Why You’ll Love This Family Favorite Beef Stew Recipe!

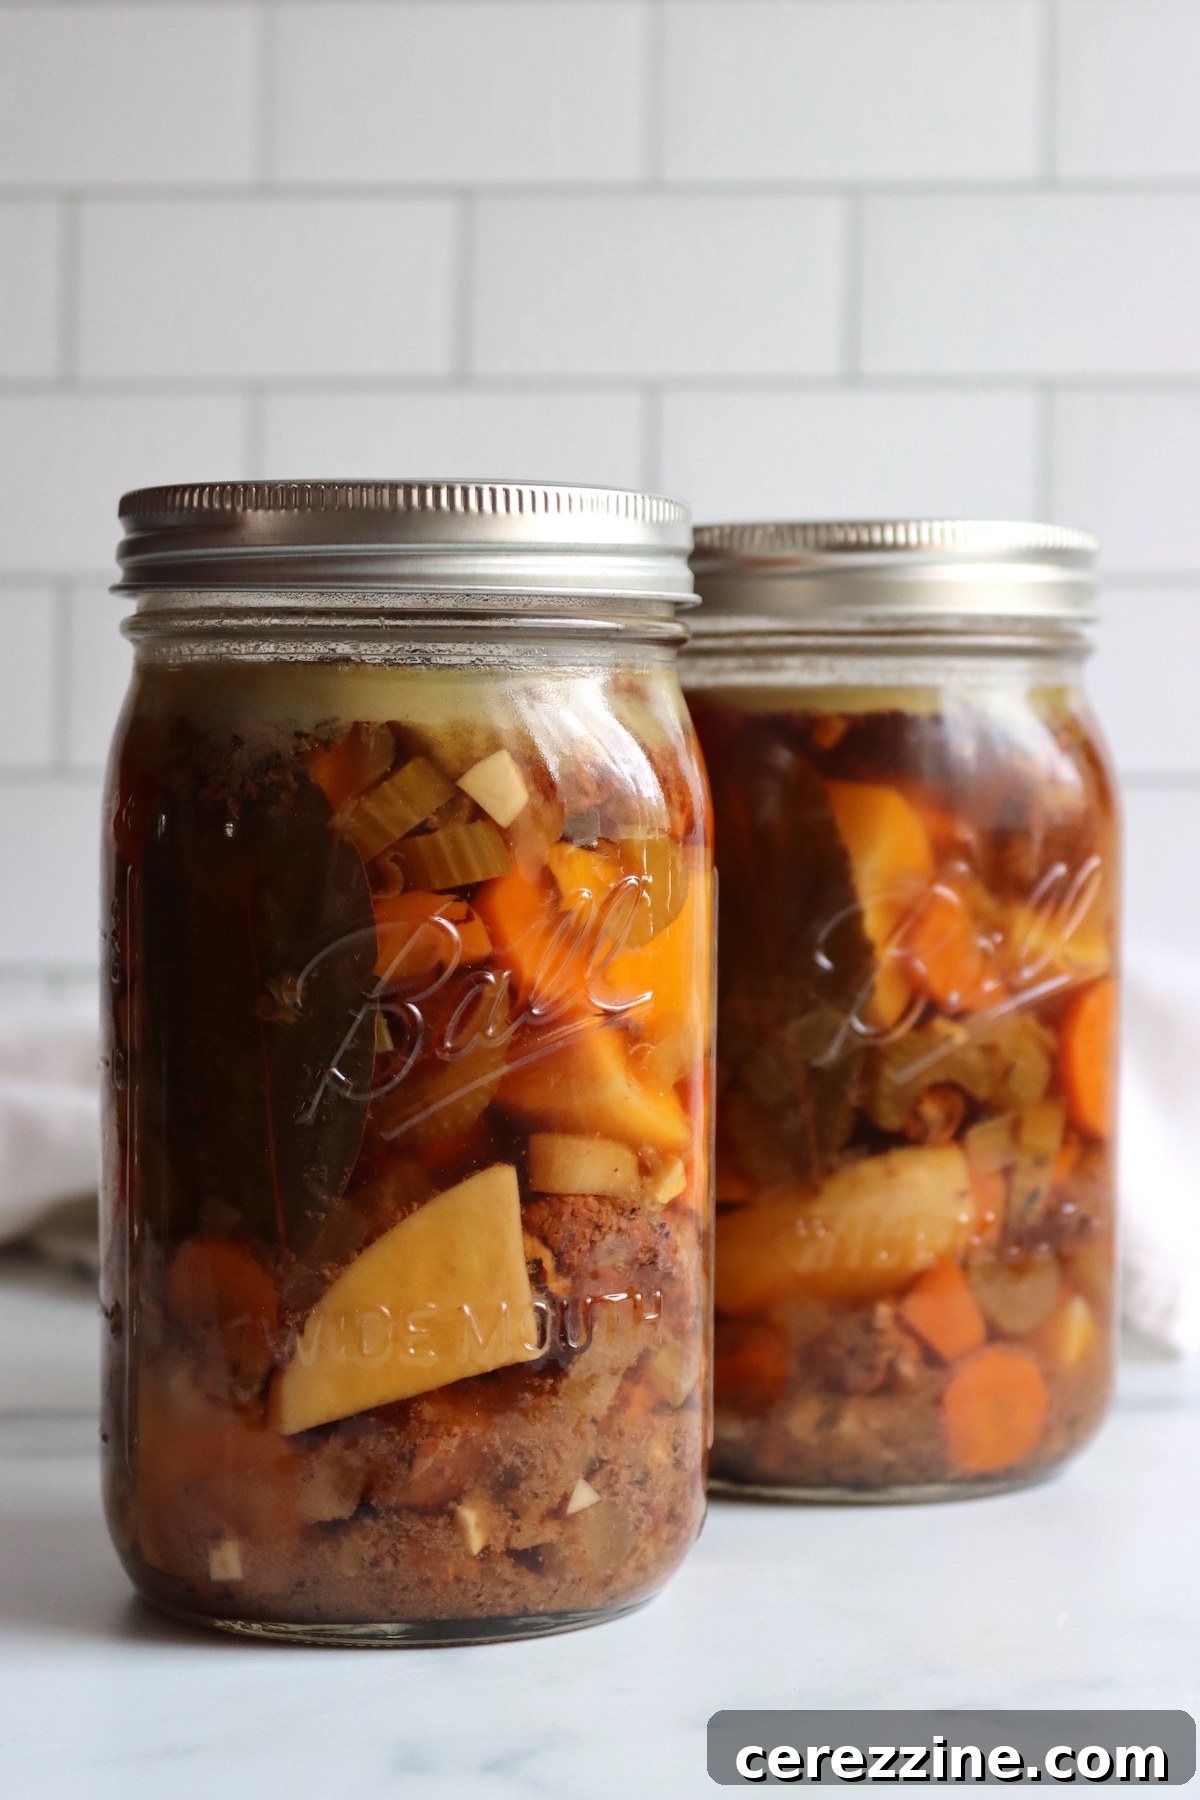
Having jars of homemade beef stew stocked in your pantry is like having a warm, satisfying dinner waiting for you at a moment’s notice. It embodies convenience and comfort, perfect for those chilly evenings when you crave a hearty meal but lack the time for extensive cooking. This recipe is a steadfast choice for any canning day, utilizing ingredients you likely already have on hand, ensuring a dependable and delicious outcome that even the pickiest eaters will adore.
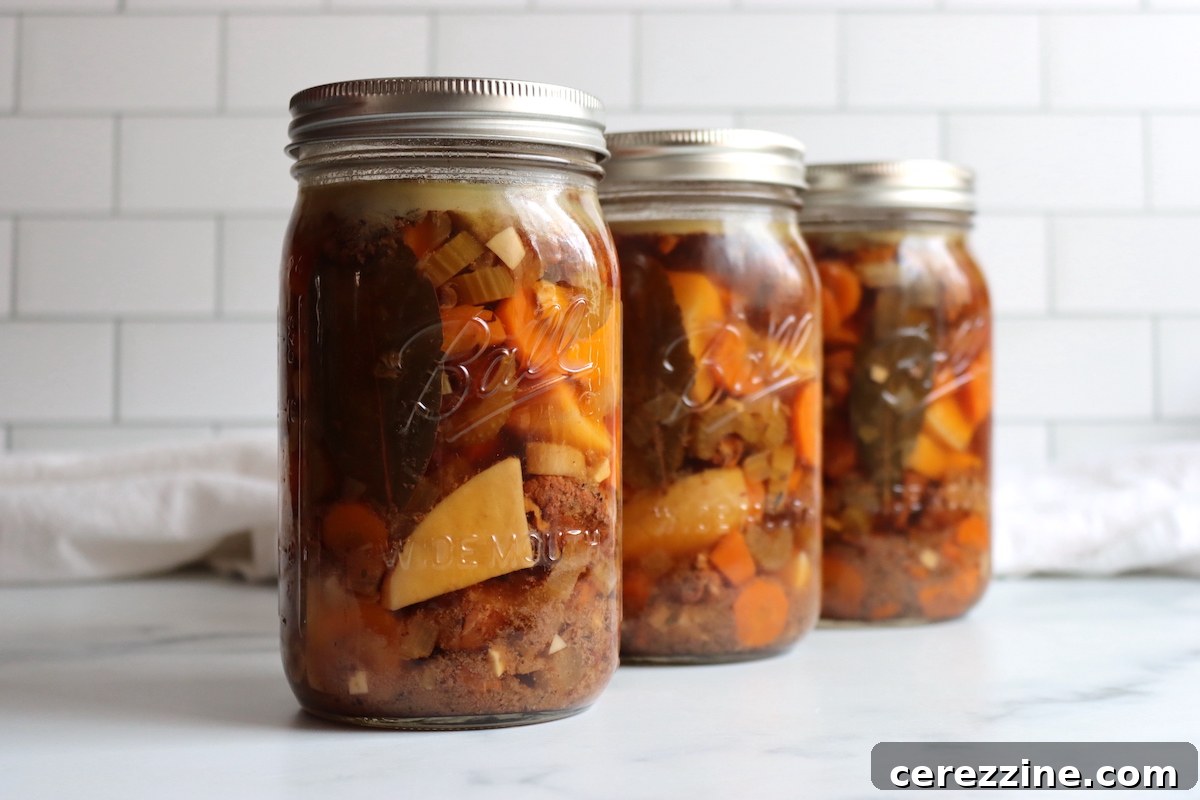
What truly sets this recipe apart is the generous packing of each jar. Unlike some canned soups that leave you with a few scattered vegetables in a sea of broth, our beef stew fills each quart jar to the brim with a balanced combination of succulent meat and tender vegetables. As written, it reliably yields five substantial quart jars, each a complete and satisfying meal. For those who prefer a slightly lighter, more broth-forward option, a simple addition of extra broth will stretch the recipe to six jars, offering versatility without compromising on flavor or quality.
This pressure canned beef stew provides unparalleled convenience. Imagine coming home after a long day and having a nutritious, homemade meal ready to heat and serve in minutes. It’s an excellent solution for meal planning, emergency preparedness, or simply enjoying the fruits of your labor long after canning day. The rich flavors meld beautifully over time, often tasting even better weeks or months after being sealed, making it a true culinary treasure.
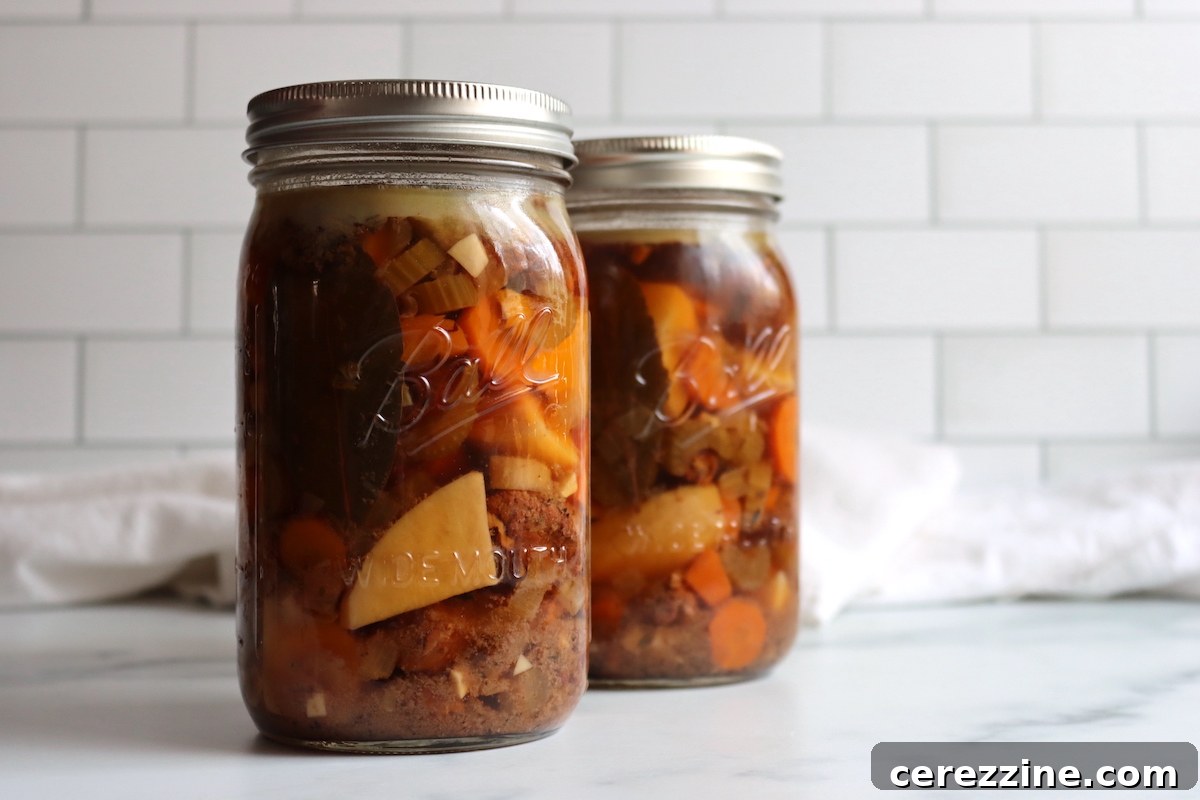
Quick Look at the Canning Beef Stew Recipe
- Recipe Name: Canning Beef Stew – A classic, hearty, pressure canned meal.
- Recipe Type: Soup & Stew Canning Recipe – Categorized for easy pantry organization.
- Canning Method: Pressure Canning – The only safe method for low-acid foods like meat and vegetables.
- Prep/Cook Time: About 45 minutes of active preparation, plus a brief 5-minute simmer.
- Canning Time: 90 minutes for quarts; 75 minutes for pints – Critical for food safety.
- Yield: 5 hearty quarts (or 10 pints) – Generous portions for family meals.
- Jar Sizes: Pints or Quart jars – Choose based on serving size needs.
- Headspace: 1 inch – Essential for proper sealing and safe processing.
- Ingredients Overview: Quality beef stew meat, fresh potatoes, carrots, celery, onion, garlic, aromatic seasonings, a touch of olive oil, and flavorful beef stock.
- Safe Canning Recipe Source: Expertly adapted from the Ball Complete Book of Preserving, with adjustments for optimized yield and enhanced flavor.
- Difficulty: Moderate – Involves straightforward vegetable chopping and meat browning, requiring careful attention to pressure canning guidelines.
- Similar Recipes: If you enjoy this, explore other robust beef canning recipes such as Beef Stroganoff, Beef Burgundy, Chipotle Beef Taco Meat, and Home Canned Beef Short Ribs. For more classic soup options, consider French Onion Soup, Tomato Soup, and Classic Vegetable Soup to complete your pantry collection.
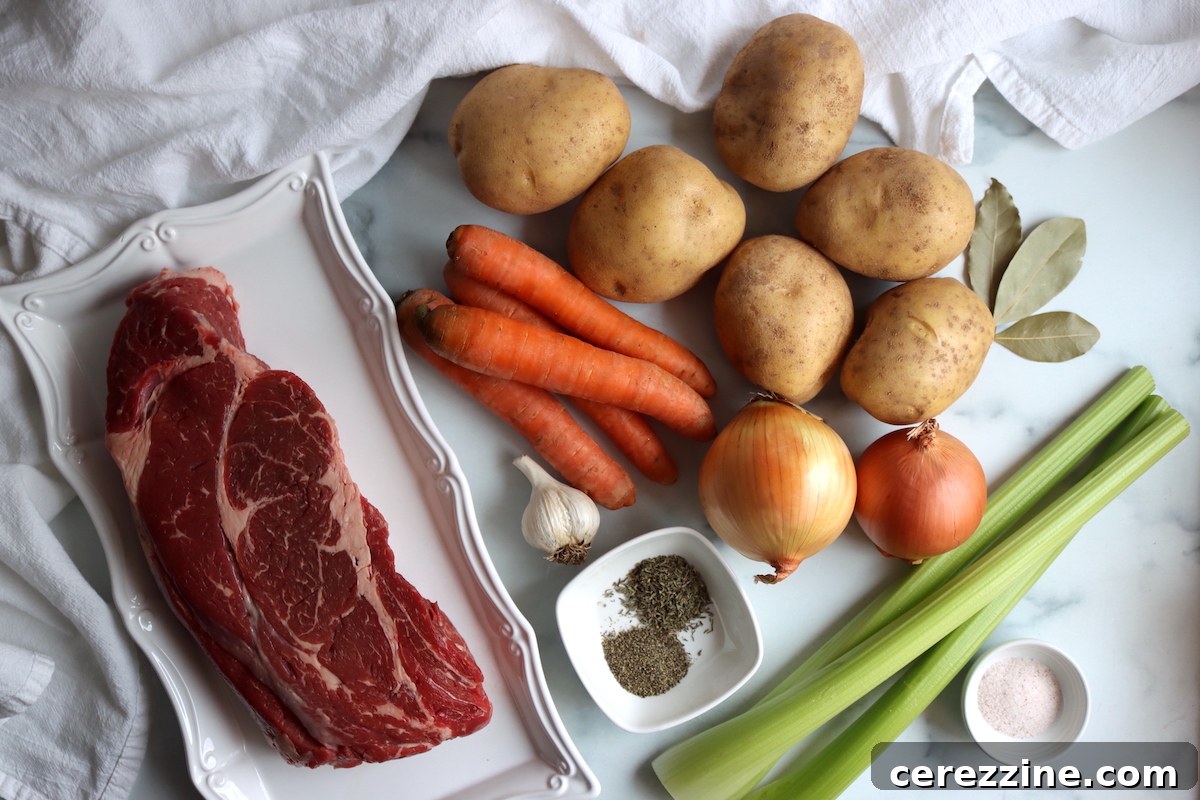
Essential Ingredients for Perfect Beef Stew Canning
Crafting a delectable and safe canned beef stew relies on a precise balance of quality ingredients. This recipe utilizes classic stew components, ensuring they cook down beautifully in the jar to create a hearty, shelf-stable meal with abundant meat and vegetables in every quart. Each ingredient plays a crucial role in achieving the desired flavor, texture, and canning safety.
- Beef stew meat: The cornerstone of this dish, providing rich flavor and substantial body. We highly recommend using a whole beef chuck roast, typically found in 2.5-pound portions. Its excellent marbling and flavor stand up well to the pressure canning process. Simply cut it into 1.5-inch stew-sized cubes for even cooking and optimal texture. While other cuts of beef can be used, a well-marbled stewing cut will always yield the best results, ensuring tender, succulent meat.
- Olive oil: Used primarily for browning the beef, this step is vital for developing deep, caramelized flavors that will permeate the entire stew. Any neutral cooking oil, such as canola or vegetable oil, will work, and even rendered beef tallow can be used for an extra layer of beefy richness. The goal is to create a flavorful crust on the meat before it’s combined with the other stew components.
- Potatoes: These provide essential substance, transforming the stew into a truly filling meal. Gold potatoes are an excellent choice as they maintain their shape remarkably well during pressure canning and release minimal starch into the broth, keeping it clear and appealing. Russet potatoes can also be used, but be aware they tend to release more starch, which might slightly thicken or cloud the broth.
- Carrots: Lending natural sweetness and that quintessential stew flavor, carrots are indispensable. Opt for hearty, robust storage carrots rather than delicate, thin summer varieties. Storage carrots hold their form and flavor under pressure, whereas salad carrots can become mushy and lose their vibrant taste.
- Celery: Often underestimated, celery contributes a subtle yet crucial depth of flavor and a familiar savory base note to the stew. Even if you’re not a fan of raw celery, its cooked essence significantly enhances the overall profile, creating a more complex and satisfying broth.
- Onion: A fundamental aromatic, onion is key to flavoring the broth and rounding out the stew’s profile. Strongly flavored yellow onions are preferred for their robust contribution, but any type of onion will work effectively.
- Garlic: An optional but highly recommended addition, minced garlic infuses the finished stew with an extra layer of savory richness and aromatic depth, elevating the overall taste.
- Salt: Critical for seasoning, salt binds all the flavors together, preventing the stew from tasting flat. It also aids in maintaining the texture of the meat and vegetables. The amount needed depends on your broth:
- Commercial Broth: If using salted store-bought broth, be mindful of its existing sodium content. Full-salt brands typically contain the equivalent of 2-3 teaspoons of salt per 8 cups, while low-sodium versions have about 1-1.5 teaspoons.
- Homemade Unsalted Broth: For unsalted homemade broth, you’ll generally need about 4.5 teaspoons of salt for a full batch.
- Adjusting for Salted Broth: When using store-bought salted broth, start with 1.5 to 3 teaspoons of added salt, tasting and adjusting carefully to achieve your desired flavor balance.
- Thyme, Bay Leaves & Black Pepper: These classic spices impart a traditional beef stew flavor that harmonizes beautifully with the other ingredients. While this blend is highly recommended, feel free to adapt the dry spices to your personal preference, ensuring they are always dry herbs and spices approved for canning.
- Beef stock: The foundation of the stew’s liquid, beef stock (or broth) brings all the components together. For the most authentic and traditional flavor, beef stock is ideal. However, in a pinch, vegetable stock, chicken stock, or even water can be used, though they may alter the final flavor profile.
This canning recipe strictly adheres to the Hearty Soup Protocols from the University of Alaska Extension, which provides a valuable framework for safe and flexible ingredient adjustments. We encourage you to review these guidelines if you wish to tailor the recipe to your specific tastes, as they clearly outline what can be safely substituted without compromising the integrity or safety of your home-canned product.
The seasonings are entirely customizable to your palate. Feel free to incorporate any dry herbs and spices that align with your preferences. Additionally, for an extra layer of gourmet flavor, you can safely substitute a portion of the beef broth with wine, adding complexity and depth to the stew.
Regarding the meat, this recipe is incredibly versatile. You can use any type of beef, pork, venison, bison, elk, or bear meat. The key is to cut the meat into uniform, stew-sized pieces (approximately 1.5 inches) for consistent cooking and tender results during the pressure canning process.
While the classic mix of potatoes, carrots, celery, and onion is featured here, the Alaskan protocol offers a comprehensive list of other vegetables that can be safely substituted into this recipe. Important safety note: all vegetables must remain fully submerged under the broth in the jars to ensure proper heat penetration. Excellent additions include corn, green beans, and mushrooms, which hold up well to canning.
However, it is absolutely critical to understand which ingredients cannot be added to this pressure canning recipe for safety reasons. You must avoid adding cooking greens (like spinach or kale), sweet potatoes, creamed corn, dry beans (unless pre-cooked and prepared according to specific canning guidelines for dry beans), or winter squash. These ingredients have different density and cooking properties that can interfere with safe heat penetration during canning.
Furthermore, you must strictly adhere to general canning safety rules and never add anything that is not approved for pressure canning. This includes thickeners (such as flour, cornstarch, or tapioca), dairy products (milk, cream), pasta, rice, pureed vegetables, or cured meats like ham or bacon. These ingredients can significantly alter the density of the stew, preventing proper heat distribution and creating a risk of spoilage or foodborne illness. While many stovetop stew recipes call for flour to brown meat or thickeners for the broth, remember that you cannot use flour or any thickeners before canning. You can, however, easily thicken the stew with a flour or cornstarch slurry just before serving to achieve your desired consistency.
Step-by-Step Instructions for Pressure Canning Beef Stew
- Gather the ingredients and prepare canner: Begin by meticulously gathering all necessary ingredients for your beef stew. Simultaneously, prepare your pressure canner for hot packing according to its manufacturer’s instructions. This typically involves adding 2-3 inches of water to the canner and bringing it to a gentle simmer. Ensure your canning jars, lids, and bands are thoroughly washed and kept hot until you’re ready to fill them.
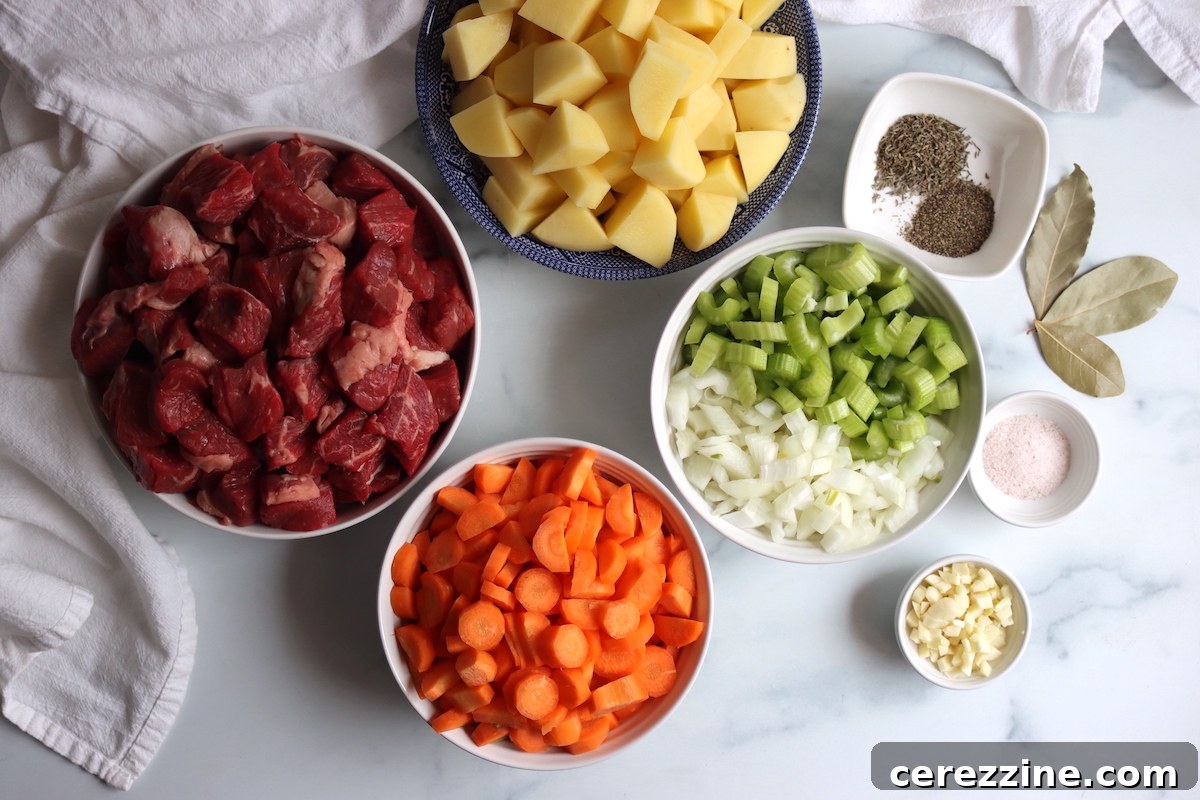
- Prepare the ingredients: Peel and cube the potatoes into roughly 1-inch pieces. Slice the carrots into uniform rounds, chop the celery, and finely dice the onion. Mince the garlic. If your beef stew meat is not pre-cut, trim any excess fat and cut it into evenly sized 1.5-inch cubes. Uniform sizing ensures consistent cooking in the canner.
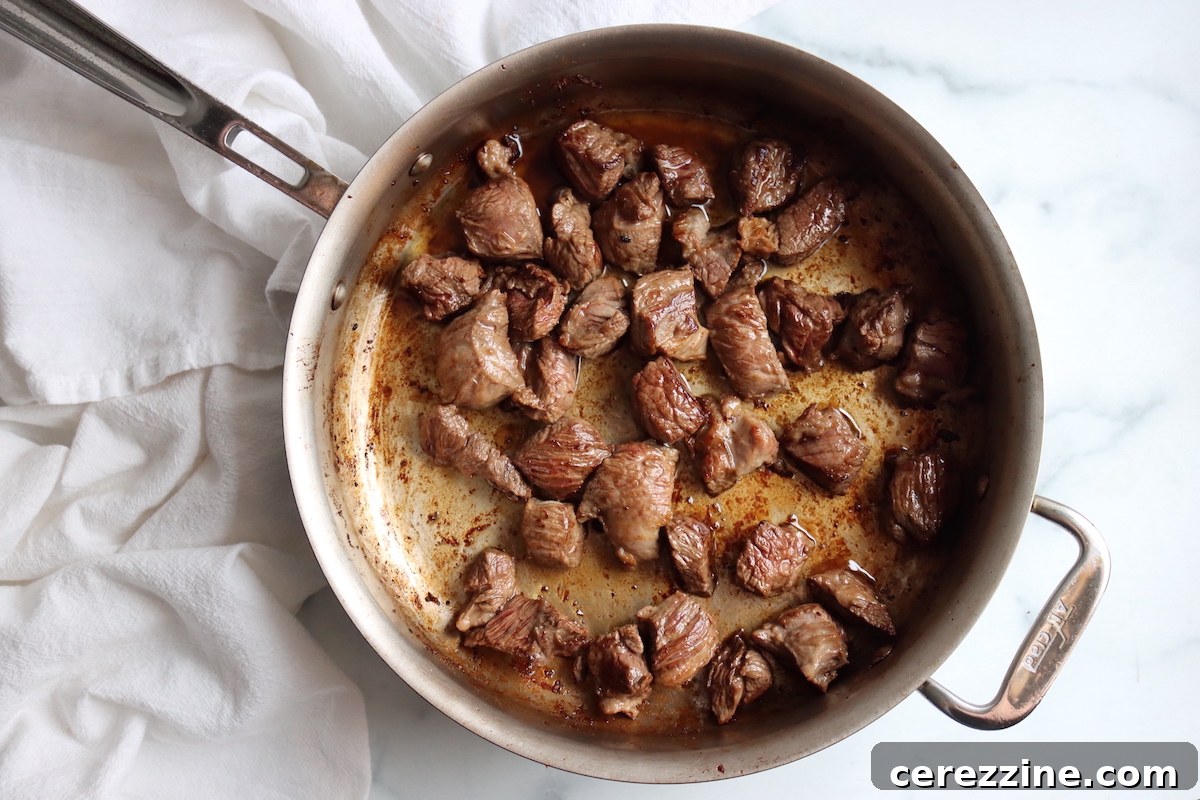
- Brown the beef: In a large, heavy-bottomed pot or Dutch oven, heat the olive oil over medium-high heat until shimmering. Add the beef cubes in a single layer, ensuring not to overcrowd the pot. Brown the meat thoroughly on all sides, working in batches if necessary. This crucial step develops deep, savory flavors through the Maillard reaction, which is essential for a rich, flavorful finished stew.
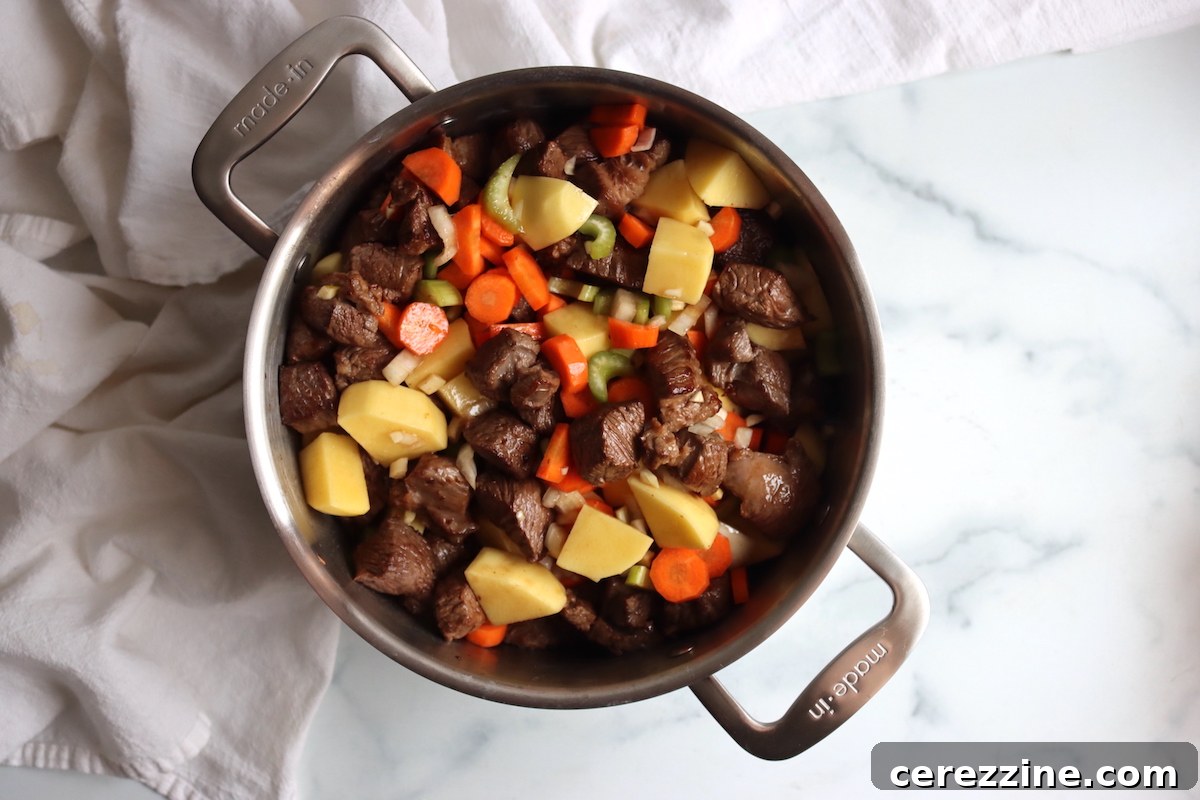
- Combine everything and simmer: Once all the beef is browned, return it to the pot. Add the prepared potatoes, carrots, celery, onion, and minced garlic. Stir in the salt, thyme, and black pepper, then pour in the beef stock. Bring the entire mixture to a rolling boil, then reduce the heat and simmer gently for 5 minutes. This brief simmer ensures all ingredients are heated through for hot packing, helps drive air from the vegetables, and sets the starches to prevent a cloudy broth.
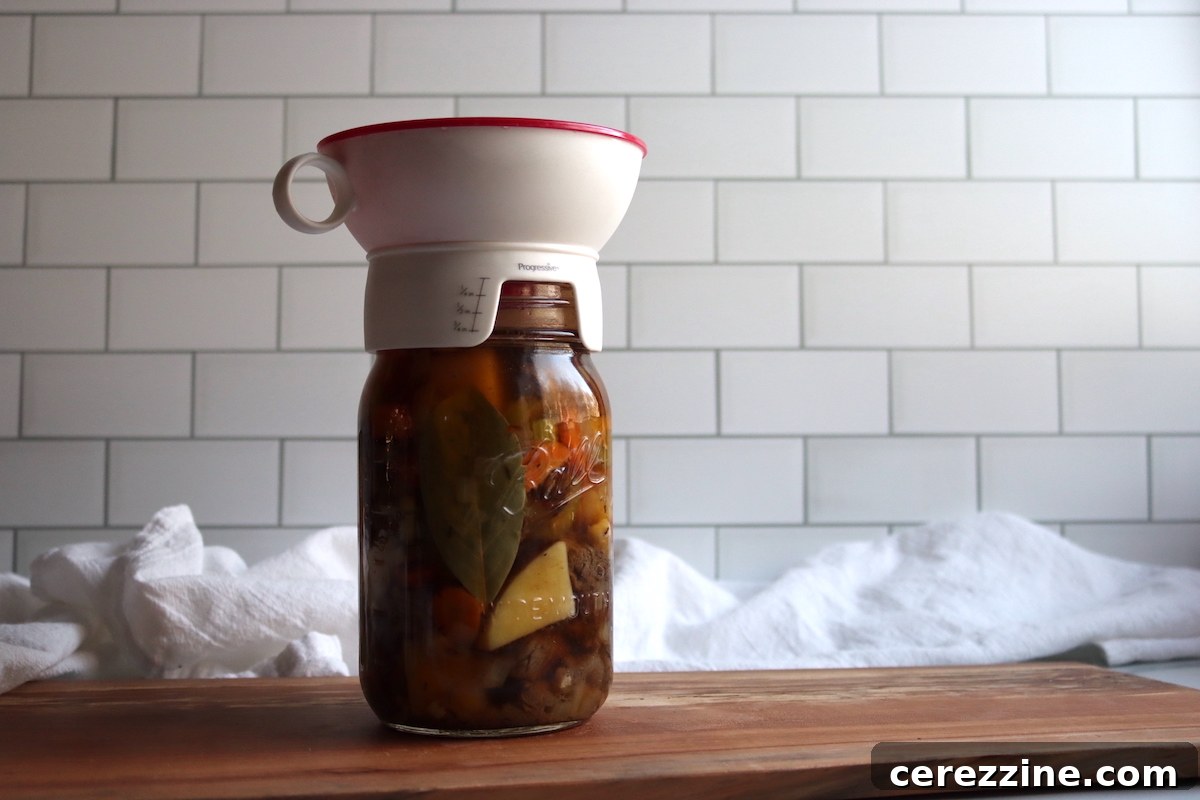
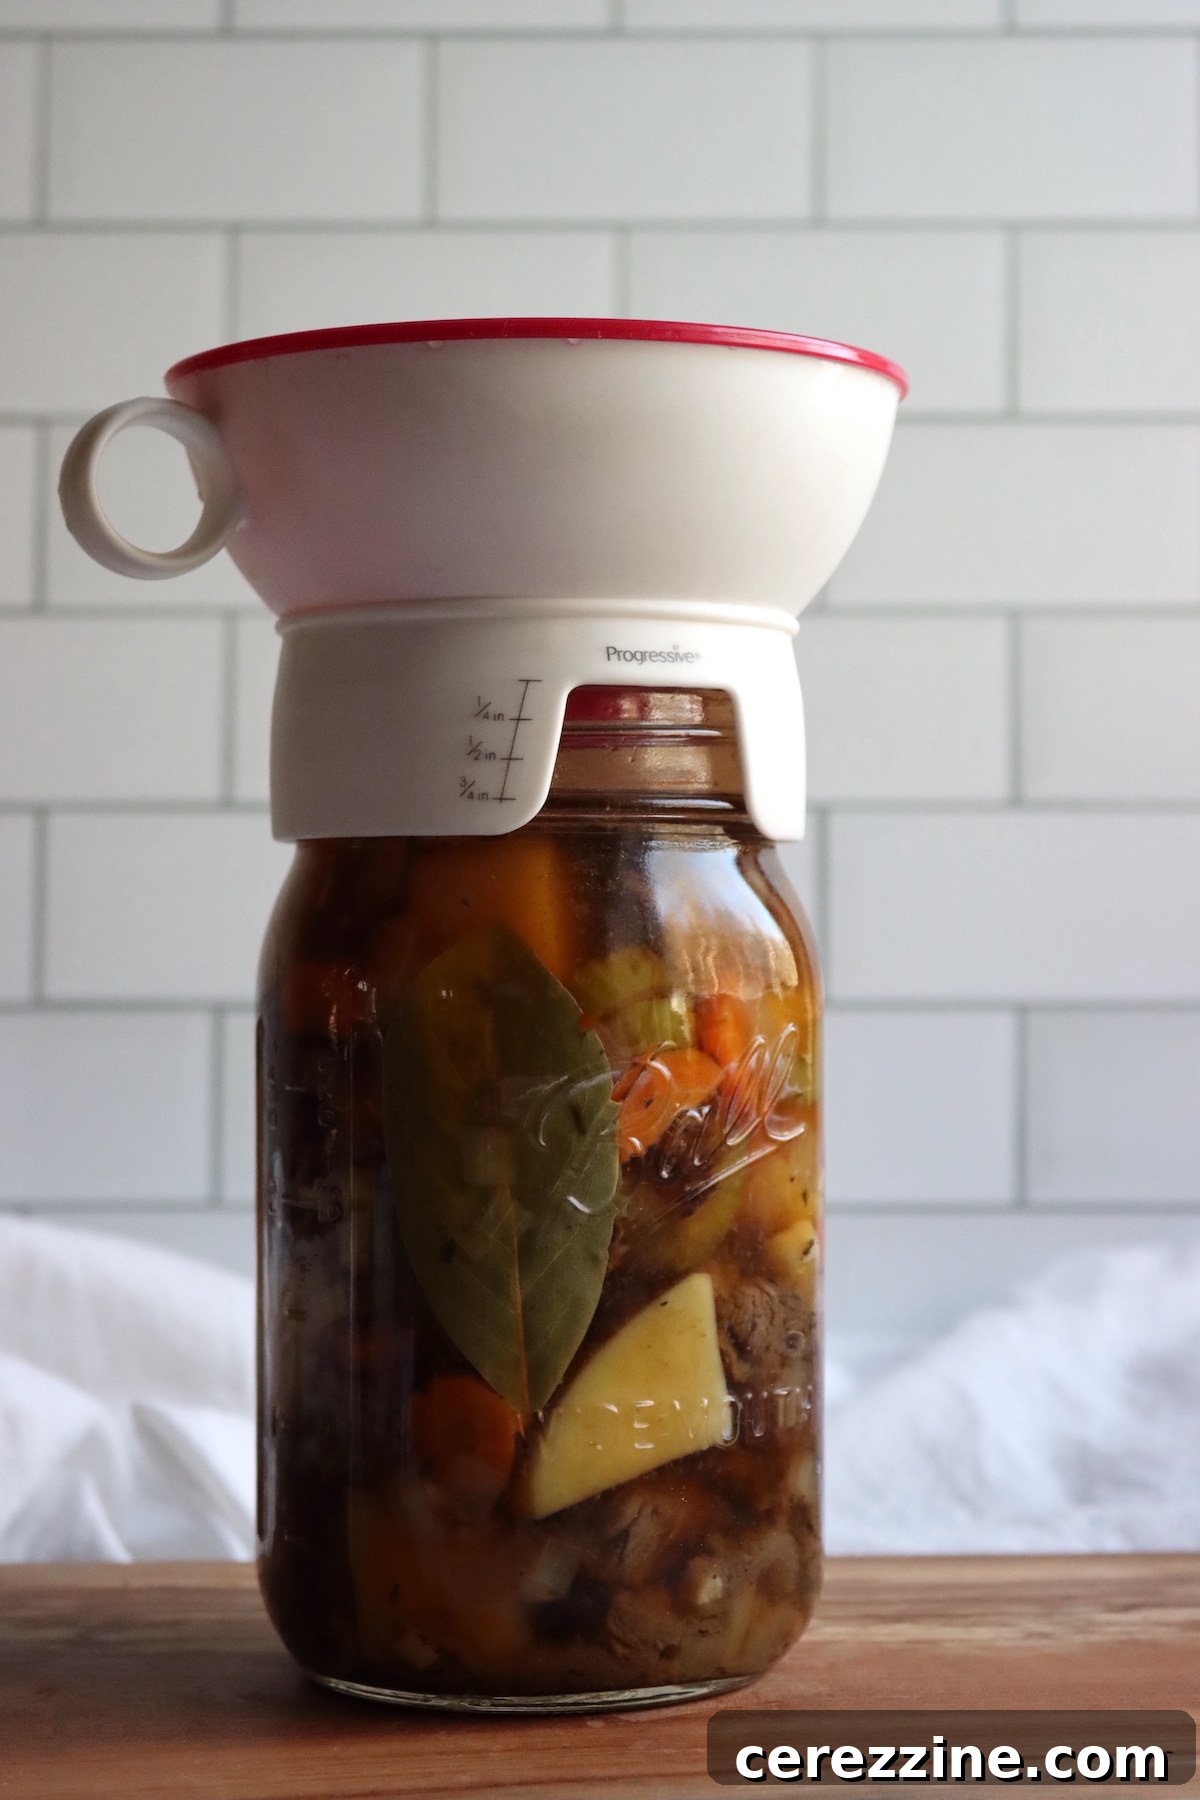
- Fill the jars carefully: Using a slotted spoon, distribute the solid ingredients (beef and vegetables) evenly among your hot, sterilized canning jars. Then, ladle the hot broth over the solids, ensuring each jar receives a balanced mix. Add one bay leaf to each quart jar. Maintain a precise 1-inch headspace (the space between the food surface and the rim of the jar). Use a clean, non-metallic utensil to remove any trapped air bubbles, gently pushing it around the inside of the jar. Adjust the liquid level if necessary to maintain the 1-inch headspace. Finally, wipe the jar rims thoroughly with a clean, damp cloth to ensure a perfect seal before applying the lids and tightening the bands to fingertip-tight.
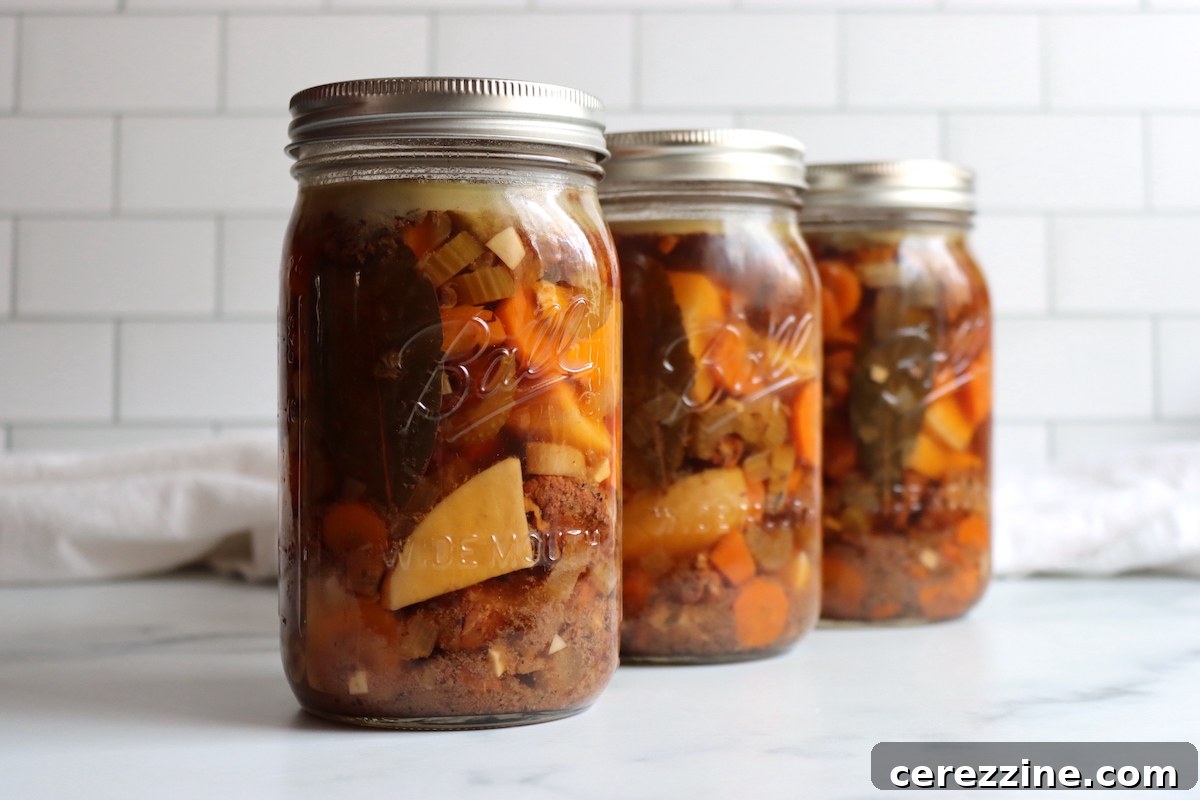
- Process the jars in a pressure canner: Carefully place the filled and lidded jars onto the rack in your preheated pressure canner. Secure the canner lid and bring it to a boil over high heat, allowing steam to vent steadily for 10 minutes. This venting step is crucial for removing air from the canner. After venting, apply the canner weight or close the petcock (depending on your canner type) and bring the pressure up to the specified level (11 lbs for dial gauge or 10 lbs for weighted gauge at altitudes below 1,000 feet). Process quart jars for 90 minutes and pint jars for 75 minutes, making sure to adjust the pressure according to your altitude. Once processing is complete, turn off the heat and allow the canner to return to zero pressure naturally. Resist the urge to force-cool the canner, as this can lead to seal failures. Once depressurized, remove the lid and let the jars sit for 5 minutes before transferring them to a towel-lined counter to cool completely for 12-24 hours. After cooling, check seals, remove bands, label, and store in a cool, dark place.
Mastering the Art of Pressure Canning Beef Stew
Understanding the nuances of pressure canning beef stew is key to achieving both safety and culinary excellence. It’s important to note that this specific stew recipe is not fully cooked before it enters the canning jar. The meat is meticulously browned to develop deep, foundational flavors, and the vegetables undergo a brief 5-minute simmer. This hot pack method serves several critical purposes: it ensures all ingredients are adequately pre-heated, which is vital for safe processing; it helps to drive out excess air from the vegetables, allowing them to pack more densely into the jars; and it gently sets the starches, preventing the broth from becoming overly cloudy during the canning cycle.
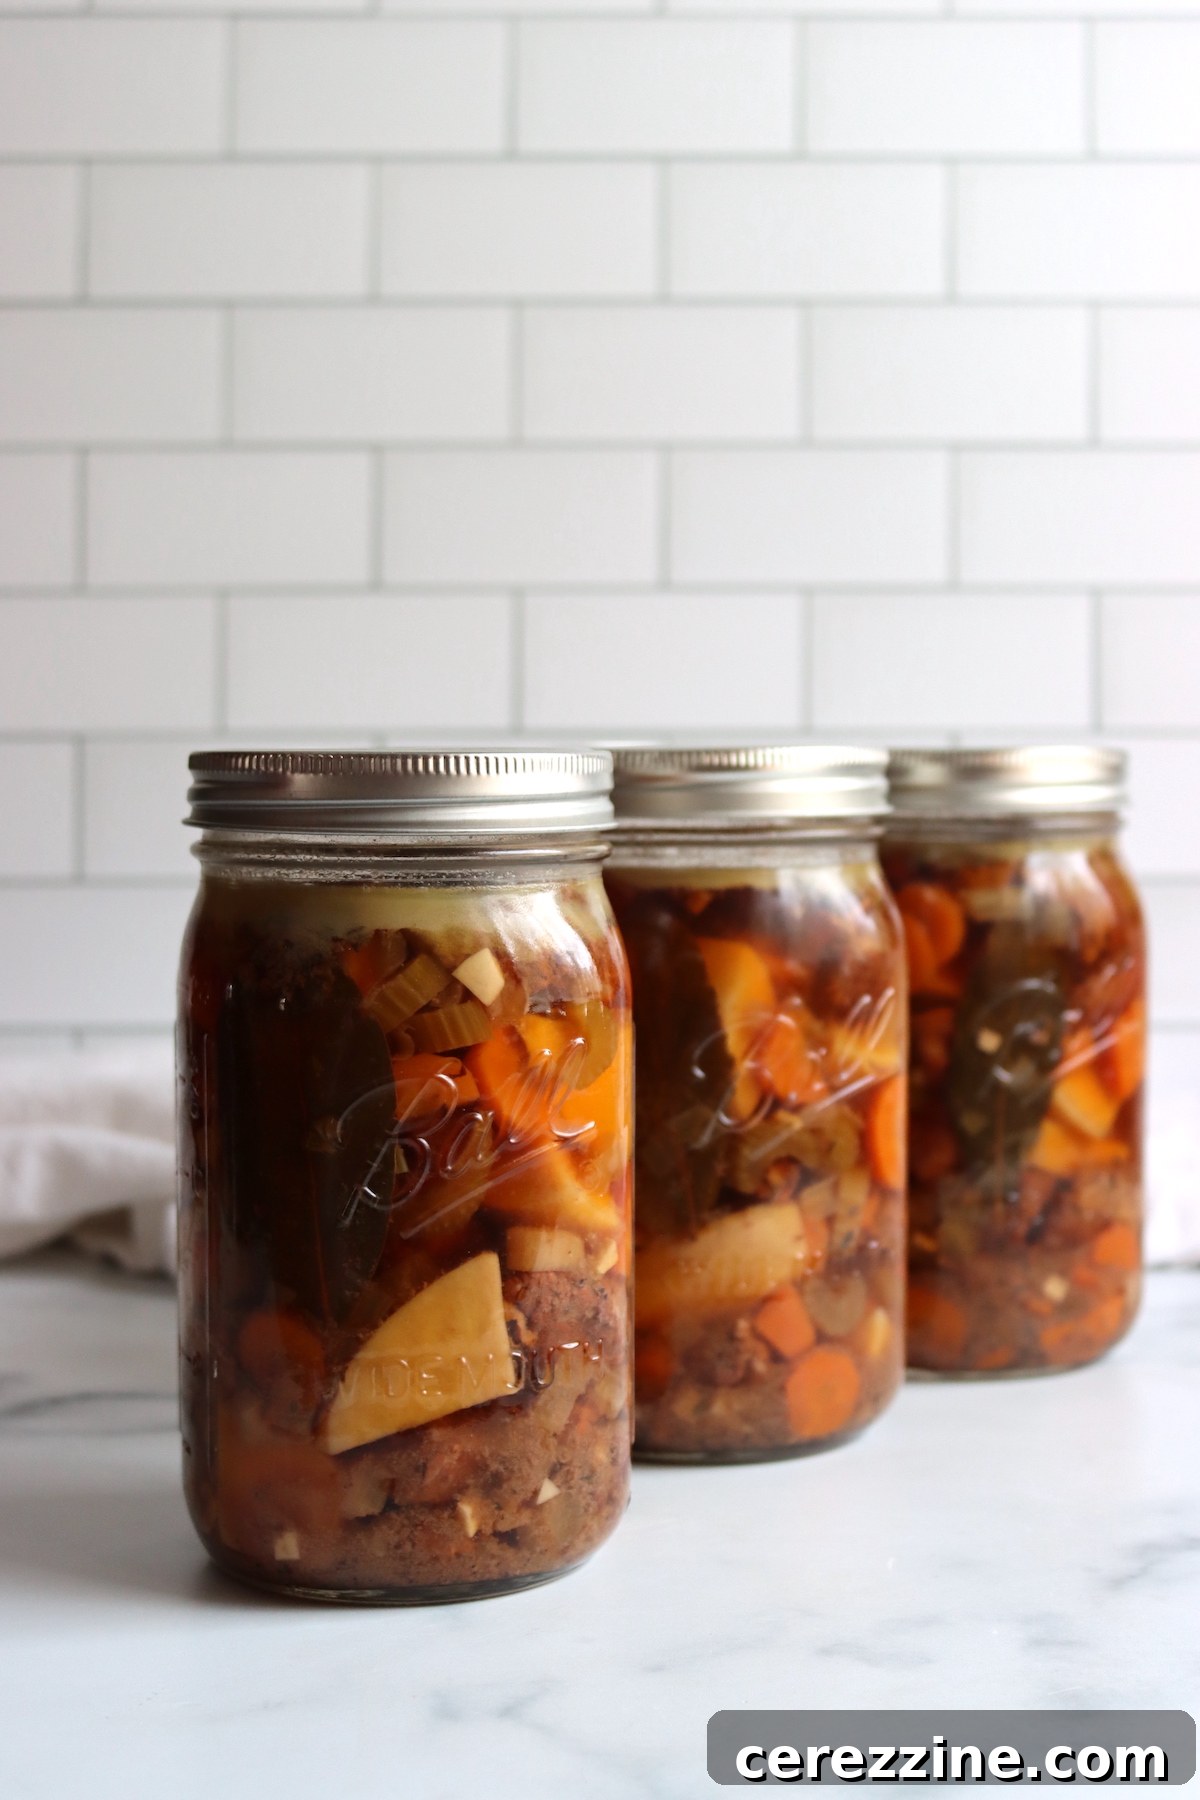
For optimal results and an appealing presentation, we highly recommend using a slotted spoon to evenly distribute the solid components—the succulent beef and a colorful medley of vegetables—among your prepared jars. Once the solids are evenly divided, use a ladle to top off each jar with the flavorful broth, ensuring that all ingredients are submerged and a precise 1-inch headspace is maintained. This careful packing ensures that each serving delivers a balanced, hearty portion of the stew.
As detailed, this recipe is formulated to yield a generous 5 quarts of beef stew (or 10 pints). If you find yourself slightly short on broth during the filling process, a small amount of boiling water can be added to top off the jars, though with our carefully measured ingredients, this should rarely be necessary. For those who prefer a less dense, more broth-forward stew, you have the flexibility to expand the yield. Simply add an extra quart of beef stock to the pot and distribute the ingredients between 6 quart jars (or 12 pints), ensuring each jar still maintains the proper 1-inch headspace and solid-to-liquid ratio for safe processing.
Once your jars are meticulously packed and the 1-inch headspace is confirmed, they are ready for the final critical step: sealing. Secure each jar with a two-part canning lid (flat lid and screw band), tightening the bands to fingertip-tight. Carefully load the jars into your preheated pressure canner. The processing times are crucial for safety: quart jars must be processed for 90 minutes, and pint jars for 75 minutes. Always remember to adjust the pressure according to your altitude, a non-negotiable step for safe home canning (refer to the altitude adjustments provided below). Following these precise steps will ensure your beef stew is not only delicious but also safely preserved for your pantry.
Critical Altitude Adjustments for Pressure Canning
When pressure canning, it is paramount to understand that while processing times remain constant regardless of elevation, the required pressure must be meticulously adjusted for higher altitudes. This ensures that the internal temperature within the canner reaches a safe level to destroy harmful bacteria. Please consult the following guidelines to ensure the safety and quality of your home-canned beef stew:
For dial gauge pressure canners, which provide a continuous pressure reading:
- 0 to 2,000 feet in elevation – Process at 11 lbs pressure
- 2,001 to 4,000 feet in elevation – Process at 12 lbs pressure
- 4,001 to 6,000 feet in elevation – Process at 13 lbs pressure
- 6,001 to 8,000 feet in elevation – Process at 14 lbs pressure
For weighted gauge pressure canners, which use weights to achieve specific pressure levels:
- 0 to 1,000 feet in elevation – Process at 10 lbs pressure (using a 10-pound weight)
- Above 1,000 feet in elevation – Process at 15 lbs pressure (using a 15-pound weight, or a 10-pound weight plus an additional 5-pound weight if your canner allows for combination)
Always verify your specific altitude and adjust your pressure canner accordingly before beginning the processing step. This attention to detail is essential for the safety and successful preservation of your beef stew.
Delightful Serving Ideas for Your Home-Canned Beef Stew
The beauty of home-canned beef stew lies in its incredible convenience: it’s fully cooked and ready to be heated and served straight from the jar. This makes it an absolute lifesaver on chilly evenings when you desire a filling, comforting meal without the time-consuming effort of starting from scratch. Simply warm it gently on the stovetop or in the microwave, and it’s a complete, satisfying dinner on its own.
For a traditional, wholesome experience, serve your piping hot beef stew with a crusty slice of homemade bread, a fluffy biscuit, or a warm dinner roll, perfect for soaking up every last drop of the rich, savory broth. The simplicity of this pairing allows the deep flavors of the stew to truly shine.
Should you prefer a thicker, more traditional stovetop stew texture, enhancing the broth after opening is an easy step. After heating the stew, you can whisk in a small flour slurry (flour mixed with cold water) or a cornstarch slurry (cornstarch mixed with cold water) and simmer for a few minutes until it thickens to your desired consistency. This simple trick transforms the stew into an even heartier dish, perfect for serving over creamy mashed potatoes, buttery egg noodles, or even topped with homemade dumplings for an ultimate comfort food experience.
For those who love to keep versatile meal starters in their pantry, this canned beef stew quickly earns its valuable shelf space. It’s not just a meal; it’s a foundation for countless culinary creations. Consider using it as a base for a pot pie by topping it with a pastry crust, or transforming it into a savory shepherd’s pie by adding a layer of mashed potatoes. Its robust flavor also makes it an excellent filling for hearty sandwiches or wraps. This recipe embodies the essence of smart meal prep, ensuring you always have a delicious, homemade option readily available.
Canning Beef Stew FAQs
As written, this recipe is designed to produce 5 hearty quart jars of beef stew. This yield is based on packing the jars generously, ensuring each contains a substantial amount of meat and vegetables, truly reflecting a proper stew. If you prefer a slightly brothier stew and pack the solids a bit lighter, you could potentially stretch the recipe to fill 6 quarts. However, if opting for 6 quarts, you would need to add approximately 4 more cups (1 quart) of beef stock to maintain adequate liquid levels for safe canning.
No, thickeners such as flour, cornstarch, tapioca, or any other thickening agents should absolutely not be added to beef stew before pressure canning. These substances can interfere with the proper heat penetration within the jar during the canning process. This interference can prevent the stew from reaching the necessary temperatures required to destroy harmful bacteria, thereby compromising food safety. For a thicker stew, the safest and recommended method is to add your desired thickening agent (like a flour or cornstarch slurry) after you open the jar and are reheating the stew for serving.
For canning beef stew, the best potatoes are those that are known to hold their shape well throughout the extensive pressure canning process. Waxy or all-purpose potato varieties tend to maintain their firmness and structural integrity more effectively in the jar. Starchy potatoes, such as some russet varieties, have a tendency to break down more significantly during processing, which can result in a mushy texture and a cloudy broth. We particularly recommend using Yukon Gold potatoes because they not only retain a beautiful cube shape after canning but also contribute a wonderful, creamy flavor to the stew, enhancing the overall eating experience.
A bland taste in canned beef stew is a common issue, and it typically boils down to two main factors: the quality of the broth and insufficient seasoning, particularly salt. Some published recipes might be overly conservative with salt or suggest using water instead of a flavorful broth, which can leave the finished jars tasting flat and uninspired. Using a rich, high-quality beef stock as the base is crucial for developing depth of flavor. Equally important is ensuring you add the correct amount of salt, accounting for whether you are using unsalted homemade broth or commercially salted store-bought broth. Refer to our detailed notes on salt quantities in the recipe to ensure you’re using the right amount for a perfectly seasoned, delicious stew every time.
More Delicious Beef Canning Recipes
Canning Taco Soup
Canning Chili Con Carne
Canning Hamburger (Ground Beef)
If you tried this Pressure Canning Recipe for Beef Stew, or any other recipe on Creative Canning, leave a ⭐ star rating and let me know what you think in the 📝 comments below!
And make sure you stay in touch with me by following on social media!
Canning Beef Stew
45 minutes
5 minutes
1 hour
30 minutes
2 hours
20 minutes
Print Recipe
Equipment
-
Pressure Canner
Ingredients
-
2 1/2
lb
stewing beef,
such as beef chuck, cut into 1 1/2-inch cubes -
2
Tbsp
olive oil,
or other neutral oil -
6
cups
potatoes,
cubed and peeled (Yukon Gold recommended) -
4
cups
carrots,
peeled and sliced -
1 1/2
cups
celery,
chopped -
1 1/2
cups
onion,
peeled and diced -
3-4
cloves
garlic,
minced (optional, but recommended) -
4 1/2
tsp
Salt,
Important, see notes on broth types -
5
whole
bay leaves,
one per quart jar -
1
tsp
thyme -
1
tsp
pepper -
8
cups
beef stock,
see notes for yield adjustment
Instructions
-
1. Prepare Canner & Jars: Prepare your pressure canner, jars, lids, and bands according to the manufacturer’s instructions. Ensure jars are washed well and kept hot until needed (e.g., in simmering water or a warm oven).
-
2. Prepare Ingredients: Peel and cube the potatoes (approx. 1-inch pieces). Slice the carrots, chop the celery, dice the onion, and mince the garlic. If the beef is not already cut, trim it and cut into uniform 1 1/2-inch cubes.
-
3. Brown the Beef: Heat the olive oil in a large, heavy-bottomed pot or Dutch oven over medium-high heat. Add the beef in batches if necessary to avoid overcrowding, browning it thoroughly on all sides. This step is crucial for developing deep flavor.
-
4. Combine Vegetables: Once all the beef is browned, return it to the pot. Add the prepared potatoes, carrots, celery, onion, and garlic. Stir everything together gently.
-
5. Add Liquids & Simmer: Add the salt, thyme, and pepper, then pour in the beef stock. (Save the bay leaves for adding individually to each jar.) Stir well, then bring the mixture to a boil over medium-high heat.
-
6. Hot Pack Prep: Once boiling, reduce the heat and simmer the stew for about 5 minutes until it is heated through. This helps remove air from vegetables and prepares for hot packing.
-
7. Fill Hot Jars: Ladle the hot stew into hot quart jars. Use a slotted spoon to distribute meat and vegetables evenly, then top with broth. Slip one bay leaf into each jar. Leave exactly 1 inch of headspace.
-
8. Remove Air Bubbles: Use a bubble remover or a clean nonmetallic utensil to carefully remove any trapped air bubbles from each jar, gently pushing it around the contents. Add more hot broth if needed to maintain the proper 1-inch headspace.
-
9. Clean Rims & Seal: Wipe the jar rims with a clean, damp cloth to ensure a good seal. Center the lids on the jars and apply the bands, tightening them to fingertip-tight.
-
10. Load Canner & Vent: Place the filled jars onto the rack in your prepared pressure canner. Securely lock the canner lid. Bring the canner to a boil and allow steam to vent steadily for 10 minutes. This purges air from the canner.
-
11. Process Jars: After venting, bring the canner up to the appropriate pressure. Process quart jars for 90 minutes (or pint jars for 75 minutes) at 11 pounds pressure for dial gauge canners or 10 pounds pressure for weighted gauge canners (adjusting for altitude as necessary).
-
12. Natural Depressurization: When the processing time is complete, turn off the heat and allow the pressure canner to return to zero pressure naturally. Do not attempt to force-cool the canner, as this can lead to seal failures and liquid loss.
-
13. Remove Jars: Once the canner is fully depressurized, wait an additional 5-10 minutes before carefully removing the lid (tilting it away from your face to avoid steam). Let the jars rest in the canner for about 5 minutes before carefully transferring them to a towel-lined counter.
-
14. Cool & Store: Allow the jars to cool undisturbed for 12 to 24 hours. After cooling, check all seals to ensure they are firm and concave. Remove the bands for storage, label the jars with contents and date, and store them in a cool, dark place.
Notes
Broth & Yield: Two quarts of beef stock will yield 5 hearty quart jars of stew. If you prefer a brothier stew, you can add an extra quart of broth (total 3 quarts) and distribute the soup between 6 quart jars. Both options are safe for canning.
Potato Quantity: 6 cups of cubed potatoes is roughly equivalent to 6 medium-sized potatoes or about 850 grams when prepared. This measurement can vary slightly based on the size of your potato cubes.
Carrot Quantity: 4 cups of sliced carrots equates to approximately 8 small carrots or 4 large carrots, or about 500 grams when prepared.
Celery Quantity: 1 1/2 cups of sliced celery is approximately 3 stalks, or about 150 grams when prepared.
Onion Quantity: 1 1/2 cups of diced onion is about 2 small onions or 1 medium onion, or roughly 170 grams when prepared.
Ensure that the beef is cut into fairly even pieces (around 1.5 inches) so it cooks uniformly and packs consistently in the jars. Keep the vegetable pieces chunky rather than finely diced; this helps them hold their shape better during the pressure canning process and prevents them from becoming overly soft.
This stew must be canned as a broth-based recipe only. It is critical for safety that you do not add any flour, cornstarch, milk, cream, pasta, rice, or other thickeners before canning. These ingredients can impede proper heat penetration, making the product unsafe.
After opening a jar, taste and adjust the seasoning (salt and pepper) before serving, as some people prefer a little extra at the table. If you desire a thicker stew, you can easily thicken it after opening the jar by adding a flour or cornstarch slurry when you reheat it for serving.
Store properly sealed jars in a cool, dark pantry away from direct sunlight. While properly canned jars remain safe to eat for an extended period, their quality (texture and flavor) begins to degrade after about a year. For the best quality, aim to consume your home-canned beef stew within 12 to 18 months. Always refrigerate any opened jars after serving.
Nutrition
Serving:
2
cups
,
Calories:
471
kcal
,
Carbohydrates:
33
g
,
Protein:
27
g
,
Fat:
26
g
,
Saturated Fat:
9
g
,
Polyunsaturated Fat:
1
g
,
Monounsaturated Fat:
12
g
,
Trans Fat:
1
g
,
Cholesterol:
81
mg
,
Sodium:
745
mg
,
Potassium:
1440
mg
,
Fiber:
5
g
,
Sugar:
6
g
,
Vitamin A:
8666
IU
,
Vitamin C:
31
mg
,
Calcium:
87
mg
,
Iron:
4
mg
Nutrition information is automatically calculated, so should only be used as an approximation.
Enjoyed this recipe? Share your thoughts below!
More Hearty Soup & Stew Canning Recipes
Canning Sausage Potato and Kale Soup (Copycat Zuppa Toscana)
Roasted Tomato Basil Soup
Canning French Onion Soup
Find the perfect recipe
Searching for something else? Enter keywords to find the perfect recipe!